Volkswagen Jetta Hybrid (2013 year). Manual - part 9
2.2
Removing and installing clutch engage‐
ment mechanism
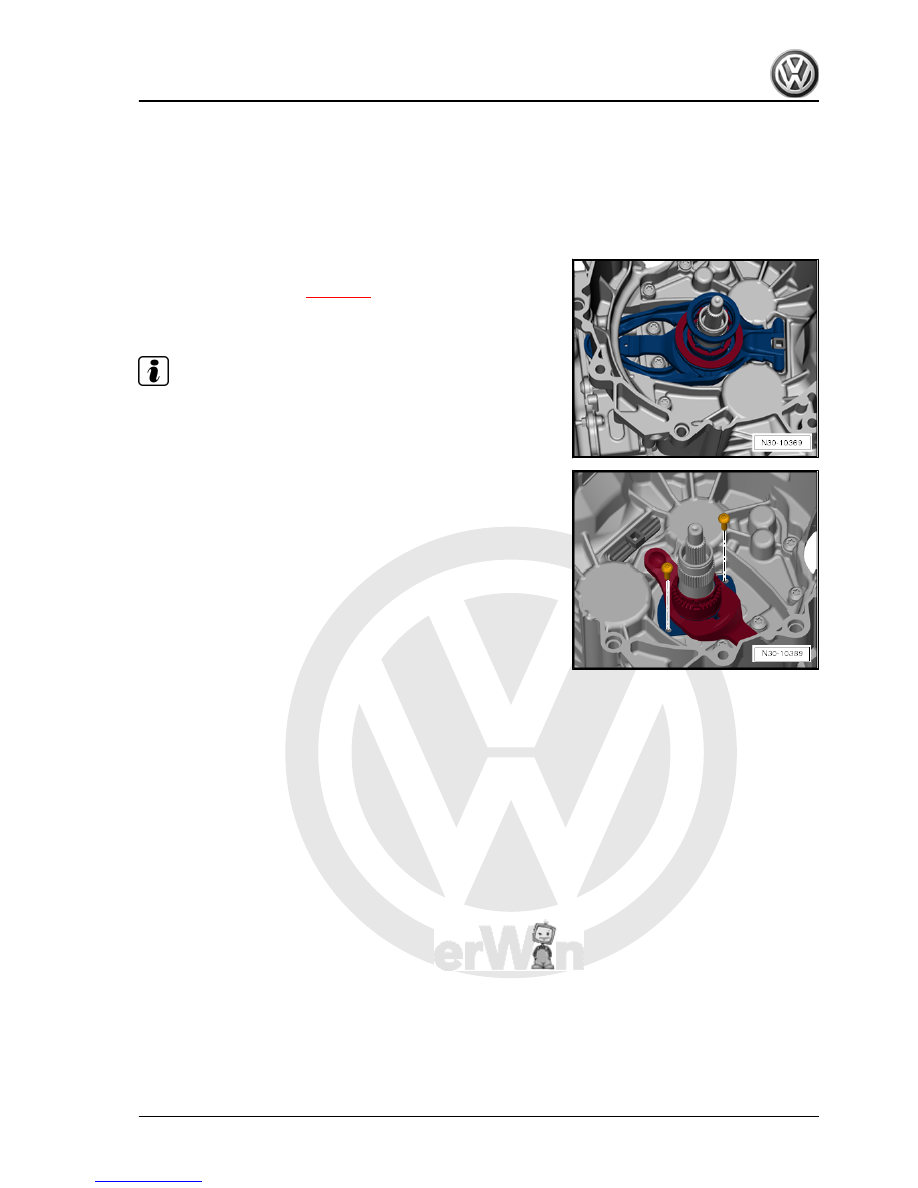
Removing
• Dual clutch is removed
⇒ page 16
.
– Remove »large« engaging lever together with »small« en‐
gagement bearing.
Note
The upper section of the guide sleeve cannot be removed or in‐
stalled alone. It is always removed or installed together with lower
section of guide sleeve and »small« engaging lever.
– Unscrew bolts and remove »small« engaging lever together
with upper and lower section of guide sleeve.
Jetta Hybrid 2013 ➤
2. Clutch mechanism
29