Toyota Land Cruiser Prado (2023 year). Manual in english - page 16
 

  Index      Manuals     Toyota Land Cruiser Prado (2023 year). Manual in english


Search            copyright infringement  


Content      ..     14      15      16      17     ..


Toyota Land Cruiser Prado (2023 year). Manual in english - page 16


256

4-1. Before driving

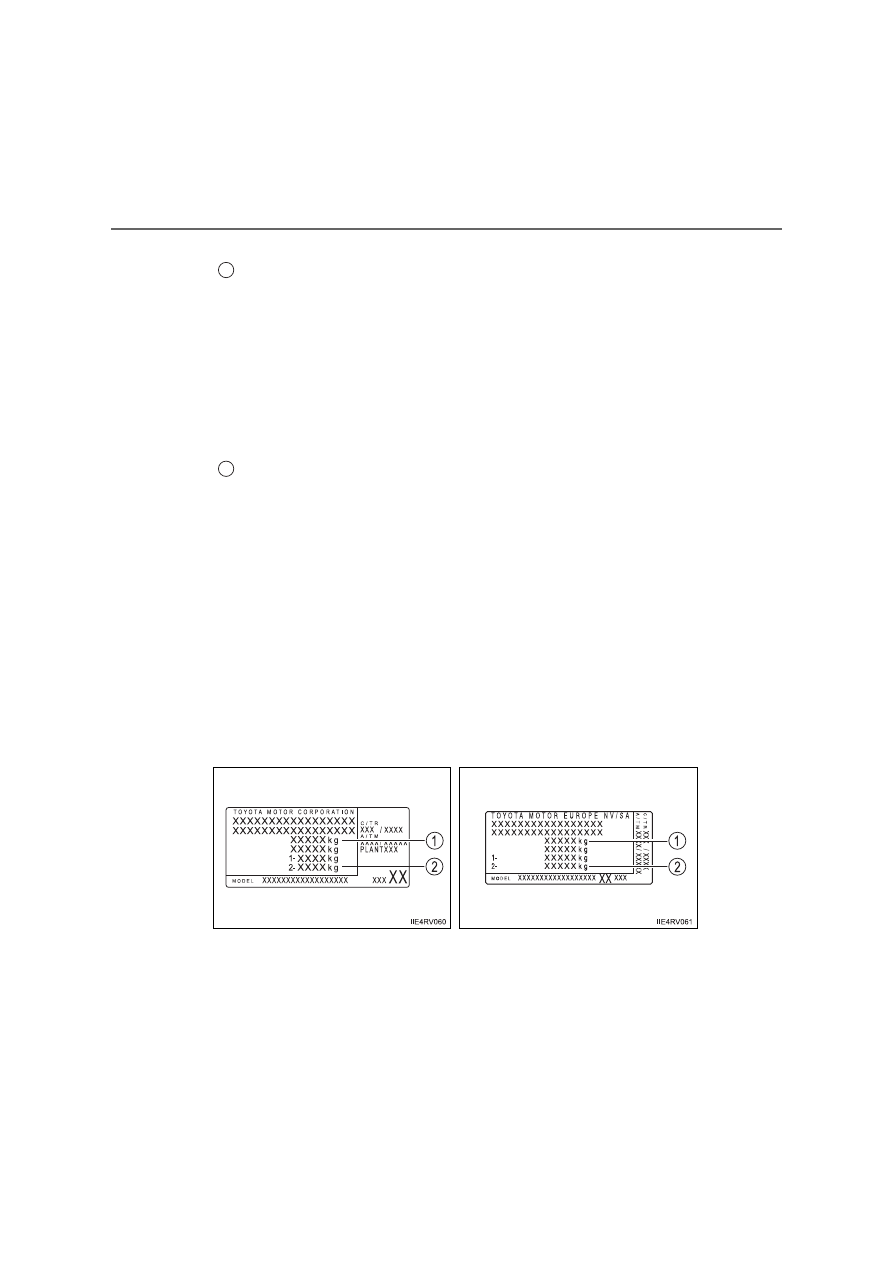
Information tag (manufacturer’s label)

Gross vehicle mass
Vehicle category M1 models

*

:

The combined weight of the driver, passengers, luggage, towing
hitch, total curb mass and drawbar load should not exceed the gross
vehicle mass by more than 100 kg (220.5 lb.). Exceeding this weight
is dangerous.

Vehicle category N1 models

*

:

The combined weight of the driver, passengers, cargo, towing hitch,
total curb mass and drawbar load must not exceed the gross vehicle
mass. Exceeding this weight is dangerous.

Maximum permissible rear axle capacity
Vehicle category M1 models

*

:

The weight borne by the rear axle should not exceed the maximum
permissible rear axle capacity by 15 % or more. Exceeding this
weight is dangerous.

Vehicle category N1 models

*

:

The weight borne by the rear axle should not exceed the maximum
permissible axle capacity. Exceeding this weight is dangerous

The values for towing capacity were derived from testing conducted
at sea level. Take note that engine output and towing capacity will
be reduced at high altitudes.

*

: To distinguish the vehicle category, ask any authorized Toyota retailer or

Toyota authorized repairer, or any reliable repairer.

1

2

Type A

Type B

257

4-1. Before driving

4

D

riv

in

g

WARNING

Vehicle category M1 models

*

: When the gross vehicle mass or maxi-

mum permissible axle capacity is exceeded

Failing to observe this precaution may lead to an accident causing death or
serious injury.

Add an additional 20.0 kPa (0.2 kgf/cm

2

 or bar, 3 psi) to the recommended

tire inflation pressure value. (

P. 761)

Do not exceed the established speed limit for towing a trailer in built-up
areas or 100 km/h (62 mph), whichever is lower.

*

: To distinguish the vehicle category, ask any authorized Toyota retailer or

Toyota authorized repairer, or any reliable repairer.

258

4-1. Before driving

5-door models

Installation positions for the towing hitch/bracket and hitch ball

78 mm (3.0 in.)
78 mm (3.0 in.)
53 mm (2.1 in.)
53 mm (2.1 in.)
53 mm (2.1 in.)
53 mm (2.1 in.)
1219 mm (48.0 in.)
137 mm (5.4 in.)

*

1

141 mm (5.6 in.)

*

2

79 mm (3.1 in.)

*

1

83 mm (3.3 in.)

*

2

54 mm (2.1 in.)

*

1

58 mm (2.3 in.)

*

2

428 mm (16.9 in.)

*

1

336 mm (13.2 in.)

*

2

200 mm (7.9 in.)

*

1

199 mm (7.8 in.)

*

2

171 mm (6.7 in.)

*

1

169 mm (6.7 in.)

*

2

171 mm (6.7 in.)

*

1

168 mm (6.6 in.)

*

2

*

1

: Vehicles with rear height control air

suspension

*

2

: Vehicles without rear height control

air suspension

1
2
3
4
5
6
7
8

9

10

11

12

13

14

259

4-1. Before driving

4

D

riv

in

g

3-door models

78 mm (3.0 in.)
78 mm (3.0 in.)
53 mm (2.1 in.)
53 mm (2.1 in.)
53 mm (2.1 in.)
53 mm (2.1 in.)
1110 mm (43.7 in.)
142 mm (5.6 in.)
84 mm (3.3 in.)
59 mm (2.3 in.)
327 mm (12.9 in.)
199 mm (7.8 in.)
169 mm (6.7 in.)
167 mm (6.6 in.)

1
2
3
4
5
6
7
8
9

10
11
12
13
14

260

4-1. Before driving

When connecting and disconnecting a trailer (vehicles with rear height
control air suspension)

Connecting

Set the rear height control air suspension to LO mode.
Turn off the engine switch or the rear height control air suspension.
Connect the trailer.
Turn on the switch that was turned off on step 

.

Set the rear height control air suspension to N mode.

Disconnecting

Set the rear height control air suspension to LO mode.
Turn off the rear height control air suspension.
Turn off the engine switch.
Set the supporting leg of a trailer on the ground and raise the hitch by
100 mm (4 in.).
Turn on the engine switch.
Turn on the rear height control air suspension.
Wait until vehicle height is stabilized.

Make sure the hitch is disconnected. If the hitch does not disconnect, raise
the hitch higher and repeat steps 

 through 

.

Tire information

Increase the tire inflation pressure to 20.0 kPa (0.2 kgf/cm

2

 or bar, 3 psi)

greater than the recommended value when towing. (

P. 761)

Increase the air pressure of the trailer tires in accordance with the total
trailer weight and according to the values recommended by the manufac-
turer of your trailer.

Trailer lights

Check that the turn signal lights and stoplights are operating correctly every
time you hitch up the trailer. Directly wiring up to your vehicle may damage
the electrical system and stop the lights from functioning correctly.

When towing a trailer

Disable the following systems, as the systems may not operate properly.

LDA (Lane Departure Alert with Yaw Assist Function)

*

 (

P. 353)

Dynamic radar cruise control

*

 (

P. 370)

Cruise control

*

 (

P. 387)

Toyota parking assist-sensor

*

 (

P. 404)

BSM (Blind Spot Monitor)

*

 (

P. 422)

*

: If equipped

1

2

3

4

2

5

1

2

3

4

5

6

7

2

7

261

4-1. Before driving

4

D

riv

in

g

Break-in schedule

Toyota recommends that vehicles fitted with new power train components
should not be used for towing trailers for the first 800 km (500 miles).

Safety checks before towing

Check that the maximum load limit for the towing hitch/bracket hitch ball is
not exceeded. Bear in mind that the coupling weight of the trailer will add to
the load exerted on the vehicle. Also make sure that the total load exerted
on the vehicle is within the range of the weight limits. (

P. 255)

Ensure that the trailer load is secure.

Supplementary outside rear view mirrors should be added to the vehicle if
the traffic behind cannot be clearly seen with standard mirrors. Adjust the
extending arms of these mirrors on both sides of the vehicle so that they
always provide maximum visibility of the road behind.

Maintenance

Maintenance must be performed more frequently when using the vehicle for
towing due to the greater weight burden placed on the vehicle compared to
normal driving.

Retighten all bolts securing the hitching ball and bracket after towing for
approximately 1000 km (600 miles).

If trailer sway occurs

One or more factors (crosswinds, passing vehicles, rough roads, etc.) can
adversely affect handling of your vehicle and trailer, causing instability.

If trailer swaying occurs:
• Firmly grip the steering wheel. Steer straight ahead.

Do not try to control trailer swaying by turning the steering wheel.

• Begin releasing the accelerator pedal immediately but very gradually to

reduce speed.
Do not increase speed. Do not apply vehicle brakes.

If you make no extreme correction with the steering or brakes, your vehicle
and trailer should stabilize (if enabled, Trailer Sway Control can also help to
stabilize the vehicle and trailer.).

After the trailer swaying has stopped:
• Stop in a safe place. Get all occupants out of the vehicle.
• Check the tires of the vehicle and the trailer.
• Check the load in the trailer.

Make sure the load has not shifted.
Make sure the tongue weight is appropriate, if possible.

• Check the load in the vehicle.

Make sure the vehicle is not overloaded after occupants get in.

If you cannot find any problems, the speed at which trailer swaying
occurred is beyond the limit of your particular vehicle-trailer combination.
Drive at a lower speed to prevent instability. Remember that swaying of the
towing vehicle-trailer increases as speed increases.

262

4-1. Before driving

WARNING

To avoid accident or injury

Vehicles with the rear height control air suspension: 
Set the vehicle height to the low mode and turn off the rear height control
air suspension to prevent the vehicle height from automatically changing.

Vehicles with the emergency tire puncture repair kit:
Do not tow a trailer when the tire installed is repaired with the emergency
tire puncture repair kit.

NOTICE

When the rear bumper strengthening material is aluminum

Ensure the steel bracket part does not come directly in contact with that
area.
When steel and aluminum come into contact, there is a reaction similar to
corrosion, which will weaken the section concerned and may result in dam-
age. Apply a rust inhibitor to parts that will come in contact when attaching a
steel bracket.

263

4-1. Before driving

4

D

riv

in

g

Your vehicle will handle differently when towing a trailer. In order to
avoid accident, death or serious injury, keep the following in mind
when towing:

Checking connections between trailer and lights

Stop the vehicle and check the operation of the connection between
the trailer and lights after driving for a brief period as well as before
starting off.

Practicing driving with a coupled trailer

Get the feel for turning, stopping and reversing with the trailer
coupled by practicing in an area with no or light traffic.

When reversing with a coupled trailer, hold the section of the
steering wheel nearest to you and rotate clockwise to turn the
trailer left or counterclockwise to turn it right. Always rotate a little
at a time to prevent steering error. Have someone guide you
when reversing to lessen the risk of accident.

Increasing vehicle-to-vehicle distance

At a speed of 10 km/h (6 mph), the distance to the vehicle running
ahead of you should be equivalent to or greater than the combined
length of your vehicle and trailer. Avoid sudden braking that may
cause skidding. Otherwise, the vehicle may spin out of control. This
is especially true when driving on wet or slippery road surfaces.

Sudden acceleration/steering input/cornering

Executing sharp turns when towing may result in the trailer colliding
with your vehicle. Decelerate well in advance when approaching
turns and take them slowly and carefully to avoid sudden braking.

Important points regarding turning

The wheels of the trailer will travel closer to the inside of the curve
than the wheels of the vehicle. To make allowance for this, take the
turns wider than you would normally do.

Guidance

264

4-1. Before driving

Important points regarding stability

Vehicle movement resulting from uneven road surfaces and strong
crosswinds will affect handling. The vehicle may also be rocked by
passing buses or large trucks. Frequently check behind when mov-
ing alongside such vehicles. As soon as such vehicle movement
occurs, immediately start to decelerate smoothly by slowly applying
the brakes. Always steer the vehicle straight ahead while braking.

Passing other vehicles

Consider the total combined length of your vehicle and trailer and
ensure that the vehicle-to-vehicle distance is sufficient before exe-
cuting lane changes.

Transmission information

Refrain from driving in the 6th gear (6-speed manual transmission)
or 5th gear (5-speed manual transmission), S5 or S6 range in S
mode (automatic transmission) to maintain the effectiveness of the
engine brake and the charge performance of electrical compo-
nents.

If the engine overheats

Towing a loaded trailer up a long, steep incline in temperatures
exceeding 30

C (85

F) may result in the engine overheating. If the

engine coolant temperature gauge indicates that the engine is over-
heating, turn the air conditioning off immediately, leave the road and
stop the vehicle in a safe place. (

P. 730)

When parking the vehicle

Always place wheel chocks under the wheels of both the vehicle
and trailer. Firmly set the parking brake and shift the shift lever to P
for automatic transmissions, and 1 or R for manual transmissions.

265

4-1. Before driving

4

D

riv

in

g

WARNING

Follow all the precautions described in this section. Failure to do so could
cause an accident resulting in death or serious injury.

Trailer towing precautions

When towing, make sure that none of the weight limits are exceeded. 
(

P. 255)

Do not use cruise control (if equipped) or dynamic radar cruise control (if
equipped) when trailer towing.

Vehicle speed in towing

Observe the legal maximum speeds for trailer towing.

Before descending hills or long declines

Reduce speed and downshift. Never downshift abruptly.

Operation of the brake pedal

Do not hold the brake pedal depressed often or for long periods of time. 
Doing so may result in the brake overheating or reduce braking effects.

NOTICE

For vehicles with an emergency tire puncture repair kit (if equipped)

Do not tow anything if a tire that has been repaired using the emergency tire
puncture repair kit is installed. The load on the tire may cause unexpected
damage to the tire.

Do not directly splice trailer lights

Directly splicing trailer lights may damage your vehicle’s electrical system
and cause a malfunction.

266

4-2. Driving procedures

Engine (ignition) switch (vehicles without a 

smart entry & start system)

Automatic transmission (gasoline engine)
Check that the parking brake is set.
Check that the shift lever is set in P.
Firmly depress the brake pedal.
Turn the engine switch to the “START” position to start the engine.

Automatic transmission (diesel engine)
Check that the parking brake is set.
Check that the shift lever is set in P.
Firmly depress the brake pedal.
Turn the engine switch to the “ON” position.

The 

 indicator turns on.

If the engine coolant temperature is above approximately 30°C (86°F), the
indicator may not turn on.

After the 

 indicator light goes out or does not turn on, turn the

engine switch to the “START” position to start the engine.

Starting the engine

1

2

3

4

1

2

3

4

5

267

4-2. Driving procedures

4

D

riv

in

g

Manual transmission (gasoline engine)
Check that the parking brake is set.
Check that the shift lever is set in N.
Firmly depress the clutch pedal.
Turn the engine switch to the “START” position to start the engine.

Manual transmission (diesel engine)
Check that the parking brake is set.
Check that the shift lever is set in N.
Firmly depress the clutch pedal.
Turn the engine switch to the “ON” position.

The 

 indicator turns on.

If the engine coolant temperature is above approximately 30°C (86°F), the
indicator may not turn on.

After the 

 indicator light goes out or does not turn on, turn the

engine switch to the “START” position to start the engine.

1

2

3

4

1

2

3

4

5

268

4-2. Driving procedures

“LOCK”

The steering wheel is locked and
the key can be removed. (Vehicles
with an automatic transmission:
The key can be removed only
when the shift lever is in P.)

“ACC”

Some electrical components such
as the audio system can be used. 

“ON”

All electrical components can be
used. 

“START”

For starting the engine.

Turning the key from “ACC” to “LOCK”

Shift the shift lever to P (automatic transmission) or N (manual transmis-
sion). (

P. 280, 287)

If the engine does not start

The engine immobilizer system may not have been deactivated. (

P. 111) 

Contact any authorized Toyota retailer or Toyota authorized repairer, or any
reliable repairer.

Changing the engine switch positions

1

2

3

4

Push in the key and turn it to the
“LOCK” position.

1

2

269

4-2. Driving procedures

4

D

riv

in

g

When the steering lock cannot be released

Key reminder function

A buzzer sounds if the driver’s door is opened while the engine switch is in
the “LOCK” or “ACC” position to remind you to remove the key.

When starting the engine, the engine
switch may seem stuck in the “LOCK”
position. To free it, turn the key while turn-
ing the steering wheel slightly left and
right.

WARNING

When starting the engine

Always start the engine while sitting in the driver’s seat. Do not depress the
accelerator pedal while starting the engine under any circumstances.
Doing so may cause an accident resulting in death or serious injury.

Caution when driving

Do not turn the engine switch to the “LOCK” position while driving. If in an
emergency, you must turn the engine off while the vehicle is moving, turn
the engine switch only to the “ACC” position to stop the engine. An accident
may result if the engine is stopped while driving. (

P. 645)

NOTICE

To prevent battery discharge

Do not leave the engine switch in the “ACC” or “ON” position for long peri-
ods of time without the engine running.

When starting the engine

Do not crank the engine for more than 30 seconds at a time. This may
overheat the starter and wiring system.

Do not race a cold engine.

If the engine becomes difficult to start or stalls frequently, have your vehi-
cle checked by any authorized Toyota retailer or Toyota authorized
repairer, or any reliable repairer immediately. 

270

4-2. Driving procedures

Engine (ignition) switch (vehicles with a 

smart entry & start system)

Automatic transmission
Check that the parking brake is set.
Check that the shift lever is set in P.
Firmly depress the brake pedal.

Vehicles with the multi-information display type A:
The smart entry & start system indicator (green) will turn on. 
If the indicator does not turn green, the engine cannot be started.
Vehicles with the multi-information display type B:

 and a message will be displayed on the multi-information display. 

If it is not displayed, the engine cannot be started.

Press the engine switch shortly
and firmly.

When operating the engine switch,
one short, firm press is enough. It
is not necessary to press and hold
the switch.
The engine will crank until it starts
or for up to 30 seconds, whichever
is less.
Continue depressing the brake
pedal until the engine is completely
started.
Diesel engine only: the 

 indi-

cator turns on. The engine will start
after the indicator light goes out.
If the engine coolant temperature is
above approximately 30°C (86°F),
the indicator may not turn on.
The engine can be started from
any engine switch mode.

Performing the following operations when carrying the elec-
tronic key on your person starts the engine or changes engine
switch modes.

Starting the engine

1

2

3

4

271

4-2. Driving procedures

4

D

riv

in

g

Manual transmission
Check that the parking brake is set.
Check that the shift lever is set in N.
Firmly depress the clutch pedal.

Vehicles with the multi-information display type A:
The smart entry & start system indicator (green) will turn on. 
If the indicator does not turn green, the engine cannot be started.
Vehicles with the multi-information display type B:

 and a message will be displayed on the multi-information display. 

If it is not displayed, the engine cannot be started.

Press the engine switch shortly
and firmly.

When operating the engine switch,
one short, firm press is enough. It
is not necessary to press and hold
the switch.
The engine will crank until it starts
or for up to 30 seconds, whichever
is less.
Continue depressing the clutch
pedal until the engine is completely
started.
The 

 indicator turns on. The

engine will start after the indicator
light goes out.
If the engine coolant temperature
is above approximately 30°C
(86°F), the indicator may not turn
on.
The engine can be started from any engine switch mode.

1

2

3

4


Content      ..     14      15      16      17     ..