Toyota Corolla (2023 year). Manual in english - page 23
 

  Index      Toyota     Toyota Corolla (2023 year). Manual in english


Search            copyright infringement  


Content      ..     21      22      23      24     ..


Toyota Corolla (2023 year). Manual in english - page 23


359

7-2. Steps to take in an emergency

7

Whe

n tr

ouble

 ar

ises

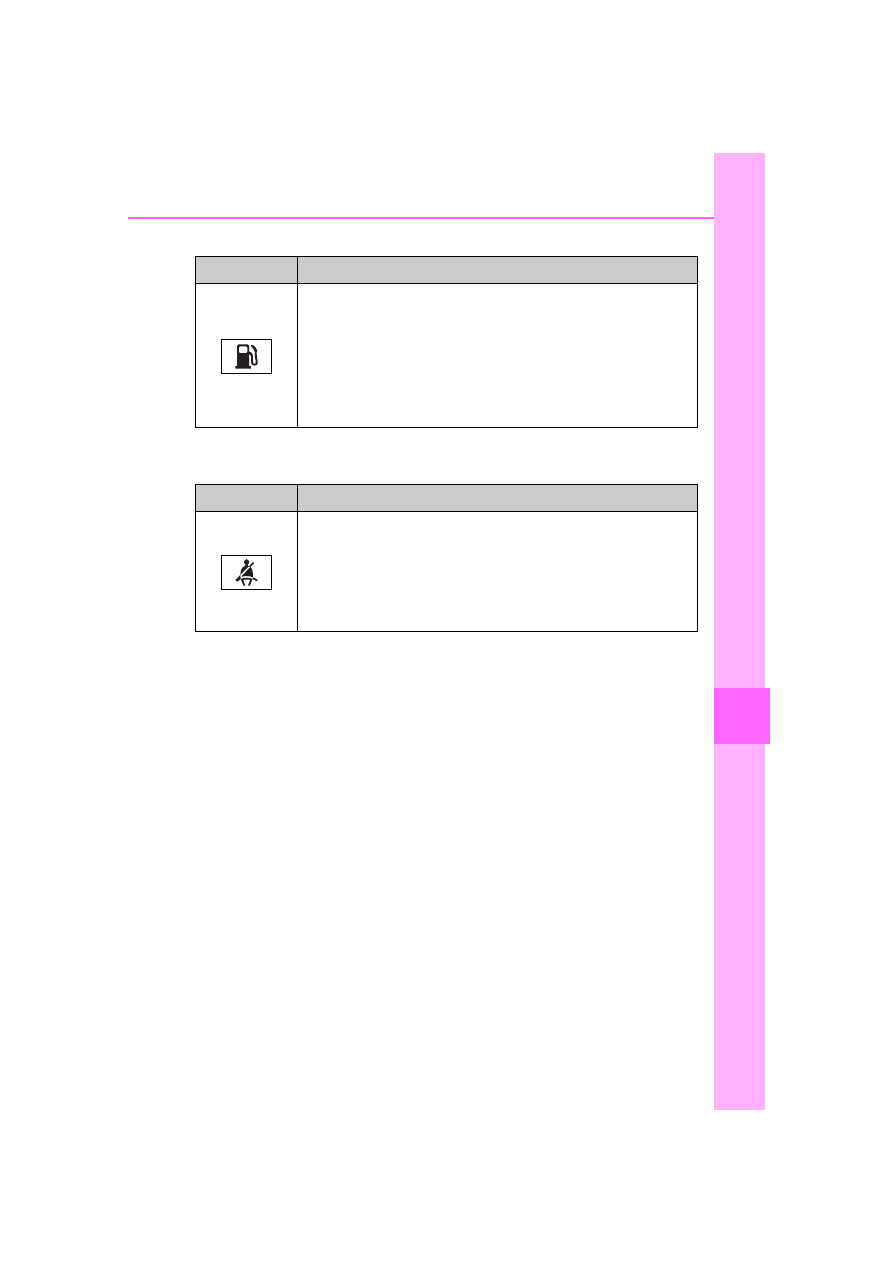
Low fuel level warning light

Driver’s and front passenger’s seat belt reminder light (warn-
ing buzzer)

*

*

: Driver’s seat belt warning buzzer:

The driver’s seat belt warning buzzer sounds to alert the driver that his or 
her seat belt is not fastened. Once the engine switch is turned to ON, the 
buzzer sounds. If the seat belt is still unfastened, the buzzer sounds inter-
mittently for a certain period of time after the vehicle reaches a certain 
speed.
Front passenger’s seat belt warning buzzer:
The front passenger’s seat belt warning buzzer sounds to alert the front 
passenger that his or her seat belt is not fastened. If the seat belt is unfas-
tened, the buzzer sounds intermittently for a certain period of time after the 
vehicle reaches a certain speed.

Warning light

Details/Actions

Vehicles without 18-inch tires:
Indicates that remaining fuel is approximately 1.9 gal. (7.1 
L, 1.6 Imp. gal.) or less
Vehicles with 18-inch tires:
Indicates that remaining fuel is approximately 2 gal. (7.5 L, 
1.6 Imp. gal.) or less

Refuel the vehicle.

Warning light

Details/Actions

Warns the driver and/or front passenger to fasten their seat 
belts

Fasten the seat belt. 
If the front passenger’s seat is occupied, the front 
passenger’s seat belt also needs to be fastened to 
make the warning light (warning buzzer) turn off.

360

7-2. Steps to take in an emergency

Rear passengers’ seat belt reminder lights (warning buzzer)

*

*

: Rear passengers’ seat belt warning buzzer:

The rear passengers’ seat belt warning buzzer sounds to alert the rear pas-
senger that his or her seat belt is not fastened. If the seat belt is unfas-
tened, the buzzer sounds intermittently for a certain period of time, after the 
seat belt is fastened and unfastened and the vehicle reaches a certain 
speed.

Tire pressure warning light

Warning light

Details/Actions

(4.2-inch dis-

play)

(7-inch display)

Warns the rear passengers to fasten their seat belts

Fasten the seat belt.

Warning light

Details/Actions

(if equipped)

When the light comes on after blinking for approximately 1 
minute (a buzzer does not sounds):
Malfunction in the tire pressure warning system

Have the system checked by your Toyota dealer.

When the light comes on (a buzzer sounds):
Low tire inflation pressure from natural causes

After the temperature of the tires has lowered suffi-
ciently, check the inflation pressure of each tire and 
adjust them to the specified level. (

P.328)

Low tire inflation pressure from flat tire

Immediately stop the vehicle in a safe place and per-
form the necessary actions. (

P.364)

361

7-2. Steps to take in an emergency

7

Whe

n tr

ouble

 ar

ises

PCS warning light (warning buzzer)

LTA indicator (warning buzzer)

LDA indicator (warning buzzer)

PDA indicator (warning buzzer)

Dynamic radar cruise control indicator (warning buzzer)

Warning light

Details/Actions

Indicates a malfunction in the PCS (Pre-Collision System).

Follow the instructions displayed on the multi-infor-
mation display. (

P.366)

If the PCS (Pre-Collision System) or VSC (Vehicle Stability 
Control) system is disabled, the PCS warning light will illu-
minate.

P.195

Warning light

Details/Actions

(Orange)

Indicates a malfunction in the LTA (Lane Tracing Assist).

Follow the instructions displayed on the multi-infor-
mation display. (

P.366)

Warning light

Details/Actions

(Orange)

Indicates a malfunction in the LDA (Lane Departure Alert).

Follow the instructions displayed on the multi-infor-
mation display. (

P.366)

Warning light

Details/Actions

(Orange)

Indicates a malfunction in the PDA (Proactive Driving 
Assist).

Follow the instructions displayed on the multi-infor-
mation display. (

P.366)

Warning light

Details/Actions

(Orange)

Indicates a malfunction in the dynamic radar cruise control.

Follow the instructions displayed on the multi-infor-
mation display. (

P.366)

362

7-2. Steps to take in an emergency

Cruise control indicator (warning buzzer)

Driving assist information indicator

*

: If equipped

Slip indicator

Warning light

Details/Actions

(Orange)

Indicates a malfunction in the cruise control.

Follow the instructions displayed on the multi-infor-
mation display. (

P.366)

Warning light

Details/Actions

Indicates either of the following systems may be malfunc-
tioning.

PCS (Pre-Collision System)

LDA (Lane Departure Alert)

Follow the instructions displayed on the multi-infor-
mation display. (

P.366)

Indicates one of the following systems is malfunctioning or 
disabled.

BSM (Blind Spot Monitor)

*

RCTA(Rear cross traffic alert)

*

SEA (Safe Exit Assist)

*

Follow the instructions displayed on the multi-infor-
mation display. (

P.366)

Warning light

Details/Actions

Indicates a malfunction in:

The VSC system;

The TRAC system; or

The hill-start assist control system

Have the vehicle inspected by your Toyota dealer 
immediately.

363

7-2. Steps to take in an emergency

7

Whe

n tr

ouble

 ar

ises

Parking brake indicator

Brake hold operated indicator

Warning buzzer

In some cases, the buzzer may not 

be heard due to being in a noisy 

location or audio sound.

Front passenger detection sen-

sor, seat belt reminder and 

warning buzzer

If luggage is placed on the front 

passenger seat, the front passen-

ger detection sensor may cause 

the warning light to flash and the 

warning buzzer to sound even if a 

passenger is not sitting in the 

seat.

If a cushion is placed on the seat, 

the sensor may not detect a pas-

senger, and the warning light may 

not operate properly.

Operation of rear passengers’ 

seat belt reminder lights

The rear passengers’ seat belt 

reminder lights will illuminate for 

approximately 60 seconds after 

either rear door has been opened 

and closed.

If any rear seat belt is fastened 

and then unfastened, the corre-

sponding light for that seat will illu-

minate continuously. If either rear 

door is opened and closed while a 

rear passengers’ seat belt light is 

illuminated, it will turn off approxi-

mately 60 seconds after the door 

is closed.

SRS warning light

This warning light system monitors 

the airbag sensor assembly, front 

impact sensors, side impact sensors 

(front door), side impact sensors 

(front), driver’s seat position sensor, 

driver’s seat belt buckle switch, front 

passenger seat belt buckle switch, 

“AIR BAG ON” indicator light, “AIR 

BAG OFF” indicator light, seat belt 

pretensioners, airbags, intercon-

necting wiring and power sources. 

(

P.32)

Electric power steering system 

warning light (warning buzzer)

When the battery charge becomes 

insufficient or the voltage temporar-

ily drops, the electric power steering 

Warning light

Details/Actions

(Flashes)

(U.S.A.)

or

(Flashes)
(Canada)

It is possible that the parking brake is not fully engaged or 
released

Operate the parking brake switch once again.

This light comes on the parking brake is not released. If the 
light turns off after the parking brakes is fully released, the 
system is operating normally.

Warning light

Details/Actions

(Flashes)

Indicates a malfunction in the brake hold system

Have the vehicle inspected by your Toyota dealer 
immediately.

364

7-2. Steps to take in an emergency

system warning light may come on 

and the warning buzzer may sound.

When the tire pressure warning 

light comes on (vehicles with a 

tire pressure warning system)

Inspect the tires to check if a tire is 

punctured.
If a tire is punctured: 

P.370

If none of the tires are punctured:

Turn the engine switch off then turn 

it to ON. Check if the tire pressure 

warning light comes on or blinks.

If the tire pressure warning light 

blinks for approximately 1 minute 

then stays on

There may be a malfunction in the 

tire pressure warning system. Have 

the vehicle inspected by your Toyota 

dealer immediately.

If the tire pressure warning light 

comes on

1

After the temperature of the tires 

has lowered sufficiently, check 

the inflation pressure of each tire 

and adjust them to the specified 

level.

2

If the warning light does not turn 

off even after several minutes 

have elapsed, check that the 

inflation pressure of each tire is 

at the specified level and perform 

initialization. (

P.318)

The tire pressure warning light 

may come on due to natural 

causes (vehicles with a tire 

pressure warning system)

The tire pressure warning light may 

come on due to natural causes such 

as natural air leaks and tire inflation 

pressure changes caused by tem-

perature. In this case, adjusting the 

tire inflation pressure will turn off the 

warning light (after a few minutes).

When a tire is replaced with a 

spare tire (vehicles with a tire 

pressure warning system)

The compact spare tire is not 

equipped with a tire pressure warn-

ing valve and transmitter. If a tire 

goes flat, the tire pressure warning 

light will not turn off even though the 

flat tire has been replaced with the 

spare tire. Replace the spare tire 

with the repaired tire and adjust the 

tire inflation pressure. The tire pres-

sure warning light will go off after a 

few minutes.

Conditions that the tire pres-

sure warning system may not 

function properly (vehicles with 

a tire pressure warning system)

P.315

WARNING

If both the ABS and the brake 

system warning lights remain 

on

Stop your vehicle in a safe place 

immediately and contact your Toy-

ota dealer.

The vehicle will become 

extremely unstable during brak-

ing, and the ABS system may fail, 

which could cause an accident 

resulting in death or serious injury.

When the electric power 

steering system warning light 

comes on

When the light comes on yellow, 

the assist to the power steering is 

restricted. When the light comes 

on red, the assist to the power 

steering is lost and handling oper-

ations of the steering wheel 

become extremely heavy.

When steering wheel operations 

are heavier than usual, grip the 

steering wheel firmly and operate 

it using more force than usual.

If the tire pressure warning 

light comes on (vehicles with 

a tire pressure warning sys-

tem)

Be sure to observe the following 

precautions.

Failure to do so could cause a 

loss of vehicle control and result 

in death or serious injury.

365

7-2. Steps to take in an emergency

7

W

he

tro

ub

le

 ar

is

es

WARNING

Stop your vehicle in a safe place 

as soon as possible. Adjust the 

tire inflation pressure immedi-

ately.

If the tire pressure warning light 

comes on even after tire infla-

tion pressure adjustment, it is 

probable that you have a flat 

tire. Check the tires. If a tire is 

flat, change it with the spare tire 

and have the flat tire repaired by 

the nearest Toyota dealer.

Avoid abrupt maneuvering and 

braking.

If the vehicle tires deteriorate, 

you could lose control of the 

steering wheel or the brakes.

If a blowout or sudden air 

leakage should occur (vehi-

cles with a tire pressure warn-

ing system)

The tire pressure warning system 

may not activate immediately.

Maintenance of the tires

Each tire, including the spare (if 

provided), should be checked 

monthly when cold and inflated to 

the inflation pressure recom-

mended by the vehicle manufac-

turer on the vehicle placard or tire 

inflation pressure label (tire and 

load information label). (If your 

vehicle has tires of a different size 

than the size indicated on the 

vehicle placard or tire inflation 

pressure label [tire and load infor-

mation label], you should deter-

mine the proper tire inflation 

pressure for those tires.)

As an added safety feature, your 

vehicle has been equipped with a 

tire pressure monitoring system 

(TPMS-tire pressure warning sys-

tem) that illuminates a low tire 

pressure telltale (tire pressure 

warning light) when one or more 

of your tires is significantly 

under-inflated. Accordingly, when 

the low tire pressure telltale (tire 

pressure warning light) illumi-

nates, you should stop and check 

your tires as soon as possible, 

and inflate them to the proper 

pressure. Driving on a signifi-

cantly under-inflated tire causes 

the tire to overheat and can lead 

to tire failure. Under-inflation also 

reduces fuel efficiency and tire 

tread life, and may affect the vehi-

cle’s handling and stopping ability.

Please note that the TPMS (tire 

pressure warning system) is not a 

substitute for proper tire mainte-

nance, and it is the driver’s 

responsibility to maintain correct 

tire pressure, even if under-infla-

tion has not reached the level to 

trigger illumination of the TPMS 

low tire pressure telltale (tire pres-

sure warning light).

Your vehicle has also been 

equipped with a TPMS (tire pres-

sure warning system) malfunc-

tion indicator to indicate when the 

system is not operating properly. 

The TPMS (tire pressure warning 

system) malfunction indicator is 

combined with the low tire pres-

sure telltale (tire pressure warning 

light). When the system detects a 

malfunction, the telltale will flash 

for approximately one minute and 

then remain continuously illumi-

nated. This sequence will con-

tinue upon subsequent vehicle 

start-ups as long as the malfunc-

tion exists. When the malfunction 

indicator is illuminated, the sys-

tem may not be able to detect or 

signal low tire pressure as 

intended.

366

7-2. Steps to take in an emergency

Warning messages

The warning messages explained 

below may differ from the actual 

messages according to operation 

conditions and vehicle specifica-

tions.

Warning buzzer

A buzzer may sound when a mes-

sage is displayed. 

The buzzer may not be audible if the 

vehicle is in a noisy location or if the 

audio system volume is high.

If “Engine Oil Level Low Add or 

Replace” is displayed

The engine oil level is low. Check 

WARNING

TPMS (tire pressure warning sys-

tem) malfunctions may occur for a 

variety of reasons, including the 

installation of replacement or 

alternate tires or wheels on the 

vehicle that prevent the TPMS 

(tire pressure warning system) 

from functioning properly. Always 

check the TPMS (tire pressure 

warning system) malfunction tell-

tale after replacing one or more 

tires or wheels on your vehicle to 

ensure that the replacement or 

alternate tires and wheels allow 

the TPMS (tire pressure warning 

system) to continue to function 

properly.

NOTICE

To ensure the tire pressure 

warning system operates 

properly (vehicles with a tire 

pressure warning system)

Do not install tires with different 

specifications or makers, as the 

tire pressure warning system may 

not operate properly.

If a warning message 

is displayed

The multi-information dis-
play shows warnings for 
system malfunctions and 
incorrectly performed oper-
ations, and messages that 
indicate a need for mainte-
nance. When a message is 
displayed, perform the 
appropriate corrective 
action for the message.

If a warning message is dis-
played again after the 
appropriate actions have 
been performed, contact 
your Toyota dealer.

Additionally, if a warning 
light comes on or flashes at 
the same time that a warn-
ing message is displayed, 
take the appropriate correc-
tive action for the warning 
light. (

P.356)

367

7-2. Steps to take in an emergency

7

Whe

n tr

ouble

 ar

ises

the level of the engine oil, and add if 

necessary.
This message may appear if the 

vehicle is stopped on a slope. Move 

the vehicle to a level surface and 

check to see if the message disap-

pears.

If “Engine Stopped Steering 

Power Low” is displayed

This message is displayed if the 

engine is stopped while driving.
When steering wheel operations are 

heavier than usual, grip the steering 

wheel firmly and operate it using 

more force than usual.

If “Auto Power OFF to Conserve 

Battery” is displayed

Power was cut off due to the auto-

matic power off function. Next time 

when starting the engine, increase 

the engine speed slightly and main-

tain that level for approximately 5 

minutes to recharge the battery.

If “Headlight System Malfunc-

tion Visit Your Dealer” is dis-

played

The following systems may be mal-

functioning. Have the vehicle 

inspected by your Toyota dealer 

immediately.

The LED headlight system

AHB (Automatic High Beam)

If “System Malfunction Visit 

Your Dealer” is displayed

Indicates one of the following sys-

tems is disabled.

PCS (Pre-Collision system)

LDA (Lane Departure Alert)

LTA (Lane Tracing Assist)

AHB (Automatic High Beam)

Dynamic radar cruise control

RSA (Road Sign Assist) (if 

equipped)

BSM (Blind Spot Monitor) (if 

equipped)

RCTA (Rear Cross Traffic 

Alert) (if equipped)

SEA (Safe Exit Assist) (if 

equipped)

Have the vehicle inspected by your 

Toyota dealer immediately.

If “System Stopped See 

Owner’s Manual” is displayed

Indicates one of the following sys-

tems is disabled.

PCS (Pre-Collision system)

LDA (Lane Departure Alert)

LTA (Lane Tracing Assist)

AHB (Automatic High Beam)

Dynamic radar cruise control

RSA (Road Sign Assist) (if 

equipped)

BSM (Blind Spot Monitor) (if 

equipped)

RCTA (Rear Cross Traffic 

Alert) (if equipped)

SEA (Safe Exit Assist) (if 

equipped)

Follow the following correction 

methods.
• Check the voltage of the battery
• Check the sensors that the Toyota 

Safety Sense 3.0 uses for foreign 

matter covering them. Remove 

them if any. (

P.185)

Indicates the sensors may not be 

operating properly. (

P.188)

When problems are solved and the 

sensors are operational, this indica-

tion may disappear by itself.

If “System Stopped Front Cam-

era Low Visibility See Owner’s 

Manual” is displayed

Indicates one of the following sys-

tems is disabled.

PCS (Pre-Collision system)

LDA (Lane Departure Alert)

368

7-2. Steps to take in an emergency

LTA (Lane Tracing Assist)

AHB (Automatic High Beam)

Dynamic radar cruise control

RSA (Road Sign Assist) (if 

equipped)

Follow the following correction 

methods.
• Using the windshield wipers, 

remove the dirt or foreign matter 

from the windshield.

• Using the air conditioning system, 

defog the windshield.

• Close the hood, remove any stick-

ers, etc. to clear the obstruction in 

front of the front camera.

If “System Stopped Front Cam-

era Out of Temperature Range 

Wait until Normal Temperature” 

is displayed

Indicates one of the following sys-

tems is disabled.

PCS (Pre-Collision system)

LDA (Lane Departure Alert)

LTA (Lane Tracing Assist)

AHB (Automatic High Beam)

Dynamic radar cruise control

RSA (Road Sign Assist) (if 

equipped)

Follow the following correction 

methods.
• If the front camera is hot, such as 

after the vehicle is parked in the 

sun, use the air conditioning sys-

tem to decrease the temperature 

around the front camera

• If a sunshade was used when the 

vehicle was parked, depending on 

its type, the sunlight reflected from 

the surface of the sunshade may 

cause the temperature of the front 

camera to become excessively 

high

• If the front camera is cold, such 

after the vehicle is parked in an 

extremely cold environment, use 

the air conditioning system to 

increase the temperature around 

the front camera

If “System Stopped Front Radar 

Sensor Blocked Clean Radar 

Sensor” is displayed

Indicates one of the following sys-

tems is disabled.

PCS (Pre-Collision system)

LDA (Lane Departure Alert)

LTA (Lane Tracing Assist)

AHB (Automatic High Beam)

Dynamic radar cruise control

Follow the following correction 

methods.
• Check if there is any foreign mat-

ter attached to the radar sensor or 

radar sensor cover and clean 

them if necessary (

P.186)

• This message may be displayed 

when driving in an open area with 

few nearby vehicles or structures, 

such as a desert, grasslands, sub-

urbs, etc.

The message may be cleared by 

driving the vehicle in an area with 

structures, vehicles, etc., nearby.

If “System Stopped Front Radar 

Sensor Out of Temperature 

Range Wait until Normal Tem-

perature” is displayed

Indicates one of the following sys-

tems is disabled.

PCS (Pre-Collision system)

LDA (Lane Departure Alert)

LTA (Lane Tracing Assist)

AHB (Automatic High Beam)

Dynamic radar cruise control

Follow the following correction 

methods.
The temperature of the radar sensor 

is outside of the operating range. 

Wait for the temperature to become 

appropriate.

369

7-2. Steps to take in an emergency

7

Whe

n tr

ouble

 ar

ises

If “System Stopped Front Radar 

In Self Calibration See Owner’s 

Manual” is displayed

Indicates one of the following sys-

tems is disabled.

PCS (Pre-Collision system)

LDA (Lane Departure Alert)

LTA (Lane Tracing Assist)

AHB (Automatic High Beam)

Dynamic radar cruise control

Follow the following correction 

methods.
• Check if there is any foreign mat-

ter attached to the radar sensor or 

radar sensor cover and clean 

them if necessary (

P.186)

• The radar sensor may be mis-

aligned and will be adjusted auto-

matically while driving. Continue 

driving for a while.

If “Cruise Control Unavailable 

See Owner’s Manual” is dis-

played

Indicates one of the following sys-

tems is disabled.

Dynamic radar cruise control

Cruise control

A message is displayed when the 

driving assist switch is pushed 

repeatedly.
Press the driving assist switch 

quickly and firmly.

If “Maintenance Required 

Soon” is displayed

Indicates that all maintenance 

according to the driven distance on 
the maintenance schedule

*

 should 

be performed soon.
Comes on approximately 4500 

miles (7200 km) after the message 

has been reset. If necessary, per-

form maintenance. Please reset the 

message after the maintenance is 

performed. (

P.295)

*

: Refer to the separate “Scheduled 

Maintenance” or “Owner’s Man-

ual Supplement” for the mainte-
nance interval applicable to your 
vehicle.

If “Maintenance Required Visit 

Your Dealer” is displayed

Indicates that all maintenance is 

required to correspond to the driven 

distance on the maintenance sched-
ule

*

.

Comes on approximately 5000 

miles (8000 km) after the message 

has been reset. (The indicator will 

not work properly unless the mes-

sage has been reset.) Perform the 

necessary maintenance. Please 

reset the message after the mainte-

nance is performed. (

P.295)

*

: Refer to the separate “Scheduled 

Maintenance” or “Owner’s Man-
ual Supplement” for the mainte-
nance interval applicable to your 
vehicle.

If “Engine Maintenance 

Required Visit Your Dealer” is 

shown

The engine or an engine component 

is malfunctioning. Have the vehicle 

inspected by your Toyota dealer 

immediately.

If a message that indicates the 

need for visiting your Toyota 

dealer is displayed

The system or part shown on the 

multi-information display is malfunc-

tioning. Have the vehicle inspected 

by your Toyota dealer immediately.

If a message that indicates the 

need for referring to Owner’s 

Manual is displayed

If “Engine Coolant Temp High” is 

displayed, follow the instructions 

accordingly. (

P.387)

If the following message is dis-

played on the multi-information 

display, it may indicate a malfunc-

tion. Have the vehicle inspected 

by your Toyota dealer immedi-

370

7-2. Steps to take in an emergency

ately.

• “Smart Key System Malfunction”

If any of the following messages 

are displayed on the multi-infor-

mation display, it may indicate a 

malfunction. Immediately stop the 

vehicle and contact your Toyota 

dealer.

• “Braking Power Low”

• “Charging System Malfunction”

• “Oil Pressure Low”

Stop the vehicle in a safe 
place on a hard, flat surface.

Set the parking brake.

Shift the shift lever to P.

Stop the engine.

Turn on the emergency flash-
ers.

NOTICE

If “High Power Consumption 

Power to Climate Temporar-

ily Limited” is displayed fre-

quently

There is a possible malfunction 

relating to the charging system or 

the battery may be deteriorating. 

Have the vehicle inspected by 

your Toyota dealer.

If you have a flat tire

Your vehicle is equipped 
with a spare tire. The flat tire 
can be replaced with the 
spare tire.

For details about tires: 

P.311

WARNING

If you have a flat tire

Do not continue driving with a flat 

tire. Driving even a short distance 

with a flat tire can damage the tire 

and the wheel beyond repair, 

which could result in an accident.

Before jacking up the 
vehicle

371

7-2. Steps to take in an emergency

7

Whe

n tr

ouble

 ar

ises

Type A

Jack handle
Jack
Towing eyelet
Spare tire
Wheel nut wrench

Location of the spare tire, jack and tools

372

7-2. Steps to take in an emergency

Type B

Jack
Wheel nut wrench
Spare tire
Jack handle

WARNING

Using the tire jack

Observe the following precau-

tions. Improper use of the tire jack 

may cause the vehicle to sud-

denly fall off the jack, leading to 

death or serious injury.

Do not use the tire jack for any 

purpose other than replacing 

tires or installing and removing 

tire chains.

Only use the tire jack that 

comes with this vehicle for 

replacing a flat tire. Do not use it 

on other vehicles, and do not 

use other tire jacks for replacing 

tires on this vehicle.

Put the jack properly in its jack 

point.

Do not put any part of your body 

under the vehicle while it is sup-

ported by the jack.

Do not start the engine or drive 

the vehicle while the vehicle is 

supported by the jack.

Do not raise the vehicle while 

someone is inside.

373

7-2. Steps to take in an emergency

7

W

he

tro

ub

le

 ar

is

es

1

Remove the deck mat.

2

Take out the jack.

Type A

Type B

For tightening
For loosening

1

Remove the deck mat. 
(

P.373)

2

Remove the tool tray.

Type A

Type B

WARNING

When raising the vehicle, do not 

put an object on or under the 

jack.

Do not raise the vehicle to a 

height greater than that required 

to replace the tire.

Use a jack stand if it is neces-

sary to get under the vehicle.

When lowering the vehicle, 

make sure that there is no-one 

near the vehicle. If there are 

people nearby, warn them 

vocally before lowering.

Taking out the jack

Taking out the spare tire

374

7-2. Steps to take in an emergency

3

Loosen the center fastener 
that secures the spare tire.

1

Chock the tires.

2

Vehicles with a steel wheel: 
Remove the wheel cap (if 
equipped) using the wrench.

Insert the wrench into the notch 


on the wheel cap.

To protect the wheel cap, place a 

rag between the wrench and the 

wheel cap.

3

Slightly loosen the wheel 
nuts (one turn).

4

Turn the tire jack portion   
by hand until the center of the 
recessed portion of the jack 

WARNING

When storing the spare tire

Be careful not to catch fingers or 

other body parts between the 

spare tire and the body of the 

vehicle.

Replacing a flat tire

Flat tire

Wheel chock 

positions

Front left-hand 
side

Behind the rear 
right-hand side 
tire

Front right-hand 
side

Behind the rear 
left-hand side tire

Rear left-hand 
side

In front of the 
front right-hand 
side tire

Rear right-hand 
side

In front of the 
front left-hand 
side tire

Flat tire

Wheel chock 

positions


Content      ..     21      22      23      24     ..