Toyota Proace EV (2022 year). Manual in english - page 1
Welcome
Key
Safety warning
Thank you for choosing a Toyota PROACE VAN or a Toyota PROACE VERSO.
This document presents the key information and recommendations required
for you to be able to explore your vehicle in complete safety. We strongly
Additional information
recommend familiarising yourself with this document and the Maintenance
and Warranty Guide.
Environmental protection feature
Your vehicle will be fitted with only some of the equipment described in this
document, depending on its trim level, version and the specification for the
Left-hand drive vehicle
country in which it was sold.
The descriptions and illustrations are for guidance only.
TOYOTA reserves the right to modify the technical specifications, equipment
Right-hand drive vehicle
and accessories without having to update this document.
If ownership of your vehicle is transferred, please ensure this Handbook is
Location of the equipment / button
passed on to the new owner.
described using a black area.
Identification
This allows you to identify the special features of the vehicle:
PROACE VAN
PROACE VAN Crew Cab with manual child lock
PROACE VAN Crew Cab with electric child lock
PROACE VAN, PROACE VERSO
2
Overview ■
Steering wheel adjustment
58
Wiper control lever
106
Overview
4
Mirrors
58
Automatic wipers
108
Labels
6
Smart Cargo
60
Changing a wiper blade
109
Precautions for the seats and bench seats
64
Fixed one-piece bench seat
65
Safety 5
Eco-driving ■
Fixed rear seat and bench seat
67
General safety recommendations
111
Rear seat and bench seat on rails
69
Hazard warning lamps
112
Instruments 1
Individual rear seat(s) on rails
71
Emergency or assistance
112
Instrument Panel
10
Crew Cab, fixed
74
Horn
114
Warning and indicator lamps
12
Crew Cab, folding
75
Pedestrian horn (Electric)
114
Indicators
18
Interior fittings
76
Vehicle stability control (VSC)
114
Lighting dimmer
23
Loading area fittings
80
Toyota Traction Select
117
Trip computer
24
Seating area fittings
82
Seat belts
118
Touch screen
26
Panoramic sunroof
84
Airbags
122
Remotely operable functions (Electric)
28
Retractable sliding table
84
Child seats
125
Setting the date and time
28
Heating and Ventilation
88
Deactivating the front passenger airbag
127
Heating
89
ISOFIX and i-Size child seats
133
Access 2
Manual air conditioning
89
i-Size child seats
144
Dual-zone automatic air conditioning
90
Electronic key with remote control function
Manual child lock
148
Front demisting - defrosting
92
and built-in key,
30
Electric child lock
148
Rear screen and/or door mirror
Unlocking/Complete or selective unlocking
33
Child lock on rear windows
149
demisting/de-icing
93
Back-up procedures
38
Rear heating - air conditioning
94
Central locking
40
Driving 6
Additional heating/ventilation system
94
Electric sliding side door(s)
42
A/C preconditioning (Electric)
98
Driving recommendations
150
General recommendations for the sliding
Courtesy lamp(s)
99
Starting/switching off the engine
152
side doors
44
Manual parking brake
157
Hands-free sliding side door(s)
46
Electric parking brake
157
Side-hinged rear doors
48
Lighting and visibility 4
Hill start assist
160
Tailgate
49
Lighting control lever
101
6-speed manual gearbox
161
Tailgate rear screen
49
Direction indicators
102
Gear efficiency indicator
161
Alarm
50
Daytime running lamps/Sidelamps
103
Automatic gearbox
162
Electric windows
52
Automatic illumination of headlamps
103
Drive selector (Electric)
166
Guide-me-home and welcome lighting
103
Driving modes (Electric)
167
Ease of use and comfort 3
Automatic headlamp dipping
104
Stop & Start
168
Headlamp beam height adjustment
105
Front seats
53
Under-inflation detection
170
Interior ambient lighting
106
2-seat front bench seat
56
3
Driving and manoeuvring aids - General
Advice on care and maintenance
226
Radio
282
recommendations
171
DAB (Digital Audio Broadcasting) radio
284
Head-up display
173
In the event of a breakdown 8
Media
284
Memorising speeds
174
Telephone
286
Warning triangle
229
Speed Limit Recognition and
Settings
289
Running out of fuel (Diesel)
229
Recommendation
175
Frequently asked questions
291
Tool box
230
Speed limiter
177
Temporary puncture repair kit
231
Cruise control - particular recommendations
179
TOYOTA Pro Touch with
12
Spare wheel
235
Cruise control
180
Changing a bulb
239
navigation system
Adaptive Cruise Control
182
Changing a fuse
245
First steps
293
Active Safety Brake with
12 V battery / Accessory battery
248
Steering mounted controls
294
Collision Risk Alert and Intelligent
Towing
252
Menus
295
emergency braking assistance
186
Voice commands
296
Lane departure warning system
188
Technical data
9
Navigation
300
Distraction detection
189
Connected navigation
303
Blind Spot Monitoring System
191
Engine technical data and towed loads
254
Applications
305
Parking sensors
192
Diesel engines
255
Radio
308
VisioPark Light
194
Electric motor
259
DAB (Digital Audio Broadcasting) radio
310
Top Rear Vision
194
Dimensions
261
Media
310
Identification markings
264
Telephone
312
Practical information 7
Settings
315
Bluetooth® audio system 10
Compatibility of fuels
198
Frequently asked questions
317
Refuelling
198
First steps
265
Misfuel prevention (Diesel)
200
Steering mounted controls
266
Event data recorders 13
Charging system (Electric)
200
Menus
267
Charging the traction battery (Electric)
208
Radio
267
DAB (Digital Audio Broadcasting) radio
269
Alphabetical index ■
Energy economy mode
212
Snow chains
212
Media
270
Towing device
213
Telephone
273
Roof bars / Roof rack
214
Frequently asked questions
276
Bonnet
215
Engine compartment
216
TOYOTA Pro Touch
11
Checking levels
217
First steps
278
Speed checks
219
Steering mounted controls
279
AdBlue® (Diesel engines)
222
Menus
280
Free-wheeling
225
Applications
281
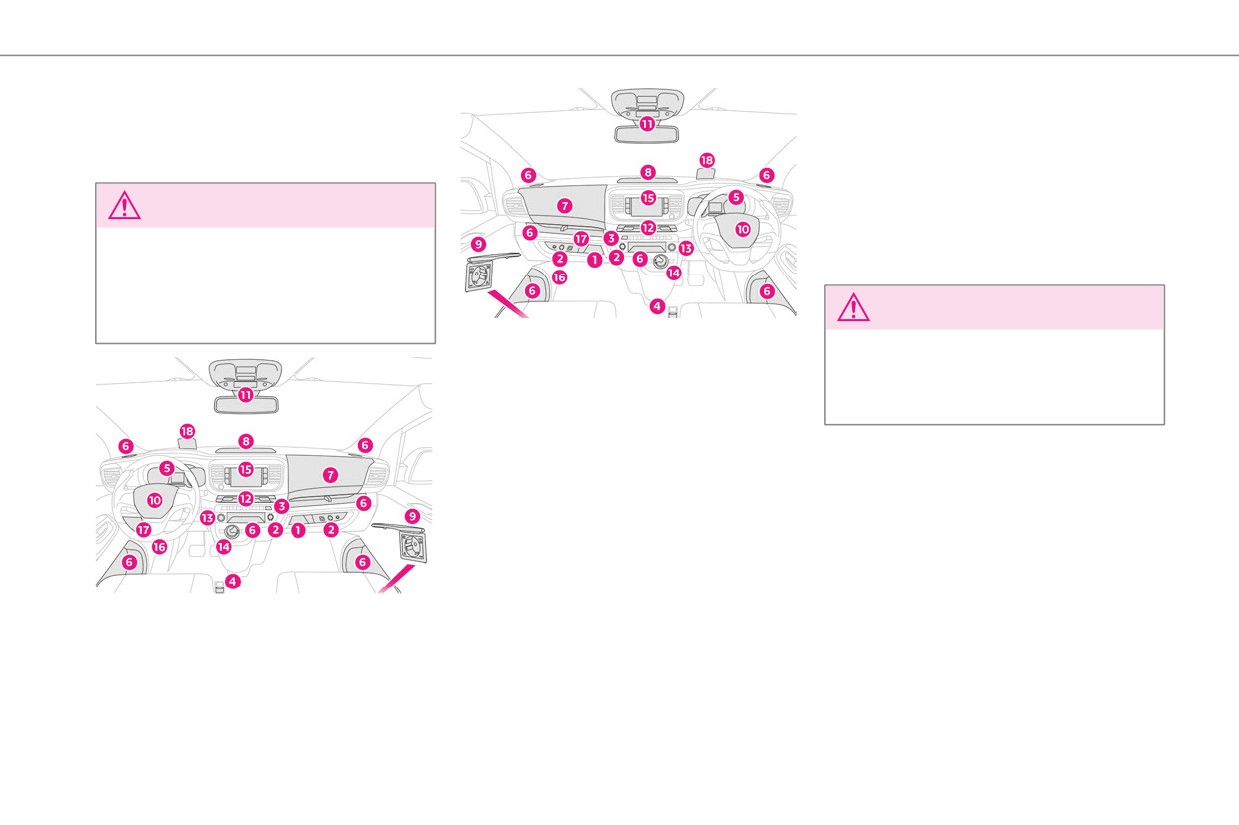
4
Presentation
14. Gearbox or drive selector
Choice of driving mode
15. Monochrome screen with audio system
Instruments and controls
Touch screen with TOYOTA Pro Touch or
TOYOTA Pro Touch with navigation system
NOTICE
16. Bonnet release
17. Dashboard fuses
These illustrations and descriptions are
18. Head-up display
intended as a guide. The presence and
location of some components varies
according to the version, trim level and
NOTICE
country of sale.
1.
Glove box
Depending on the vehicle's equipment, the
Deactivation of the front passenger airbag
storage compartments may be open or
2.
12 V (120 W) accessory sockets
closed. This configuration is shown as an
3.
USB socket
example.
4.
Electric parking brake
5.
Instrument panel
6.
Storage
Cup/can holder
7.
Storage compartment
8.
Upper storage compartment
9.
220 V (120 W) accessory socket
10.
Horn
11.
Courtesy lamp
Warning lamps display for seat belts and
front passenger airbag
Interior rear view mirror
Emergency and assistance call button
12.
Heating/Air conditioning
Front demisting - de-icing
Rear screen demisting - de-icing
13.
"START/STOP" button
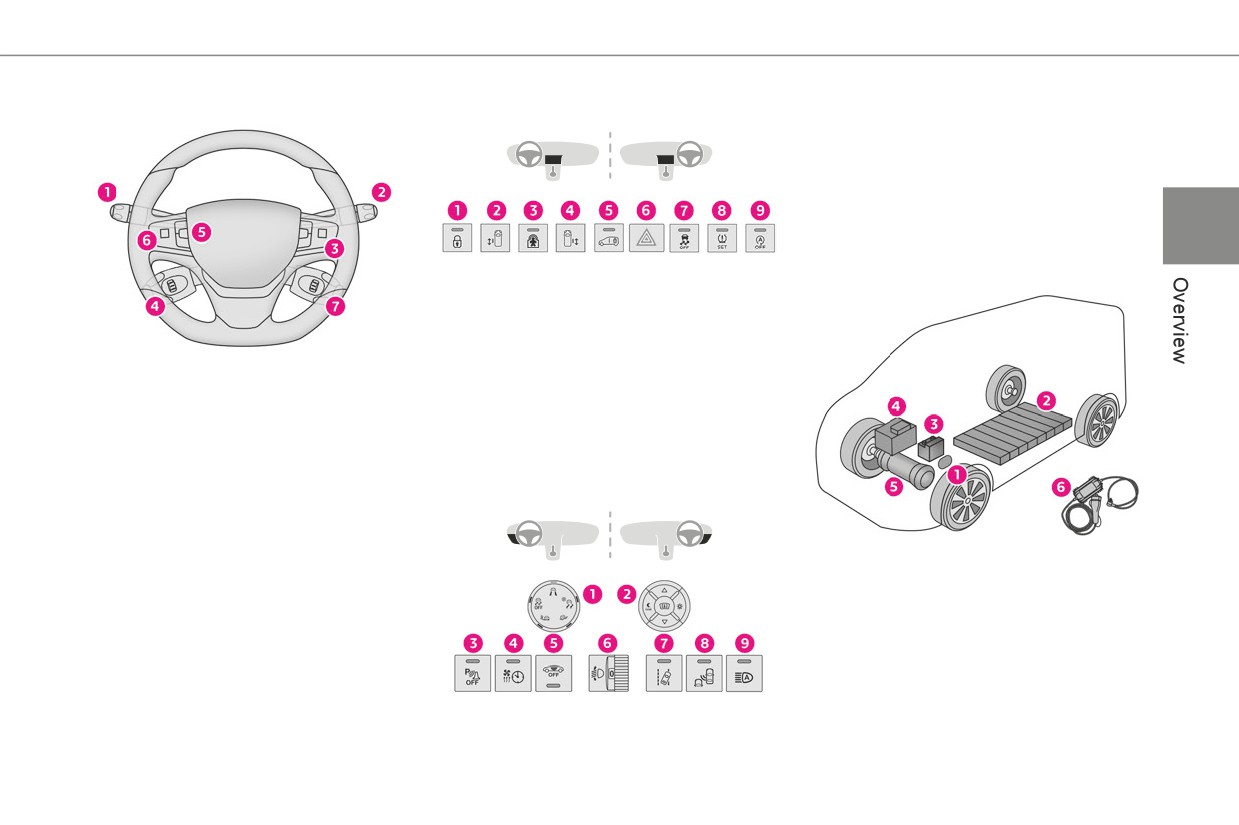
5
Steering-mounted controls
Central control bar
4. Additional heating/ventilation system (Diesel)
5. Alarm
6. Headlamp beam height adjustment
7. Lane departure warning system
8. Blind spot monitoring system
9. Automatic headlamp dipping
Electric motor
1. Locking/unlocking from the inside
2. Left-hand electric sliding side door
3. Electric child lock
4. Right-hand electric sliding side door
5. Cab/loading area selectivity
1.
Exterior lighting/Direction indicators control
6. Hazard warning lamps
stalks
7. DSC/ASR system
2.
Wiper controls/Screenwash/Trip computer
8. Tyre under-inflation detection
3.
Audio system setting controls
9. Stop & Start (Diesel)
4.
Controls for Cruise control/Speed limiter/
Adaptive Cruise Control
Side control bar
5.
Instrument panel display mode selection
wheel
6.
Voice synthesis control
Volume adjustment
1.
Charging connectors
7.
Audio system setting controls
2.
Traction battery
3.
Accessory battery
4.
On-board charger
5.
Electric motor
6.
Charging cable
The charging connectors 1 enable 3 types of
1. Toyota Traction Select
charging:
2. Head-up display
- Domestic charging in mode 2 using a domestic
3. Parking sensors
socket and associated charging cable 6.
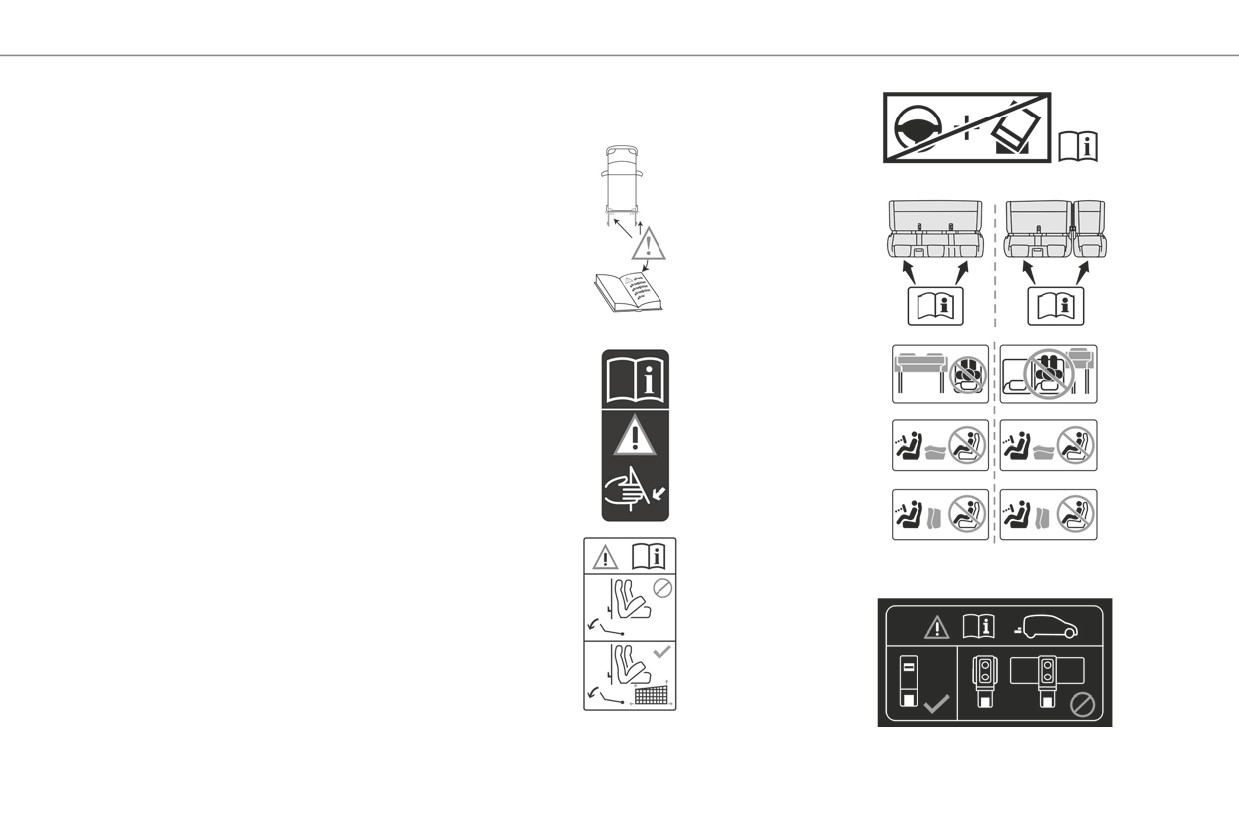
6
- Accelerated charging in mode 3 using an
Labels
accelerated charging unit (Wallbox).
- Superfast charging in mode 4 using a fast
public charger.
Smart Cargo section.
The 400 V traction battery 2 uses Lithium-Ion
technology. It stores and supplies the energy
required for the operation of the electric motor,
air conditioning and heating. Its charge level is
represented by an indicator and a reserve power
warning lamp on the instrument panel.
The 12 V accessory battery 3 powers the
Side-hinged rear doors section.
vehicle’s conventional electrical system. It is
recharged automatically by the traction battery
via the on-board charger.
The on-board charger 4 provides domestic
charging (mode 2) and accelerated charging
(mode 3) of the traction battery as well as
recharging of the 12 V accessory battery.
The electric motor 5 provides propulsion in
accordance with the selected driving mode and
driving conditions. It recovers energy during
vehicle braking and deceleration phases.
Precautions for seats and bench seats
section.
Retractable sliding table section.
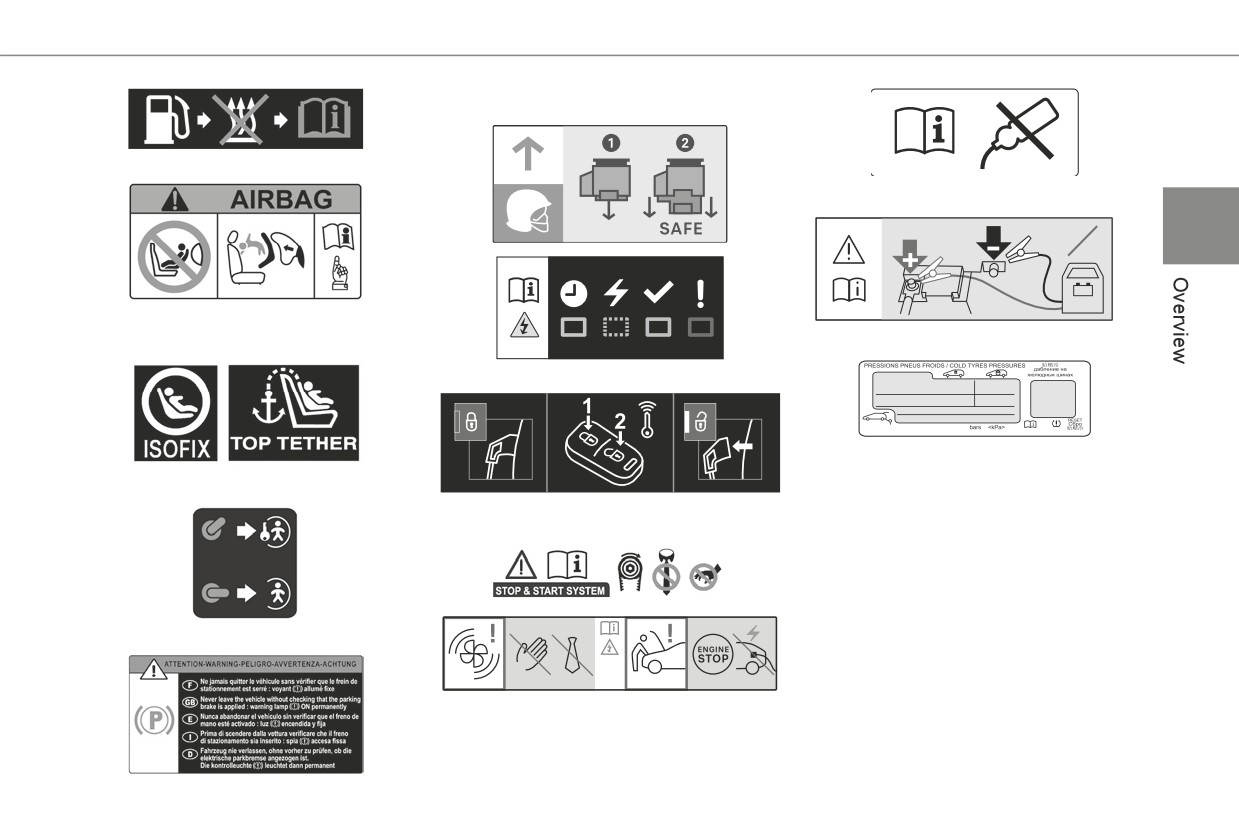
7
Electric parking brake section.
Additional heating/ventilation section.
Checking levels section.
24V
12V
Deactivating the front passenger airbag
section.
12 V battery/Accessory battery section.
Charging system (Electric) section.
Temporary puncture repair kit, Spare wheel
and Identification markings section.
ISOFIX child seats section.
Charging the traction battery (Electric)
section.
Manual child lock section.
Bonnet section.
8
Control the use of electrical equipment
Limit the causes of excess consumption
Eco-driving
Before moving off, if the passenger compartment
Spread loads throughout the vehicle. Place the
Eco-driving refers to a range of everyday
is too warm, ventilate it by opening the windows
heaviest items in the boot as close as possible to
practices that allow the motorist to optimise
and air vents before using the air conditioning.
the rear seats.
the vehicle's energy consumption (fuel and/or
At speeds above 31 mph (50 km/h), close the
Limit the loads carried in the vehicle and
electricity) and CO2 emissions.
windows and leave the air vents open.
minimise wind resistance (e.g. roof bars, roof
Optimise your use of the gearbox
Consider using equipment that can help keep
rack, bicycle carrier, trailer). Preferably, use a
With a manual gearbox, move off gently and
the temperature in the passenger compartment
roof box.
change up promptly. While accelerating, change
down (e.g. sunroof blind, window blinds).
Remove roof bars and roof racks after use.
up early.
Unless automatically regulated, switch off the air
At the end of winter, remove snow tyres and refit
With an automatic gearbox, favour automatic
conditioning as soon as the desired temperature
summer tyres.
mode. Do not depress the accelerator pedal
has been reached.
Comply with the servicing instructions
heavily or suddenly.
Switch off the demisting and defrosting functions,
Check tyre pressures regularly, with the tyres
The gear shift indicator prompts you to engage
if they are not managed automatically.
cold, referring to the label in the door aperture on
the most suitable gear. Whenever this indication
Switch off the heated seat as soon as possible.
the driver's side.
is displayed on the instrument panel, follow it
Adapt the use of headlamps and/or foglamps to
Carry out this check in particular:
straight away.
the level of visibility, in accordance with current
- before a long journey.
With an automatic gearbox, this indicator
legislation in the country in which you are driving.
- at each change of season.
appears only in manual mode.
Avoid running the engine before moving off,
- after a long period out of use.
Drive smoothly
particularly in winter (other than in severe wintry
Do not forget the spare wheel and, where
conditions: temperature below -23°C). The
Maintain a safe distance between vehicles, use
applicable, the tyres on your trailer or caravan.
vehicle will warm up much faster while driving.
engine braking rather than the brake pedal and
Have your vehicle serviced regularly (e.g. engine
As a passenger, avoid connecting your
press the accelerator gradually. These practices
oil, oil filter, air filter, passenger compartment
multimedia devices (e.g. film, music, video
help to save on energy consumption, reduce
filter, etc.). Observe the schedule of operations in
game) to help reduce the consumption of energy.
CO2 emissions and decrease general traffic
the manufacturer's service schedule.
Disconnect all portable devices before leaving
noise.
With a Diesel engine, if the SCR system is faulty,
the vehicle.
When the traffic is flowing smoothly, select the
your vehicle will emit pollution. Check with any
cruise control.
authorized Toyota retailer or Toyota authorized
repairer, or any reliable repairer as soon as
possible to restore your vehicle's nitrogen oxide
emissions to legal levels.
9
When filling the fuel tank, do not continue after
the third cut-out of the nozzle, to avoid overflow.
You will only see the fuel consumption of your
new vehicle settle down to a consistent average
after the first 1,900 miles (3,000 kilometres).
Optimising the driving range (Electric)
The vehicle’s electrical consumption depends
heavily on the route, the vehicle speed and your
driving style.
Try to remain in the "ECO" zone on the power
indicator, by driving smoothly and maintaining a
steady speed.
Anticipate the need to slow down, and brake
smoothly, whenever possible using engine
braking with the regenerative braking function,
which will move the power indicator into the
"CHARGE" zone.
Use the air conditioning rather than the heating
to demist the passenger compartment.
10
Instrument panel
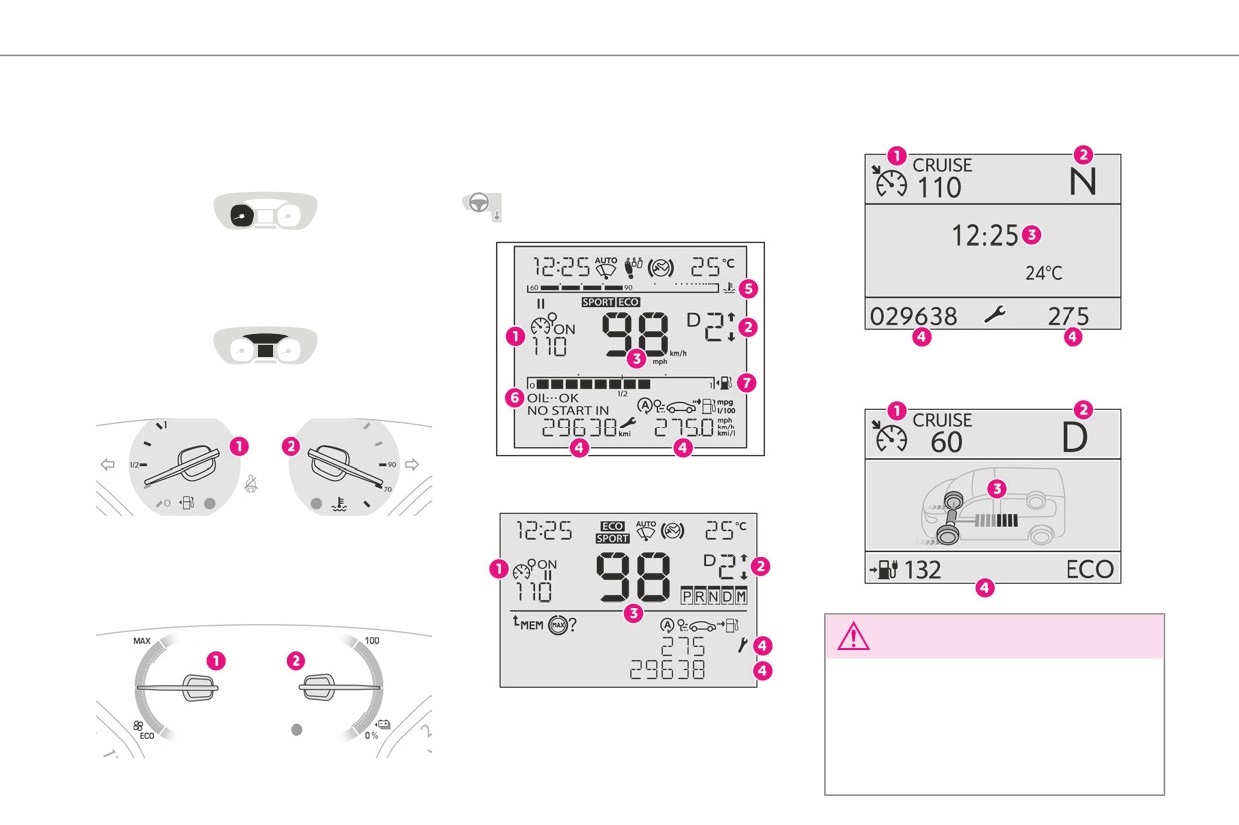
1. Thermal comfort consumption indicator
With matrix display
2. Charge level indicator
Speedometer
With LCD display
Analogue speedometer (km/h or mph).
Indicators and displays
With matrix display (Electric)
With LCD text or matrix display
With LCD text display
1. Fuel gauge
2. Engine coolant temperature gauge.
With matrix display (Electric)
NOTICE
When travelling abroad, you may need to
change the distance unit: the speed must be
displayed in the country’s official unit (mph or
km/h). The unit is changed via the screen's
configuration menu, with the vehicle
stationary.
11
1.
Cruise control or speed limiter settings
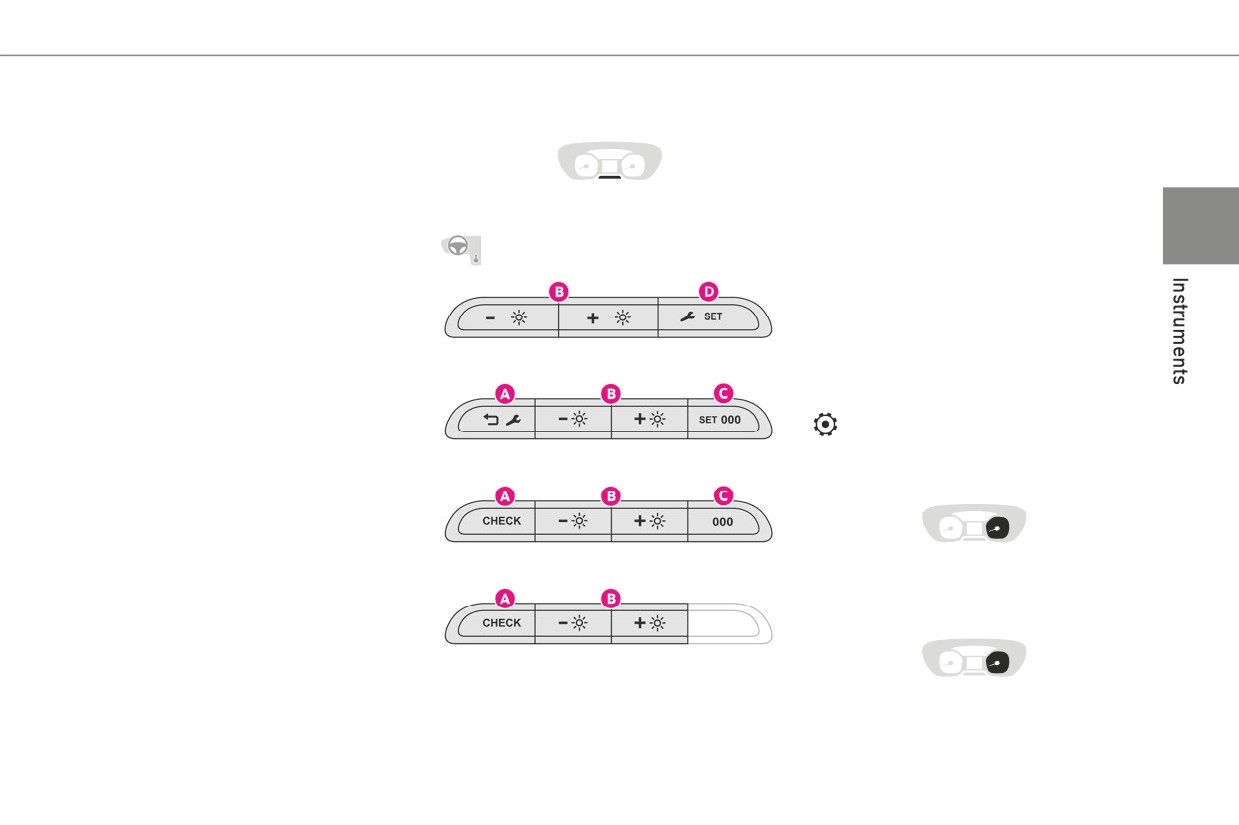
Control buttons
B. General lighting dimmer.
Display of speed limit signs
Depending on version: browse a menu or list,
2.
Gear shift indicator (Diesel)
or change a value.
Gear with an automatic gearbox (Diesel) or
C. Resetting the trip distance recorder.
Drive selector position (Electric)
Depending on version: enter the configuration
3.
Digital speedometer (mph or km/h) with LCD
With LCD display
menu (long press), confirm a choice (short
1
and LCD text instrument panel (Diesel)
press).
Display area with matrix instrument panel:
D. Reminder of servicing information or driving
alert or function status message, trip
range with the SCR system and the AdBlue®.
computer, digital speedometer (mph or km/h),
Resetting the selected function (service
power flow/vehicle charge state (Electric),
indicator or trip distance recorder).
etc.
Depending on version: enter the configuration
4.
Service indicator, then total distance recorder
With LCD text display
menu (long press), confirm a choice (short
(miles or km)
press).
Trip distance recorder (miles or km) (Diesel)
With the touch screen, it is also possible
Remaining range/Driving mode selected
to adjust the lighting dimmer.
(Electric)
Display area with LCD text instrument
With matrix display
Rev counter
panel: alert or function status message, trip
computer, etc.
5.
Engine coolant temperature indicator
6.
Engine oil level indicator
7.
Fuel gauge
With matrix display (Electric)
Rev counter (x 1000 rpm).
Power indicator (Electric)
A. Resetting the service indicator.
Temporary reminder of servicing information.
Reminder of driving range with the AdBlue®
Power indicator CHARGE, ECO, POWER or
system.
NEUTRAL.
Depending on version: go back up a level or
cancel the current operation.
12
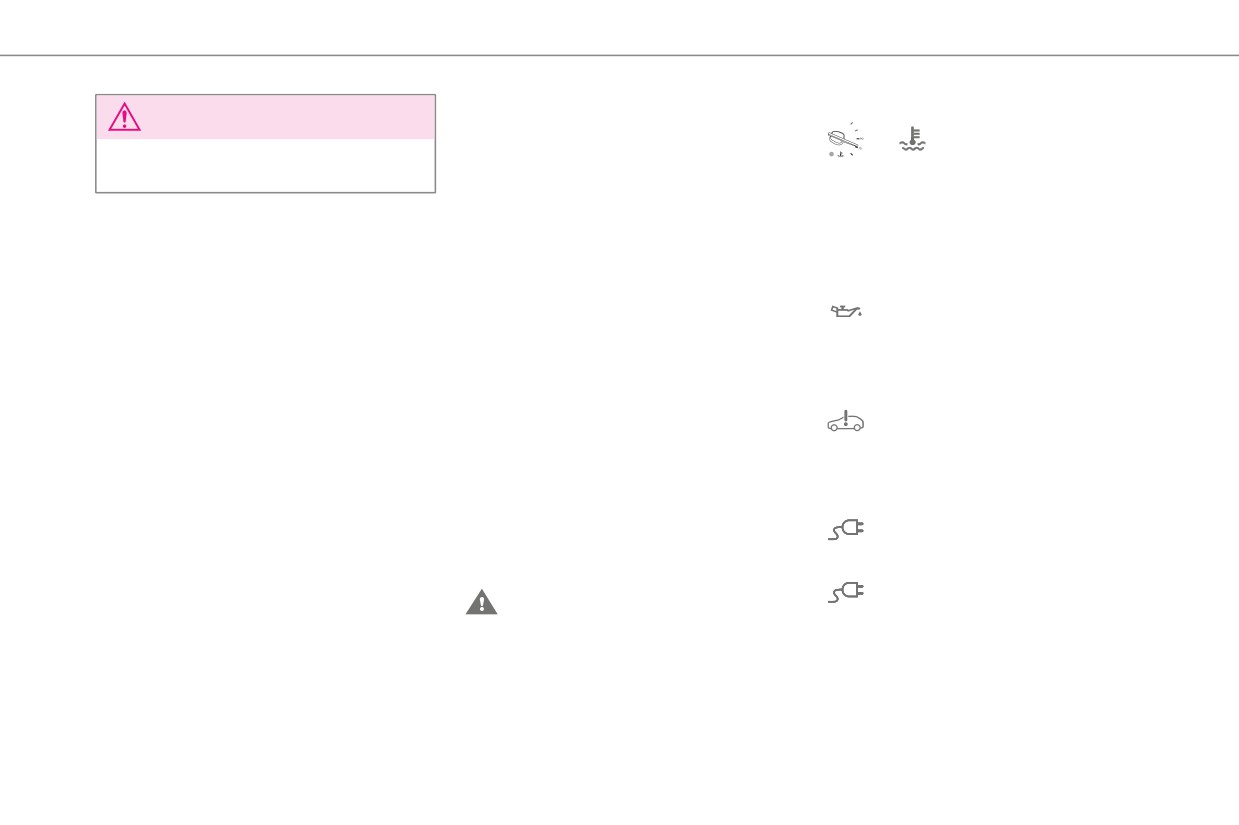
Persistent warning lamp
Maximum engine coolant temperature
NOTICE
or
Fixed (warning lamp or LED),
If a red or orange warning lamp comes on, there
with the needle in the red zone
For more information on the Indicators,
may be fault which needs further investigation.
(depending on version).
please refer to the corresponding section.
If a lamp remains lit
The cooling system temperature is too high.
The references (1), (2) and (3) in the warning
Carry out (1), then allow the engine to cool
and indicator lamp description indicate whether
before topping up the level, if necessary. If the
Warning and indicator
you should contact a qualified professional in
problem persists, carry out (2).
lamps
addition to the immediate recommended actions.
Engine oil pressure
(1):You must stop the vehicle.
Displayed as symbols, the warning and indicator
Fixed.
Stop as soon as it is safe to do so and switch off
lamps inform the driver of the occurrence of a
There is a fault with the engine lubrication
the ignition.
malfunction (warning lamps) or of the operating
system.
(2):Contact any authorized Toyota retailer or
status of a system (operation or deactivation
Carry out (1) and then (2).
Toyota authorized repairer, or any reliable
indicator lamps). Certain lamps light up in two
System malfunction (Electric)
repairer.
ways (fixed or flashing) and/or in several colours.
Fixed.
(3):Go to any authorized Toyota retailer or Toyota
Associated warnings
A fault involving the electric motor or
authorized repairer, or any reliable repairer.
traction battery has been detected.
The illumination of a lamp may be accompanied
Carry out (1) and then (2).
by an audible signal and/or a message displayed
List of warning and
in a screen.
Cable connected (Electric)
indicator lamps
Relating the type of alert to the operating status
Fixed when the ignition is switched on.
of the vehicle allows you to determine whether
Red warning/indicator lamps
The charging cable is connected to the
the situation is normal or whether a fault has
vehicle's connector.
STOP
occurred: refer to the description of each lamp
Fixed when the ignition is switched on,
Fixed, associated with another warning
for further information.
accompanied by a message.
lamp, accompanied by the display of a
It is not possible to start the vehicle while the
When the ignition is switched on
message and an audible signal.
charging cable is connected to the vehicle’s
A serious fault with the engine, braking system,
Certain red or orange warning lamps come on
connector.
power steering, automatic gearbox or a major
for a few seconds when the ignition is switched
Disconnect the charging cable and close the
electrical fault has been detected.
on. These warning lamps should go off as soon
flap.
Carry out (1) and then (2).
as the engine is started.
For more information on a system or a function,
refer to the corresponding section.
13
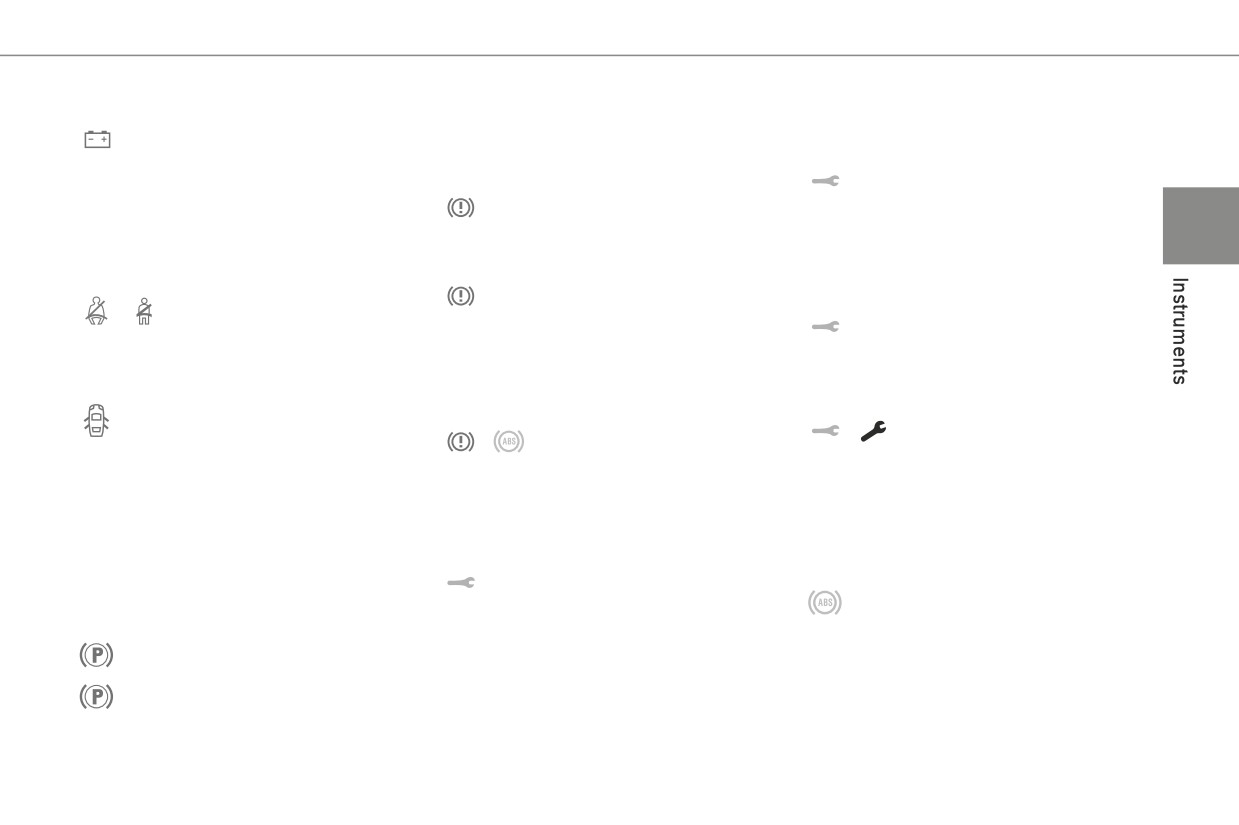
Battery charge
With an automatic gearbox or drive selector,
For any other problems, such as a fault with the
Fixed.
select mode P.
tyre under-inflation detection system, carry out
The battery charging circuit has a fault
Switch off the ignition and carry out (2).
(3).
(dirty or loose terminals, slack or cut alternator
Manual parking brake
Fixed, accompanied by the display of a
belt, etc.).
Fixed.
message.
Clean and retighten the terminals. If the warning
The parking brake is applied or not
One or more major faults for which there is no
1
lamp does not go off when the engine is started,
properly released.
specific warning lamp have been detected.
carry out (2).
Identify the cause of the anomaly using the
Braking
Seat belts not fastened / unfastened
message displayed in the instrument panel, then
Fixed.
Fixed or flashing, accompanied by
carry out (3).
The brake fluid level has dropped
an increasing audible signal.
Fixed, accompanied by the message
significantly.
A seat belt has not been fastened or has been
‘Parking brake fault’.
Carry out (1), then top up with brake fluid
unfastened (depending on version).
Automatic release of the electric parking brake is
that complies with the manufacturer's
unavailable.
Door open
recommendations. If the problem persists, carry
Carry out (2).
Fixed, associated with a message
out (2).
Service warning lamp fixed and
identifying the access.
Fixed.
service spanner flashing then
An audible signal supplements the alert if the
The electronic brake force
fixed.
speed is higher than 10 km/h (6 mph).
distribution (EBFD) system is faulty.
The servicing interval has been exceeded.
A door, the boot, the tailgate or the tailgate
Carry out (1) and then (2).
The vehicle must be serviced as soon as
screen is still open (depending on version).
Orange warning/indicator lamps
possible.
Close the access.
Only with Diesel engines.
If your vehicle is equipped with a right-hand
Service
Temporarily on, accompanied by the
Anti-lock braking system (ABS)
hinged door, its opening will not be indicated by
display of a message.
Fixed.
this warning lamp.
One or more minor faults have been detected for
The anti-lock braking system has a fault.
Electric parking brake
which there is no specific warning lamp.
The vehicle retains conventional braking.
Fixed.
Identify the cause of the fault using the message
Drive carefully at moderate speed, then carry
The electric parking brake is applied.
displayed in the instrument panel.
out (3).
Flashing.
You may be able to deal with some faults
Application/release is faulty.
yourself, such as changing the battery in the
Carry out (1): park on flat ground (on a level
remote control.
surface).
With a manual gearbox, engage a gear.
14
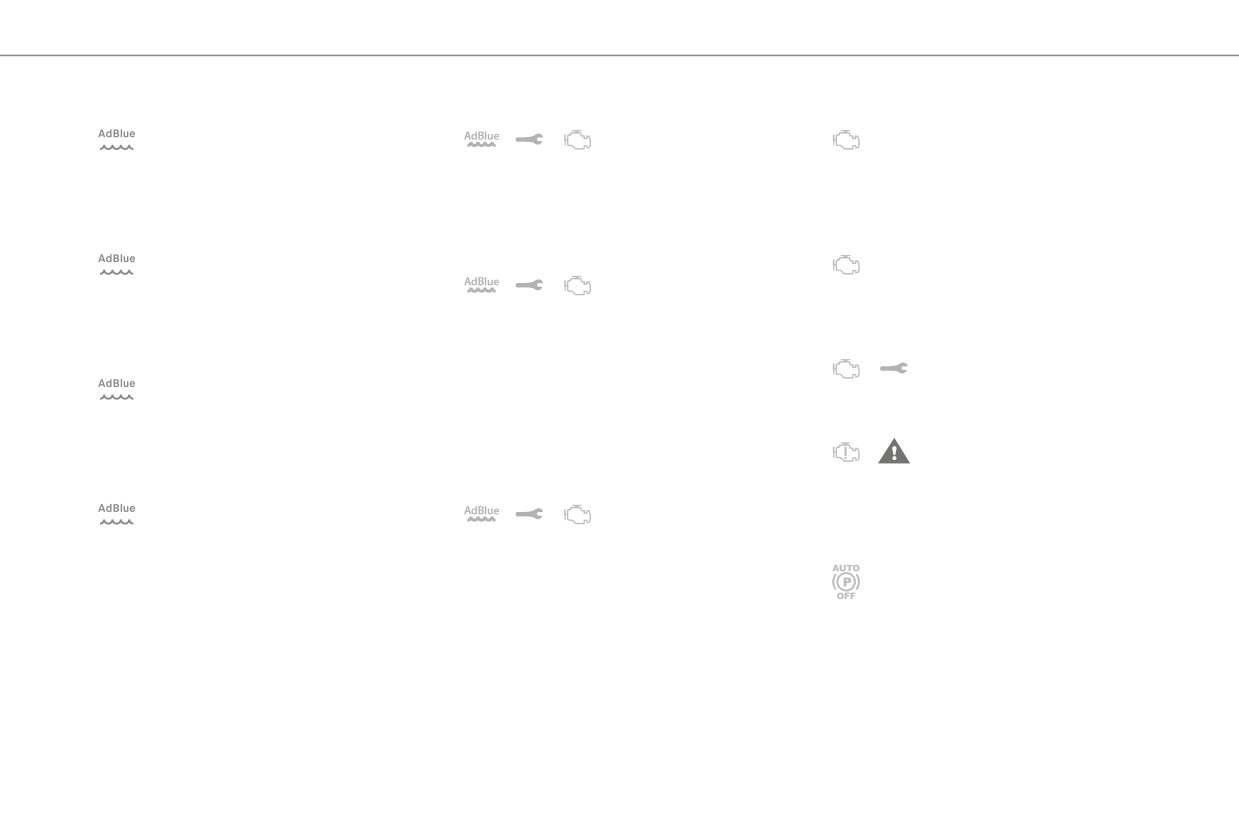
AdBlue® (with Euro 6.3)
SCR emissions control system (Diesel)
Engine self-diagnosis system
On for around 30 seconds when starting
Fixed when the ignition is
Flashing.
the vehicle, accompanied by a message
switched on, accompanied
The engine management system has a
indicating the driving range.
by an audible signal and a message.
fault.
The driving range is between 2,400 and 800 km
A malfunction involving the SCR emissions
There is a risk that the catalytic converter will be
(1,500 and 500 miles).
control system has been detected.
destroyed.
Top up the AdBlue®.
This alert disappears once the exhaust
Carry out (2) without fail.
Fixed, on switching on the ignition,
emissions return to normal levels.
Fixed.
accompanied by an audible signal and a
Flashing AdBlue® warning
The emission control system has a fault.
message indicating the driving range.
lamp on switching on the
The warning lamp should go off when the engine
The driving range is between 800 and 100 km
ignition, with the Service and Engine self-
is started.
(500 and 62 miles).
diagnostics warning lamps on fixed,
Carry out (3) quickly.
Promptly top up the AdBlue®, or carry out (3).
accompanied by an audible signal and a
Fixed.
Flashing, accompanied by an audible
message indicating the driving range.
A minor engine fault has been
signal and a message indicating the
Depending on the message displayed, it may be
detected.
driving range.
possible to drive for up to 1,100 km (685 miles)
Carry out (3).
The driving range is less than 100 km (62 miles).
before the engine immobiliser is triggered.
Fixed.
You must top up the AdBlue® to avoid engine
Carry out (3) without delay, to avoid starting
A major engine fault has been
starting being prevented, or carry out (3).
being prevented.
detected.
Flashing, accompanied by an audible
Flashing AdBlue® warning
Carry out (1) and then (2).
signal and a message indicating that
lamp on switching on the
Deactivation of the automatic functions
starting is prevented.
ignition, with the Service and Engine self-
(with electric parking brake)
The AdBlue® tank is empty: the legally required
diagnostics warning lamps on fixed,
Fixed.
engine immobiliser system prevents the engine
accompanied by an audible signal and a
The "automatic application" (on switching
from starting.
message indicating that starting is prevented.
off the engine) and "automatic release" (on
To restart the engine, top up the AdBlue® or carry
The engine immobiliser prevents the engine
acceleration) functions are deactivated.
out (2).
from restarting (over the authorised driving limit
If automatic application/release is no longer
It is essential to add at least 5 litres of AdBlue®
after confirmation of an emissions control system
possible:
to the tank.
malfunction).
► Start the engine.
To start the engine, carry out (2).
► Use the control lever to apply the parking
brake.
► Take your foot fully off the brake pedal.
15
► Hold the control lever pressed in the release
► With an automatic gearbox or drive selector,
Carry out (3).
direction for between 10 and 15 seconds.
select P, then place the supplied chock against
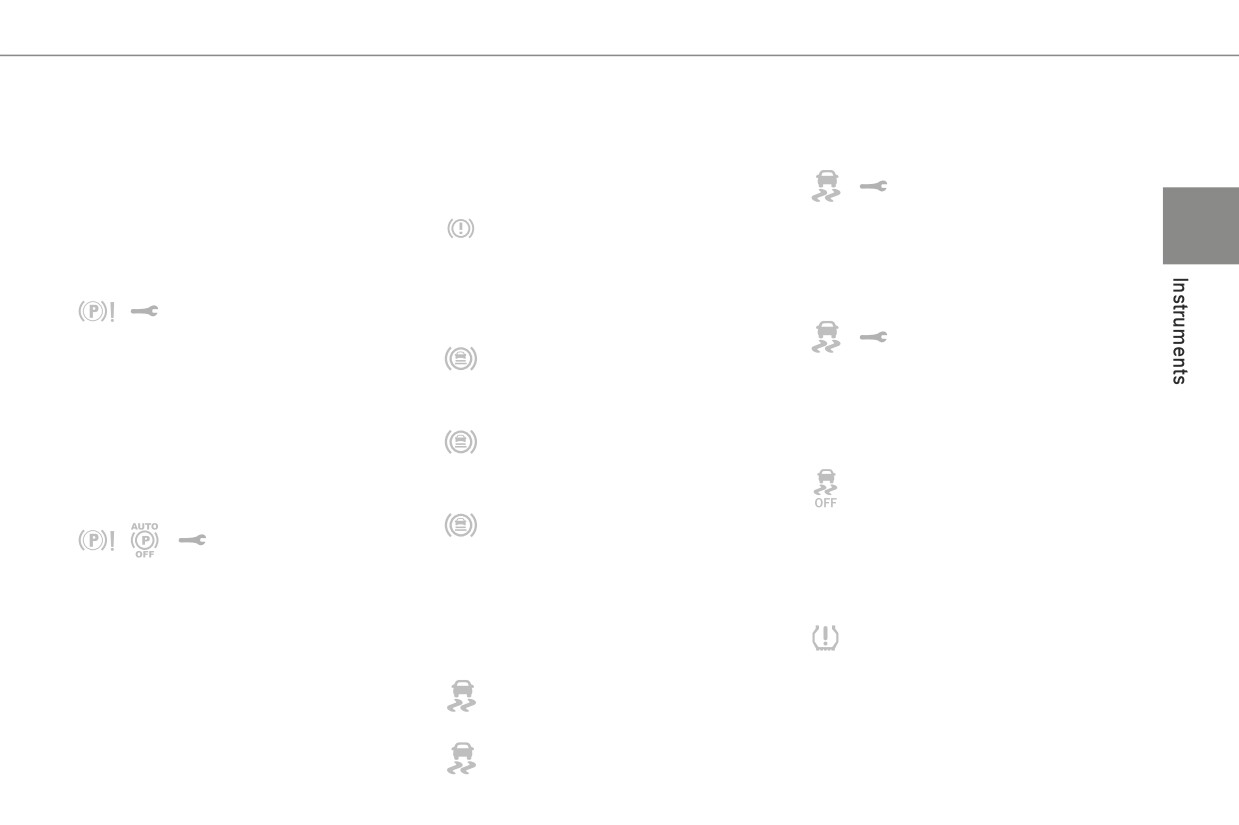
Emergency brake malfunction (with
► Release the control lever.
one of the wheels.
electric parking brake)
► Depress and hold the brake pedal.
Then carry out (2).
Fixed, accompanied by the
► Hold the control lever in the “Application”
Braking
message "Parking brake fault".
direction for 2 seconds.
Fixed.
Emergency braking does not deliver optimal
1
► Release the control lever and the brake
A minor fault with the braking system has
performance.
pedal.
been detected.
If automatic release is not available, use manual
Malfunction (with electric parking brake)
Drive carefully.
release or carry out (3).
Fixed, accompanied by the
Carry out (3).
Hill start assist
message "Parking brake fault".
Collision Risk Alert/Active Safety Brake
Fixed, accompanied by the
The vehicle cannot be immobilised with the
Flashing.
message "Anti roll-back system
engine running.
The system activates and brakes the
fault".
If manual application and release commands are
vehicle momentarily to reduce the speed of
The system has a fault.
not working, the electric parking brake control
collision with the vehicle in front.
Carry out (3).
lever is faulty.
Fixed, accompanied by a message and
Dynamic stability control (DSC) and anti-
The automatic functions must be used at all
an audible signal.
slip regulation (ASR)
times and are automatically re-enabled in the
The system has a fault.
Fixed.
event of a control lever fault.
Carry out (3).
The system is deactivated.
Carry out (2).
Fixed, accompanied by the display of a
Press the button to reactivate it.
Fixed, accompanied by the
message.
The DSC/ASR system is activated automatically
message "Parking brake
The system has been deactivated via the vehicle
when the vehicle is started, and from around
fault".
configuration menu.
50 km/h (30 mph).
The parking brake is faulty: manual and
For more information, refer to the Driving
automatic functions may not be working.
Under-inflation
section.
When stationary, to immobilise the vehicle:
Fixed, accompanied by an audible signal
Dynamic stability control (DSC) and anti-
► Pull and hold the control lever for
and a message.
slip regulation (ASR)
approximately 7 to 15 seconds, until the indicator
The pressure in one or more wheels is too low.
Flashing.
lamp comes on on the instrument panel.
Check the pressure of the tyres as soon as
DSC/ASR regulation is activated in the
If this procedure does not work, secure the
possible.
event of a loss of grip or trajectory.
vehicle:
Reinitialise the detection system after adjusting
Fixed.
► Park on a level surface.
the pressure.
The DSC/ASR system has a fault.
► With a manual gearbox, engage a gear.

16
Under-inflation warning lamp
Front passenger airbag (OFF)
Put the vehicle on charge as soon as possible.
flashing then fixed and Service
Fixed.
Tortoise mode with limited driving range
warning lamp fixed.
The front passenger airbag is deactivated.
(Electric)
The tyre pressure monitoring system is faulty.
The control is in the "OFF" position.
Fixed.
Under-inflation detection is no longer monitored.
You can install a "rearward facing" child seat,
The state of charge of the traction battery
Check the tyre pressures as soon as possible
unless there is a fault with the airbags (airbag
is critical.
and carry out (3).
warning lamp on).
The engine power gradually decreases.
Engine pre-heating (Diesel)
Airbags
You must put the vehicle on charge.
Temporarily on
Fixed.
If the warning lamp remains lit, carry out (2).
(up to approximately 30 seconds in
One of the airbags or seat belt
Pedestrian horn (Electric)
severe weather conditions).
pyrotechnic pretensioners is faulty.
Fixed.
When switching on the ignition, if the weather
Carry out (3).
Horn fault detected.
conditions and the engine temperature make it
Low fuel level
Carry out (3).
necessary.
or
Fixed (warning lamp or LED)
Presence of water in diesel filter
Wait until the warning lamp goes off before
and needle in the red zone
Fixed (with LCD instrument panel).
starting.
(depending on version), accompanied by an
The diesel filter contains water.
When the warning lamp goes off, starting will
audible signal and a message.
Risk of damage to the injection system : carry
occur immediately if you press and hold:
The audible signal and the message are
out (2) without delay.
- the clutch pedal with a manual gearbox.
repeated with increasing frequency as the fuel
- the brake pedal with an automatic gearbox.
Particle filter (Diesel)
level drops towards zero.
If the engine does not start, make the engine
Fixed, accompanied by an audible signal
When it first comes on, there remains less than
starting request again, while keeping your foot
and a message about the risk of particle
8 litres of fuel in the tank.
on the pedal.
filter blockage.
Refuel without delay to avoid running out of fuel.
The particle filter is beginning to saturate.
Front passenger airbag (ON)
Never drive until completely empty, this could
As soon as traffic conditions allow, regenerate
Fixed.
damage the emission control and injection
the filter by driving at a speed of at least 60 km/h
The front passenger airbag is activated.
systems.
(40 mph) until the warning lamp goes off.
The control is in the "ON" position.
Low traction battery level (Electric)
Fixed, accompanied by an audible signal
In this case, do NOT install a "rearward
100
Fixed LED and needle in the red zone,
and a message signalling that the additive
facing" child seat on the front passenger seat
0 %
accompanied by an audible signal and a
level in the particle filter is too low.
- Risk of serious injury!
message.
The minimum level of the additive reservoir has
The state of charge of the traction battery is low.
been reached.
View the remaining range.
Top up as soon as possible: carry out (3).
17
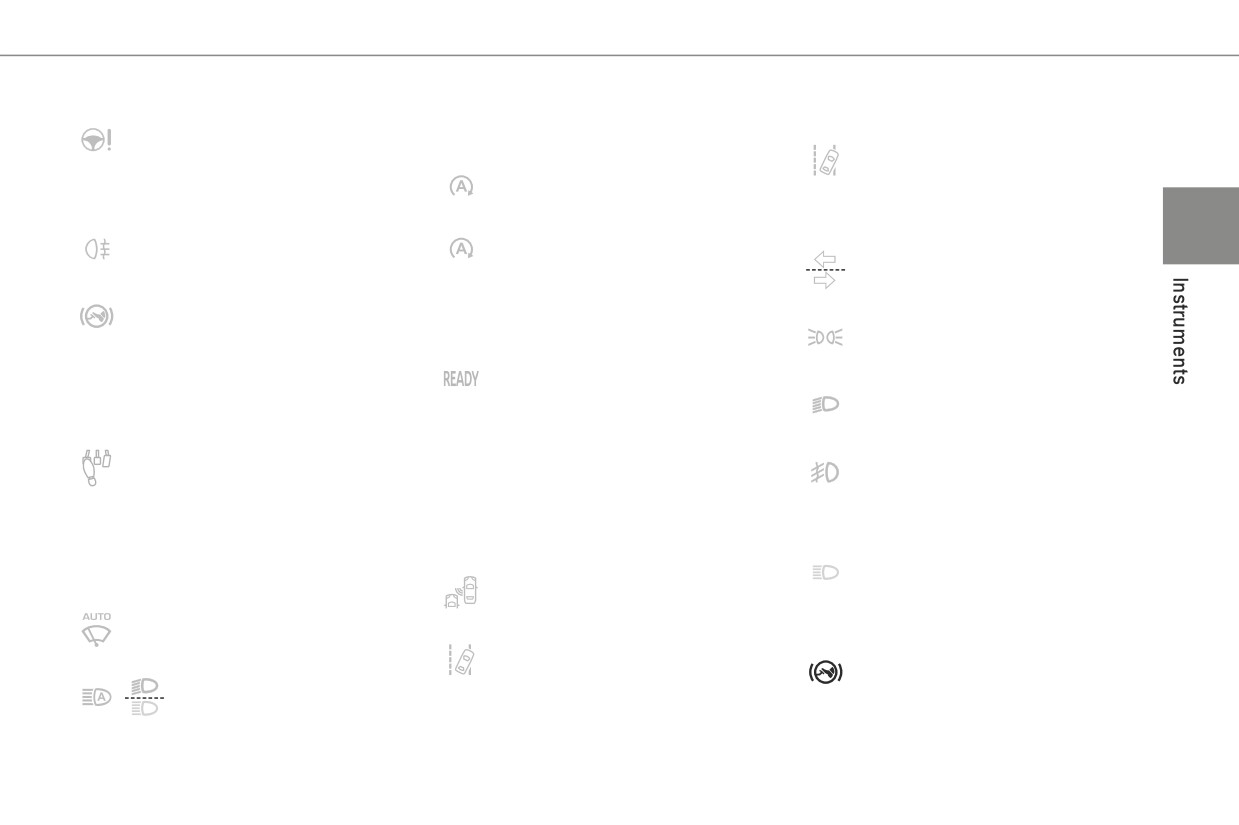
Power steering
For more information, refer to the Lighting and
For more information, refer to the Driving
Fixed.
visibility section.
section.
The power steering has a fault.
Stop & Start
Fixed, accompanied by an onscreen
Drive carefully at moderate speed, then carry
Fixed.
message.
out (3).
When the vehicle stops the Stop & Start
The system has a fault.
Rear foglamp
puts the engine into STOP mode.
Stay alert and drive carefully, then carry out (3).
1
Fixed.
Flashing temporarily.
Direction indicators
The lamp is on.
STOP mode is momentarily unavailable
Direction indicators with audible signal.
or START mode is automatically triggered.
The direction indicators are on.
Foot on the brake
For more information, refer to the Driving
Fixed.
Sidelamps
section.
Insufficient or no pressure on the brake
Fixed.
pedal.
Vehicle ready to drive (Electric)
The lamps are on.
With the automatic gearbox or the drive selector,
Fixed, accompanied by an audible signal
Dipped beam headlamps
it may be necessary to depress the brake pedal
when it comes on.
Fixed.
to unlock the gearbox from mode N.
The vehicle is ready to drive and the thermal
The lamps are on.
Foot on the clutch
comfort systems are available.
Front foglamps
Fixed.
The indicator lamp goes out upon reaching a
Fixed.
Stop & Start: the change to START mode
speed of approximately 3 mph (5 km/h) and
The front foglamps are lit.
is rejected because the clutch pedal is not fully
lights up again when the vehicle stops moving.
Blue warning/indicator lamps
depressed.
The lamp will go out when you turn off the
Fully depress the clutch pedal.
engine and exit the vehicle.
Main beam headlamps
Blind spot monitoring
Fixed.
Green warning/indicator lamps
Fixed.
The lamps are on.
Automatic wiping
The function has been activated.
Black/white warning lamps
Fixed.
Lane departure warning system
Automatic windscreen wiping is activated.
Foot on brake
Flashing, accompanied by an audible
Automatic headlamp dipping
Fixed.
signal.
Fixed.
Omission or insufficient pressure on the
A line is being crossed, right-hand side (or left-
The function has been activated
brake pedal.
hand side).
via the vehicle’s configuration menu.
With an automatic gearbox, with the engine
Turn the steering wheel in the opposite direction
The lighting control lever is in the "AUTO"
running, before releasing the parking brake, to
to return to the correct trajectory.
position.
move out of position P.
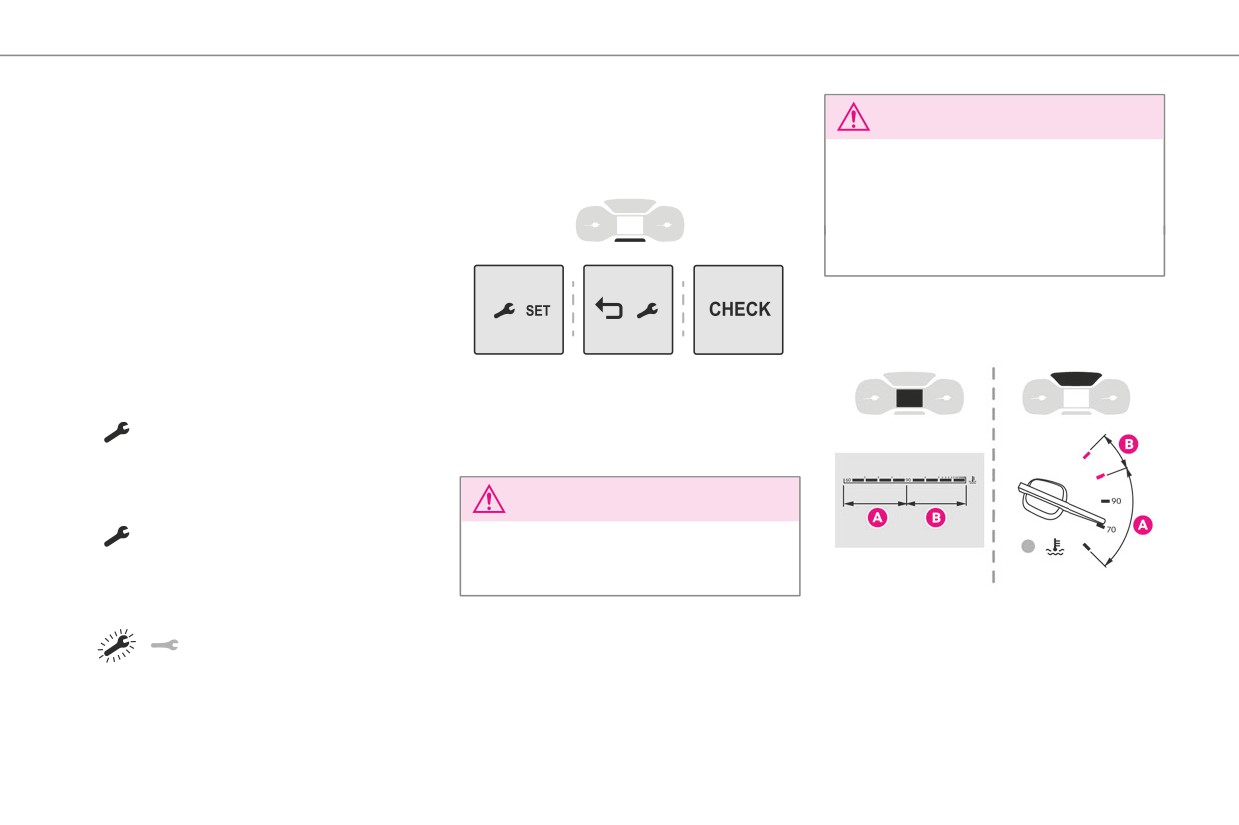
18
Resetting the service indicator
Indicators
NOTICE
The service indicator must be reset after each
service.
The distance indicated (in miles or kilometres)
Service indicator
► Switch off the ignition.
is calculated according to the distance
The service indicator is displayed on the
covered and the time elapsed since the last
instrument panel. Depending on the vehicle
service.
version:
The alert may be triggered close to a due
- the distance recorder display line indicates
date.
the distance remaining before the next service
is due, or the distance travelled since it was due
preceded by the sign “-”.
Coolant temperature
- an alert message indicates the distance
indicator (Diesel)
remaining, as well as the period before the next
service is due or how long it is overdue.
► Press and hold this button.
Service spanner
► Switch on the ignition; the distance recorder
Lights up temporarily when the ignition is
display begins a countdown.
switched on.
► Release the button when =0 is displayed; the
Between 3,000 km (1,800 miles) and 1,000 km
spanner disappears.
(600 miles) remain before the next service is
due.
NOTICE
Fixed, when the ignition is switched on.
If you have to disconnect the battery following
The service is due in less than 1,000 km
this operation, lock the vehicle and wait at
(600 miles).
least 5 minutes for the reset to be registered.
Have your vehicle serviced very soon.
With the engine running:
Service spanner flashing
Service reminder
- In zone A, the temperature is correct.
Flashing then fixed, when the
- In zone B, the temperature is too high.
ignition is switched on.
You can access service information at any time.
The associated warning lamp and the
(With Diesel engines, combined with the Service
► Press this button.
STOP warning lamp light up in red on the
warning lamp.)
The service information is displayed for a few
instrument panel, accompanied by the display of
The servicing interval has been exceeded.
seconds, then disappears.
a message and an audible signal.
Have your vehicle serviced as soon as possible.
You must stop the vehicle as soon as it is
safe to do so.
19
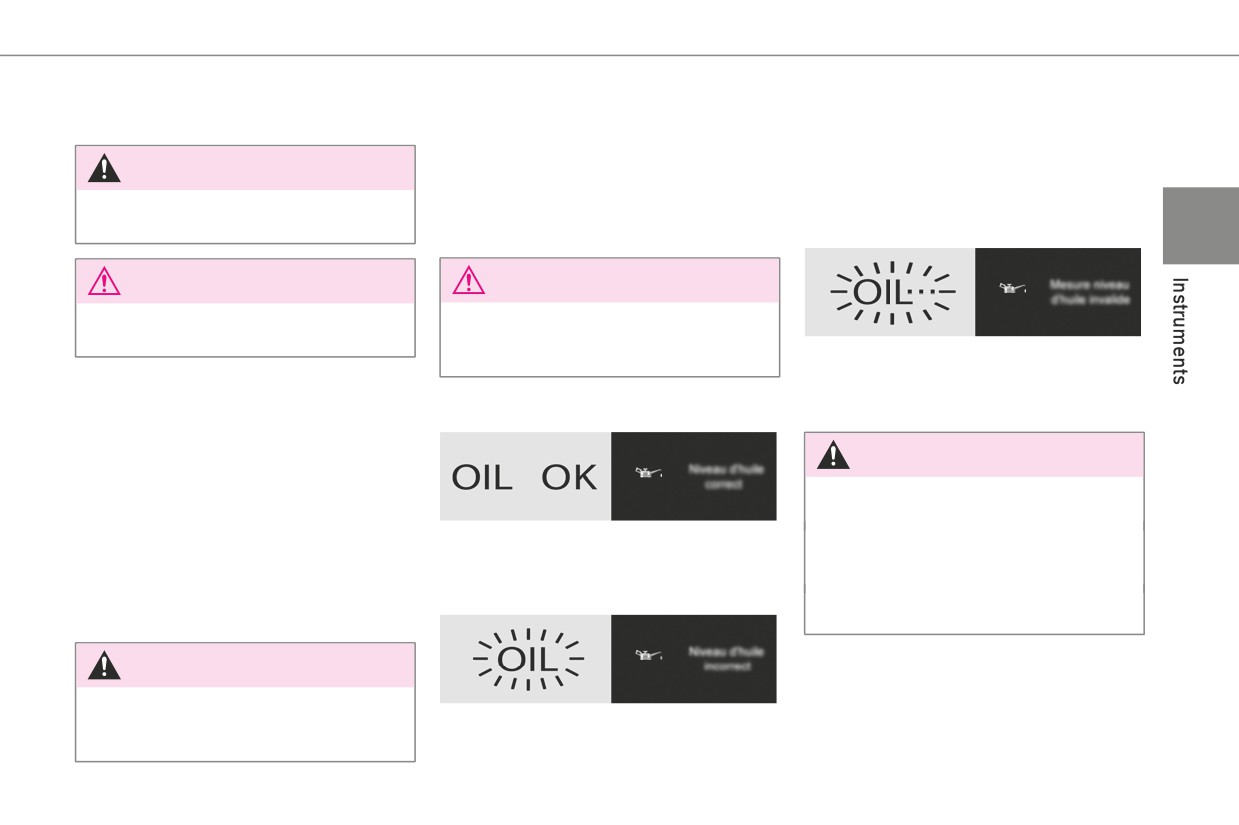
Wait a few minutes before switching off the
Engine oil level indicator
If the low oil level is confirmed by a check using
engine.
the dipstick, the level must be topped up to avoid
(Depending on version)
damaging the engine.
On versions fitted with an electric oil gauge, the
WARNING
For more information on Checking levels, refer
state of the engine oil level is displayed on the
to the corresponding section.
instrument panel for a few seconds when the
After switching off the ignition, carefully open
ignition is switched on, at the same time as the
the bonnet and check the coolant level.
Oil level gauge fault
1
servicing information.
NOTICE
NOTICE
For more information on Checking levels,
The level read will only be correct if the
refer to the corresponding section.
vehicle is on level ground and the engine has
This is indicated by a message on the instrument
been off for more than 30 minutes.
panel. Contact any authorized Toyota retailer
Checking
or Toyota authorized repairer, or any reliable
Oil level correct
repairer.
After driving for a few minutes, the temperature
and pressure in the cooling system increase.
To top up the level:
WARNING
► wait at least one hour for the engine to cool,
In the event of a malfunction of the electric
► unscrew the cap by two turns to allow the
gauge, the oil level is no longer monitored.
pressure to drop,
This is indicated by a message on the instrument
If the system is faulty, you must check the
► when the pressure has dropped, remove the
panel.
engine oil level using the manual dipstick
cap,
located in the engine compartment.
► top up the level to the "MAX" mark.
Low oil level
For more information on Checking levels,
For more information on Checking levels, refer
refer to the corresponding section.
to the corresponding section.
WARNING
Be aware of the risk of scalding when topping
up the coolant. Do not fill above the maximum
This is indicated by a message on the instrument
level (indicated on the reservoir).
panel.
20
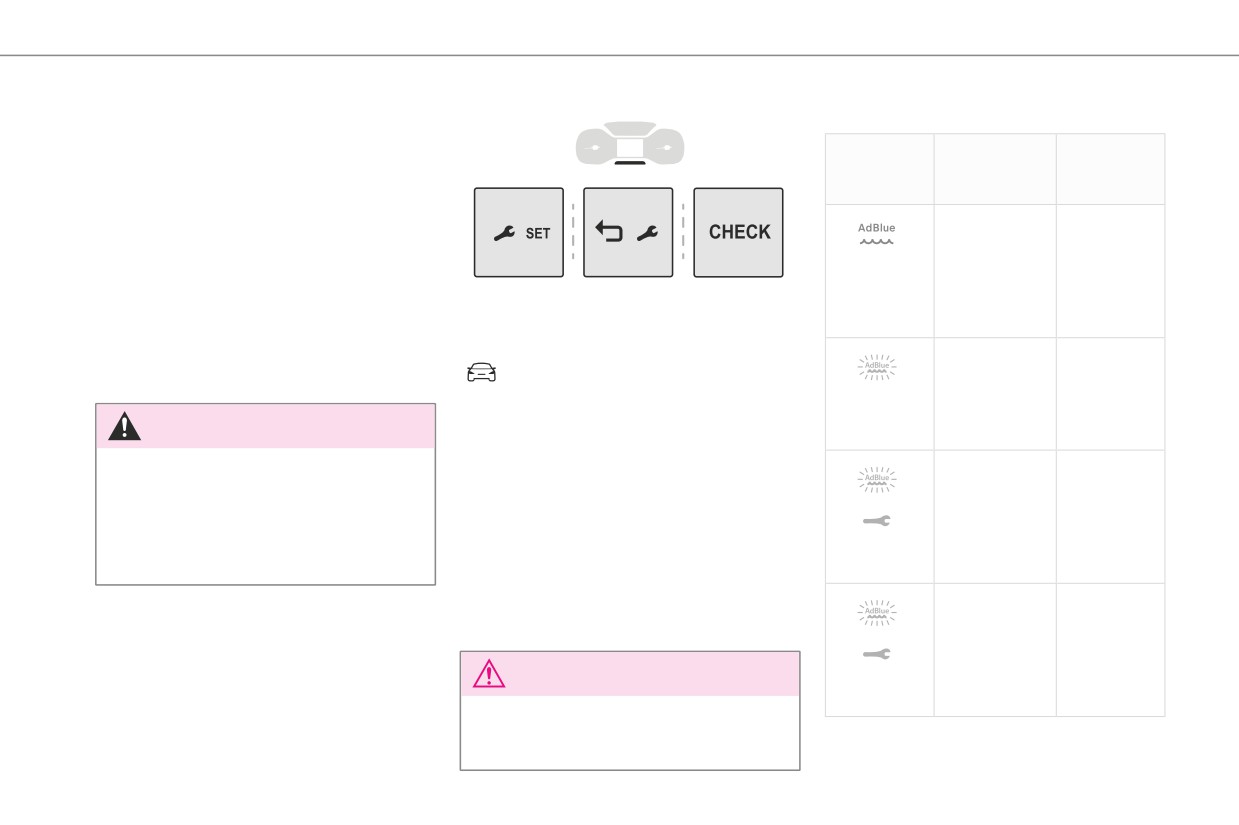
AdBlue® range indicators
With Euro 6.3 engines
The Diesel engines are equipped with a system
Warning/
Action
Remaining
that associates the SCR (Selective Catalytic
indicator
range
Reduction) emissions control system and the
lamps on
Diesel particle filter (DPF) for the treatment of
exhaust gases. They cannot function without
Top up.
Between
AdBlue®fluid.
2,400 km
When the level of AdBlue® falls below the
and 800 km
reserve level (between 2,400 and 0 km (1,500
(1,500 miles
miles and 0 miles)), a warning lamp lights up
► Press this button to temporarily display the
and 500
when the ignition is switched on and an estimate
driving range.
miles)
of the distance that can be travelled before
With touch screen
Top up as
Between
engine starting is prevented is displayed in the
You can view the range information in the
soon as
800 km and
instrument panel.
"Driving/Vehicle" menu.
possible.
100 km (500
miles and
Actions required related to a lack of
WARNING
62 miles)
AdBlue®
The engine starting prevention system
The following warning lamps light up when the
A top-up is
Between
required by regulations is activated
quantity of AdBlue® is lower than the reserve
essential, due
100 km and
automatically once the AdBlue® tank is empty.
level corresponding to a range of 2,400 km
to the risk that
0 km (62
It is then no longer possible to start the
(1,500 miles).
the engine will
miles and 0
engine until the minimum level of AdBlue® has
Together with the warning lamps, messages
be prevented
miles)
been topped up.
regularly remind you of the need to top up to
from starting.
avoid engine starting being prevented. Refer to
To be able
0 miles (km)
Manual display of the range
the Warning and indicator lamps section for
to restart the
details of the messages displayed.
engine, add at
While the driving range is greater than
least 5 litres of
1,500 miles (2,400 km), it is not displayed
NOTICE
AdBlue® to its
automatically.
tank.
For more information on AdBlue® (Diesel
engines), and in particular on topping up,
refer to the corresponding section.
///////////////////////////////////////