Toyota Prius (2022 year). Manual in english - page 17
 

  Index      Toyota     Toyota Prius (2022 year). Manual in english


Search            copyright infringement  


Content      ..     15      16      17      18     ..


Toyota Prius (2022 year). Manual in english - page 17


273

4-3. Operating the lights and wipers

4

Drivin

g

The windshield wipers and washer can be operated when

The power switch is in ON mode.

Dripping prevention wiper sweep (vehicles with rain-sensing windshield
wipers)

After  washing  and  wiping  operation  several  times,  the  wipers  operate  one
more time after a short delay to prevent dripping. However, this function will
not operate while driving.

Raindrop sensor (vehicles with rain-sensing windshield wipers)

If the wiper switch is turned to the 

 position while the power switch is in

ON  mode,  the  wipers  will  operate  once  to  show  that AUTO  mode  is  acti-
vated.

If the wiper sensitivity is adjusted to higher, the wiper may operate once to
indicate the change of sensitivity.

If the temperature of the raindrop sensor is 185

F (85

C) or higher, or 5°F

(-15°C) or lower, automatic operation may not occur. In this case, operate
the wipers in any mode other than AUTO mode.

If no windshield washer fluid sprays

Check that the washer nozzles are not blocked, if there is washer fluid in the
washer fluid tank.

Customization

Settings of AUTO mode operation can be changed. (Customizable features:

P. 686)

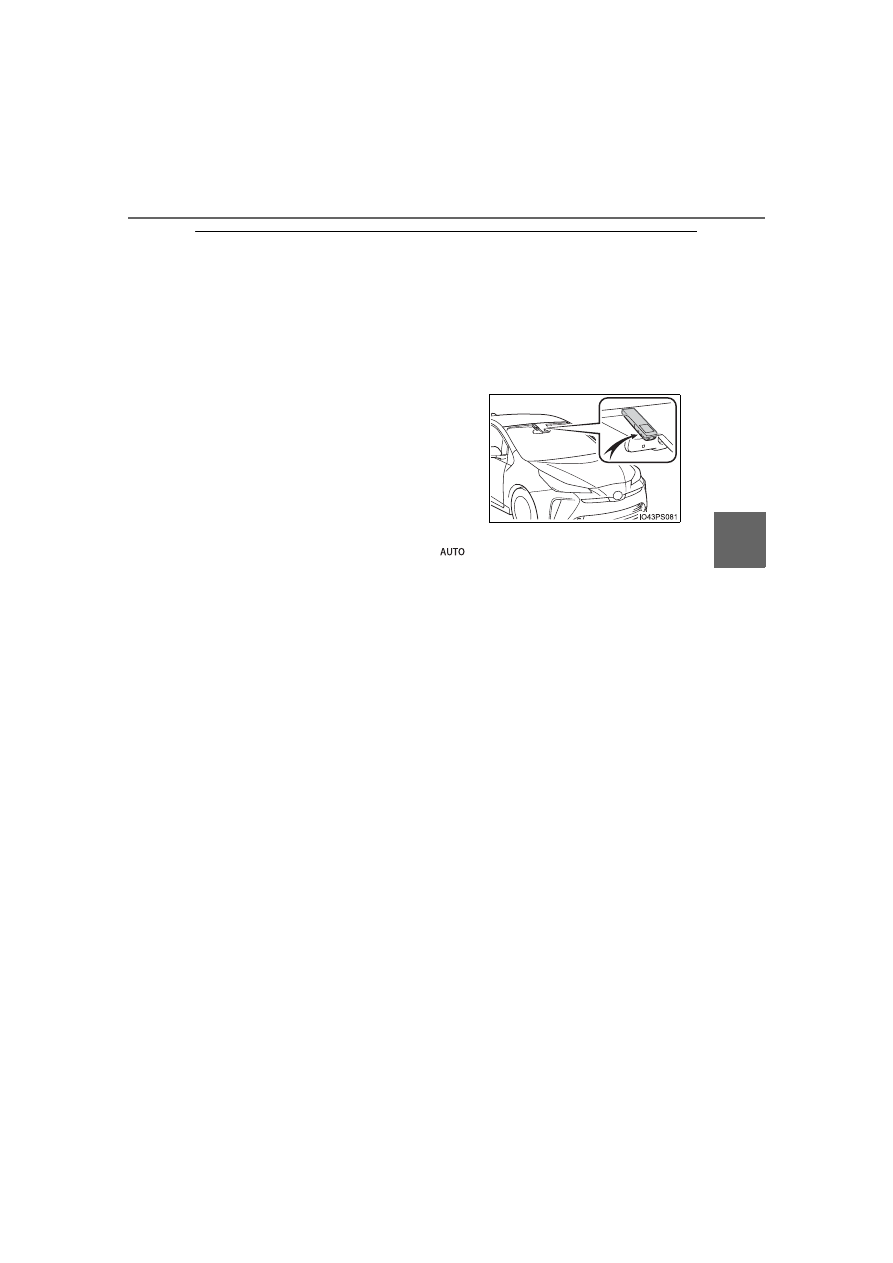
The raindrop sensor judges the amount
of raindrops. 
An optical sensor is adopted. It may not
operate properly when sunlight from the
rising or setting of the sun intermittently
strikes  the  windshield,  or  if  bugs,  etc.
are present on the windshield.

274

4-3. Operating the lights and wipers

WARNING

Caution regarding the use of windshield wipers in AUTO mode (vehi-
cles with rain-sensing windshield wipers)

The windshield wipers may operate unexpectedly if the sensor is touched or
the windshield is subject to vibration in AUTO mode. Take care that your fin-
gers, etc. do not become caught in the windshield wipers.

Caution regarding the use of washer fluid

When it is cold, do not use the washer fluid until the windshield becomes
warm. The fluid may freeze on the windshield and cause low visibility. This
may lead to an accident, resulting in death or serious injury.

NOTICE

When the windshield is dry

Do not use the wipers, as they may damage the windshield.

When the washer fluid tank is empty

Do not operate the switch continually as the washer fluid pump may over-
heat.

When a nozzle becomes blocked

In this case, contact your Toyota dealer.
Do not try to clear it with a pin or other object. The nozzle will be damaged.

To prevent 12-volt battery discharge

Do not leave the wipers on longer than necessary when the hybrid system
is off.

275

4-3. Operating the lights and wipers

4

Drivin

g

Rear window wiper and washer

Operating the 

 switch operates the rear wiper as follows:

Type A

Off

Intermittent operation

Normal operation

Type B

Off

Intermittent operation

Normal operation

Washer/wiper 

dual

operation

Pushing  the  lever  operates  the
wiper and washer.

The rear window wiper and washer can be operated when

The power switch is in ON mode.

If no washer fluid sprays

Check  that  the  washer  nozzle  is  not  blocked  if  there  is  washer  fluid  in  the
washer fluid tank.

: If equipped

Operating the wiper lever

1

2

3

1

2

3

4

276

4-3. Operating the lights and wipers

NOTICE

When the rear window is dry

Do not use the wiper, as it may damage the rear window.

When the washer fluid tank is empty

Do not operate the switch continually as the washer fluid pump may over-
heat.

When a nozzle becomes blocked

In this case, contact your Toyota dealer. 
Do not try to clear it with a pin or other object. The nozzle will be damaged.

To prevent 12-volt battery discharge

Do not leave the wiper on longer than necessary when the hybrid system is
off.

277

4-4. Refueling

4

Drivin

g

Opening the fuel tank cap

Turn  the  power  switch  off  and  ensure  that  all  the  doors  and  win-
dows are closed.

Confirm the type of fuel.

Fuel types

P. 671

Fuel tank opening for unleaded gasoline

To  help  prevent  incorrect  fueling,  your  vehicle  has  a  fuel  tank  opening  that
only accommodates the special nozzle on unleaded fuel pumps.

Gasoline price setting screen

After refueling more than approximately 1.3 gal. (5 L, 1.1 Imp.gal.) and turn-
ing the power switch to ON mode, the gasoline price setting screen will be
automatically displayed on the multi-information display. (

P. 101)

The  fuel  tank  of  your  vehicle  has  a  special  structure,  which
requires a reduction in fuel tank pressure before refueling. After
the opener switch has been pressed, it will take several seconds
until the vehicle is ready for refueling.

Before refueling the vehicle

278

4-4. Refueling

WARNING

When refueling the vehicle

Observe the following precautions while refueling the vehicle. Failure to do
so may result in death or serious injury.

After  exiting  the  vehicle  and  before  opening  the  fuel  door,  touch  an
unpainted metal surface to discharge any static electricity. It is important to
discharge static electricity before refueling because sparks resulting from
static electricity can cause fuel vapors to ignite while refueling.

Always hold the grips on the fuel tank cap and turn it slowly to remove it. 
A  whooshing  sound  may  be  heard  when  the  fuel  tank  cap  is  loosened.
Wait until the sound cannot be heard before fully removing the cap. In hot
weather, pressurized fuel may spray out of the filler neck and cause injury.

Do  not  allow  anyone  that  has  not  discharged  static  electricity  from  their
body to come close to an open fuel tank.

Do not inhale vaporized fuel.
Fuel contains substances that are harmful if inhaled.

Do not smoke while refueling the vehicle.
Doing so may cause the fuel to ignite and cause a fire.

Do not return to the vehicle or touch any person or object that is statically
charged.
This may cause static electricity to build up, resulting in a possible ignition
hazard.

When refueling

Observe the following precautions to prevent fuel overflowing from the fuel
tank:

Securely insert the fuel nozzle into the fuel filler neck.

Stop filling the tank after the fuel nozzle automatically clicks off.

Do not top off the fuel tank.

279

4-4. Refueling

4

D

riv

in

g

Press  the  opener  to  open  the
fuel filler door.

The fuel filler door will open within
about  10  seconds  of  the  switch
being  pressed.  Before  refueling  is
possible, a message will be shown
on  the  multi-information  display  in
the  instrument  cluster  to  indicate
the  progress  of  the  fuel  filler  door
opener.

Turn the fuel tank cap slowly to
open and hang it on the back of
the fuel filler door.

NOTICE

Refueling

Finish  refueling  within  30  minutes.  If  more  than  30  minutes  passes,  the
internal valve closes. In this condition, fuel may overflow during the refuel-
ing process. 
Press the fuel filler door opener switch again.

Do not spill fuel during refueling. 
Doing so may damage the vehicle, such as causing the emission control
system to operate abnormally or damaging fuel system components or the
vehicle’s painted surface.

Opening the fuel tank cap

1

2

280

4-4. Refueling

When the fuel filler door cannot be opened by pressing the inside switch

Using  the  lever  to  open  the  fuel  filler  door  may  not  allow  for  an  adequate
reduction in fuel tank pressure before refueling. To prevent fuel from spilling
out, turn the cap slowly when removing it. 
During refueling, fuel may spill out from the filler opening due to air being dis-
charged  from  inside  the  fuel  tank. Therefore,  fill  the  fuel  tank  carefully  and
slowly.

Open  the  back  door  and  remove  the
cover underneath the luggage compart-
ment light.

Pull the lever backward and check that
the fuel lid opens.

NOTICE

When refueling

1

2

When  refueling  your  vehicle,  make  sure
that the fuel filler door lock is not pushed
by the fuel nozzle boot, etc., as this may
cause a valve to close, possibly resulting
in a fuel spill.
If  the  fuel  filler  door  lock  has  been
pushed,  operate  the  fuel  filler  door
opener switch in the vehicle before con-
tinuing to refuel.

281

4-4. Refueling

4

D

riv

in

g

After  refueling,  turn  the  fuel  tank
cap  until  you  hear  a  click.  Once
the  cap  is  released,  it  will  turn
slightly in the opposite direction.

Closing the fuel tank cap

WARNING

When replacing the fuel tank cap

Do not use anything but a genuine Toyota fuel tank cap designed for your
vehicle.  Doing  so  may  cause  a  fire  or  other  incident  which  may  result  in
death or serious injury.

282

4-5. Using the driving support systems

Toyota Safety Sense 2.0

PCS (Pre-Collision System)

P. 291

LTA (Lane Tracing Assist)

P. 302

AHB (Automatic High Beam)

P. 262

RSA (Road Sign Assist)

P. 317

Dynamic radar cruise control with full-speed range

P. 321

: If equipped

The  Toyota  Safety  Sense  2.0  consists  of  the  following  drive
assist systems and contributes to a safe and comfortable driv-
ing experience:

Driving assist system

WARNING

Toyota Safety Sense 2.0

The Toyota Safety Sense 2.0 is designed to operate under the assumption
that the driver will drive safely, and is designed to help reduce the impact to
the occupants and the vehicle in the case of a collision or assist the driver in
normal driving conditions. 
As there is a limit to the degree of recognition accuracy and control perfor-
mance that this system can provide, do not overly rely on this system. The
driver is always responsible for paying attention to the vehicle’s surround-
ings and driving safely.

283

4-5. Using the driving support systems

4

Drivin

g

Two types of sensors, located behind the front grille and windshield,
detect information necessary to operate the drive assist systems.

Radar sensor
Front camera

Sensors

1

2

284

4-5. Using the driving support systems

WARNING

To avoid malfunction of the radar sensor

Observe the following precautions. 
Otherwise, the radar sensor may not operate properly, possibly leading to
an accident resulting in death or serious injury.

Keep the radar sensor and the radar sensor cover clean at all times.

Do  not  attach  accessories,  stickers  (including  transparent  stickers)  or
other items to the radar sensor, radar sensor cover or surrounding area.

Do not subject the radar sensor or its surrounding area to a strong impact. 
If  the  radar  sensor, front grille, or  front  bumper has  been  subjected to  a
strong impact, have the vehicle inspected by your Toyota dealer.

Do not disassemble the radar sensor.

Do not modify or paint the radar sensor or radar sensor cover.

In the following cases, the radar sensor must be recalibrated. Contact your
Toyota dealer for details.
• When  the  radar  sensor  or  front  grille  are  removed  and  installed,  or

replaced

• When the front bumper is replaced

Radar sensor
Radar sensor cover

If  the  front  of  the  radar  sensor  or  the
front or back of the radar sensor cover
is dirty or covered with water droplets,
snow, etc., clean it.
Clean the radar sensor and radar sen-
sor  cover  with  a  soft  cloth  to  avoid
damaging them.

1

2

285

4-5. Using the driving support systems

4

D

riv

in

g

WARNING

To avoid malfunction of the front camera

Observe the following precautions.
Otherwise, the front camera may not operate properly, possibly leading to
an accident resulting in death or serious injury.

Keep the windshield clean at all times.
• If  the  windshield  is  dirty  or  covered  with  an  oily  film,  water  droplets,

snow, etc., clean the windshield.

• If a glass coating agent is applied to the windshield, it will still be neces-

sary to use the windshield wipers to remove water droplets, etc. from
the area of the windshield in front of the front camera.

• If the inner side of the windshield where the front camera is installed is

dirty, contact your Toyota dealer.

If the part of the windshield in front of the front camera is fogged up or cov-
ered with condensation, or ice, use the windshield defogger to remove the
fog, condensation, or ice. (

P. 434, 444)

If water droplets cannot be properly removed from the area of the wind-
shield  in  front  of  the  front  camera  by  the  windshield  wipers,  replace  the
wiper insert or wiper blade.

Do not attach window tint to the windshield.

Replace the windshield if it is damaged or cracked. 
After replacing the windshield, the front camera must be recalibrated. Con-
tact your Toyota dealer for details.

Do not allow liquids to contact the front camera.

Do not allow bright lights to shine into the front camera.

Do not attach objects, such as stickers,
transparent  stickers,  etc.,  to  the  outer
side  of  the  windshield  in  front  of  the
front  camera  (shaded  area  in  the  illus-
tration).
A:  From  the  top  of  the  windshield  to
approximately  0.4  in.  (1  cm)  below  the
bottom of the front camera
B:  Approximately  7.9  in.  (20  cm)
(Approximately  4.0  in.  [10  cm]  to  the
right and left from the center of the front
camera)

286

4-5. Using the driving support systems

WARNING

Do not dirty or damage the front camera. 
When cleaning the inside of the windshield, do not allow glass cleaner to
contact the lens of the front camera. Also, do not touch the lens. 
If the lens is dirty or damaged, contact your Toyota dealer.

Do not subject the front camera to a strong impact.

Do not change the installation position or direction of the front camera or
remove it. 

Do not disassemble the front camera.

Do  not  modify  any  components  of  the  vehicle  around  the  front  camera
(inside rear view mirror, etc.) or ceiling.

Do not attach any accessories to the hood, front grille or front bumper that
may obstruct the front camera. Contact your Toyota dealer for details.

If a surfboard or other long object is to be mounted on the roof, make sure
that it will not obstruct the front camera.

Do not modify the headlights or other lights.

287

4-5. Using the driving support systems

4

Drivin

g

Certifications

For vehicles sold in the U.S.A., Hawaii, Saipan and Puerto Rico

288

4-5. Using the driving support systems

For vehicles sold in Canada


Content      ..     15      16      17      18     ..