Toyota GR Supra (2022 year). Manual in english - page 4
 

  Index      Toyota     Toyota GR Supra (2022 year). Manual in english


Search            copyright infringement  


Content      ..     2      3      4      5     ..


Toyota GR Supra (2022 year). Manual in english - page 4


52

3-1. CONTROLS

1

Turn the Controller until the 
desired menu item is high-
lighted.

2

Press the Controller.

The display of menus 
“Media/Radio”, “Communica-
tion” and “Connected Serv.” can 
be adjusted, for instance to 
remove the entries of functions 
that are not used from the 
menu.

Via Toyota Supra Command:

1

Select the menu.

2

“Personalize menu”

3

Select desired menu con-
tents to be displayed.

After a menu item is selected, 
for instance "System settings", a 
new display appears.
• Move the Controller to the left.

The current display closes and the 
previous display is shown.

 Press the button.

The previous display re-opens.

• Move the Controller to the 

right.

The new display opens.

An arrow indicates that addi-
tional displays can be opened.

 Press and hold this button.

The recently used menus are 
displayed.

 Press the button.

The "Options" menu is dis-
played.

The menu consists of various 
areas:
• Screen settings, for instance 

"Split screen".

• Control options for the 

selected main menu, for 
instance for "Media/Radio".

• If applicable, further operating 

options for the selected menu, 
for instance "Save station".

Settings, such as brightness, 
can be entered.

Via Toyota Supra Command:

1

"My Vehicle"

2

"System settings"

Adjusting menu contents

Changing between dis-
plays

Opening recently used 
menus

Opening the Options 
menu

Changing settings

53

3-1. CONTROLS

3

CON

T

ROLS

3

"Displays"

4

"Control display"

5

"Brightness at night"

6

Turn the Controller until the 
desired setting is displayed.

7

Press the Controller.

1

Turn the Controller: select let-
ter or number.

2

: confirm entry.

For alphabetical lists with more 
than 30 entries, the letters for 
which there is an entry are dis-
played at the left edge.

1

Turn the Controller to the left 
or right quickly.

All letters for which there are 
entries are displayed on the left 
edge.

2

Select the first letter of the 
desired entry.

The first entry of the selected letter 
is displayed.

The Control Display is equipped 
with a touchscreen.

Touch screen with your fingers. 
Do not use any objects.

 Tap on the symbol.

The main menu is displayed.

All Toyota Supra Command 
functions can be called up via 
the main menu.

1

 Tap on symbol.

All menu items of the main menu 
are displayed.

2

Drag the menu item to the 
desired position on the right 
or left.

Entering letters and num-
bers

Input

Deleting

Symbol

Function

Press the Controller: 
delete letter or number.

Hold the Controller down: 
delete all letters or num-
bers.

Using alphabetical lists

Operating via touch-
screen

General information

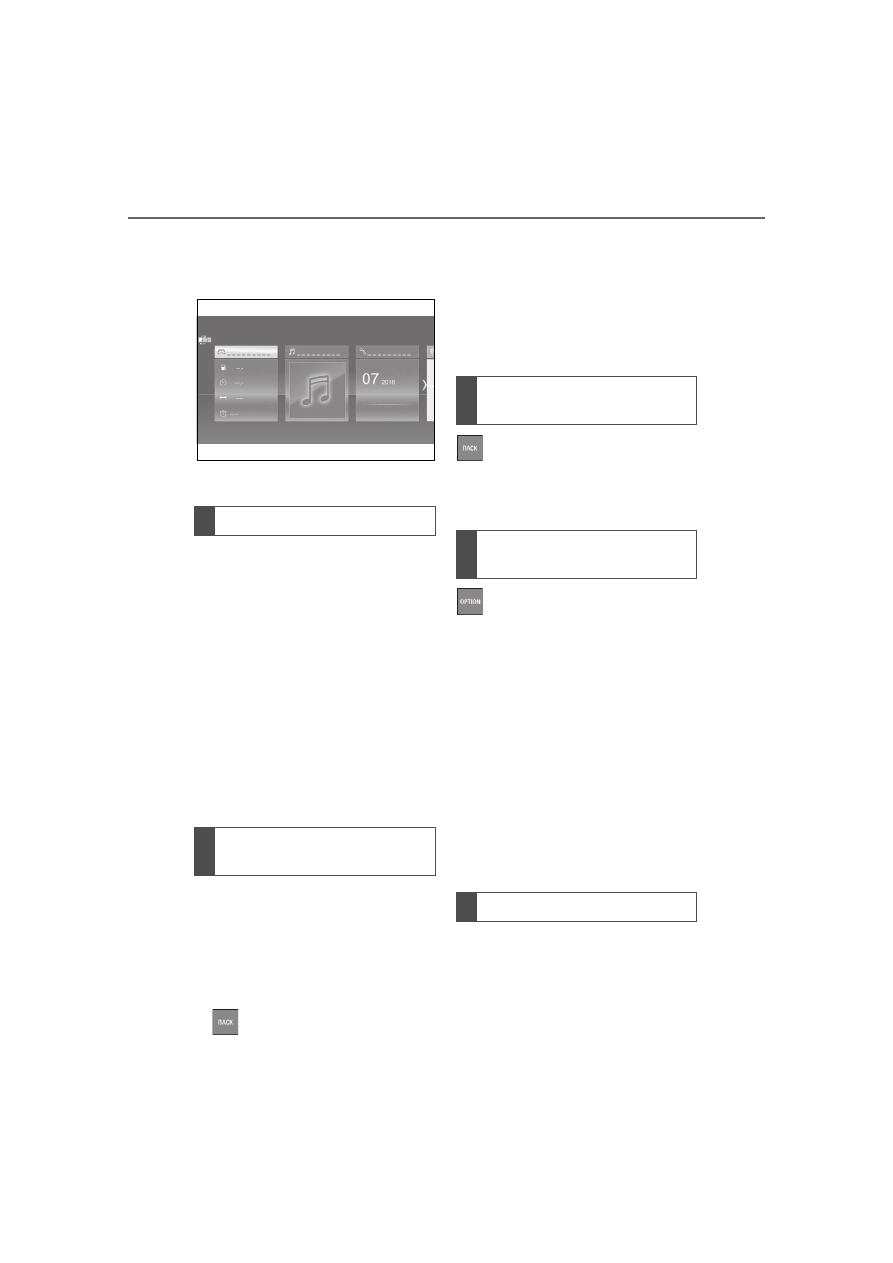
Opening the main menu

Adapting the main menu

54

3-1. CONTROLS

Tap desired menu item.

You can display dynamic con-
tents within the menu items. The 
contents of the menu items 
update automatically, e.g., the 
active destination guidance in 
the navigation. To access the 
dynamic content directly, tap on 
the lower section of the menu 
item.

Via Toyota Supra Command:

1

"My Vehicle"

2

"Contents of main menu"

After a menu item is selected, a 
new display opens.

An arrow indicates that addi-
tional displays can be opened.
• Swipe to the left.
• Tap arrow.

New display is opened.

Settings such as brightness can 
be changed via the touch-
screen.

Via Toyota Supra Command:

1

"My Vehicle"

2

"System settings"

3

"Displays"

4

"Control display"

5

"Brightness at night"

6

To perform the desired set-
ting:

• Slide in the selected field to 

the right or left, until the 
desired setting is displayed.

,  

Tap 

on 

symbol.

1

 Touch the symbol on the 

touchscreen.

A keyboard is displayed in the Con-
trol Display.

2

Enter letters and numbers.

Selecting menu items

Dynamic contents

Changing between dis-
plays

Changing settings

Entering letters and num-
bers

Input

55

3-1. CONTROLS

3

CON

T

ROLS

The navigation map can be 
moved with the touchscreen.

Some Toyota Supra Command 
functions can be operated using 
the touchpad on the Controller.

Via Toyota Supra Command:

1

"My Vehicle"

2

"System settings"

3

"Touchpad"

4

Select the desired setting:

• "Speller": enter letters and 

numbers.

• "Map": using the map.
• "Search fields": write letters 

without selecting the list field.

• "Audio feedback": pro-

nounces entered letters and 
numbers.

Entering letters requires some 
practice at the beginning. When 
entering, pay attention to the fol-
lowing:
• The system distinguishes 

between upper and 
lower-case letters and num-
bers. To make entries, it may 
be necessary to change 
between upper and 
lower-case letters, numbers 
and characters, refer to page 
53.

• Enter characters as they are 

displayed on the Control Dis-
play.

• Always enter associated char-

acters, such as accents or 
periods so that the letter can 
be clearly recognized. The set 
language determines what 
input is possible. Where nec-
essary, enter special charac-
ters via the Controller.

Deleting

Symbol

Function

Tapping the symbol: 
deletes the letter or num-
ber.

Tapping and holding the 
symbol all letters: deletes 
all letters or numbers.

Operating navigation map

Function

Operation

Enlarge/shrink 
map.

Drag in or out 
with the fingers.

Touchpad

General information

Selecting functions

Entering letters and num-
bers

56

3-1. CONTROLS

The map in the navigation sys-
tem can be moved via the 
touchpad.

The Toyota Supra Command 
functions can be stored on the 
programmable memory buttons 
and called up directly, for 
instance radio stations, naviga-
tion destinations and phone 
numbers.

1

Select function via Toyota 
Supra Command.

2

 Press and hold the 

desired button until a signal 
sounds.

 Press the button.

The function will work immedi-
ately. This means, for instance 
that the number is dialed when a 
phone number is selected.

Touch buttons with finger. Do 
not wear gloves or use objects.

The button assignment is dis-
played at the top edge of 
screen.

Entering special charac-
ters

Entry

Operation

Delete a charac-
ter.

Swipe to the left 
on the touchpad.

Enter a blank 
space.

Swipe to the 
right in the cen-
ter of the touch-
pad.

Enter a hyphen.

Swipe to the 
right in the upper 
area of the 
touchpad.

Enter an under-
score.

Swipe to the 
right in the lower 
area of the 
touchpad.

Using the map

Function

Operation

Move map.

Swipe in the 
appropriate 
direction.

Enlarge/shrink 
map.

Drag in or out on 
the touchpad 
with fingers.

Display menu.

Tap once.

Programmable memory 
buttons

General information

Storing a function

Running a function

Displaying the key assign-
ment

57

3-1. CONTROLS

3

CON

T

ROLS

1

Press and hold buttons 1 and 
8 simultaneously for approx. 
5 seconds.

2

"OK"

Most functions displayed on the 
Control Display can be operated 
by voice commands via the 
voice activation system. The 
system supports you with 
announcements during input.

• Functions that can only be 

used when the vehicle is sta-
tionary can only be operated 
via the voice activation sys-
tem to a limited extent.

• The system uses a special 

microphone on the driver's 
side.

• ›...‹ in the Owner's Manual 

denotes verbal instructions to 
use with the voice activation 
system.

• A language must be set via 

Toyota Supra Command that 
is supported by the voice acti-
vation system. To set the lan-

guage, refer to page 60

• Always say commands in the 

language of the voice activa-
tion system.

1

 Press the button on the 

steering wheel.

2

Wait for the signal.

3

Say the command.

No other commands may be 
available. In this case, operate 
the function via Toyota Supra 
Command.

Most menu items on the Control 
Display can be voiced as com-
mands.

Commands from other menus 

Deleting the button 
assignments

Operation via voice

Concept

General information

Functional requirements

Using the voice activation 
system

Activating the voice activa-
tion system

This symbol indicates that 
the voice activation sys-
tem is active.

Terminating the voice activa-
tion system

Press the button on the 
steering wheel or ›Can-
cel‹.

Possible commands

General information

58

3-1. CONTROLS

can also be spoken.

You may select list entries such 
as phone list entries via voice 
activation. Read these list 
entries out loud exactly as they 
are shown in the respective list.

The following is displayed in the 
top area of the Control Display:
• Some possible commands for 

the current menu.

• Some possible commands 

from other menus.

• Status of the voice recogni-

tion.

 Encrypted connection is 

not available.

• To have the available spoken 

instructions read out loud: 
›Voice commands‹.

• To have information on the 

operating principle of the 
voice activation system read 
out loud: ›General information 
on voice control‹.

• To have help for the current 

menu read out loud: ›Help‹.

Do not use the voice activation 
system to initiate an Emergency 

Request. In stressful situations, 
the voice and vocal pitch can 
change. This can unnecessarily 
delay the establishment of a 
phone connection.

Instead, use the SOS button, 
refer to page 316, close to the 
interior mirror.

You can set the system to use 
standard dialog or a short ver-
sion.

The short version of the voice 
dialog plays back short mes-
sages in abbreviated form.

Via Toyota Supra Command:

1

"My Vehicle"

2

"System settings"

3

"Language"

4

"Speech mode:"

5

Select the desired setting.

It is possible to answer during 
inquiries of the voice activation 
system. The function can be 
deactivated if inquiries are often 
undesirably interrupted, for 
instance due to background 
noise or talking.

Via Toyota Supra Command:

Displaying possible com-
mands

Help on the voice activation 
system

Information for Emergency 
Requests

Adjusting

Setting the voice dialog

Speaking during voice out-
put

59

3-1. CONTROLS

3

CON

T

ROLS

1

"My Vehicle"

2

"System settings"

3

"Language"

4

"Speaking during voice out-
put"

Online speech processing pro-
vides a dictation function, a nat-
ural method of entering 
destinations and improves the 
quality of voice recognition. To 
use the functions, data is trans-
mitted to a service provider via 
an encrypted connection and 
stored locally there.

Via Toyota Supra Command:

1

"My Vehicle"

2

"System settings"

3

"Language"

4

"Server speech recognition"

Turn the volume button during 
the spoken instructions until the 
desired volume is set.
• The volume remains constant 

even if the volume of other 
audio sources is changed.

• Certain noises can be 

detected and may lead to 
problems. Keep the doors and 
windows closed.

• Noises from the front passen-

ger or the rear seat bench can 
impair the system. Avoid mak-
ing other noise in the vehicle 
while speaking.

• Major language dialects can 

cause problems with the voice 
recognition feature. Speak 
loud and clear.

A smartphone connected to the 
vehicle can be used via voice 
activation.

Activate voice command 
response on the smartphone for 
this purpose.

1

Press and hold the 

 but-

ton on the steering wheel for 
approx. 3 seconds.

Voice command response is acti-
vated on the smartphone.

2

Release the 

 button.

If activation is successful, a confir-
mation appears on the Control Dis-
play.

If it was not possible to activate 
voice command response, the 
list of Bluetooth devices appears 
on the Control Display.

Online speech processing

Adjusting the volume

System limits

Using a smartphone via 
voice activation

60

3-1. CONTROLS

This chapter describes all stan-
dard, country-specific and 
optional features offered with 
the series. It also describes fea-
tures that are not necessarily 
available in your vehicle, e. g., 
due to the selected options or 
country versions. This also 
applies to safety-related func-
tions and systems. When using 
these functions and systems, 
the applicable laws and regula-
tions must be observed.

Via Toyota Supra Command:

1

"My Vehicle"

2

"System settings"

3

If necessary, "Language"

4

"Language:"

5

Select the desired setting.

For voice dialog for the voice 
activation system, refer to page 
58.

Via Toyota Supra Command:

1

"My Vehicle"

2

"System settings"

3

"Date and time"

4

"Time zone:"

5

Select the desired setting.

Via Toyota Supra Command:

1

"My Vehicle"

2

"System settings"

3

"Date and time"

4

"Time"

5

Turn the Controller until the 
desired hours are displayed.

6

Press the Controller.

7

Turn the Controller until the 
desired minutes are dis-
played.

8

Press the Controller.

Via Toyota Supra Command:

1

"My Vehicle"

2

"System settings"

3

"Date and time"

4

"Time format:"

5

Select the desired setting.

General settings

Vehicle features and 
options

Language

Setting the language

Setting the voice dialog

Time

Setting the time zone

Setting the time

Setting the time format

61

3-1. CONTROLS

3

CON

T

ROLS

Depending on your vehicle's 
optional features, the time, date 
and, if needed, the time zone 
are updated automatically.

Via Toyota Supra Command:

1

"My Vehicle"

2

"System settings"

3

"Date and time"

4

"Automatic time setting"

Via Toyota Supra Command:

1

"My Vehicle"

2

"System settings"

3

"Date and time"

4

"Date:"

5

Turn the Controller until the 
desired day is displayed.

6

Press the Controller.

7

Make the settings for the 
month and year.

Via Toyota Supra Command:

1

"My Vehicle"

2

"System settings"

3

"Date and time"

4

"Date format:"

5

Select the desired setting.

Depending on the country ver-
sion, you can set the units of 
measurement for some values, 
for instance consumption, dis-
tances, and temperature.

Via Toyota Supra Command:

1

"My Vehicle"

2

"System settings"

3

"Units"

4

Select the desired menu 
item.

5

Select the desired setting.

If vehicle location has been acti-
vated, the current vehicle posi-
tion can be displayed in the 
Toyota Supra Apps.

Via Toyota Supra Command:

1

"My Vehicle"

2

"Vehicle settings"

3

"Vehicle tracking"

4

"Vehicle tracking"

Automatic time setting

Date

Setting the date

Setting the date format

Setting the units of mea-
surement

Activating/deactivating 
the display of the current 
vehicle position

Concept

Activating/deactivating

62

3-1. CONTROLS

For some functions, popup win-
dows are displayed automati-
cally on the Control Display. 
Some of these popup windows 
can be activated or deactivated.

Via Toyota Supra Command:

1

"My Vehicle"

2

"System settings"

3

"Pop-ups"

4

Select the desired setting.

Via Toyota Supra Command:

1

"My Vehicle"

2

"System settings"

3

"Displays"

4

"Control display"

5

"Brightness at night"

6

Turn the Controller until the 
desired brightness is set.

7

Press the Controller.

Depending on the light condi-
tions, the brightness settings 
may not be clearly visible.

For some menu items of the 
main menu, the displayed con-

tents can be selected.

1

 Press button.

2

"Contents of main menu"

3

Select the desired menu and 
the desired content.

The menu centrally displays all 
messages arriving in the vehicle 
in list form.

The following messages can be 
displayed:
• Traffic messages.
• Vehicle messages.
• Communication messages, 

for example emails, SMS text 
messages or reminders.

• Service notification mes-

sages.

Messages are additionally dis-
played in the status field.

Via Toyota Supra Command:

1

"My Vehicle"

2

"System settings"

3

"Notifications"

4

Select the desired message.

The respective menu is opened, 
where the message is dis-

Activating/deactivating 
popup windows

Control Display

Brightness

Selecting the contents of 
the main menu

Messages

Concept

General information

Retrieving messages

63

3-1. CONTROLS

3

CON

T

ROLS

played.

All messages, except vehicle 
messages, can be deleted from 
the list. Vehicle messages are 
displayed as long as they are 
relevant.

Via Toyota Supra Command:

1

"Notifications"

2

Select the desired message.

3

 Press button.

4

"Delete this notification" or 
"Delete all notifications"

The following settings can be 
adjusted:
• Select the applications, from 

which messages will be per-
mitted.

• Sort the messages according 

to date or priority.

Via Toyota Supra Command:

1

"My Vehicle"

2

"System settings"

3

"Notifications"

4

Select the desired setting.

This chapter describes all stan-
dard, country-specific and 
optional features offered with 
the series. It also describes fea-
tures that are not necessarily 
available in your vehicle, for 
instance, due to the selected 
options or country versions. This 
also applies to safety-related 
functions and systems. When 
using these functions and sys-
tems, the applicable laws and 
regulations must be observed.

The vehicle offers different func-
tions, whose use requires a data 
transfer to Toyota or a service 
provider. The data transfer can 
be deactivated for some func-
tions.

With data transfer deactivated, 
the respective function cannot 
be used.

Only make these settings while 
stationary.

Deleting messages

Adjusting

Personal settings

Vehicle features and 
options

Data protection

Data transfer

Concept

General information

64

3-1. CONTROLS

Follow the instructions on the 
Control Display.

Via Toyota Supra Command:

1

"My Vehicle"

2

"System settings"

3

"Data privacy"

4

Select the desired setting.

Depending on the usage, the 
vehicle stores personal data, 
such as stored radio stations. 
This personal data can be per-
manently deleted using Toyota 
Supra Command.

Depending on the equipment 
package, the following data can 
be deleted:
• Driver profile settings.
• Stored radio stations.
• Stored programmable mem-

ory buttons.

• Travel and Onboard Com-

puter information.

• Music hard disc.
• Navigation, for instance 

stored destinations.

• Phone book.
• Online data, for instance 

Favorites, cookies.

• Office data, for instance voice 

notes.

• Login accounts.

Altogether, the deletion of the 
data can take up to 15 minutes.

Data can only be deleted while 
stationary.

Heed and follow the instructions 
on the Control Display.

Via Toyota Supra Command:

1

"My Vehicle"

2

"System settings"

3

"Data privacy"

4

"Delete personal data"

5

"Delete personal data"

6

"OK"

7

Exit and lock the vehicle.

The deletion process takes 15 
minutes to complete.

If not all of the data was deleted, 
repeat the deletion.

Switch on the drive-ready state 
to cancel deletion of the data.

Activating/deactivating

Deleting personal data in 
the vehicle

Concept

General information

Functional requirement

Deleting data

Canceling deletion

65

3-1. CONTROLS

3

CON

T

ROLS

In the driver profiles, individual 
settings for several drivers can 
be stored and called up again 
when required.

There are three driver profiles 
with which personal vehicle set-
tings can be stored. Every 
remote control has one of these 
driver profiles assigned.

If the vehicle is unlocked using a 
remote control, the assigned 
personal driver profile will be 
activated. All settings stored in 
the driver profile are automati-
cally applied.

If several drivers use their own 
remote control, the vehicle will 
adjust the personal settings 
during unlocking. These settings 
are also restored, if the vehicle 
has been used in the meantime 
by a person with a different 
remote control.

Changes to the settings are 
automatically stored in the driver 
profile currently activated.

If another driver profile is 
selected via Toyota Supra Com-
mand, the settings stored in it 
will be applied automatically. 
The new driver profile is 
assigned to the vehicle key that 

is currently in use.

There is an additional guest pro-
file available that is not assigned 
to any vehicle key. It can be 
used to apply settings in the 
vehicle without changing the 
personal driver profiles.

For the system to be able to 
identify the driver profile associ-
ated to a particular driver, the 
detected remote control must be 
clearly allocated to the driver.

This is the case when:
• The driver is only carrying his 

or her own remote control.

• The driver unlocks the vehi-

cle.

• The driver gets into the vehi-

cle through the driver's door.

After switching on the Control 
Display, the name of the active 
driver profile is displayed.

Select driver profile, refer to 
page 66.

As soon as the engine is started 
or any key is pressed, the last 
selected display is shown on the 
Control Display.

To exit the welcome screen via 
Toyota Supra Command: "OK"

Driver profile

Concept

General information

Functional requirements

Active driver profile

66

3-1. CONTROLS

The settings for the following 
systems and functions are 
stored in the active driver profile. 
The scope of storable settings 
depends on country and equip-
ment.
• Unlocking and locking.
• Lights.
• Climate control.
• Radio.
• Instrument cluster.
• Programmable memory but-

tons.

• Volumes, tone.
• Control Display.
• TV.
• Parking Sensors.
• Rearview camera.
• Head-up Display.
• Sport mode switch.
• Seat position, exterior mirror 

position.

Both the positions saved via the 
seat memory and the last position 
set are saved.

• Toyota Supra Safety.

Regardless of the remote con-
trol in use, a different driver pro-
file may be activated. This 
allows you to call up personal 
vehicle settings, even if you did 
not unlock the vehicle with your 
own remote control.

Via Toyota Supra Command:

1

"My Vehicle"

2

"Driver profiles"

3

Select driver profile.

4

"OK"

• All settings stored in the 

called-up driver profile are 
automatically applied.

• The called-up driver profile is 

assigned to the remote con-
trol being used at the time.

• If the driver profile is already 

assigned to a different remote 
control, this driver profile will 
apply to both remote controls.

The guest profile is for individual 
settings that are stored in none 
of the three personal driver pro-
files.

Via Toyota Supra Command:

1

"My Vehicle"

2

"Driver profiles"

3

"Drive off (guest)"

4

"OK"

The guest profile cannot be 
renamed. It is not assigned to 
the current remote control.

A personal name can be 
assigned to the active driver 
profile to avoid confusion 
between the driver profiles.

Adjusting

Profile management

Selecting a driver profile

Guest profile

Renaming a driver profile

67

3-1. CONTROLS

3

CON

T

ROLS

Via Toyota Supra Command:

1

"My Vehicle"

2

"Driver profiles"

3

Select driver profile.

 The driver profile marked with 

this symbol can be renamed.

4

"Change driver profile name"

5

Enter profile name.

6

 Select the symbol.

The settings of the active driver 
profile are reset to their factory 
settings.

Via Toyota Supra Command:

1

"My Vehicle"

2

"Driver profiles"

3

Select driver profile.

 The driver profile marked with 

this symbol can be reset.

4

"Reset driver profile"

5

"OK"

Most settings of the active driver 
profile can be exported.

Exporting is helpful when storing 
and retrieving personal set-
tings, for instance before deliv-
ering the vehicle to a workshop. 
The stored driver profiles can be 
taken into another vehicle.

Via Toyota Supra Command:

1

"My Vehicle"

2

"Driver profiles"

3

Select driver profile.

 The driver profile marked with 

this symbol can be exported.

4

"Export driver profile"

5

Select a storage device for 
exporting the driver profile.

• "USB device"

Select USB storage device, as 
needed, refer to page 72.

The existing settings of the 
active driver profile are overwrit-
ten with the settings of the 
imported driver profile.

Via Toyota Supra Command:

1

"My Vehicle"

2

"Driver profiles"

3

Select the driver profile to be 
overwritten.

 The driver profile marked with 

this symbol can be overwritten.

4

"Import driver profile"

5

Select a storage device for 
importing the driver profile.

• USB storage device: "USB 

device"

Select USB storage device as 
needed.

6

Select the driver profile to be 
imported.

A clear assignment between the 
remote control and driver may 

Resetting a driver profile

Exporting driver profiles

Importing driver profiles

System limits


Content      ..     2      3      4      5     ..