Toyota RAV4 Prime (2021 year). Manual in english - part 2
 

  Index      Toyota     Toyota RAV4 Prime (2021 year). Manual in english


Search            copyright infringement  


Content      ..      1      2      3      ..


Toyota RAV4 Prime (2021 year). Manual in english - part 2


78

2-1. Plug-in hybrid system

engine and electric motor. 
(

P.81)

• If electricity needed for EV 

driving in EV mode or AUTO 
EV/HV mode is not remaining, 
the operation mode will be 
automatically switched to HV 
mode.

• The operation mode can be 

switched to HV mode at any 
timing by operating the switch 
to keep electricity for EV driv-
ing etc.

*

 (

P.78). Switching 

to HV mode when driving on a 
highway or when driving uphill 
is recommended in order to 
conserve battery power.

When in HV mode, the HV drive 
mode indicator illuminates.

*

: The EV driving range may reduce 

even after switching to HV mode.

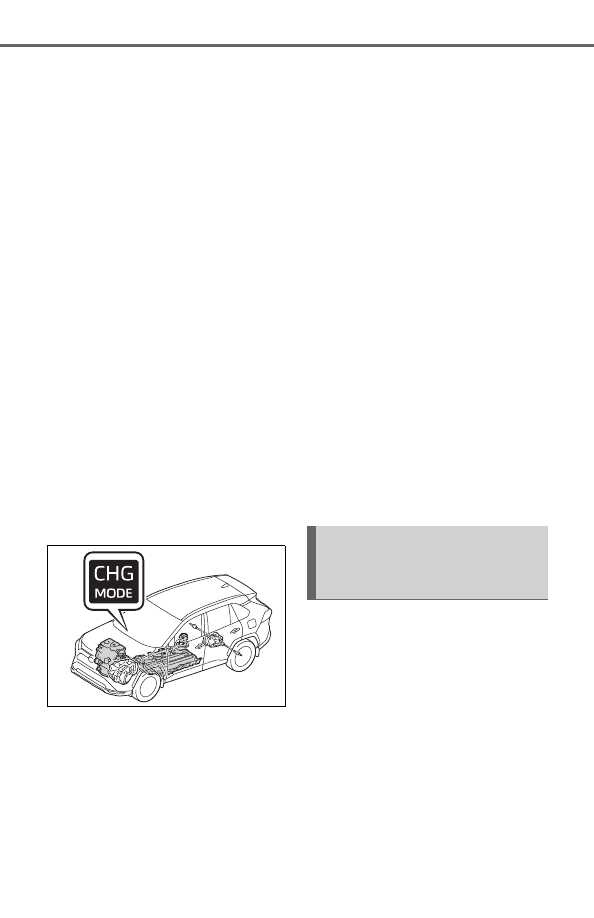
Hybrid battery (traction bat-
tery) charge mode (

P.79)

Electricity generated in the gas-
oline engine can be charged in 
the hybrid battery (traction bat-
tery) by switching to the hybrid 
battery (traction battery) charge 
mode when electricity needed 
for EV driving is not remaining.

*

• The system may not be able 

to switch to the hybrid battery 
(traction battery) charge 
mode due to the state of the 
plug-in hybrid system. 
(

P.80)

• Charging time differs depend-

ing on the driving state of the 
vehicle when driving in hybrid 
battery (traction battery) 
charge mode.

When in the hybrid battery (traction 
battery) charge mode, the hybrid 
battery charge mode indicator illu-
minates.

*

: When in the hybrid battery (trac-

tion battery) charge mode, the 
hybrid battery can be charged 
while driving. However, the gaso-
line engine runs to charge the 
battery and fuel consumption 
becomes higher compared with 
driving in HV mode.

The plug-in hybrid system oper-
ation modes can be switched 
using the switches.

Switching the plug-in 
hybrid system operation 
modes

Press the AUTO EV/HV mode 
switch or EV/HV mode selection 
switch to change modes as the 
following table shows. 

When in EV mode, the EV drive 
mode indicator illuminates.

Plug-in hybrid system 
operation mode selection 
switches

-------------------------------------------------------------------------------------------------------------------------------------------------------------

79

2-1. Plug-in hybrid system

2

Plug

-in hyb

rid system

When in AUTO EV/HV mode, the 
AUTO EV/HV mode indicator illumi-
nates.
When in HV mode, the HV drive 
mode indicator illuminates.

AUTO EV/HV mode switch

*

: If there is not enough charge 

remaining in the hybrid battery 
(traction battery) to allow EV driv-
ing, AUTO EV/HV mode will not 
be selectable.

EV/HV mode selection switch

*

: If there is not enough charge 

remaining in the hybrid battery 
(traction battery) to allow EV driv-
ing, EV mode will not be select-
able.

Switching to the hybrid bat-
tery (traction battery) 
charge mode

Press and hold the EV/HV mode 
selection switch.

Take your hand off the switch once 
the hybrid battery charge mode 
indicator starts to blink.
The hybrid battery charge mode 
indicator illuminates when the 
switch to hybrid battery (traction 
battery) charge mode is complete.
When the hybrid battery (traction 
battery) is fully charged

*

, the hybrid 

battery (traction battery) charge 
mode is automatically canceled and 
the operation mode will be switched 
to HV mode.
The hybrid battery (traction bat-
tery) charge mode will be canceled 
by pressing AUTO EV/HV mode 
switch or EV/HV mode selection 
switch.

*

: The maximum charge amount in 

the hybrid battery (traction bat-
tery) charge mode is approxi-
mately 80% of the fully charged 
capacity for the charging from an 

Current mode

Mode after 

switching

EV mode

AUTO EV/HV 

mode

AUTO EV/HV 

mode

EV mode

HV mode

AUTO EV/HV 

mode

*

Current mode

Mode after 

switching

EV mode

HV mode

AUTO EV/HV 

mode

HV mode

HV mode

EV mode

*

-------------------------------------------------------------------------------------------------------------------------------------------------------------

80

2-1. Plug-in hybrid system

external power source.

If the plug-in hybrid system 

operation mode cannot be 

changed

In the following situations, the plug-

in hybrid system operation mode 

cannot be changed even if the 

AUTO EV/HV mode switch or 

EV/HV mode selection switch is 

pressed. (In this case, the warning 

message is displayed on the multi-

information display when the switch 

is pressed.)

When electricity needed for EV 

driving is not remaining (when in 

EV mode or AUTO EV/HV mode)

When the traction battery is 

almost completely charged (hybrid 

battery [traction battery] charge 

mode)

When switching from EV mode 

to another mode using the 

switch

When the power switch is turned off, 

operation mode switching is can-

celed and the system returns to EV 

mode the next time the vehicle is 
started.

*

*

: If there is not enough charge 

remaining in the hybrid battery 
(traction battery) to allow EV driv-
ing, the system switches to HV 
mode.

Hybrid battery (traction battery) 

charge mode

The following may occur to protect 

the system, etc.

• Cannot switch to hybrid battery 

(traction battery) charge mode or 

cannot cancel it

• Gasoline engine does not start or 

stops even after switching to 

hybrid battery (traction battery) 

charge mode

If a load to the system is large, 

such as when the power con-

sumption of the air conditioning 

system is large or when the tem-

perature of the engine coolant is 

high, it may take longer time than 

usual to charge using the hybrid 

battery (traction battery) charge 

mode, or charging to the hybrid 

battery (traction battery) may not 

be performed.

When in EV mode

In EV mode, EV driving (driving 

WARNING

When using the hybrid bat-

tery (traction battery) charge 

mode

Observe the following precautions 

when using the hybrid battery 

(traction battery) charge mode 

while parking.
Failure to do so may lead to death 

or serious health hazard, as the 

gasoline engine operates when in 

the hybrid battery (traction bat-

tery) charge mode.

Do not stop the vehicle near 

flammable materials.

Do not use the hybrid battery 

(traction battery) charge mode 

in a closed area where ventila-

tion is insufficient, such as in a 

garage or area with snow 

buildup.

Control when driving in 
each mode

-------------------------------------------------------------------------------------------------------------------------------------------------------------

81

2-1. Plug-in hybrid system

2

Plug

-in hyb

rid system

using only the electric motor)

*

 is 

possible. However, depending 
on the situation, EV driving may 
be canceled and both gasoline 
engine and electric motor are 
used (

P.82). Also, if a little 

electricity is remaining in the 
hybrid battery (traction battery), 
HV mode is automatically 
selected. To drive in EV mode 
long, observe the followings.

Avoid sudden acceleration 
and sudden deceleration, and 
be sure to drive smoothly. If 
you repeatedly accelerate, 
the hybrid battery (traction 
battery) charge will deplete 
quickly. Also, EV driving may 
be canceled by rapid acceler-
ation or vehicle speed.

Restrain your speed as much 
as possible. The distance that 
can be driven in EV mode will 
reduce considerably at high 
speeds.

*

: The EV driving range can be 

checked using the multi-informa-
tion display. (

P.172)

When in AUTO EV/HV mode

Only the electric motor is used 
for EV driving

*

 during normal 

driving, but when the accelera-
tor pedal is strongly depressed, 
the gasoline engine starts. 
(

P.82)

Also, when the hybrid battery 
(traction battery) level is low, the 
mode switches to HV mode 

automatically the same as in EV 
mode.
AUTO EV/HV mode is suitable 
for driving conditions when more 
power is required, such as for 
driving uphill or accelerating 
suddenly. However, because 
the gasoline engine will start 
more easily, it is recommended 
to drive in EV mode usually.

*

: The EV driving range can be 

checked using the multi-informa-
tion display. (

P.172)

When in HV mode

The vehicle can be used in the 
same way as a standard hybrid 
vehicle.
In HV mode, controls are pri-
marily carried out as follows in 
accordance with the driving con-
ditions.

The gasoline engine stops

*


when the vehicle is stopped.

During start off, the electric 
motor (traction motor) drives 
the vehicle.

During normal driving, the 
gasoline engine and electric 
motor (traction motor) are 
controlled effectively, and the 
vehicle is driven with optimum 
fuel efficiency. Also, when 
necessary, the electric motor 
(traction motor) operates as 
an electrical generator to 
charge the hybrid battery 
(traction battery).

-------------------------------------------------------------------------------------------------------------------------------------------------------------

82

2-1. Plug-in hybrid system

When the accelerator pedal is 
depressed heavily, drive force 
from both the gasoline engine 
and the electric motor (trac-
tion motor) is used to acceler-
ate.

*

: When the hybrid battery (traction 

battery) requires charging or the 
engine is warming up, etc., the 
gasoline engine will not automati-
cally stop. (

P.83)

When braking (regenera-
tive braking)

The electric motor (traction 
motor) charges the hybrid bat-
tery (traction battery).
The EV driving range can be 
extended by actively using this 
regenerative braking to store 
electricity in the hybrid battery 
(traction battery).
Moreover, as fuel consumption 
is also reduced when in HV 
mode, the regenerative braking 
system can be used effectively.

Regenerative braking

In the following situations, kinetic 

energy is converted to electric 

energy and deceleration force can 

be obtained in conjunction with the 

recharging of the hybrid battery 

(traction battery).

The accelerator pedal is released 

while driving with the shift lever in 

D or S.

The brake pedal is depressed 

while driving with the shift lever in 

D or S.

EV driving range

The EV driving range is displayed 

on the multi-information display. 

(

P.172)

The EV driving range changes in 

accordance with the charge status 

of the hybrid battery (traction bat-

tery), the speed of the vehicle, etc.

Even if there is enough charge 

remaining in the hybrid battery 

(traction battery), EV driving may 

be canceled and both gasoline 

engine and electric motor are 

used depending on the situation. 

(

P.82)

EV indicator

The EV indicator comes on when 

the vehicle is driven using only the 

electric motor (traction motor) or the 

gasoline engine is stopped.
The on/off operation of the EV indi-
cator can be changed. (

P.177)

After EV mode has switched to 

HV mode due to low hybrid bat-

tery (traction battery) charge

If the hybrid battery (traction battery) 

is regenerated by driving continu-

ously down a long slope, the EV 

driving range etc. will be displayed 

on the multi-information display and 

EV mode will be automatically 

switched to.
If EV mode is not switched to even 

though EV driving range is being 

displayed, EV mode can be 

switched to by pressing the EV/HV 

mode selection switch.

Gasoline engine operation in 

EV mode or AUTO EV/HV mode

Even if there is a sufficient amount 

of electricity remaining in the hybrid 

battery (traction battery) and EV 

-------------------------------------------------------------------------------------------------------------------------------------------------------------

83

2-1. Plug-in hybrid system

2

Plug

-in hyb

rid system

driving range (

P.172) is being dis-

played on the multi-information dis-

play, EV driving (driving using only 

the electric motor) may be canceled 

and both gasoline engine and elec-

tric motor are used depending on 

the situation (EV driving will be 

returned to automatically after EV 

driving becomes possible again).
EV driving may be canceled auto-

matically in the following circum-
stances

*1

:

When vehicle speed is more than 

approximately 84 mph (135 km/h).

When power is needed temporar-

ily, for example when the acceler-

ator pedal is depressed firmly or 
when accelerating suddenly.

*2

When the temperature of the 

hybrid system is high. 

The vehicle has been left in the 

sun, driven on a hill, driven at high 

speeds, etc.

When the temperature of the 

hybrid system is low.

When the heater is switched on 

when the outside temperature is 

below about 14°F (-10°C).

When the windshield defogger 

switch is pressed. (

P.398)

When the system determines that 

the gasoline engine needs to be 

started.

*1

:The gasoline engine may also 

operate in circumstances other 
than those listed above, depend-
ing on conditions.

*2

:When driving in AUTO EV/HV 

mode. Even in EV mode, the gas-
oline engine may start, depend-
ing on the condition of the hybrid 
battery (traction battery).

If “Engine Started to Protect 

System EV driving unavailable” 

is displayed on the multi-infor-

mation display

EV driving may be canceled in order 

to protect the hybrid system, etc.
In this case, perform driving with the 

gasoline engine until EV driving will 

be returned to automatically.

Conditions in which the gaso-

line engine may not stop

The gasoline engine starts and 

stops automatically. However, it 

may not stop automatically in the 
following conditions

*

:

During gasoline engine warm-up

During hybrid battery (traction bat-

tery) charging

When the temperature of the 

hybrid battery (traction battery) is 

high or low

When the windshield defogger 

switch is pressed. (

P.398)

*

: Depending on the circumstances, 

the gasoline engine may also not 
stop automatically in situations 
other than those above.

Sounds and vibrations specific 

to a hybrid vehicle

There may be no engine sound or 

vibration even though the vehicle is 

able to move with the “READY” indi-

cator is illuminated. For safety, 

apply the parking brake and make 

sure to shift the shift lever to P when 

parked.
The following sounds or vibrations 

may occur when the hybrid system 

is operating and are not a malfunc-

tion.

Motor sounds may be heard from 

the engine compartment.

Sounds may be heard from the 

hybrid battery (traction battery) 

when the hybrid system starts or 

stops.

Relay operating sounds such as a 

snap or soft clank will be emitted 

from the hybrid battery (traction 

battery), behind the rear seats, 

when the hybrid system is started 

or stopped.

-------------------------------------------------------------------------------------------------------------------------------------------------------------

84

2-1. Plug-in hybrid system

Sounds from the hybrid system 

may be heard when the back door 

is open.

Sounds may be heard from the 

transmission when the gasoline 

engine starts or stops, when driv-

ing at low speeds, or during idling.

Engine sounds may be heard 

when accelerating sharply.

Sounds may be heard due to 

regenerative braking when the 

brake pedal is depressed or as 

the accelerator pedal is released.

Vibration may be felt when the 

gasoline engine starts or stops.

Cooling fan sounds may be heard 

from the air intake vent under the 

rear seat. (

P.91)

Sounds may be heard from near 

the hybrid battery (traction battery) 

in accordance with the operation 

of the air conditioning system or 

“Battery Cooler” (

P.116).

Maintenance, repair, recycling, 

and disposal

Contact your Toyota dealer regard-

ing maintenance, repair, recycling 

and disposal. Do not dispose of the 

vehicle yourself.

In order to make EV mode or 
AUTO EV/HV mode available, 
charge the hybrid battery (trac-
tion battery) from an external 
power source before using the 
vehicle.

Even if charging the hybrid battery 
(traction battery) has not been com-
pleted, the vehicle can be driven. 
However, if there is not enough 
charge remaining, it is possible that 
the vehicle cannot be driven in EV 
mode or AUTO EV/HV mode or the 
EV driving range will become 

shorter.

Refilling fuel

Plug-in hybrid vehicles can be 

driven using electricity charged from 

an external power source. However, 

as the gasoline engine is used 

depending on the situation (

P.82) 

even if in EV mode or AUTO EV/HV 

mode, and the gasoline engine is 

provided on board as a power 

source for driving in HV mode, it is 

needed to refueling the vehicle. 
Check the fuel amount and refill 

immediately when the fuel level 

becomes low. (

P.306)

If the vehicle is not used for a 

long time

The 12-volt battery may dis-

charge. In this event, charge the 

12-volt battery. (

P.539) 

In order to prevent the hybrid bat-

tery (traction battery) from becom-

ing extremely low in charge, 

charge the hybrid battery (traction 

battery) from external power 

source or start the hybrid system 

at least once every 2 or 3 months, 

and turn the power switch off after 

the gasoline engine has stopped 

automatically. (If the gasoline 

engine does not start up even 

after approximately 10 seconds 

have passed since the “READY” 

indicator came on, the power 

Charging (

P.99)

-------------------------------------------------------------------------------------------------------------------------------------------------------------

85

2-1. Plug-in hybrid system

2

Plug

-in hyb

rid system

switch can be turned to off without 

any further action.) 

When the 12-volt battery is dis-

charged, refer to P.539, “If the 12-

volt battery is discharged” and 

perform the correction procedure.

When the vehicle is left with the 

AC charging cable connected, the 

electricity consumption amount of 

the 12-volt battery increases due 

to controls, such as the system 

checking, operating. When the AC 

charging cable is not needed, 

immediately remove it from the 

vehicle.

When driving with the gasoline 
engine stopped, a sound, which 
changes in accordance with the 
driving speed, will be played in 
order to warn people nearby of 
the vehicle’s approach. The 
sound will stop when the vehicle 
speed exceeds approximately 
22 mph (35 km/h).

Acoustic Vehicle Alerting Sys-

tem

In the following cases, the Acoustic 

Vehicle Alerting System may be dif-

ficult for surrounding people to hear.

In very noisy areas

In the wind or the rain

Also, as the Acoustic Vehicle Alert-

ing System is installed on the front 

of the vehicle, it may be more diffi-

cult to hear from the rear of the vehi-

cle compared to the front.

When “Acoustic Vehicle Alert-

ing System Malfunction Visit 

your Dealer” is displayed on the 

multi-information display

The Acoustic Vehicle Alerting Sys-

tem may be malfunctioning. Have 

the vehicle inspected by your 

Toyota dealer immediately.

*

: This function can only be used in 

the mainland U.S.A. It cannot be 
used in other states and territo-
ries, including Alaska and Hawaii.

This system operates based on 
the driving situation and traffic 
information to enhance fuel 
economy.
For details about Predictive effi-
cient drive, refer to “NAVIGA-
TION AND MULTIMEDIA 
SYSTEM OWNER’S MANUAL”.

When the vehicle approaches 
to predictive deceleration sup-
port points registered in the 
navigation system, the “Refer-
ence operation range” (

) of 

the ECO Accelerator Guid-
ance (

P.173) on the multi-

information display will be 
turned off to encourage the 
driver to reduce excessive 
acceleration.

Acoustic Vehicle Alerting 
System

Predictive efficient drive 
(predictive deceleration 
support) (vehicles with 
navigation system)

*

A

-------------------------------------------------------------------------------------------------------------------------------------------------------------

86

2-1. Plug-in hybrid system

The engine braking force will 
be increased according to the 
driving conditions to more effi-
ciently charge the hybrid bat-
tery (traction battery) after the 
accelerator pedal is released.

-------------------------------------------------------------------------------------------------------------------------------------------------------------

87

2-1. Plug-in hybrid system

2

Plug

-in hyb

rid system

The illustration is an example for explanation and may differ from the actual 
item.

Caution label

High voltage cables (orange) 

Power control unit

DC/DC converter

Rear electric motor (traction motor)

AC charging inlet

Service plug

Onboard traction battery charger

Hybrid battery (traction battery)

Plug-in hybrid system precautions

Take care when handling the hybrid system, as it contains a 
high voltage system (about 650V at maximum) as well as 
parts that become extremely hot when the hybrid system is 
operating. Obey the caution labels attached to the vehicle.

System components

A

B

C

D

E

F

G

H

I

-------------------------------------------------------------------------------------------------------------------------------------------------------------

88

2-1. Plug-in hybrid system

Front electric motor (traction motor)

Air conditioning compressor

Junction box

Running out of fuel

When the vehicle has run out of fuel 

and the hybrid system cannot be 

started, refuel the vehicle with at 

least enough gasoline to make the 

low fuel level warning light (

P.518) 

go off. If there is only a small 

amount of fuel, the hybrid system 

may not be able to start. (The stan-

dard amount of fuel is about 2.3 gal. 

[8.8 L, 1.9 Imp.gal.], when the vehi-

cle is on a level surface. This value 

may vary when the vehicle is on a 

slope. Add extra fuel when the vehi-

cle is inclined.)

Electromagnetic waves

High voltage parts and cables on 

the hybrid vehicles incorporate 

electromagnetic shielding, and 

therefore emit approximately the 

same amount of electromagnetic 

waves as conventional gasoline 

powered vehicles or home elec-

tronic appliances.

Your vehicle may cause sound 

interference in some third party-

produced radio parts.

Effect of magnetic forces

If objects that generate strong mag-

netic forces, such as large speak-

ers, are placed inside the luggage 

compartment or installed nearby, 

the generated magnetic forces may 

negatively affect the hybrid system.

Hybrid battery (traction battery) 

(lithium-ion battery)

The hybrid battery (traction battery) 

has a limited service life.
The hybrid battery (traction battery) 

capacity (the ability to hold a 

charge) reduces with time and use 

in the same way as other recharge-

able batteries. The extent at which 

capacity reduces changes drasti-

cally depending on the environment 

(ambient temperature, etc.) and 

usage conditions, such as how the 

vehicle is driven and how the hybrid 

battery (traction battery) is charged. 

This is a natural characteristic of 

lithium-ion batteries, and is not a 

malfunction. Also, even though the 

EV driving range becomes shorter 

when the hybrid battery (traction 

battery) capacity reduces, vehicle 

performance does not significantly 

become worse.
In order to reduce the possibility of 

the capacity reducing, follow the 

directions listed on P.121, “Capacity 

reduction of the hybrid battery (trac-

tion battery)”.

Starting the hybrid system in an 

extremely cold environment

When the hybrid battery (traction 

battery) is extremely cold (below 

approximately -22°F [-30°C]) under 

the influence of the outside tem-

perature, it may not be possible to 

start the hybrid system. In this case, 

try to start the hybrid system again 

after the temperature of the hybrid 

battery increases due to the outside 

temperature increase etc.

J

K

L

WARNING

High voltage precautions

The vehicle has high voltage DC 

and AC systems as well as a 12-

volt system. DC and AC high volt-

age is very dangerous and can 

cause severe burns and electric 

shock that may result in death or 

serious injury.

-------------------------------------------------------------------------------------------------------------------------------------------------------------

89

2-1. Plug-in hybrid system

2

Plug

-in hyb

rid system

WARNING

Never touch, disassemble, 

remove or replace the high volt-

age parts, cables or their con-

nectors.

The hybrid system will become 

hot after starting as the system 

uses high voltage. Be careful of 

both the high voltage and the 

high temperature, and always 

obey the caution labels 

attached to the vehicle.

Never try to open the service 

plug access hole located in the 

luggage compartment. The ser-

vice plug is used only when the 

vehicle is serviced and is sub-

ject to high voltage.

Road accident cautions

Observe the following precautions 

to reduce the risk of death or seri-

ous injury:

Pull your vehicle off the road, 

apply the parking brake, shift 

the shift lever to P, and turn the 

hybrid system off.

Do not touch the high voltage 

parts, cables and connectors.

If electric wires are exposed 

inside or outside your vehicle, 

an electric shock may occur. 

Never touch exposed electric 

wires.

Do not touch the battery if liquid 

is leaking from or adhering to it. 

If electrolyte (carbonic-based 

organic electrolyte) from the 

hybrid battery (traction battery) 

comes into contact with the 

eyes or skin, it could cause 

blindness or skin wounds. In the 

unlikely event that it comes into 

contact with the eyes or skin, 

wash it off immediately with a 

large amount of water, and seek 

immediate medical attention.

If electrolyte is leaking from the 

hybrid battery (traction battery), 

do not approach the vehicle. 

Even in the unlikely event that 

the hybrid battery (traction bat-

tery) is damaged, the internal 

construction of the battery will 

prevent a large amount of elec-

trolyte from leaking out. How-

ever, any electrolyte that does 

leak out will give off a vapor. 

This vapor is an irritant to skin 

and eyes and could cause acute 

poisoning if inhaled.

Do not bring burning or high-

temperature items close to the 

electrolyte. The electrolyte may 

ignite and cause a fire.

If a fire occurs in the hybrid 

vehicle, leave the vehicle as 

soon as possible. Never use a 

fire extinguisher that is not 

meant for electric fires. Using 

even a small amount of water 

may be dangerous.

If your vehicle needs to be 

towed, do so with front wheels 

raised. If the wheels connected 

to the electric motor (traction 

motor) are on the ground when 

towing, the motor may continue 

to generate electricity. This may 

cause a fire. (

P.507)

-------------------------------------------------------------------------------------------------------------------------------------------------------------

90

2-1. Plug-in hybrid system

WARNING

Carefully inspect the ground 

under the vehicle. If you find 

that liquid has leaked onto the 

ground, the fuel system may 

have been damaged. Leave the 

vehicle as soon as possible.

Hybrid battery (traction bat-

tery)

Your vehicle contains a sealed 

lithium-ion battery.

Never resell, hand over or mod-

ify the hybrid battery. To prevent 

accidents, hybrid batteries that 

have been removed from a dis-

posed vehicle are collected 

through Toyota dealer. Do not 

dispose of the battery yourself. 

Unless the battery is properly 

collected, the following may 

occur, resulting in death or seri-

ous injury:

• The hybrid battery may be ille-

gally disposed of or dumped, 

and it is hazardous to the envi-

ronment or someone may touch 

a high voltage part, resulting in 

an electric shock.

• The hybrid battery is intended to 

be used exclusively with your 

hybrid vehicle. If the hybrid bat-

tery is used outside of your 

vehicle or modified in any way, 

accidents such as electric 

shock, heat generation, smoke 

generation, an explosion and 

electrolyte leakage may occur. 

When reselling or handing over 

your vehicle, the possibility of 

an accident is extremely high 

because the person receiving 

the vehicle may not be aware of 

these dangers.

If your vehicle is disposed of 

without the hybrid battery hav-

ing been removed, there is a 

danger of serious electric shock 

if high voltage parts, cables and 

their connectors are touched. In 

the event that your vehicle must 

be disposed of, the hybrid bat-

tery must be disposed of by 

your Toyota dealer or a qualified 

service shop. If the hybrid bat-

tery is not disposed of properly, 

it may cause electric shock that 

can result in death or serious 

injury.

Caution while driving

If the vehicle under floor area 

receives strong shock or impact 

while driving, stop the vehicle in a 

safe area and check around the 

bottom of the vehicle. If there is 

damage to the hybrid battery 

(traction battery) or liquid leakage, 

it may lead to a vehicle fire, etc. 

Do not touch the vehicle and 

immediately contact your Toyota 

dealer.

Modifications

Do not modify the vehicle to make 

the height lower.
It is easier for the hybrid battery 

(traction battery) in the under floor 

area to come in contact with the 

ground when the vehicle is low-

ered. If the hybrid battery (traction 

battery) is damaged, a vehicle fire 

may occur which could lead to 

death or serious injury.

-------------------------------------------------------------------------------------------------------------------------------------------------------------

91

2-1. Plug-in hybrid system

2

Plug

-in hyb

rid system

There is an air intake vent under 
the rear seat for cooling the 
DC/DC converter.
Blocking the air intake vent may 
prevent the plug-in hybrid sys-
tem from operating properly.

When a certain level of impact is 

NOTICE

Notice about fuel

For plug-in hybrid vehicles, fuel 

may remain in the tank for a 

long time and undergo changes 

in quality depending on the how 

the vehicle is used. Refuel at 

least 5.3 gal. (20 L, 4.4 Imp.gal.) 

of fuel every 12 months (refuel a 

total of at least 5.3 gal. [20 L, 

4.4 Imp.gal.] over a 12-month 

period), as this may affect com-

ponents of the fuel system or 

the gasoline engine.

If the vehicle has not been refu-

eled for a certain amount of time 

and it is possible that the quality 

of the fuel remaining in the tank 

has changed, “No New Fuel has 

been Added Recently Please 

refuel” is displayed on the multi-

information display when the 

power switch is turned to ON. If 

the message is displayed, refuel 

the vehicle immediately.

DC/DC converter air 
intake vent

NOTICE

DC/DC converter air intake 

vent

Make sure not to block the air 

intake vent with anything, such 

as a seat cover, plastic cover, or 

luggage. Blocking the air intake 

vent may prevent the plug-in 

hybrid system from operating 

properly.

When dust etc. has accumu-

lated in the air intake vent, clean 

it with a vacuum cleaner to pre-

vent the vent from clogging.

Do not wet or allow foreign sub-

stances to enter the air vent as 

this may cause a short circuit 

and damage the DC/DC con-

verter.

Do not carry large amounts of 

water such as water cooler bot-

tles in the vehicle. If water spills 

onto the DC/DC converter, the 

converter may be damaged. 

Have the vehicle inspected by 

your Toyota dealer.

A filter is installed to the air 

intake vent. When the filter 

remains noticeably dirty even 

after cleaning the air intake 

vent, filter cleaning or replace-

ment is recommended. When 

cleaning the filter, refer to 

P.486.

If “Maintenance required for 

DCDC converter cooling parts 

See Owner’s Manual” is shown 

on the multi-information dis-

play, the air intake vent and fil-

ter may be clogged. Refer to 

P.486 for information on how to 

clean the air intake vent.

Emergency shut off sys-
tem

-------------------------------------------------------------------------------------------------------------------------------------------------------------

92

2-1. Plug-in hybrid system

detected by the impact sensor, 
the emergency shut off system 
blocks off the high voltage cur-
rent and stops the fuel pump to 
minimize the risk of electrocu-
tion and fuel leakage. 
If the emergency shut off system 
activates, your vehicle will not 
restart. To restart the hybrid sys-
tem, contact your Toyota dealer.

A message is automatically dis-
played when a malfunction 
occurs in the hybrid system or 
an improper operation is 
attempted.
If a warning message is shown 
on the multi-information display, 
read the message and follow the 
instructions.

If a warning light comes on, a 

warning message is displayed 

or the 12-volt battery is discon-

nected

The hybrid system may not start. In 

that case, try to start the system 

again. If the “READY” indicator does 

not come on, contact your Toyota 

dealer.

Primarily using EV mode and 
AUTO EV/HV mode when driv-
ing in cities and using HV mode 
when driving on highways (or 
freeways) can help conserve 
fuel and electricity. (

P.78)

When using Eco drive mode, the 
torque corresponding to the 
accelerator pedal depression 
amount can be generated more 
smoothly than it is in normal 
conditions. In addition, the oper-
ation of the air conditioning sys-
tem (heating/cooling) will be 
minimized, improving fuel and 
electricity economy. (

P.377)

Eco-friendly driving is possible 
by keeping the Hybrid System 
Indicator within Eco area. 
(

P.167)

Hybrid warning message

Plug-in hybrid vehicle 

driving tips

For economical and ecolog-
ical driving, pay attention to 
the following points:

Using EV mode, AUTO 
EV/HV mode and HV 
mode effectively

Using Eco drive mode

Use of Hybrid System 
Indicator

-------------------------------------------------------------------------------------------------------------------------------------------------------------

93

2-1. Plug-in hybrid system

2

Plug

-in hyb

rid system

Shift the shift lever to D when 
stopped at a traffic light, or driv-
ing in heavy traffic etc. Shift the 
shift lever to P when parking. 
When using the N, there is no 
positive effect on fuel consump-
tion. In the N, the gasoline 
engine operates but electricity 
cannot be generated. Also, 
when using the air conditioning 
system, etc., the hybrid battery 
(traction battery) power is con-
sumed.

Drive your vehicle smoothly. 
Avoid abrupt acceleration and 
deceleration. Gradual accel-
eration and deceleration will 
make more effective use of 
the electric motor (traction 
motor) without having to use 
gasoline engine power.

Avoid repeated acceleration. 
Repeated acceleration con-
sumes hybrid battery (trac-
tion battery) power, resulting 
in poor fuel consumption. Bat-
tery power can be restored by 
driving with the accelerator 
pedal slightly released.

Make sure to operate the brakes 
gently and a timely manner. A 

greater amount of electrical 
energy can be regenerated 
when slowing down.

Repeated acceleration and 
deceleration, as well as long 
waits at traffic lights, will lead to 
high fuel and electricity con-
sumption. Check traffic reports 
before leaving and avoid delays 
as much as possible. When driv-
ing in a traffic jam, gently 
release the brake pedal to allow 
the vehicle to move forward 
slightly while avoiding overuse 
of the accelerator pedal. Doing 
so can help control excessive 
electricity and fuel consumption.

Control and maintain the vehi-
cle at a constant speed. 
Before stopping at a toll booth 
or similar, allow plenty of time 
to release the accelerator and 
gently apply the brakes. A 
greater amount of electrical 
energy can be regenerated 
when slowing down.

Electricity consumption will 
increase significantly when 
driving at high speeds in EV 
mode or AUTO EV/HV mode. 
If there will be a long distance 
to the next external charging 
point after leaving a freeway, 
it is recommended to drive in 

Shift lever operation

Accelerator pedal/brake 
pedal operation

When braking

Delays

Highway driving

-------------------------------------------------------------------------------------------------------------------------------------------------------------

94

2-1. Plug-in hybrid system

HV mode while on the free-
way and change to EV mode 
or AUTO EV/HV mode after 
leaving the freeway. (

P.78)

Turn the “A/C” switch off 
when it is not needed. Doing 
so can help reduce excessive 
electricity and fuel consump-
tion.

In summer: When the ambient tem-
perature is high, use the recircu-
lated air mode. Doing so will help to 
reduce the burden on the air condi-
tioning system and reduce electric-
ity and fuel consumption as well.
In winter: Avoid excessive and 
unnecessary use of the heater. 
Usage of the heated steering wheel 
(if equipped) (

P.407) and seat 

heaters (

P.408) are effective.

Using the Remote Air Condi-
tioning System (

P.405) 

while the AC charging cable is 
connected to the vehicle can 
reduce electricity consump-
tion immediately after starting 
off by operating air condition-
ing mainly using electricity 
from an external power 
source.

When setting the charging 
schedule, setting the charging 
mode to “Departure” and “Cli-
mate Prep” to on can reduce 
electricity consumption imme-
diately after starting off by 
operating air conditioning 

before charging is completed. 
(

P.130)

Make sure to check the tire infla-
tion pressure frequently. If there 
is improper tire inflation pres-
sure in the tires, the EV driving 
range will become shorter, and 
fuel consumption when in HV 
mode will increase.
Also, as snow tires can cause 
large amounts of friction, their 
use on dry roads can lead to 
increased fuel and electricity 
consumption.

Carrying heavy luggage will lead 
to poor fuel economy. Avoid car-
rying unnecessary luggage. 
Installing a large roof rack will 
also cause poor fuel economy.

Since the gasoline engine starts 
up and cuts out automatically, 
warming up is not necessary.

Air conditioning

Checking tire inflation 
pressure

Luggage

Warming up before driv-
ing

-------------------------------------------------------------------------------------------------------------------------------------------------------------

95

2-1. Plug-in hybrid system

2

Plug

-in hyb

rid system

The value displayed on the SOC 
(State of Charge) gauge 
(

P.165) is estimated from the 

following information.

The amount of hybrid battery 
(traction battery) charge cur-
rently remaining

The electricity consumption 
(the estimated distance that 
EV driving is possible per unit 
of electrical energy) based on 
the recorded value

Past air conditioning system 
electricity consumption 
amount

The electricity consumption var-
ies depending on how the vehi-
cle is driven. The vehicle 

automatically records the elec-
tricity consumption when being 
charged and uses the electricity 
consumption for estimating the 
EV driving range. Therefore, the 
EV driving range displayed 
when the hybrid battery (traction 
battery) is fully charged may dif-
fer from the previous EV driving 
range depending on how the 
vehicle was driven.
The EV driving range may 
change significantly with each 
charging until the electricity con-
sumption based on the recorded 
value is stable (for approxi-
mately the first month or two). 
However, this does not indicate 
a malfunction.
When the air conditioning sys-
tem is turned on, the EV driving 
range (with using the air condi-
tioning system) is estimated 
based on the past air condition-
ing electricity consumption 
amount considering that the 
electricity consumption may 
become higher.

The distance that EV driving is 
possible varies significantly 
depending on how the vehicle is 
driven, road conditions, the 
weather, the outside tempera-
ture, usage conditions of electri-
cal components and the number 

EV driving range

The EV driving range dis-
played on the multi-informa-
tion display shows the 
reference distance that EV 
driving (driving using only 
the electric motor) is possi-
ble, and the actual distance 
that can be driven may dif-
fer from that displayed.

Even if the EV driving range is 
displayed, EV driving may be 
canceled and both gasoline 
engine and electric motor are 
used depending on the situa-
tion. (

P.82)

Displayed value

Tips for extending the EV 
driving range

-------------------------------------------------------------------------------------------------------------------------------------------------------------

96

2-1. Plug-in hybrid system

of occupants.
The distance that EV driving is 
possible can be extended if the 
following is performed:

When starting off, depress 
the accelerator pedal 
smoothly to accelerate

As a guide, accelerate up to 
approximately 12mph (20 km/h) 
in the first 5 seconds.
Electrical and fuel efficiency can 
be improved just by using the 
ECO Accelerator Guidance dis-
played on the multi-information 
display and taking care to start 
off gently. (

P.173)

When the driving mode is set to 
Eco drive mode, depressing the 
accelerator pedal generates 
smooth torque that makes it easier 
to operate the accelerator gently.
At the same time, the air condition-
ing control is switched to eco air 
conditioning mode (

P.397) to 

reduce the strength of the air condi-
tioning operation.

Maintain sufficient vehicle-
to-vehicle distance and do 
not accelerate or decelerate 
unnecessarily

Try to maintain a fixed speed 
while driving. Driving at a short 
vehicle-to-vehicle distance will 
result in repeating wasteful 
acceleration and deceleration, 
which will worsen the electrical 
and fuel efficiency.

Release the accelerator 
pedal early before stopping 
the vehicle, such as at a 
traffic light

The regenerative brake will 
operate to convert the kinetic 
energy of the vehicle into electri-
cal energy, which will charge the 
hybrid battery (traction battery).
The regeneration status can be 
checked from the Hybrid Sys-
tem Indicator. (

P.167)

When the brake pedal is 
depressed lightly during decel-
eration, the regeneration 
amount increases, enabling 
more electrical energy to be 
recovered.

If the brake pedal is depressed too 
strongly, the recovered amount 
indicator will reach the maximum 
level and the upper limit of the 
recoverable energy will be 
exceeded. Therefore, be sure to 
operate the brake pedal early.

Use the air conditioning 
system appropriately, and 
also utilize the heated steer-
ing wheel (if equipped) and 
seat heaters

In EV mode, the vehicle is 
cooled and heated by electrical 
energy. (Except in extremely 
cold temperatures of approxi-
mately 14°F (-10°C) or less.)
Preventing excessive cooling or 
heating of the vehicle will reduce 
power consumption and 
improve electrical efficiency.

-------------------------------------------------------------------------------------------------------------------------------------------------------------

97

2-1. Plug-in hybrid system

2

Plug

-in hyb

rid system

When eco air conditioning mode 
is used, the air conditioning con-
trol is switched automatically to 
a lower setting. (

P.397)

The heated steering wheel (if 
equipped) and seat heaters are 
efficient heating device that 
directly warm the body using 
less electric power.

When used together with the air 
conditioning system, a low tem-
perature setting can be used to 
improve electrical and fuel effi-
ciency.

Check the tire pressure

If the tire pressure is lower than 
the specified value, it will 
worsen the electrical and fuel 
efficiency.

A pressure level 7 psi (50 kPa, 0.5 
kgf/cm

2

 or bar) lower than the spec-

ified value will cause a worsening of 
several percentage points.

When driving on highways, 
use the EV/HV mode selec-
tion switch to drive in HV 
mode

The power consumption will 
increase significantly if the vehi-
cle is driven in EV mode on 
highways.

Do not load unnecessary 
objects in the vehicle

Driving with objects weighing 
220 lb. (100 kg) in the vehicle 
will worsen the electrical and 
fuel efficiency by approximately 
3%.

Air resistance also greatly 
affects electrical and fuel effi-
ciency. Remove any exterior 
accessories such as a roof lug-
gage carrier when they are not 
being used.
The running resistance of snow 
tires is high and they will worsen 
electrical and fuel efficiency. 
Replace them with standard 
tires as soon as they are no lon-
ger needed.

Know your vehicle’s electri-
cal and fuel efficiency

If you know your vehicle’s daily 
electrical and fuel efficiency, you 
will understand the benefits of 
Eco drive.
Use the Power Consump-
tion/Fuel Economy, ECO Accel-
erator Guidance/“Eco Score” 
and other data displayed on the 
multi-information display.

The following indicate that 
charging has been carried out 
properly.

The charging indicator of the 
charging port turns off

“Charging Complete” is dis-
played on the multi-informa-
tion display when a door is 
opened with the power switch 
off (

P.119)

Regardless of the type of power 

Display when charging is 
completed

-------------------------------------------------------------------------------------------------------------------------------------------------------------

98

2-1. Plug-in hybrid system

source or whether the charging 
schedule function is used, 
charging is completed if the 
above can be confirmed.

Charging-related messages: 

P.152

-------------------------------------------------------------------------------------------------------------------------------------------------------------

99

2-2. Charging

2

Plug

-in hyb

rid system

2-2.Charging

AC charging inlet

AC charging inlet light

Charging indicator (

P.100)

AC charging inlet cap

Charging port lid (

P.100)

AC charging cable (

P.102)

Charging port

Charging equipment

This vehicle features equipment for connecting to an external 
power source.

Charging equipment and names

A

B

C

D

E

F

G

-------------------------------------------------------------------------------------------------------------------------------------------------------------

100

2-2. Charging

Opening the charging port 
lid

Press the central rear edge of 
the charging port lid (the loca-
tion shown in the illustration) 
with the doors unlocked.

Push and take your hand away to 
slightly open the charging port lid. 
Then open the lid fully by hand.

Closing the charging port 
lid

Close the charging port lid and 
press the central rear edge of 
the charging port lid (the loca-
tion shown in the illustration).

When the doors are locked, the 
charging port lid is also locked. 
(

P.107)

The illumination/flashing pattern changes to inform the user of the 
charging status in the following ways.

Opening and closing the 
charging port lid

Charging indicator

-------------------------------------------------------------------------------------------------------------------------------------------------------------

101

2-2. Charging

2

Plug

-in hyb

rid system

*

: Flashes for a certain period of time, and then turns off.

Charging indicator of the charging port

When a system malfunction occurs while charging or using the Remote Air 

Conditioning System, the charging indicator rapidly flashes for a certain 

period of time, and then turns off. 
If this occurs, when a door is opened with the power switch off, a message 

is displayed on the multi-information display. When a message is displayed, 

follow the instructions displayed on the screen.

Illumination/flashing pat-

tern

Vehicle condition

Illuminated

Charging is in progress

Charging is possible

“Battery Heater” (

P.115) is operating

“Battery Cooler” (

P.116) is operating

Flashing (normally)

*

When charging schedule is registered (

P.130) 

and AC charging cable is connected to vehicle

Rapidly flashing

*

When charging cannot be carried out due to 
malfunction in a power source or the vehicle etc. 
(

P.149)

Not illuminated

Charging connector is not inserted into AC 
charging inlet

When the charging schedule (

P.130) is on 

standby

When charging is completed

-------------------------------------------------------------------------------------------------------------------------------------------------------------

102

2-2. Charging

AC charging cable

The function, correct oper-
ating procedure, etc. of the 
AC charging cable are 
explained.

WARNING

When using the AC charging 

cable and CCID (Charging 

Circuit Interrupting Device)

Observe the following precau-

tions.
Failure to do so may cause an 

unexpected accident, resulting in 

death or serious injury.

Do not attempt to disassemble 

or repair the AC charging cable, 

charging connector, plug or 

CCID (Charging Circuit Inter-

rupting Device). 

If a problem arises with the AC 

charging cable or the CCID 

(Charging Circuit Interrupting 

Device), stop charging immedi-

ately and contact your Toyota 

dealer.

Do not subject the AC charging 

cable, charging connector, plug 

or CCID (Charging Circuit Inter-

rupting Device) to strong force 

or impact.

Do not apply excessive force to 

the AC charging cable by force-

fully folding, twisting, pulling or 

dragging the AC charging cable.

Do not damage the AC charging 

cable with sharp objects.

Do not fold the charging con-

nector or plug or insert foreign 

objects into them.

Do not put the charging connec-

tor and plug into water.

Do not bring the AC charging 

cable to a high-temperature 

item such as a heating device.

Do not apply a load to the AC 

charging cable and plug-cord 

(such as wrapping the AC 

charging cable around the CCID 

(Charging Circuit Interrupting 

Device) and the charging con-

nector).

Do not use or leave the AC 

charging cable in situations 

where a load is applied to the 

outlet and the plug (such as 

when the CCID (Charging Cir-

cuit Interrupting Device) is 

hanging in the air without con-

tacting the ground).

NOTICE

Precautions when handling 

AC charging cable

Make sure to observe the follow-

ing precautions. Failure to 

observe these precautions may 

result in damage to the AC 

charging cable and AC charging 

inlet.

Insert the charging connector 

straight into the AC charging 

inlet.

After inserting the charging con-

nector, do not apply excessive 

force to or twist the connector. 

Also, do not lean on the connec-

tor or hang any objects from it.

Do not step on or trip over the 

AC charging cable.

Before removing the charging 

connector, make sure that it is 

unlocked. (

P.107)

After removing the AC charging 

cable, promptly return it to its 

proper location.

-------------------------------------------------------------------------------------------------------------------------------------------------------------

103

2-2. Charging

2

Plug

-in hyb

rid system

Charging connector

Latch release button

Plug

NOTICE

After removing the charging 

connector, securely install the 

AC charging inlet cap.

When using the AC charging 

cable and related parts

P.123

Precautions for low tempera-

tures

In low temperatures, the AC 

charging cable and plug-cord may 

become hard.
Therefore, make sure to not apply 

excessive force when they are 

hard. If excessive force is applied 

to the hardened AC charging 

cable and plug-cord, they may be 

damaged.

The names of each part of the AC charging cable

A

B

C

-------------------------------------------------------------------------------------------------------------------------------------------------------------

104

2-2. Charging

Plug-cord

CCID (Charging Circuit Interrupting Device)

Power indicator (

P.104)

Charging indicator (

P.104)

Error warning indicator (

P.104)

The CCID (Charging Circuit 
Interrupting Device) has the fol-
lowing safety features.

Electrical leakage detec-
tion function

If an electrical leakage is 
detected during charging, the 
power source will be automati-
cally interrupted, thus prevent-
ing fires or electrical shocks 
caused by electrical leakage.

If the power source is interrupted, 
the error warning indicator flashes.
If the power source is interrupted: 

P.105

Automatic check function

This is an automatic system 
check that is run before 
charging begins to check for 
problems in the operation of the 
electrical leakage detection 
function.

If a malfunction is found in the elec-
trical leakage detection function as 
a result of the check, the error 
warning indicator flashes to inform 
the user. (

P.105)

Temperature detection 
function

A temperature detection func-
tion is equipped to the plug. 
While charging, if heat is gener-
ated due to looseness on the 
outlet side etc., this function 
suppresses heat by controlling 
the charging current.

Conditions for supplying 
current to the vehicle

The CCID (Charging Circuit 
Interrupting Device) is designed 
to prevent electrical current from 
being supplied to the charging 
connector when it is not con-
nected to the vehicle, even if the 
plug is inserted into the outlet.

Indicator operation

3 indicators are used to indicate 
the following conditions.

D

E

F

G

H

Safety functions

CCID (Charging Circuit 
Interrupting Device) indi-
cators

-------------------------------------------------------------------------------------------------------------------------------------------------------------

105

2-2. Charging

2

Plug

-in hyb

rid system

Power indicator

Illuminates when electricity is flow-

ing to the CCID (Charging Circuit 
Interrupting Device).

Charging indicator

Illuminates when charging is in 
progress.

Error warning indicator

Flashes when there is an electrical 
leakage or when a malfunction 
occurs in the CCID (Charging Cir-
cuit Interrupting Device).

When a malfunction occurs during charging

The indicators on the CCID (Charging Circuit Interrupting Device) 
use a combination of different statuses (not illuminated, illuminated 
or flashing) to inform the user of internal malfunctions.

When the error warning indicator is illuminated or flashing, temporarily 
remove the plug from the outlet and then reconnect it to check if the error 
indicator turns off.
If the error warning indicator turns off, charging is now possible.
If it does not turn off, perform the correction procedure in the following 
chart.

A

B

C

Status

Power indi-

cator

Error warning 

indicator

Cause/Correction procedure

Charging sys-
tem error

Not illumi-

nated

Not illumi-

nated or illu-

minated

An electrical leakage is 
detected and charging is 
canceled, or there is a mal-
function in the AC charging 
cable.

Consult your Toyota 
dealer

Illuminated

Flashes

Plug tempera-
ture detection 
malfunction

Flashes

Flashes

There is a malfunction in the 
plug temperature detection 
part.

*1

Consult your Toyota 
dealer

-------------------------------------------------------------------------------------------------------------------------------------------------------------

106

2-2. Charging

*1

:When this occurs, charging is carried out without a limited charging cur-

rent.

*2

:When this occurs, charging is carried out with a limited charging current.

For safety, inspect the AC 
charging cable on a routine 
basis.

Plug tempera-
ture increase 
detection

Flashes

Not illumi-

nated

An increase in the tempera-
ture of the plug is detected 
due to an improper connec-
tion between the outlet and 
plug.

*2

Check that the plug is 
securely connected to 
the outlet

AC charging 
cable life span 
notice

Illuminated

Flashes

The number of charges 
using the AC charging cable 
is nearing the end of its 
usable life span.

Consult your Toyota 
dealer

AC charging 
cable life span

Illuminated

Illuminated

The number of charges 
using the AC charging cable 
has exceeded its usable 
number of charges.

Consult your Toyota 
dealer

Status

Power indi-

cator

Error warning 

indicator

Cause/Correction procedure

Inspecting and maintain-
ing the AC charging cable

WARNING

Routine inspection

Check the following points regu-

larly.
Failure to do so may cause an 

unexpected accident, resulting in 

death or serious injury.

The AC charging cable, plug, 

charging connector, CCID 

(Charging Circuit Interrupting 

Device) etc. have not been 

damaged.

The outlet has not been dam-

aged.

-------------------------------------------------------------------------------------------------------------------------------------------------------------

107

2-2. Charging

2

Plug

-in hyb

rid system

Unlocking the charging port 
lid

1

Unlock the doors using the 
smart key system or wireless 
remote control.

2

Press the central rear edge 
of the charging port lid (the 

WARNING

The plug can be securely 

inserted into the outlet.

The plug does not get extremely 

hot during use.

The tip of the plug has not been 

deformed.

The plug is not dirtied by dust 

etc.

Remove the plug from the outlet 
before inspecting it. If any abnor-
malities are found in the AC 
charging cable as a result of the 
inspection, immediately stop use 
and consult your Toyota dealer.

Maintaining the AC charging 

cable

When the AC charging cable is 

dirty, first remove the dirt with a 

hard, wringed cloth, and then 

wipe the cable with a dry cloth.
However, never wash it with 

water. If the AC charging cable is 

washed with water, fire or electric 

shock may occur during charging, 

possibly resulting in death or seri-

ous injury.

When not using the AC 

charging cable for a long time

Remove the plug from the outlet. 

Dust could accumulate on the 

plug or in the outlet, possibly 

causing overheating which could 

lead to a fire.
Also, keep the cable in a place 

free from moisture.

Locking and unlock-

ing the charging port 

lid and charging con-

nector

The charging port lid and 
charging connector can be 
locked/unlocked by the fol-
lowing procedures.

Using the smart key sys-
tem

*

P.198

Using the wireless remote 
control

*

P.196

*

: If the smart key system or the 

wireless remote control does 
not operate properly, use the 
mechanical key. (

P.537)

Locking and unlocking 
the charging port lid

-------------------------------------------------------------------------------------------------------------------------------------------------------------

108

2-2. Charging

location shown in the illustra-
tion) and open it.

Locking the charging port 
lid

The charging port lid will be 
locked when the lid is closed 
and the doors are locked using 
the smart key system or wire-
less remote control.

Security feature

If a door or charging port lid is not 

opened within approximately 60 

seconds after the vehicle is 

unlocked, the security feature auto-

matically locks the lid again when 

the doors are automatically locked. 

(

P.199)

Locking the charging port lid

If the charging port lid is closed after 

the doors are locked, the lid will not 

be locked. In this case, close the lid 

and then lock the doors again.

If the charging port lid does not 

open

If the charging port lid does not 

open when using the normal proce-

dure, it can be opened in an emer-

gency by performing the following 

steps.

1

Open the back door. (

P.205, 

207)

2

Pull the luggage side cover and 

remove it. (

P.467)

3

Hook a finger to the emergency 

release lever as shown in the 

illustration.

4

Move the emergency release 

lever in the direction shown in 
the illustration.

*

The charging port lid is unlocked 

and can be opened.

*

: Make sure to move in the direction 

shown in the illustration. Applying 
force in other directions may dam-
age the emergency release lever.

5

Press the central rear edge of 

the charging port lid to open it. 

(

P.100)

This unlocking method is a tempo-

rary correction procedure for emer-

gency use only. If the problem 

persists, have the vehicle inspected 

by your Toyota dealer immediately.

Locking the charging con-
nector

The charging connector will be 
automatically locked when 
inserting it into the AC charging 

Locking and unlocking 
the charging connector

-------------------------------------------------------------------------------------------------------------------------------------------------------------

109

2-2. Charging

2

Plug

-in hyb

rid system

inlet. (The setting can be 
changed: 

P.109)

Unlocking the charging 
connector

The charging connector will be 
unlocked when the doors are 
unlocked using the smart key 
system or wireless remote con-
trol.

Changing the charging con-
nector lock settings

The method for locking and 
unlocking the charging connec-
tor can be changed as follows 
on the 

 screen on the multi-

information display.

Refer to P.177 for details on how to 
change the settings.

*1

:The charging connector will be 

unlocked if power supply is inter-
rupted due to a power outage 

etc. after the charging connector 
is automatically locked.

*2

:The charging connector can be 

unlocked by similar operations to 
that of “Auto Lock” (Default set-
ting).

Charging connector lock func-

tion

The charging connector lock func-

tion does not guarantee that theft of 

the AC charging cable will be pre-

vented, and is not necessarily effec-

tive for all mischiefs.

Unlocking the charging connec-

tor using the smart key system

If the charging connector is locked 

while the doors are unlocked, lock 

and then unlock the doors to unlock 

the charging connector.

Security function for unlocking

If the charging connector is not 

removed within approximately 30 

seconds after the vehicle is 

unlocked, the security function auto-

matically locks the connector again.

Changing the charging connec-

tor lock settings

The charging connector lock set-

tings cannot be changed when the 

AC charging cable is connected to 

the vehicle.

When the charging connector 

cannot be inserted into the AC 

charging inlet

Check that the connector lock pin is 

not lowered.
If the connector lock pin is lowered, 
the connector lock is operating. 
Unlock the doors using the smart 
key system or wireless remote con-
trol and unlock the charging connec-
tor lock and check that the 
connector lock pin is not lowered.

Setting

Operation description

“Auto 
Lock” 
(Default 
setting)

The charging connec-
tor is automatically 
locked when the 
charging connector is 
connected.

“Auto Lock 
& Unlock”

The charging connec-
tor is automatically 
locked when the 
charging connector is 
connected and auto-
matically unlocked 
when charging is com-
pleted.

*1, 2

“OFF”

Not using the charging 
connector locking sys-
tem

-------------------------------------------------------------------------------------------------------------------------------------------------------------

110

2-2. Charging

If the charging connector can-

not be unlocked

The charging connector can be 

unlocked by operating the emer-

gency release lever.

1

Open the back door. (

P.205, 

207)

2

Remove the cover as shown in 

the illustration.

3

Insert a hand from the lower side 

of the vehicle obliquely upward, 

and hook a finger to the emer-

gency release lever.

4

Move the emergency release 

lever in the direction shown in 
the illustration.

*

The charging connector is unlocked 

and can be removed.

*

: Make sure to move in the direction 

shown in the illustration. Applying 
force in other directions may dam-
age the emergency release lever.

5

Reinstall the cover to the its orig-

inal position.

This method is a temporary correc-

tion procedure for emergency use 

only. If the problem persists, have 

the vehicle inspected by your 

Toyota dealer immediately.
Do not operate the emergency 

release lever when the charging 

connector can be unlocked in the 

normal procedure.

WARNING

When connecting the 

charging connector to the AC 

charging inlet

Do not insert hand into the con-

nector lock portion. 

A hand may be caught in the 

connector lock pin, resulting in 

an injury.

-------------------------------------------------------------------------------------------------------------------------------------------------------------

111

2-2. Charging

2

Plug

-in hyb

rid system

Connect to an AC 120 V out-
let (NEMA 5-15R) with a 
Ground-Fault Circuit-Inter-
rupter (GFCI) and a circuit 
breaker. Use of a 15A individ-
ual circuit is strongly recom-
mended to ensure AC 
charging cable will operate 
properly.

When charging outdoors, 
make sure to connect to a 
weatherproof outlet that is 
certified for outdoor use. 
Checking Ground-Fault Cir-
cuit-Interrupter (GFCI) opera-
tion before its use is 
recommended.

WARNING

Be careful not to touch the 

charging port lid lock portion. 

When the connector lock oper-

ates, the charging port lid lock 

will also operate. The charging 

port lid lock pin may hit a hand, 

resulting in an injury.

NOTICE

When locking the charging 

connector

Observe the following precau-

tions. Failure to do so may cause 

a malfunction in the charging con-

nector locking system.

Check that the charging con-

nector is compatible with this 

vehicle. 

A charging connector of the dif-

ferent type or a charging con-

nector with damaged or 

deformed insertion part may not 

be locked.

Do not apply excessive force to 

the charging connector when 

the charging connector is 

locked. 

When removing the charging 

connector, make sure to unlock 

the charging connector.

Power sources that 

can be used

An external power source 
that fulfills the following cri-
teria is necessary for 
charging this vehicle. Con-
firm this before charging.

WARNING

Warnings for electrical faults

Make sure to observe the precau-

tions in this Owner’s Manual when 

charging the vehicle.
Failure to use a power source that 

fulfills the requirements, or failure 

to observe regulations while 

charging could lead to an acci-

dent, possibly resulting in death or 

serious injury.

Power sources

-------------------------------------------------------------------------------------------------------------------------------------------------------------

112

2-2. Charging

NEMA 5-15R outlet

The illustration is an example 
shown for demonstration pur-
poses, and may differ from the 
actual configuration.

The charging environment

For safe charging, the following 

charging equipment and settings 

are recommended.

Weatherproof outlet

When charging outdoors, connect 
the plug to a weatherproof outlet, 
and ensure that the plug remains 
waterproof while the plug is con-
nected.

Dedicated circuit

• To reduce the risk of fire, connect 

only to an at least 15A branch cir-

cuit with an over-current protec-

tion in accordance with the 

National Electric Code, 

ANSI/NFPA 70.

• To reduce the risk of electric 

shock when working with the plug, 

connect to a outlet with a Ground-

Fault Circuit-Interrupter (GFCI) or 

that has an Earth Leakage Circuit 

Breaker installed.

When your circuit breaker trips 

during charging

The upper limit of the charging cur-

rent can be changed in “Vehicle Set-

tings” on the multi-information 

display.

1

Press 

 or 

 of the meter 

control switches to select 

.

2

Press 

 or 

 of the meter 

control switches to select “Vehi-

cle Settings”, and then press and 
hold 

.

3

Press 

 or 

 of the meter 

control switches to select 

“Charging Settings”, and then 
press 

The “Charging Settings” screen 

will be displayed.

4

Press 

 or 

 of the meter 

control switches to select 

“Charging Current”, and then 
press 

The “Charging Current” screen 

will be displayed.

5

Press 

 or 

 of the meter 

control switches to select “16A”

*1


or “8A”, and then press 

The maximum charging current 

during charging will be restricted 
to 16A

*1

 or 8A.

*2

If the breaker still trips while 

charging, even after changing the 

upper limit of the charging current, 

check if the connected power 

source meets the specified charging 

conditions. (

P.111)

*1

:Vehicles with 6.6 kW onboard 

traction battery charger only

*2

:Restricting the charging current 

will lengthen the charging time.

Outlets that can be con-
nected

-------------------------------------------------------------------------------------------------------------------------------------------------------------

113

2-2. Charging

2

Plug

-in hyb

rid system

WARNING

Power sources precautions

Observe the following precau-

tions.
If you do not follow them, fire, 

electrical shock or damage may 

occur, possibly resulting in death 

or serious injury.

Connect to an AC 120 V outlet 

(NEMA 5-15R) with a Ground-

Fault Circuit-Interrupter (GFCI) 

and supplied by a circuit 

breaker per your local code. 

Use of a 15A individual circuit is 

strongly recommended.

Do not connect the AC charging 

cable to a multi-outlet adaptor, 

multi-plugs, or conversion plug.

Connecting the AC charging 

cable to an extension cord is 

strictly prohibited. The exten-

sion cord may overheat and 

does not contain a Ground-

Fault Circuit-Interrupter (GFCI).

The leakage detection function 

of the CCID (Charging Circuit 

Interrupting Device) (

P.104

may not operate correctly.

Do not connect to a power strip.

Use of a block heater for 

charging is prohibited.

Make sure to connect the 

charging connector and AC 

charging inlet directly. Do not 

connect a converting adaptor or 

extension cord between the 

charging connector and AC 

charging inlet.

-------------------------------------------------------------------------------------------------------------------------------------------------------------

114

2-2. Charging

Charging from an external 
power source (

P.123)

This is a charging method used 
when charging from an AC out-
let (120 V) with the AC charging 
cable equipped to the vehicle or 
charging at a public charging 
station.

The charging start time (or depar-
ture time) and day can be set to 
carry out charging using the 
charging schedule at the desired 
date and time. (

P.130)

Using the hybrid battery 
(traction battery) charge 
mode (

P.79)

The plug-in hybrid system can 
be switched to hybrid battery 
(traction battery) charge mode 
to charge the hybrid battery 
(traction battery) using electricity 
generated by gasoline engine 
operation.

The maximum charge amount in 
the hybrid battery (traction battery) 
charge mode is approximately 80% 
of the fully charged capacity for the 
charging from an external power 
source.

The time required to charge the 
hybrid battery (traction battery) 
differs according to the charging 
voltage and charging current.

Home power source

Charging voltage: AC 120 V

Charging current

*1

: 12A

Estimated charging time

*2, 3

Approximately 12 hours

Charging station (3.3 kW 
onboard traction battery char-
ger)

Charging voltage: AC 240 V

Charging current

*1

: 16A

Estimated charging time

*2, 3

Approximately 4 hours 30 minutes

Charging station (6.6 kW 
onboard traction battery char-
ger

*4

)

Charging voltage: AC 240 V

Charging current

*1

: 32A

Estimated charging time

*2, 3

Approximately 2 hours 30 minutes

*1

:This is the maximum value. Fur-

thermore, the upper limit of the 
charging current can be changed 
in “Vehicle Settings”. (

P.112)

*2

:The time required to complete 

charging depends on conditions 
such as the remaining charge of 
the hybrid battery (traction bat-
tery), the outside temperature 
and specifications of a charger 
(charging station).

*3

:When using “My Room Mode” 

Charging methods

The following methods can 
be used to charge the 
hybrid battery (traction bat-
tery).

Types of charging meth-
ods

Estimated charging time

-------------------------------------------------------------------------------------------------------------------------------------------------------------

115

2-2. Charging

2

Plug

-in hyb

rid system

(

P.144), the time required for 

charging to complete may be 
longer or the charging may not 
be completed.

*4

:If equipped

Charging time may increase

In the following situations, charging 

time may become longer than nor-

mal:

In very hot or very cold tempera-

tures.

When the hybrid battery (traction 

battery) becomes hot, such as 

immediately after high-load driv-

ing.

The vehicle is consuming a lot of 

electricity, for example, when the 

headlights are on etc.

When using “My Room Mode”. 

(

P.144)

There is a power outage during 

charging.

There is an interruption in the 

electrical supply.

There is a drop in the voltage of 

external power source.

The charge in the 12-volt battery 

is low, for example due to the 

vehicle being left unused for a 

long period of time.

The maximum charging current is 
set to 8A or 16A

*

 through “Vehicle 

Settings”. (

P.112)

When the “Battery Heater” oper-

ates. (

P.115)

When the “Battery Cooler” is oper-

ated before charging. (

P.116)

When the plug generates heat 

due to a loose outlet connection 

etc.

*

: Vehicles with 6.6 kW onboard 

traction battery charger only

Using a DC Charger

DC Chargers cannot be used with 

this vehicle.

Charging electricity

This vehicle can be charged up to 
approximately 3.3 kW or 6.6 kW

*

.

However, depending on the used 

charger or AC charging cable, 

charging electricity may be limited.

*

: Vehicles with 6.6 kW onboard 

traction battery charger only

This vehicle is equipped with 
several functions that are linked 
with charging.

“My Room Mode” (

P.144)

When the AC charging cable is 
connected to the vehicle, electri-
cal components such as the air 
conditioning system or audio 
system can be used using the 
external power source

*

.

*

: The power of the hybrid battery 

(traction battery) may be used 
depending on the situation.

“Battery Heater”

When the outside temperature 
is low and the AC charging 
cable is connected to the vehi-
cle, this function automatically 
warms the hybrid battery (trac-
tion battery) until it reaches or 
exceeds a certain temperature.
“Battery Heater” will operate 
when the “Battery Heater” of the 
“Charging Settings” on the multi-
information display is on. 
(

P.178)

Charging-linked functions

-------------------------------------------------------------------------------------------------------------------------------------------------------------

116

2-2. Charging

Hybrid battery (traction bat-
tery) warming control 
(Alaska and Canada only)

This control operates after the 
AC charging cable remains con-
nected to the vehicle for 3 days 
and “Battery Heater” automati-
cally stops. It automatically insu-
lates the hybrid battery (traction 
battery) in extremely low tem-
peratures.

This control stops 31 days 
after the AC charging cable is 
connected, even if it is still 
connected to the vehicle.

When this control operates, 
charging schedule settings 
are ignored and charging 
starts.

“Battery Cooler”

When the hybrid battery (trac-
tion battery) is hot and the AC 
charging cable is connected to 
the vehicle, this function cools 
the hybrid battery (traction bat-
tery) before charging is carried 
out.

“Battery Cooler” will operate 
when the “Battery Cooler” of 
the “Charging Settings” on the 
multi-information display is 
on. (

P.178)

When the charging voltage is 
120 V, the function does not 
operate.

Traction battery heating and 

cooling system (“Battery 

Heater” and “Battery Cooler”)

The system operates when the 

hybrid battery (traction battery) is 

below or above a certain tempera-

ture.

The system may operate when 

charging is not being performed.

When the charging schedule is 

used (

P.130), this function will 

operate according to the charging 

schedule.

“Battery Heater”

When “Battery Heater” is operat-

ing, the charging indicator illumi-

nates.

When the AC charging cable is 

removed from the vehicle or 

remains connected to the vehicle 

for approximately 3 days, the sys-

tem automatically stops.

When “Battery Heater” is operat-

ing during charging, the charging 

time may be longer than normal.

If the outside temperature 

becomes high while “Battery 

Heater” is operating, charging 

may complete earlier than the 

“Departure” time set. (

P.130)

When the following operations are 

performed while “Battery Heater” 

is operating, the hybrid battery 

(traction battery) heating opera-

tion stops.

• The shift lever is changed to any 

position other than P

• The Remote Air Conditioning Sys-

tem is operated (

P.405)

“Battery Heater” may operate 

even when the hybrid battery 

(traction battery) is fully charged 

depending on the temperature of 

the hybrid battery (traction bat-

tery).

• The remaining charge of the 

hybrid battery (traction battery) 

decreases when “Battery Heater” 

operates. The charging operation 

-------------------------------------------------------------------------------------------------------------------------------------------------------------

117

2-2. Charging

2

Plug

-in hyb

rid system

may start again to charge the 

hybrid battery (traction battery).

• “Charging Stopped Due to Pulled 

Charging Connector” may be 

shown when the charging connec-

tor is removed while recharging. 

(

P.152)

“Battery Cooler”

The charging indicator is illumi-

nated while “Battery Cooler” is on 

standby or operating.

“Battery Cooler” is implemented 

for a maximum of approximately 

30 minutes. However, when the 

“Departure” time is set (

P.130

and there is not sufficient time 

between the current time and the 

time that charging will complete, 

“Battery Cooler” operation time 

may become shorter.

When there is a small amount of 

remaining charge in the hybrid 

battery (traction battery), even if 

the hybrid battery (traction battery) 

is hot, “Battery Cooler” may not be 

implemented.

When the traction battery is 

almost completely charged, “Bat-

tery Cooler” may not be imple-

mented.

When the following operations are 

performed while “Battery Cooler” 

is operating, the hybrid battery 

(traction battery) cooling operation 

stops.

• The hood is opened

• The power switch is turned to any 

mode other than off

• The Remote Air Conditioning Sys-

tem is operated (

P.405)

• “Charge Now” is implemented 

(

P.131)

“Battery Cooler” uses the power of 

the hybrid battery (traction battery) 

and external power source.

• While “Battery Cooler” is operat-

ing, the amount of the remaining 

charge of the hybrid battery (trac-

tion battery) increases and 

decreases in a certain range, and 

does not increase as in normal 

charging.

• The operation of “Battery Cooler” 

is recognized as charging by a 

charger. The charger that calcu-

lates the fee according to charging 

time causes a charging fee.

-------------------------------------------------------------------------------------------------------------------------------------------------------------

118

2-2. Charging

To enable the use of EV mode 
or AUTO EV/HV mode, we rec-
ommend systematically 
charging the vehicle.

Before leaving home

In order to use EV mode or 
AUTO EV/HV mode, charge the 
hybrid battery (traction battery) 
at home before leaving.

The charging schedule function 
(

P.130) can be used to set the 

system to automatically fully charge 
the hybrid battery (traction battery) 
before your desired departure time. 
It is also possible to set the air con-
ditioning to make the interior in a 
comfortable state before your 
desired departure time.

At your destination

Use a public charging station to 

charge the hybrid battery (trac-
tion battery).
If there are no charging facilities 
at your destination, the hybrid 
battery (traction battery) can be 
charged using the hybrid battery 
(traction battery) charge mode. 
(

P.79)

*

*

: When using the hybrid battery 

(traction battery) charge mode 
while parked, make sure that no 
flammable objects are near the 
vehicle and the vehicle is parked 
in a well-ventilated area. (

P.80)

After returning home

In order to drive the next time, 
charge the hybrid battery (trac-
tion battery).

Settings the charging schedule 
allows you to charge the hybrid bat-
tery (traction battery) at the desired 
time such as late at night or early in 
the morning. Furthermore, the 
charging schedule can be set to 
automatically charge the hybrid bat-
tery (traction battery) every day or 
at the same time on certain days. 
(

P.130)

Charging tips

This section explains meth-
ods for using the charging 
function for this vehicle and 
checking information 
related to charging.

Systematically charging

-------------------------------------------------------------------------------------------------------------------------------------------------------------

119

2-2. Charging

2

Plug

-in hyb

rid system

Information related to charging 
is displayed and can be checked 
on the multi-information display.

While charging

When any door is opened during 
charging, the current charging 
condition and approximate time 
remaining until charging is com-
plete are displayed for a certain 
period of time.

After charging is complete

When any door is opened with 
the power switch off after 
charging is complete, a mes-
sage detailing the results of the 
charging is displayed for a while. 
Also, a message is displayed if 
an operation that stops charging 

is performed or a situation 
where charging cannot be per-
formed occurs.

When a message is displayed, fol-
low the instructions displayed on 
the screen. (

P.152)

Multi-information display 

during charging

If approximately 100 seconds 

elapse after the power switch is 

turned to ON during charging, the 

power switch will automatically turn 

off and the display will disappear.

Checking information 
related to charging

-------------------------------------------------------------------------------------------------------------------------------------------------------------

120

2-2. Charging

Safety functions

The hybrid system will not start 

while the AC charging cable is 

attached to the vehicle, even if the 

power switch is operated.

If the AC charging cable is con-

nected while the “READY” indica-

tor is illuminated, the hybrid 

system will stop automatically and 

driving will not be possible.

This vehicle has been designed 
to allow charging from an exter-
nal power source using a AC 
charging cable for exclusive use 
with standard household AC 
outlets.
However, the vehicle differs 
greatly from standard household 
electrical goods in the following 
ways, and incorrect usage could 
cause fire or electric shock, pos-
sibly leading to death or serious 
injury.

The charging operation is 
designed to operate at 12A 
continuously for the charge 
duration (up to 12 hours). 
(

P.114)

Charging can be conducted 
outdoors.

To charge properly, follow the 
procedure after reading the 
explanation below. Charging is 
intended to be carried out by 
licensed drivers only who prop-
erly understand the charging 
procedure.

Do not allow children to use 

Things to know before 

charging

Make sure to read the fol-
lowing precautions before 
connecting the AC charging 
cable to the vehicle and 
charging the hybrid battery 
(traction battery).

WARNING

Caution when charging

People with implantable cardiac 

pacemakers or cardiac resynchro-

nization therapy-pacemakers 

should not carry out the charging 

procedure. Ask someone else to 

do it.

Do not approach the charger 

and AC charging cable while 

charging. 

Charging procedure may affect 

the operation of such devices.

Do not remain in the vehicle 

during charging. 

Charging procedure may affect 

the operation of such devices.

Do not enter the vehicle even to 

take something out of the lug-

gage compartment. 

Charging procedure may affect 

the operation of such devices.

When the AC charging cable 

is connected to the vehicle

Do not operate the shift lever.

In the unlikely event that the AC 

charging cable has been dam-

aged, the shift position may 

change from P to another position 

and the vehicle could move, pos-

sibly leading to an accident.

Charging precautions

-------------------------------------------------------------------------------------------------------------------------------------------------------------

121

2-2. Charging

2

Plug

-in hyb

rid system

the AC charging cable without 
supervision. Also, keep the 
AC charging cable out of 
reach of infants.

When charging with a char-
ger, follow the procedures for 
using each charger.

When charging using a public 
charging facility, check the 
setting of the charging sched-
ule function.

• When the charging schedule is 

registered, temporarily turn off 
the function or turn “Charge Now” 
on. (

P.137, 142)

• When the charging schedule is 

set to on, charging will not start 
even if the AC charging cable is 
connected. Also, charging fee 
may occur due to connection of 
the AC charging cable.

Before charging, always check 
the following items.

The parking brake is applied. 
(

P.290)

Lights such as the head-
lights, emergency flashers 
and interior lights etc. are 
turned off.

If these light switches are turned 
on, then these features will con-
sume electricity, and charging time 
will increase.

The power switch is turned to 
OFF. (

P.283)

Before charging, make sure that 
each part of the AC charging 
cable is in good condition. 
(

P.106)

During charging

The charging starting time may 

differ depending on the state of 

the vehicle, but this does not indi-

cate a malfunction.

Cooling fan sounds may be heard 

from near the rear seat. (

P.91)

During charging, sounds may be 

heard from near the hybrid battery 

(traction battery) in accordance 

with the operation of the air condi-

tioning system or “Battery Cooler” 

(

P.116).

During and after charging, the rear 

seat and its surrounding area in 

which the onboard traction battery 

charger is installed may get warm.

The surface of the CCID 

(Charging Circuit Interrupting 

Device) may become hot, but this 

does not indicate a malfunction.

Depending on radio wave condi-

tions, interference may be heard 

on the radio.

The current charging condition 

and the estimated time until 

charging will complete can be 

checked on the multi-information 

display.

Capacity reduction of the 

hybrid battery (traction battery)

The capacity of the hybrid battery 

(traction battery) will decline gradu-

ally when the hybrid battery (traction 

battery) is in use. The rate at which 

it declines will differ in accordance 

with environmental conditions and 

the way in which the vehicle is used. 

Observing the following can help 

Confirm the following 
before charging

Inspecting the AC 
charging cable

-------------------------------------------------------------------------------------------------------------------------------------------------------------

122

2-2. Charging

suppress battery capacity decline.

Avoid parking the vehicle in areas 

with a high temperature under 

direct sunlight when the hybrid 

battery (traction battery) is fully 

charged.

Avoid accelerating and decelerat-

ing frequently and suddenly when 

EV driving.

Avoid frequent driving near the top 

speed for EV driving. (

P.82)

Leave a low level of charge in the 

hybrid battery (traction battery) 

when leaving the vehicle undriven 

for a long period of time. 

After confirming that EV mode or 

AUTO EV/HV mode has switched 

to HV mode, turn the power switch 

off.

Use the charging schedule func-

tion as much as possible in order 

to fully charge the hybrid battery 

(traction battery) immediately 

before starting off. (

P.130)

Also, if the hybrid battery (traction 

battery) capacity reduces, the dis-

tance that can be driven in EV mode 

or AUTO EV/HV mode decreases. 

However, vehicle performance does 

not significantly become worse.

When the remaining charge of 

the hybrid battery (traction bat-

tery) is low after charging

In the following situations, the 

remaining charge of the hybrid bat-

tery (traction battery) after charging 

completes may be less than normal 

in order to protect the system (the 

EV driving range after the battery is 
fully charged may be shorter).

*

Charging is carried out when the 

outside temperature is low or high.

Charging is carried out immedi-

ately after high-load driving or in 

extreme heat.

When none of the above situations 

apply and there is a drastic drop in 

the remaining charge of the hybrid 

battery (traction battery) after 

charging completes, have the vehi-

cle inspected by your Toyota dealer.

*

: When this occurs, even if the 

remaining charge display of the 
hybrid battery (traction battery) 
shows that it is fully charged, the 
remaining charge rapidly 
decreases faster than normal.

When the charging amount sent 

to the hybrid battery (traction 

battery) decreases

When the amount of power supplied 

by the charger is low or operation of 

the “Battery Heater”, etc., reduces 

the charging power sent to the 

hybrid battery (traction battery), the 

charging amount sent to the hybrid 

battery (traction battery) may 

decrease.

Certification

This device complies with Part 15 of 

the FCC Rules. Operation is subject 

to the following two conditions:
(1) this device may not cause harm-

ful interference, and
(2) this device must accept any 

interference received, including 

interference that may cause unde-

sired operation.

-------------------------------------------------------------------------------------------------------------------------------------------------------------

123

2-2. Charging

2

Plug

-in hyb

rid system

P.121

1

Prepare the AC charging 
cable.

2

Insert the AC charging cable 
into the outlet of the external 
power source.

Make sure to hold the body of the 

plug and insert it firmly into the out-

let. 

Check that the power indicator on 

the CCID (Charging Circuit Inter-

rupting Device) is illuminated. (If it 

is not illuminated, refer to P.147)
In order to reduce the load on the 

outlet and plug, when inserting the 

plug, use a string, etc. to hang the 

CCID (Charging Circuit Interrupting 

How to charge

This section explains the 
procedure for charging the 
hybrid battery (traction bat-
tery) with the equipped AC 
charging cable.

When using a charging sta-
tion, make sure to check the 
operation instructions on 
the charging station.

When the charging schedule 
is registered, make sure 
“Charge Now” is turned on 
before charging. (

P.137, 

142)

WARNING

AC charging inlet

Do not disassemble, repair or 

modify the AC charging inlet. 

Doing so may lead to unforeseen 

accidents or serious injury. When 

the AC charging inlet needs to be 

repaired, consult your Toyota 

dealer.

NOTICE

When using the AC charging 

cable and related parts

To prevent damage to the AC 

charging cable and related parts, 

observe the following precautions.

When interrupting or canceling 

charging, remove the charging 

connector before removing the 

plug.

When removing the AC 

charging cable, check that the 

charging connector is unlocked.

Do not forcefully pull the 

charging connector cap and AC 

charging inlet cap.

Do not apply a vibration to the 

charging connector while 

charging. Charging may be 

stopped.

Do not insert anything but the 

charging connector into the AC 

charging inlet.

When inserting the plug into or 

removing the plug from the out-

let, make sure to hold the body 

of the plug.

Do not damage the AC charging 

inlet cap with a sharp object.

Do not forcefully pull the AC 

charging cable that is caught or 

entangled. If the cable is entan-

gled, disentangle it before 

using.

Charging precautions

When charging

-------------------------------------------------------------------------------------------------------------------------------------------------------------

124

2-2. Charging

Device) on a hook or equivalent.

3

Unlock the doors and open 
the charging port lid. 
(

P.107)

The AC charging inlet light (

) will 

illuminate.

4

Remove the AC charging 
inlet cap and secure it into 
the holder on the charging 
port lid.

5

Remove the charging con-
nector cap and secure it to 
the cable.

6

Insert the charging connector 
into the AC charging inlet.

Align the guide position on the bot-

tom of the charging connector, and 

push the charging connector 

straight into the AC charging inlet 

as far as possible.
Once a click sound is heard, check 

that the charging connector is 

securely locked.
When the charging connector is 

inserted straight as far as possible, 

it will automatically lock. (

P.108)

7

Confirm that the charging 
indicator of the charging port 
is illuminated.

Charging will not start if the 

A

-------------------------------------------------------------------------------------------------------------------------------------------------------------

125

2-2. Charging

2

Plug

-in hyb

rid system

charging indicator does not illumi-

nate when the charging connector 

is inserted. (

P.105)

If the charging indicator is flashing, 

the charging schedule is registered. 

(

P.130)

If the error warning indicator on the 

CCID (Charging Circuit Interrupting 

Device) flashes during charging, 

check P.125 and follow the correc-

tion procedure.
The charging indicator will turn off 

when charging is completed.
The charging indicator will also turn 

off when charging is interrupted. In 

this case, refer to P.147.

If the charging indicator of the 

charging port flashes after con-

necting the AC charging cable

The charging schedule (

P.130) is 

registered and charging cannot be 

performed. To cancel charging 

using the charging schedule and 

start charging, perform any of the 

following procedures.

Turn “Charge Now” on (

P.137, 

142)

While the charging indicator is 

flashing, remove and reconnect 

the charging connector within 5 

seconds

When the charging connector 

cannot be inserted into the AC 

charging inlet

P.109

Charging time

P.114

Safety function

If the latch release button is 

pressed, charging will not begin 

even if the AC charging cable is 

connected.
Also, charging will be stopped if the 

latch release button is pressed and 

held for several seconds during 

charging. When restarting charging, 

reinsert the charging connector after 

pulling it out, and check that the 

charging indicator of the charging 

port illuminates.

Charging time may increase

P.115

While charging

When the power switch is turned to 

ON and the energy monitor is dis-

played on the audio system screen, 

the charging connector is displayed 

on the energy monitor and the flow 

of electricity during charging is dis-

played (

P.187). 

Protection function of AC 

charging inlet overheating 

(vehicles with 6.6 kW onboard 

traction battery charger)

By installing a temperature sensor 

to the AC charging inlet, prevents 

parts from melting when the tem-

perature rises due to foreign matter 

entering the charging connector. 

When a certain temperature 

increase is detected, charging is 

stopped immediately and a mes-

sage is displayed on the multi-infor-

mation display. After the 

temperature has decreased, 

charging resumes by performing the 

operation to start charging again.

-------------------------------------------------------------------------------------------------------------------------------------------------------------

126

2-2. Charging

WARNING

When charging

Observe the following precau-

tions.
Failure to do so may cause an 

unexpected accident, resulting in 

death or serious injury.

Connect to a power source suit-

able for charging. (

P.111)

Check that the AC charging 

cable, plug and outlet are free of 

foreign matter.

Before charging, check that the 

AC charging inlet is not 

deformed, damaged or cor-

roded, and check that the inlet 

is free of foreign matter such as 

dirt, snow and ice. 

If there is dirt or dust in these 

areas, remove completely 

before inserting the charging 

connector.

Do not get the terminals of the 

AC charging inlet wet.

Only use outlets where the plug 

can be securely inserted.

Do not bundle or wind the AC 

charging cable while charging, 

as doing so may result in over-

heating.

Do not touch the terminals of 

the charging connector and AC 

charging inlet with a sharp metal 

objects (needles etc.) or hands, 

or short them with foreign 

objects.

When charging outdoors, make 

sure to connect to a weather-

proof outlet for outdoor use. 

Ensure the weatherproof outlet 

cover closes completely. If the 

weatherproof outlet cover can-

not be closed, install a weather-

proof outlet cover that will close.

In order to stop charging at the 

charging station, follow the 

instructions of the charger.

If any heat, smoke, odors, noise 

or other abnormalities are 

noticed during charging, stop 

charging immediately.

Do not insert the plug if the out-

let is submerged in water or 

snow.

When charging while it is raining 

or snowing, do not connect or 

disconnect the plug if your 

hands are wet. Also, do not get 

the plug or outlet wet.

Do not charge the vehicle 

during a lightning storm.

Prevent the AC charging cable 

from being caught in the door or 

back door.

Do not let the wheels on the AC 

charging cable, plug, charging 

connector and CCID (Charging 

Circuit Interrupting Device).

Firmly insert the plug into the 

outlet.

Do not use an extension cord 

and converting adaptor.

Close the hood before using the 

charging system. The cooling 

fan may start operating sud-

denly. Touching or getting close 

to rotating parts such as the fan 

may cause your hands or 

clothes (especially a necktie or 

scarf) to become caught and 

result in a serious injury.

If the power indicator on the 

CCID (Charging Circuit Inter-

rupting Device) does not illumi-

nate after plugging the AC 

charging cable into the socket-

outlet, unplug it immediately.

-------------------------------------------------------------------------------------------------------------------------------------------------------------

127

2-2. Charging

2

Plug

-in hyb

rid system

WARNING

If the error warning indicator 

on the CCID (Charging Circuit 

Interrupting Device) illumi-

nates or flashes during 

charging

There may be an electrical leak-

age in the power source path, or 

there may be a malfunction in the 

AC charging cable or CCID 

(Charging Circuit Interrupting 

Device). Refer to P.105 and follow 

the correction procedure. If the 

error warning indicator does not 

turn off even after performing the 

correction procedure, immediately 

stop charging, remove the AC 

charging cable and contact your 

Toyota dealer. Continuing to 

charge the vehicle in that condi-

tion may lead to unforeseen acci-

dents or serious injury.

Onboard traction battery 

charger

The onboard traction battery char-

ger is located under the rear 

seats. Make sure to observe the 

following precautions regarding 

the onboard traction battery char-

ger. Failure to observe these pre-

cautions may result in death or 

serious injury such as burns and 

electric shocks.

The onboard traction battery 

charger is hot during charging. 

Do not touch the onboard trac-

tion battery charger, as doing so 

may result in burns.

Do not disassemble, repair or 

modify the onboard traction bat-

tery charger. When the onboard 

traction battery charger needs 

to be repaired, consult your 

Toyota dealer.

NOTICE

When charging

Do not insert the plug into the AC 

charging inlet.
The AC charging inlet may be 

damaged.

Using private power genera-

tor

Do not use private power genera-

tors as a power source for 

charging.
Doing so may make charging 

unstable, the voltage may be 

insufficient, and the error warning 

indicator on the CCID (Charging 

Circuit Interrupting Device) of the 

AC charging cable may flash.

Charging station

Due to the environment in which 

the power equipment is located, 

charging may be unstable due to 

noise, the voltage may be insuffi-

cient, and the error warning indi-

cator on the CCID (Charging 

Circuit Interrupting Device) of the 

AC charging cable may flash.

Onboard traction battery 

charger cooling air intake 

vent

Cooling air intake vent for the 

onboard traction battery charger 

is installed under the rear seats.
Make sure to observe the follow-

ing precautions regarding the 

cooling air intake vent. Failure to 

observe these precautions may 

result in a charging system mal-

function.

-------------------------------------------------------------------------------------------------------------------------------------------------------------

128

2-2. Charging

1

Unlock the doors to unlock 
the charging connector. 
(

P.109)

The charging connector will be 

unlocked and the AC charging inlet 

light will illuminate when the doors 

are unlocked.

2

Pull the charging connector 
towards you while pressing 
the latch release button.

If the latch release button is 

pressed during charging (while the 

charging indicator is illuminated), 

charging will be interrupted.

3

Attach the charging connec-
tor cap.

4

Attach the AC charging inlet 
cap and close the charging 
port lid.

Lock the doors to lock the charging 

port lid. (

P.108)

5

Remove the plug from the 
outlet when the charging 
equipment will not be used 
for a prolonged period of 
time.

Hold the body of the plug when 

removing.
Make sure to put the cable away 

immediately after disconnecting. 

(

P.129)

When leaving the plug inserted, 

inspect the plug and connector 

once a month to check if dirt or dust 

NOTICE

Do not block the air intake vent 

with seat covers or luggage

If the air intake vent is clogged 

with dust, clean it with a vacuum 

cleaner

Do not allow water or foreign 

matter to enter the air intake 

vent

Do not spill large amounts of 

water near the air intake vent

If water is spilled, have the vehi-

cle inspected by your Toyota 

dealer and do not charge the 

hybrid battery (traction battery) 

before the inspection.

After charging

-------------------------------------------------------------------------------------------------------------------------------------------------------------

129

2-2. Charging

2

Plug

-in hyb

rid system

has accumulated.

When the outside temperature 

is low or high

The level shown on the SOC (State 

of Charge) gauge (

P.165) ma

drop slightly when the power switch 

is turned to ON, even if charging 

has been completed and the hybrid 

battery (traction battery) is fully 

charged. However, this does not 

indicate a malfunction.

When removing the charging 

connector

Press the latch release button, 

check that the lever raises up, and 

then pull the charging connector 

towards you.
If the lever does not raise up even 

after the latch release button is 

pressed, the charging connector is 

locked. If this occurs, unlock the 

doors using the smart key system or 

wireless remote control to unlock 

the charging connector. (

P.107)

If the charging connector can-

not be unlocked

P.110

WARNING

After charging

Remove the plug if it will not be 

used for a long time.
Dirt and dust may accumulate 

plug or outlet, which could cause 

a malfunction or fire, possibly 

leading to death or serious injury.

NOTICE

After charging

Store the AC charging cable out 

of reach from infants and chil-

dren.

After disconnecting the charging 

connector from the AC charging 

inlet, make sure to put on the 

AC charging inlet cap and close 

the charging port lid. If the AC 

charging inlet cap is not put on, 

water or foreign objects may 

enter the AC charging inlet, 

which could lead to vehicle 

damage.

After removing the plug from the 

outlet, keep it in a safe place 

free from moisture and dust. 

The AC charging cable or plug 

may be damaged if the cable is 

stepped on or ridden over by 

the vehicle.

-------------------------------------------------------------------------------------------------------------------------------------------------------------

130

2-2. Charging

Calendar settings

Current date and time information is 

automatically set using GPS. How-

ever, if GPS calibration of clock is 

turned off in the multimedia system 

settings, the date needs to be set on 

the multi-information display.
If the calendar settings check 

screen is displayed when an 

attempt was made to register a 

charge schedule, check that the cor-

rect date is set. If it is incorrect, be 

sure to correct it.
If the calendar information is wrong, 

the charging schedule function will 

not operate normally.

When registering the charging 
schedule, the following settings 
can be changed.

Select the charging mode

One of the two following 
charging modes can be 
selected.

“Start”

Starts charging at the set time

*1


and finishes charging when fully 
charged.

*2

“Departure”

Starts charging to finish at the 
set time.

*3, 4

When this setting is selected, 
the air conditioning-linked func-
tion can be used.

*1

:Charging schedule function is 

performed in accordance with 
the clock in the multi-information 
display. Before registering the 
charging schedule, check the 
clock settings to the proper time.

*2

:There might be a slight error in 

the timing when charging starts 
due to the state of the hybrid bat-
tery (traction battery).

*3

:When the system determines 

that there is no time to finish 
charging by the set scheduled 
departure time, it starts charging. 
Check the charging schedules.

*4

:If sudden changes in tempera-

ture or changes in the condition 
of the power source occur while 
charging, charging may not end 
exactly at the time estimated by 
the system.

Repeated setting

The periodic charging schedule 
can be set by selecting your 
desired day of the week. (If no 
days are selected, charging is 
only carried out once.)

Using the charging 

schedule function

Charging can be carried out 
at the desired time by regis-
tering the charging sched-
ule. Also, it is possible to 
set the charging schedule to 
one’s preferences, such as 
having charging complete 
by a certain departure time 
or be carried out at the 
same time on certain days.

Settings of the charging 
schedule function

-------------------------------------------------------------------------------------------------------------------------------------------------------------

131

2-2. Charging

2

Plug

-in hyb

rid system

Air conditioning-linked set-
ting (“Climate Prep”)

When the charging mode is set 
to “Departure”, the vehicle air 
conditioning system (

P.396

can be set to automatically oper-
ate

*

 according to the set time.

By adjusting the cabin temperature 
in advance, passengers can enjoy 
a pleasant interior immediately after 
entering the vehicle.

*

: Operation starts approximately 

20 minutes before the set depar-
ture time.

Turning “Charge Now” on 
and off

If even one charging schedule is 
registered, charging does not 
start until the set time, even if 
the AC charging cable is con-
nected to the vehicle. To start 
charging without changing the 
charging schedule setting, turn 
“Charge Now” on to temporarily 
cancel the charging schedule 
and enable charging after con-
necting the AC charging cable.

Changing “Next Event”

*1

It is possible to temporarily set 
the time of the next charging 
schedule without changing the 
registered repeated setting.

*2

*1

:The “Next Event” refers to the 

closest charging schedule from 
the current time among the regis-
tered charging schedules. 
Charging schedule is performed 
based on the “Next Event”.

*2

:When “Next Event” is changed, 

the current charging schedule 
will be temporarily ignored and 
charging will not be carried out 
until the time specified by “Next 
Event”. (For example, when 
“Next Event” is set for 2 days 
later, even if items are registered 
on the charging schedule, 
charging will not be carried out 
until the time specified by “Next 
Event”.)

The charging schedule can be 
registered on the multi-informa-
tion display or audio system 
screen (vehicles with Premium 
Audio).

Multi-information display 
operation: 

P.133

Audio system screen opera-
tion (vehicles with Premium 
Audio): 

P.139

Charging schedule

The charging schedule cannot be 

set while driving.

A maximum of 15 charging sched-

ules can be registered.

Registering the charging 
schedule

-------------------------------------------------------------------------------------------------------------------------------------------------------------

132

2-2. Charging

To make sure that the charging 

schedule function operates cor-

rectly

Check the following items.

Adjust the clock to the correct time 

(

P.169)

The calendar is set to the correct 

date (

P.177)

Check that the power switch is 

turned off

After registering the charging 

schedule, connect the AC 

charging cable 

The charging start time is deter-

mined based on the charging 

schedule at the time that the AC 

charging cable was connected.

After connecting the AC charging 

cable, check that the charging 

indicator of the charging port 

flashes (

P.100)

Do not use an outlet that has a 

power cut off function (including a 

timer function) 

Use an outlet that constantly sup-

plies electricity. For outlets where 

the power is cut off due to a timer 

function, etc., charging may not be 

carried out according to plan if the 

power is cut off during the set 

time.

When the AC charging cable 

remains connected to the vehi-

cle

Even if multiple consecutive 

charging schedules are registered, 

the next charge will not be carried 

out according to the charging 

schedule until the AC charging 

cable is removed and reconnected 

after charging completes. Also, 

when the hybrid battery (traction 

battery) is fully charged, charging 

according to the charging schedule 

will not be carried out.

“Climate Prep”

When the air conditioning-linked 

setting is turned on, the air condi-

tioning operates until the set 

departure time. Therefore, the air 

conditioning will consume electric-

ity and charging may not complete 

by the set departure time.

If the hybrid battery (traction bat-

tery) is fully charged, charging will 

not be carried out, even if the 

charging schedule is set. How-

ever, if “Climate Prep” is turned 

on, the air conditioning will oper-

ate only once when it nears the 

time set in “Departure”. If this 

occurs, the air conditioning will 

consume electricity and the 

remaining charge of the hybrid 

battery (traction battery) when 

departing may be decreased.

When the doors are unlocked, the 

air conditioning system does not 

operate.

Smartphone-linked operation 

(vehicles with Premium Audio)

After applying to Toyota Apps, it is 

possible to use the smartphone 

application to change charging 

schedule settings.
For details about Toyota Apps, refer 

to 

http://www.toyota.com/connectedse

rvices in the United States and 

http://www.toyota.ca/connected in 

Canada.

When charging schedules are 

ignored

When the following operations are 

performed while the charging 

schedule is on standby, charging 

schedule is temporarily canceled 

and charging is started.

When the Remote Air Condition-

ing System (

P.405) is operated

When turning “My Room Mode” 

on (

P.144)

When turning “Charge Now” on 

(

P.137, 142)

When an operation that temporar-

ily cancel charging using the 

charging schedule (

P.125)

-------------------------------------------------------------------------------------------------------------------------------------------------------------

133

2-2. Charging

2

Plug

-in hyb

rid system

Effects of outside temperature

When the charging mode is set to 

“Departure”, charging schedule may 

be ignored due to the outside tem-

perature and charging may start.

“Battery Heater” (

P.115) / 

“Battery Cooler” (

P.116)

When charging is carried out using 

the charging schedule, the hybrid 

battery (traction battery) heating or 

cooling function may operate 

according to the temperature of the 

hybrid battery (traction battery).

When the charging mode is set to 

“Start”, the function starts at the 

set charging start time.

“Battery Heater”: When the 

charging mode is set to “Depar-

ture”, the function starts automati-

cally to complete heating by the 

desired departure time.

“Battery Cooler”: When the 

charging mode is set to “Depar-

ture”, cooling starts approximately 

30 minutes before the charging 

start time. However, if there is no 

time to finish charging by the 

charging schedule, the hybrid bat-

tery (traction battery) cooling time 

may be shortened and “Battery 

Cooler” may not operate.

When operating charging 
schedule, use the meter control 
switches.

Meter control switches 
(

P.171)

Multi-information display

Registering the charging 
schedule

1

Press 

 or 

 of the meter 

control switches to select 

.

2

Press 

 or 

 of the meter 

control switches to select 
“Vehicle Settings”, and then 
press and hold 

.

3

Press 

 or 

 of the meter 

control switches to select 
“Charging Settings”, and then 
press 

.

The “Charging Settings” screen will 

be displayed. 

4

Press 

 or 

 of the meter 

control switches to select 
“Charging Schedule”, and 
then press 

.

The “Charging Schedule” screen 

will be displayed.

5

Press 

 or 

 of the meter 

control switches to select 
“Scheduled Events”, and 
then press 

.

The “Scheduled Events” screen will 

Setting operations on 
multi-information display

A

B

-------------------------------------------------------------------------------------------------------------------------------------------------------------

134

2-2. Charging

be displayed.

6

Press 

 or 

 of the meter 

control switches to select “+”, 
and then press 

.

The “Charging Mode” screen will be 

displayed.

7

Press 

 or 

 of the meter 

control switches to select the 
item to change with the cur-
sor, and then press 

 or 


to change the setting.

Set the desired charging mode and 

charging start (or departure) time.
When the charging mode is “Start”, 

this sets the charging start time. 

When it is “Departure”, this sets the 

charging end time.
After changing the settings to the 
desired settings, press 

.

When the charging mode is set to 

“Departure”, the “Climate Prep” 

screen is displayed. When the 

charging mode is set to “Start”, the 

“Repeat” screen (step 

9

) is dis-

played.

8

When the charging mode is 
set to “Departure”, set the 
“Climate Prep” to on or off.

*

Press 

 or 

 of the meter con-

trol switches and select “Yes” or 
“No”, and then press 

.

Select “Yes” to turn on the air con-

ditioning system and select “No” to 

turn it off.
The “Repeat” screen will be dis-

played.

*

: When the charging mode is set to 

“Start”, “Climate Prep” screen will 
not display.

9

To activate the repeated set-
ting, press 

 or 

 of the 

meter control switches to 
select the desired day to acti-
vate for the repeated setting, 
and then press 

.

-------------------------------------------------------------------------------------------------------------------------------------------------------------

135

2-2. Charging

2

Plug

-in hyb

rid system

Each time 

 is pressed, the 

repeated setting switches between 

on and off.
When set to on, the charging 

schedule is repeated on that day. It 

is possible to set more than one 

day to on.
If no days are set to on, charging is 

only carried out once according to 

the charging schedule for the next 

24 hours.
After changing the settings to the 

desired settings, select “Done”, and 
then press 

.

A screen where the settings can be 

saved will be displayed.

10

Select “Save” and press 


to save the settings.

The settings will be saved.
If you wish to change the settings, 
press 

 and perform the setting 

procedure again.
After setting operations are com-

plete, when the AC charging cable 

is connected to the vehicle, 

charging will be carried out accord-

ing to the charging schedule set-

tings.

Switching charging sched-
ules between on and off

The registered charging sched-
ules can be turned on and off.

1

Perform step 

1

 to 

5

 of the 

“Registering the charging 
schedule” procedure 
(

P.133) and display 

“Scheduled Events” screen.

A list of the registered charging 

schedule will be displayed.

2

Press 

 or 

 of the meter 

control switches to select the 
item to turn ON/OFF, and 
then press 

.

Each time 

 is pressed, the 

selected charging schedule 

switches between on and off.
When set to off, a charging sched-

ule is ignored and charging accord-

ing to the charging schedule is not 

-------------------------------------------------------------------------------------------------------------------------------------------------------------

136

2-2. Charging

carried out.

Changing the registered 
charging schedules

The registered charging sched-
ules can be modified or deleted.

1

Perform step 

1

 to 

5

 of the 

“Registering the charging 
schedule” (

P.133) proce-

dure and display “Scheduled 
Events” screen.

A list of the registered charging 

schedule will be displayed.

2

Press 

 or 

 of the meter 

control switches to select the 
item to change, and then 
press and hold 

.

The “Edit Event” screen will be dis-

played.

3

Press 

 or 

 of the meter 

control switches to select the 
item to operate, press 


and perform the necessary 
operation.

“Edit”

Change the desired settings as 
described starting from step 

7

 of 

the “Registering the charging 
schedule” procedure. (

P.133)

Press 

 to return to the previous 

screen.

“Delete”

A deletion confirmation screen will 
be displayed.

Press 

 or 

 of the meter con-

trol switches to select “Yes”, and 
then press 

 to delete the 

selected charging schedule.
To cancel deletion, select “No” and 

-------------------------------------------------------------------------------------------------------------------------------------------------------------

137

2-2. Charging

2

Plug

-in hyb

rid system

then press 

.

Press 

 to return to the previous 

screen.

Setting “Charge Now” to on

The “Charge Now” setting can 
be changed by performing one 
of the two following procedures.

Operation on “Charging 
Schedule” screen

1

Perform step 

1

 to 

4

 of the 

“Registering the charging 
schedule” procedure 
(

P.133) and display 

“Charging Schedule” screen.

2

Press 

 or 

 of the meter 

control switches to select 
“Charge Now”, and then 
press 

.

Each time 

 is pressed, “Charge 

Now” switches between on and off.

Operation on “Closing Dis-
play” screen

*

*

: If “Closing Display” is not set to 

“Charging Schedule” on the 


screen of the multi-information 
display, the “Closing Display” is 
not displayed. In this case, check 
the settings on the multi-informa-

tion display.

1

Turn the power switch off.

The “Closing Display” screen is dis-

played on the multi-information dis-

play. (

P.138)

2

Press 

 to set “Charge 

Now” to on.

Each time 

 is pressed, “Charge 

Now” switches between on and off.

After setting operations are 
complete, charging starts when 
the AC charging cable is con-
nected. (

P.123)

Changing “Next Event”

*

*

: When “Charge Now” is set to on 

or when using “My Room Mode” 
(

P.144) etc., it is not possible to 

change the registered “Next 
Event”.

1

Perform step 

1

 to 

4

 of the 

“Registering the charging 
schedule” procedure 
(

P.133) and display 

“Charging Schedule” screen.

2

Press 

 or 

 of the meter 

control switches to select 
“Next Event”, and then press 

.

The “Next Event” screen will be dis-

played.

-------------------------------------------------------------------------------------------------------------------------------------------------------------

138

2-2. Charging

3

Press 

 or 

 of the meter 

control switches to select 
“Yes”, and then press 

.

The confirmation message will be 

displayed on the screen.

Press 

, and the “Charging 

Mode” screen will be displayed.

Press 

 to return to the previous 

screen.

4

Change the desired settings 
as described starting from 
step 

7

 of the “Registering the 

charging schedule” proce-
dure. (

P.133)

Press 

 to return to the previous 

screen.

When charging schedule set-

ting operations are canceled

When the vehicle is in the following 

conditions, charging schedule set-

ting operations are canceled.

The power switch is operated 

before the settings are confirmed

The vehicle starts off

A display with a higher priority 

than that of the charging schedule 

setting is shown

“Next Event”

After charging completes, the “Next 

Event” displayed on the multi-infor-

mation display will not change until 

the AC charging cable is removed, 

even after charging is performed 

according to the “Next Event” 

schedule.

To return to original setting 

after changing “Next Event” 

setting

Turning the setting of “Charge Now” 

on and then off can return the set-

ting of “Next Event” to its original 

setting.

When “Next Event” is changed 

while charging

When the charging mode is 

“Departure”, the current charging 

is interrupted or continued 

depending on the remaining time 

until the charging is completed.

When the charging mode is 

“Start”, the current charging is 

interrupted, the next charging will 

start at the set time.

When the power switch is 

turned off

You can check the next charging 

schedule (“Next Event”) on the 
“Closing Display” screen

*

 when 

“Closing Display” is set to “Charging 
Schedule” on 

 screen of the 

multi-information display and the 

power switch is turned off.

*

: The “Closing Display” screen may 

not be displayed during charging.

-------------------------------------------------------------------------------------------------------------------------------------------------------------

139

2-2. Charging

2

Plug

-in hyb

rid system

For details on how to operate the 
audio system screen, refer to 
“NAVIGATION AND MULTIMEDIA 
SYSTEM OWNER’S MANUAL”.

Setting operations related to the 
charging schedule are per-
formed on the “Charging Sched-
ule” screen.

Displaying the “Charging 
Schedule” screen

1

Press the “MENU” button to 
display the menu screen.

2

Select “Info” and “Charging 
Schedule”, in that order.

The “Charging Schedule” screen 

will be displayed.

How to read the “Charging 
Schedule” screen

Charging schedules (calen-
dar display)

Displays the week-long registered 

WARNING

Cautions while performing 

the setting operation

When performing the setting 

operation while the hybrid system 

is operated, ensure that the vehi-

cle is parked in a place with ade-

quate ventilation. In a closed area 

such as a garage, exhaust gases 

including harmful carbon monox-

ide (CO) may collect and enter 

the vehicle. This may lead to 

death or a serious health hazard.

NOTICE

While performing the setting 

operation

When performing the setting 

operation while the hybrid system 

is stopped, be careful that the 12-

volt battery will not be discharged.

Setting operations on the 
audio system screen 
(vehicles with Premium 
Audio)

A

-------------------------------------------------------------------------------------------------------------------------------------------------------------

140

2-2. Charging

charging schedule in a list using 
icons.

“Add” button

Press to add a new item to the 
charging schedule. (

P.140)

“Edit” button

Press to change or delete regis-
tered items on the charging sched-
ule. (

P.141)

“Charge Now” button

Press to set “Charge Now” to on. 
(

P.142)

Return button

Press to close the “Charging 
Schedule” screen.

Charging schedules (icon 
display)

When an item is registered on the 
charging schedule, an icon is dis-
played on the calendar.

Main content displayed on the 
calendar:

*1

:A row with a red line indicates 

the current time.

*2

:When “Charge Now” (

P.142) is 

set to on, the orange icon moves 

to the position of the red line and 
changes to display “Charge 
Now”.

Registering the charging 
schedule

1

Display the “Charging Sched-
ule” screen. (

P.139)

2

Press “Add”.

The “Edit Charging Event” screen 

will be displayed on the screen.

3

Change the schedule to the 
desired time.

Charging mode

Press “Start” or “Departure” to set 
the desired charging mode.

Start (or departure) time

When the charging mode is “Start”, 
set the charging start time (start 
time). When it is “Departure”, set 
the charging end time (departure 
time).
Press “+” or “-” to set the desired 
time.

Repeated settings

Each time the button is pressed, 
the repeated setting for the 
selected day switches between on 
and off.
When turned on, the charging 
schedule is repeated on that day. It 

Display

Content

Red line

*1

Current time

Orange icon

*2

Charging sched-
ule for Next 
Event

Green icon

The charging 
mode is set to 
“Departure”

Blue icon

The charging 
mode is set to 
“Start”

B

C

D

E

F

A

B

C

-------------------------------------------------------------------------------------------------------------------------------------------------------------

141

2-2. Charging

2

Plug

-in hyb

rid system

is possible to turn more than one 
day on.
If no buttons are turned on, 
charging is only carried out once 
according to the charging schedule 
for the next 24 hours.

“Climate Prep” (

P.131)

When the charging mode is set to 
“Departure”, the “Climate Prep” is 
displayed.
To operate the air conditioning sys-
tem, press the “Climate Prep” but-
ton to set the function to on.
Each time the button is pressed, 
the function switches between on 
and off.

4

After setting operations are 
complete, press “Save”.

The charging schedule is registered 

and an icon is added to the calen-

dar.
To cancel registration of the 

charging schedule, press the return 

button.
After setting operations are com-

plete, when the power switch is 

turned off and the AC charging 

cable is connected to the vehicle, 

charging is carried out according to 

the charging schedule settings.

Switching charging sched-
ules between on and off

1

Display the “Charging Sched-
ule” screen. (

P.139)

2

Press “Edit”.

The “Scheduled Events” screen will 

be displayed on the screen.

3

From the items displayed on 
the screen, press on or off in 
the row of the charging 
schedule you wish to change.

If the charging schedule you wish to 

change is not displayed on the 

screen, scroll the list up and down 

to display it.
Each time the button is pressed, 

the charging schedule switches 

between on and off.

Changing the registered 
charging schedules

1

Display the “Charging Sched-
ule” screen. (

P.139)

2

Press “Edit”.

The “Scheduled Events” screen will 

be displayed on the screen.

3

From the items displayed on 
the screen, press “Edit” in the 
row of the charging schedule 
you wish to change.

The settings screen will be dis-

played on the screen.

D

-------------------------------------------------------------------------------------------------------------------------------------------------------------


Content      ..      1      2      3      ..