Toyota Tundra (2015 year). Manual - part 1019


  Index      Toyota     Toyota Tundra (2015 year) - Service and Repair Manual


Search            copyright infringement  


Content   ..  1017  1018  1019  1020   ..


Toyota Tundra (2015 year). Manual - part 1019


Last Modified: 9-16-2014

6.6 A

Doc ID: RM000001QHX02SX

Model Year: 2015

Model: Tundra

Prod Date Range: [08/2014 -           ]

Title: WF1AM TRANSFER: TRANSFER ASSEMBLY: INSTALLATION; 2015 MY Tundra [08/2014 -        ]

INSTALLATION

CAUTION:

Be sure to perform this procedure with several people as the transfer assembly is very heavy.

1. INSTALL TRANSFER ASSEMBLY

(a) Support the transfer assembly with a transmission jack.

NOTICE:

Secure the transfer assembly to the transmission jack using a

belt, etc. to prevent it from falling.

(b) Raise the transfer assembly so that it is level with the automatic transmission assembly and install the

transfer assembly with the 8 bolts.

Torque:

40 N·m {408 kgf·cm, 30ft·lbf}

NOTICE:

Take care not to damage the rear adaptor oil seal with the transfer input shaft spline.

2. CONNECT WIRE HARNESS AND CONNECTOR

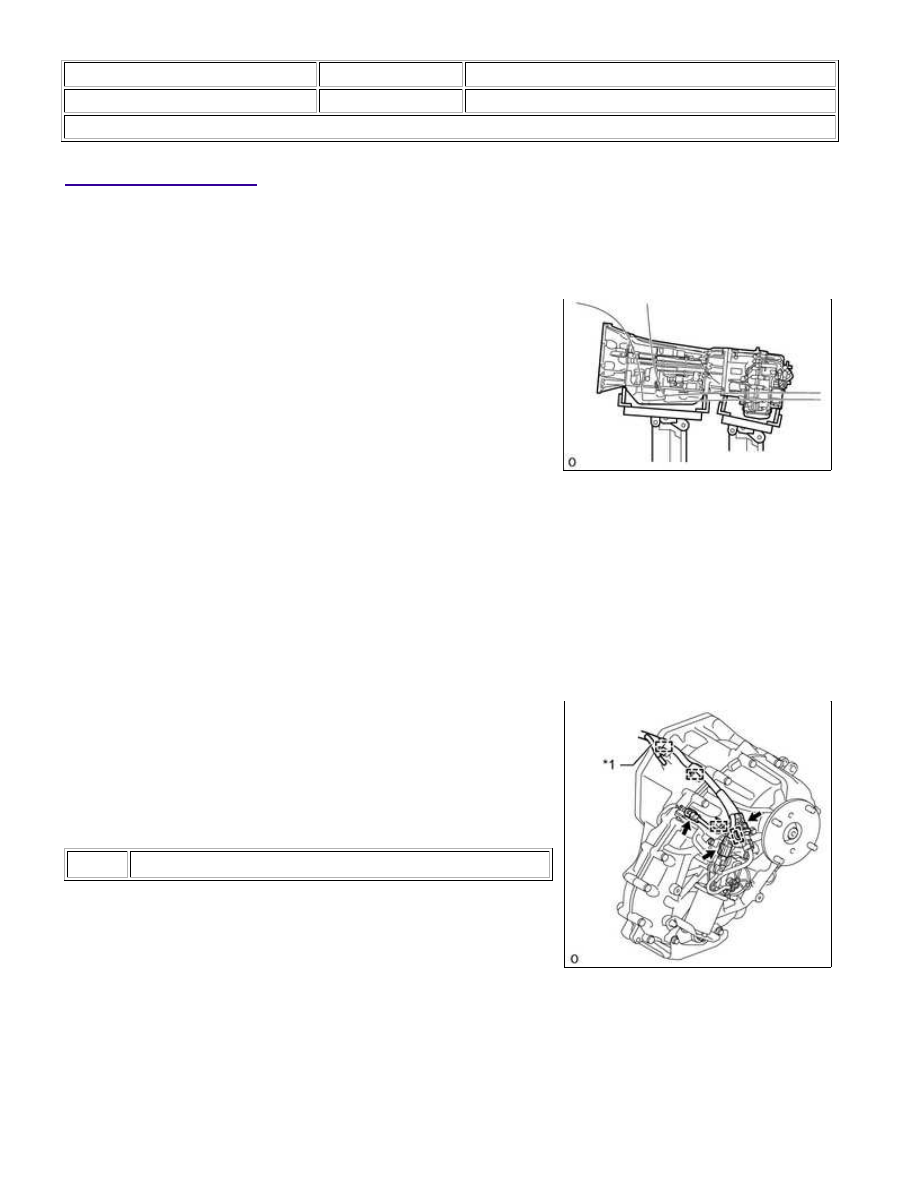
(a) Connect the 3 connectors, 4 clamps and transfer breather hose.

Text in Illustration

*1

Transfer Breather Hose

3. INSTALL REAR NO. 1 ENGINE MOUNTING INSULATOR

(a) Remove the transmission jack from the transfer assembly.

NOTICE:

Do not remove the transmission jack from the automatic transmission assembly in this step.

(b) Install the rear No. 1 engine mounting insulator with the 4 bolts.

WF1AM TRANSFER: TRANSFER ASSEMBLY: INSTALLATION; 20...

Torque:

59 N·m {602 kgf·cm, 44ft·lbf}

4. INSTALL NO. 3 FRAME CROSSMEMBER SUB-ASSEMBLY

(a) Install the No. 3 frame crossmember sub-assembly to the rear No. 1 engine mounting insulator with the 4

bolts.

Torque:

21 N·m {214 kgf·cm, 15ft·lbf}

(b) Install the No. 3 frame crossmember sub-assembly with the 4 bolts, 4 washers and 4 nuts.

Torque:

110 N·m {1122 kgf·cm, 81ft·lbf}

NOTICE:

(c) Remove the transmission jack from the automatic transmission assembly.

5. INSTALL PROPELLER WITH CENTER BEARING SHAFT ASSEMBLY

6. INSTALL FRONT PROPELLER SHAFT ASSEMBLY

7. ADD TRANSFER OIL 

8. CHECK TRANSFER OIL 

9. CHECK FOR TRANSFER OIL LEAK

WF1AM TRANSFER: TRANSFER ASSEMBLY: INSTALLATION; 20...

Last Modified: 9-16-2014

6.6 K

Doc ID: RM000002B4A01HX

Model Year: 2015

Model: Tundra

Prod Date Range: [08/2014 -           ]

Title: WF1AM TRANSFER: TRANSFER CASE REAR OIL SEAL: COMPONENTS; 2015 MY Tundra [08/2014 -        ]

COMPONENTS

ILLUSTRATION

WF1AM TRANSFER: TRANSFER CASE REAR OIL SEAL: COMP...

Last Modified: 9-16-2014

6.6 A

Doc ID: RM0000030S8015X

Model Year: 2015

Model: Tundra

Prod Date Range: [08/2014 -           ]

Title: WF1AM TRANSFER: TRANSFER CASE REAR OIL SEAL: REPLACEMENT; 2015 MY Tundra [08/2014 -        ]

REPLACEMENT

1. DRAIN TRANSFER OIL 

2. REMOVE PROPELLER WITH CENTER BEARING SHAFT ASSEMBLY

3. REMOVE OUTPUT SHAFT COMPANION FLANGE SUB-ASSEMBLY (REAR) 

4. REMOVE TRANSFER OUTPUT SHAFT TYPE T OIL SEAL

(a) Using SST, remove the transfer output shaft type T oil seal.

SST: 09308-10010

NOTICE:

Be careful not to damage the transfer output shaft type T oil seal

and rear transfer case contact surface.

5. INSTALL TRANSFER OUTPUT SHAFT TYPE T OIL SEAL

(b) Using SST and a hammer, tap in a new transfer output shaft

type T oil seal as shown in the illustration.

SST: 09502-12010

SST: 09513-36040

Drive in depth (A):

1.4 to 2.4 mm (0.056 to 0.094 in.)

6. INSTALL OUTPUT SHAFT COMPANION FLANGE SUB-ASSEMBLY (REAR) 

7. INSTALL PROPELLER WITH CENTER BEARING SHAFT ASSEMBLY

8. ADD TRANSFER OIL 

9. CHECK TRANSFER OIL 

10. CHECK FOR TRANSFER OIL LEAK

WF1AM TRANSFER: TRANSFER CASE REAR OIL SEAL: REPL...


Content   ..  1017  1018  1019  1020   ..