Toyota Tundra. Manual - part 2887


  Index      Toyota     Toyota Tundra (2007-2010 year) - Service and Repair Manual


Search            copyright infringement  


Content   ..  2885  2886  2887  2888   ..


Toyota Tundra. Manual - part 2887


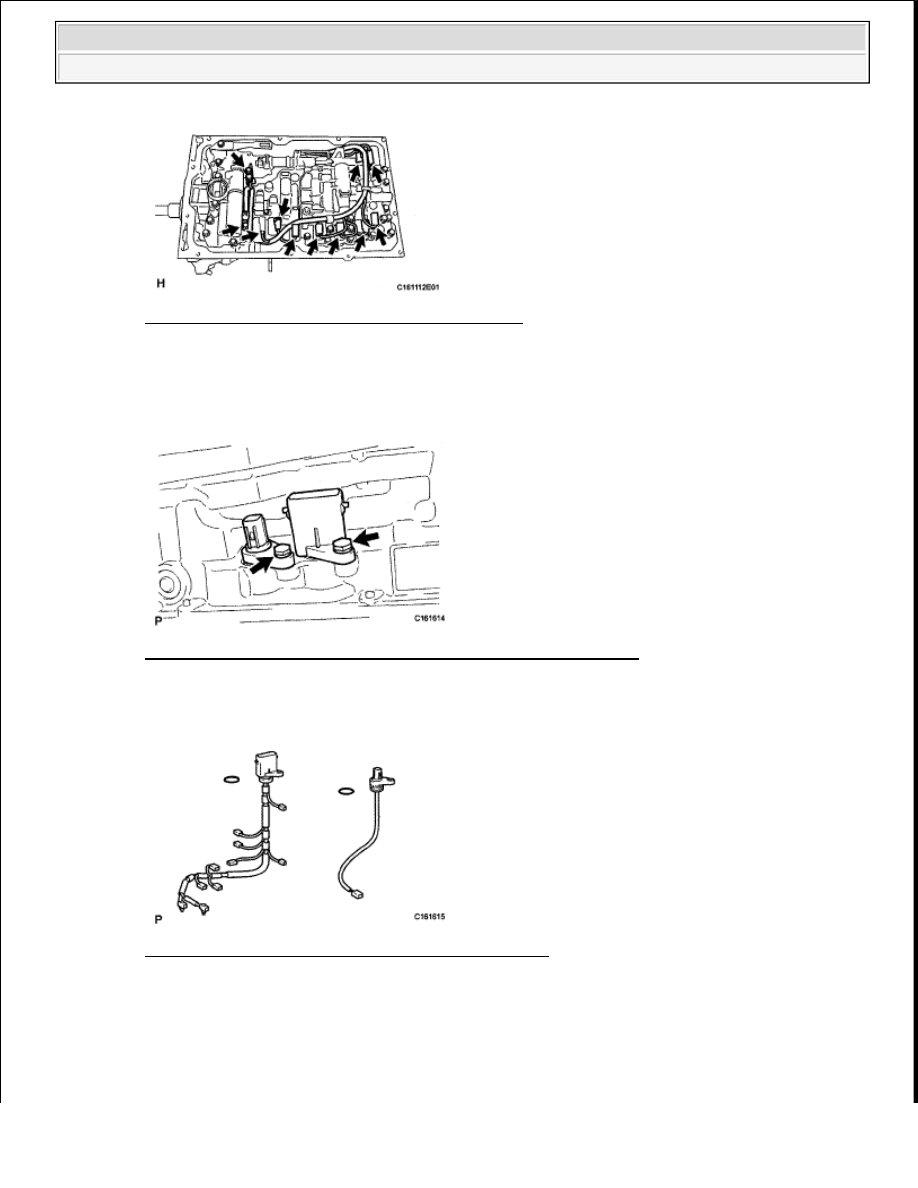
Fig. 390: Locating Solenoid Valves & Connectors 
Courtesy of TOYOTA MOTOR SALES, U.S.A., INC. 

d. Remove the 2 bolts and pull out the No. 1 and No. 2 transmission wires.  

e. Pull the transmission wires out of the transmission case. 

Fig. 391: Locating No. 1 & No. 2 Transmission Wires With Bolts 
Courtesy of TOYOTA MOTOR SALES, U.S.A., INC. 

f. Remove the 2 O-rings from the transmission wires. 

Fig. 392: Identifying Transmission Wires & O-Rings 
Courtesy of TOYOTA MOTOR SALES, U.S.A., INC. 

15. REMOVE TRANSMISSION VALVE BODY ASSEMBLY 

a. Remove the bolt, detent spring cover and detent spring.  

b. Remove the 19 bolts.  

c. Remove the valve body assembly. 


2009 Toyota Tundra 

2009 TRANSMISSION AB60F Automatic Transaxle - Tundra


Fig. 393: Locating Transmission Valve Body Bolts 
Courtesy of TOYOTA MOTOR SALES, U.S.A., INC. 

16. REMOVE TRANSMISSION CASE GASKET 

a. Remove the 3 gaskets. 

Fig. 394: Identifying Transmission Case Gaskets 
Courtesy of TOYOTA MOTOR SALES, U.S.A., INC. 

17. REMOVE BRAKE DRUM GASKET 

a. Remove the 3 gaskets. 

Fig. 395: Identifying Brake Drum Gaskets 
Courtesy of TOYOTA MOTOR SALES, U.S.A., INC. 

18. REMOVE CHECK BALL BODY 


2009 Toyota Tundra 

2009 TRANSMISSION AB60F Automatic Transaxle - Tundra


a. Remove the check ball body and spring. 

Fig. 396: Identifying Check Ball Body & Spring 
Courtesy of TOYOTA MOTOR SALES, U.S.A., INC. 

19. REMOVE C-2 ACCUMULATOR PISTON 

a. While applying compressed air to the oil hole, remove the C-2 accumulator piston and spring.  

b. Remove the 2 O-rings from the piston. 

Fig. 397: Identifying C-2 Accumulator Piston 
Courtesy of TOYOTA MOTOR SALES, U.S.A., INC. 

20. REMOVE B-3 ACCUMULATOR PISTON 

a. While applying compressed air to the oil hole, remove the B-3 accumulator piston and spring.  

b. Remove the 2 O-rings from the piston. 

NOTE:

Be careful as the C-3 and B-3 accumulator pistons may jump out.

NOTE:

Be careful as the C-3 accumulator piston may jump out.


2009 Toyota Tundra 

2009 TRANSMISSION AB60F Automatic Transaxle - Tundra


Fig. 398: Identifying B-3 Accumulator Piston 
Courtesy of TOYOTA MOTOR SALES, U.S.A., INC. 

21. REMOVE C-3 ACCUMULATOR PISTON 

a. While applying compressed air to the oil hole, remove the C-3 accumulator piston and spring.  

b. Remove the 2 O-rings from the piston. 

Fig. 399: Identifying C-3 Accumulator Piston 
Courtesy of TOYOTA MOTOR SALES, U.S.A., INC. 

22. REMOVE B-1 ACCUMULATOR VALVE 

a. Remove the B-1 accumulator valve and 2 springs. 

Fig. 400: Identifying B-1 Accumulator Valve & Springs 
Courtesy of TOYOTA MOTOR SALES, U.S.A., INC. 


2009 Toyota Tundra 

2009 TRANSMISSION AB60F Automatic Transaxle - Tundra


Content   ..  2885  2886  2887  2888   ..