Toyota Tundra. Manual - part 2439


  Index      Toyota     Toyota Tundra (2007-2010 year) - Service and Repair Manual


Search            copyright infringement  


Content   ..  2437  2438  2439  2440   ..


Toyota Tundra. Manual - part 2439
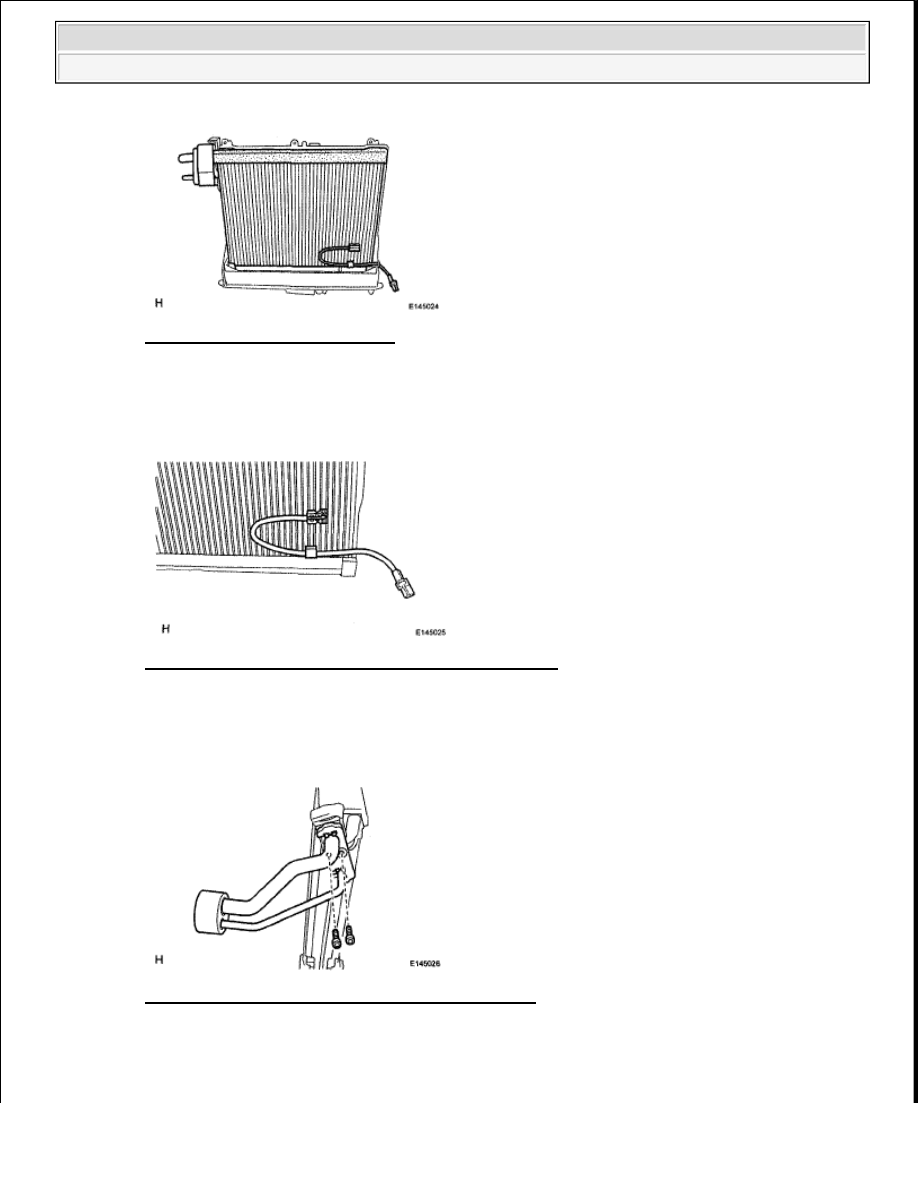


Fig. 191: Identifying Evaporator 
Courtesy of TOYOTA MOTOR SALES, U.S.A., INC. 

16. REMOVE EVAPORATOR TEMPERATURE SENSOR 

a. Remove the sensor. 

Fig. 192: Identifying Evaporator Temperature Sensor 
Courtesy of TOYOTA MOTOR SALES, U.S.A., INC. 

17. REMOVE COOLER EXPANSION VALVE 

a. Using a 4 mm hexagon wrench, remove the 2 bolts. 

Fig. 193: Identifying Cooler Expansion Valve Bolts 
Courtesy of TOYOTA MOTOR SALES, U.S.A., INC. 

b. Remove the tube and accessory and 2 O-rings.  

c. Remove the cooler expansion valve and 2 O-rings from the cooler evaporator.  


2009 Toyota Tundra 

2009 HVAC Air Conditioning - Tundra


REASSEMBLY 

1. INSTALL COOLER EXPANSION VALVE 

a. Sufficiently apply compressor oil to 4 new O-rings and the fitting surface of the hose joint. 

Compressor oil:  

ND-OIL 8 or equivalent  

b. Install the 2 O-rings to the cooler evaporator.  

c. Install the 2 O-rings to the tube and accessory.  

d. Install the cooler expansion valve and tube and accessory to the evaporator.  

e. Using a 4 mm hexagon wrench, install the 2 bolts. 

Torque: 3.5 N*m (36 kgf*cm, 31 in.*lbf)  

Fig. 194: Identifying Cooler Expansion Valve Bolts 
Courtesy of TOYOTA MOTOR SALES, U.S.A., INC. 

2. INSTALL EVAPORATOR TEMPERATURE SENSOR 

a. Insert the sensor to a location that is 1 fin to the right or left of its previous location. 

EVAPORATOR TEMPERATURE SENSOR DIMENSION 

NOTE:

If reusing the evaporator, do not insert the sensor into a location where 
the sensor was previously inserted.

Area Standard Dimension

a

48 mm (1.89 in.)

b

9 mm (0.354 in.)

c

34.3 mm (1.35 in.)

d

47.7 mm (1.88 in.)

e

50 mm (1.97 in.)


2009 Toyota Tundra 

2009 HVAC Air Conditioning - Tundra


Fig. 195: Installing Evaporator Temperature Sensor 
Courtesy of TOYOTA MOTOR SALES, U.S.A., INC. 

3. INSTALL NO. 1 COOLER EVAPORATOR SUB-ASSEMBLY 

a. Install the evaporator to the blower case (front side). 

Fig. 196: Identifying Evaporator 
Courtesy of TOYOTA MOTOR SALES, U.S.A., INC. 

b. Install the blower case (back side).  

c. Install the 6 screws and attach the 4 claws. 


2009 Toyota Tundra 

2009 HVAC Air Conditioning - Tundra


Fig. 197: Locating Blower Case Screws And Claws 
Courtesy of TOYOTA MOTOR SALES, U.S.A., INC. 

d. Install the packing, as shown in the illustration. 

Fig. 198: Identifying Packing 
Courtesy of TOYOTA MOTOR SALES, U.S.A., INC. 

4. INSTALL HEATER RADIATOR UNIT SUB-ASSEMBLY 

a. Install the heater radiator unit.  

b. Attach the 3 claws to install the heater clamp. 


2009 Toyota Tundra 

2009 HVAC Air Conditioning - Tundra


Content   ..  2437  2438  2439  2440   ..