Subaru Legacy III (2000-2003 year). Manual - part 939
GW-16
GLASS/WINDOWS/MIRRORS
FRONT REGULATOR AND MOTOR ASSEMBLY
7. Front Regulator and Motor
Assembly
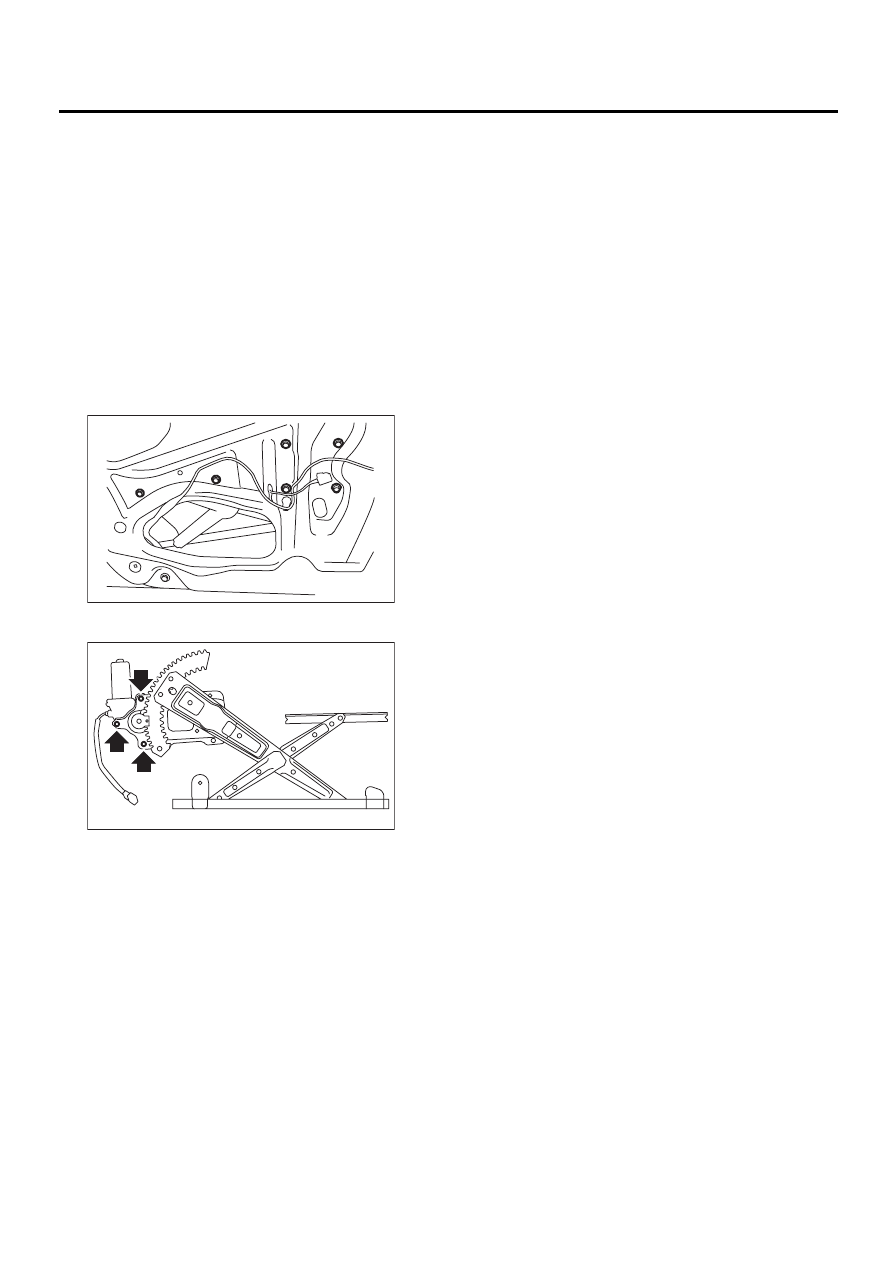
A: REMOVAL
1) Remove door trim. <Ref. to EI-30, REMOVAL,
Front Door Trim.>
2) Remove sealing cover. <Ref. to EB-13, RE-
MOVAL, Front Sealing Cover.>
3) Remove inner remote. <Ref. to SL-19, REMOV-
AL, Front Inner Remote.>
4) Remove door glass. <Ref. to GW-12, REMOV-
AL, Front Door Glass.>
5) Disconnect motor connector.
6) Loosen four bolts and two nuts to pull out regu-
lator assembly.
7) Loosen screws to remove motor assembly.
B: INSTALLATION
1) Install in the reverse order of removal.
2) Adjust front door glass. <Ref. to GW-13, AD-
JUSTMENT, Front Door Glass.>
C: INSPECTION
1) Make sure that power window motor rotates
properly when battery voltage is applied to termi-
nals of motor connector.
2) Change polarity of battery connections to termi-
nals to ensure that motor rotates in reverse direc-
tion.
GW-00098
GW-00099