Subaru Impreza 3 / Impreza WRX / Impreza WRX STI. Manual - part 102
LU(STI)-10
Oil Pressure System
LUBRICATION
B: INSPECTION
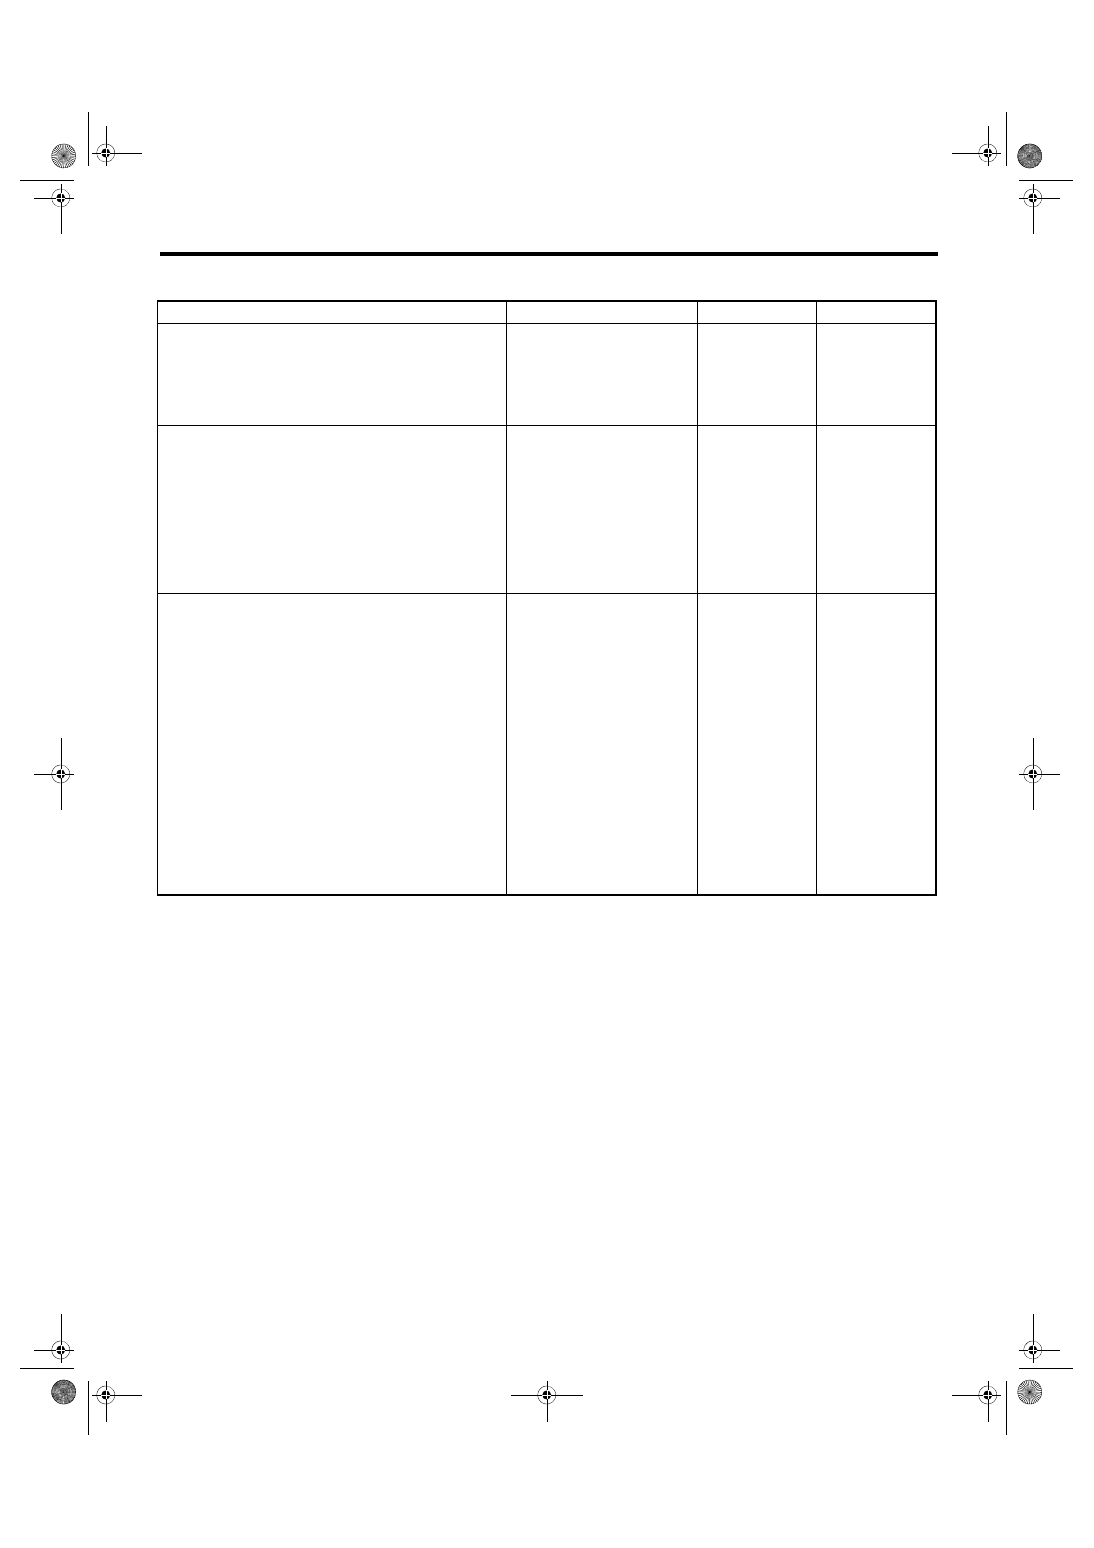
Step
Check
Yes
No
1
CHECK COMBINATION METER.
1) Turn the ignition switch to ON (engine OFF).
2) Check other warning lights.
Does the warning light illumi-
nate?
Repair or replace
the combination
meter. <Ref. to IDI-
5, INSPECTION,
Combination Meter
System.>
2
CHECK POWER SUPPLY TO OIL PRES-
SURE SWITCH.
1) Turn the ignition switch to OFF.
2) Disconnect the connector from oil pressure
switch.
3) Turn the ignition switch to ON.
4) Measure the voltage between oil pressure
switch harness connector and chassis ground.
Connector & terminal
(E11) No. 1 (+) — Chassis ground (–):
Is the voltage 10 V or more?
Replace the oil
pressure switch.
<Ref. to LU(STI)-
22, Oil Pressure
Switch.>
3
CHECK COMBINATION METER.
1) Turn the ignition switch to OFF.
2) Remove the combination meter.
3) Measure the resistance of combination
meter.
Terminals
No. 2 — No. 19:
Is the resistance less than 10
Ω?
Repair the harness
and connector.
NOTE:
In this case, repair
the following item:
• Open circuit of
harness between
combination meter
and oil pressure
switch
• Poor contact of
combination meter
connector
• Poor contact of
oil pressure switch
connector
• Poor contact of
coupling connector
Repair or replace
the combination
meter. <Ref. to IDI-
5, INSPECTION,
Combination Meter
System.>