Subaru Impreza 3 / Impreza WRX / Impreza WRX STI. Manual - part 41
 

  Index      Subaru     Subaru Impreza 3 / Impreza WRX / Impreza WRX STI - service repair manual 2008-2014 year


Search            


Content   ..  39  40  41  42   ..


Subaru Impreza 3 / Impreza WRX / Impreza WRX STI. Manual - part 41


FU(STI)-76

Fuel Tank

FUEL INJECTION (FUEL SYSTEMS)

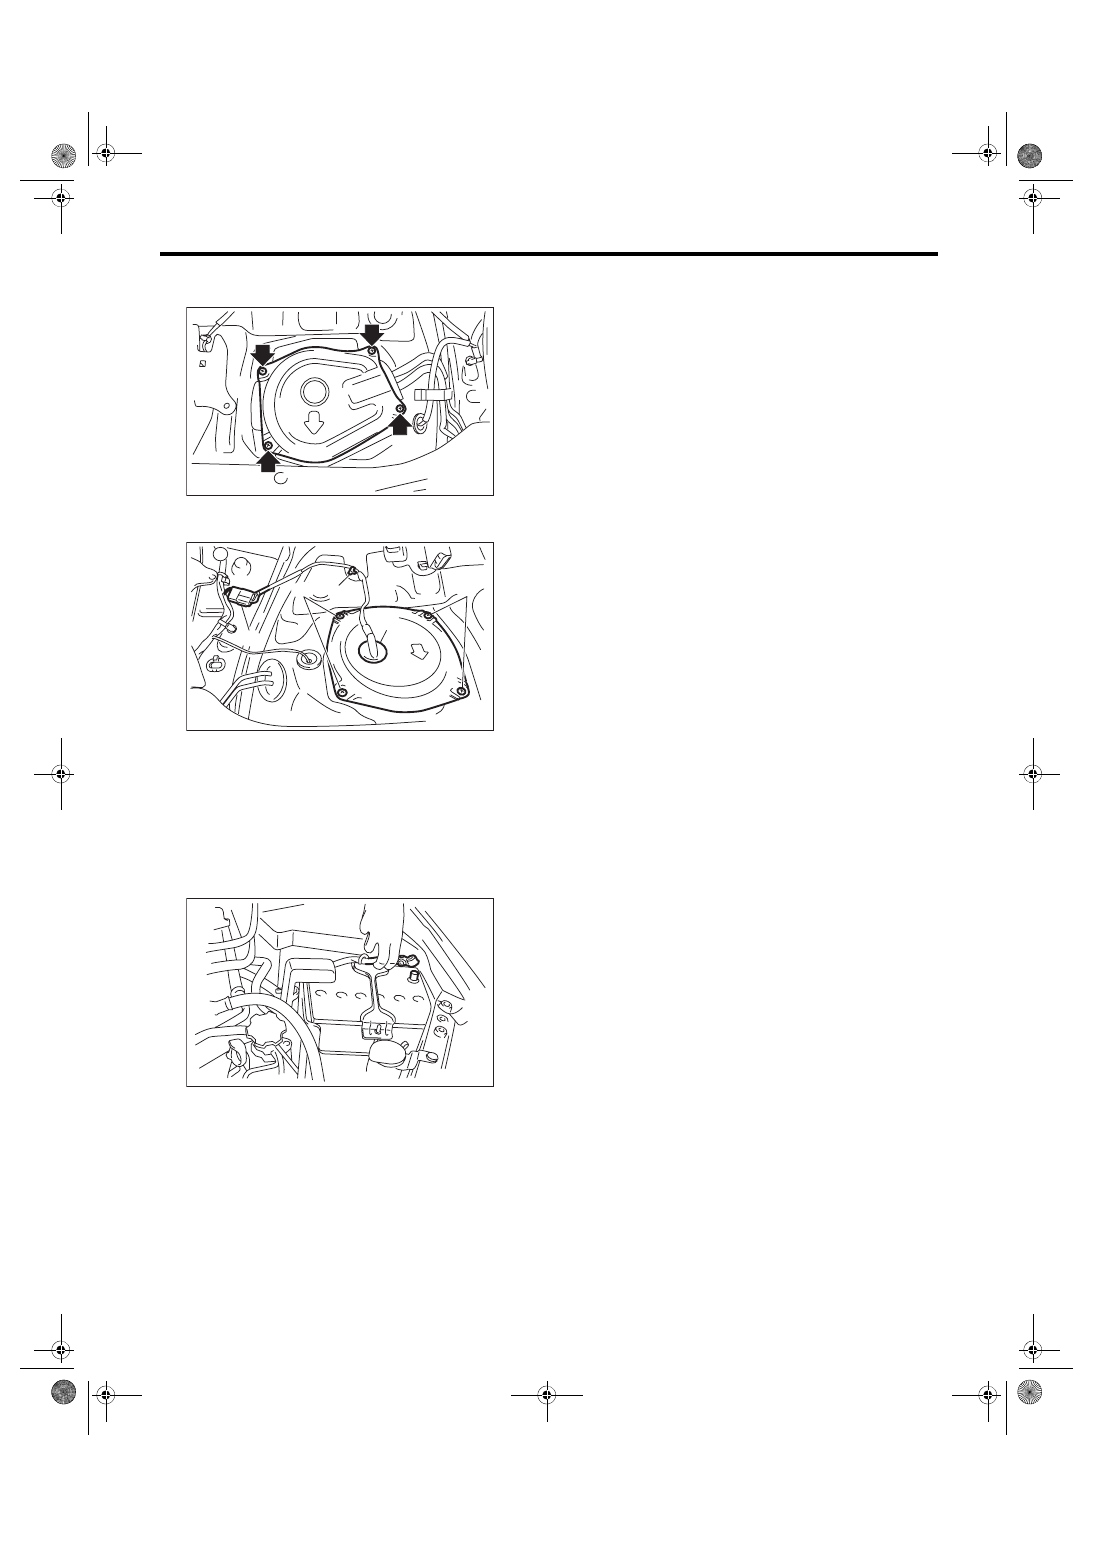
21) Install the service hole cover of fuel sub level

sensor.

22) Attach the service hole cover of the fuel pump,

and attach the connector and clip.

23) Install  the  rear  seat  cushion.  <Ref.  to  SE-14,

INSTALLATION, Rear Seat.>

24) Connect the battery ground terminal.

25) Inspect the wheel alignment and adjust if nec-

essary.

C: INSPECTION

1) Check that the fuel tank and fuel pipe have no

deformation, cracks and other damages.

2) Check  that  the  fuel  hose  and  tube  have  no

cracks, damage or loose part.

(A) Connector
(B) Clip

(C) Screw
(D) Grommet

FU-06553

FU-06552

(A)

(B)

(D)

(C)

(C)

IN-00203

FU(STI)-77

Fuel Filler Pipe

FUEL INJECTION (FUEL SYSTEMS)

26.Fuel Filler Pipe

A: REMOVAL

WARNING:

Place  “NO  OPEN  FLAMES”  signs  near  the

working area.
CAUTION:

Be careful not to spill fuel.

1) Release the fuel pressure. <Ref. to FU(STI)-67,

RELEASING  OF  FUEL  PRESSURE,  PROCE-

DURE, Fuel.>

2) Drain  fuel.  <Ref.  to  FU(STI)-67,  DRAINING

FUEL  (WITH  SUBARU  SELECT  MONITOR),

PROCEDURE, Fuel.>

3) Disconnect the ground cable from battery.

4) Open the fuel filler lid, and remove the filler cap.

5) Remove the screws which secure the fuel filler

ring, and then remove the fuel filler ring.

6) Remove the rear wheel RH.

7) Lift up the vehicle.

8) Remove the rear mud guard RH. <Ref. to EI-30,

REAR MUD GUARD, REMOVAL, Mud Guard.>

9) Remove the rear sub frame. <Ref. to RS-17, RE-

MOVAL, Rear Sub Frame.>

10) Remove the bolts and nuts which secure fuel

filler pipe assembly onto the vehicle body.

11) Disconnect the fuel filler hose (A) and evapora-

tion hose (B) from the fuel filler pipe assembly.

12) Remove the fuel filler pipe assembly from the

underside of the vehicle.

IN-00203

FU-03835

FU-03426

(B)

FU-05755

(A)

(B)

FU(STI)-78

Fuel Filler Pipe

FUEL INJECTION (FUEL SYSTEMS)

B: INSTALLATION

1) Open the fuel filler lid.

2) Attach the fuel filler pipe gasket to the fuel filler

pipe assembly, and insert the fuel filler pipe assem-

bly from inside of the rear fender.

3) Install the fuel filler ring to the fuel filler pipe as-

sembly.
NOTE:

If the edges of rubber gasket are folded toward in-

side, straighten it with a flat tip screwdriver.

Tightening torque:

4.4 N·m (0.4 kgf-m, 3.2 ft-lb)

4) Securely insert the fuel filler hose (A) and evap-

oration  hose  (B)  until  the  hose  end  contacts  the

spool, then attach the clamp or clip as shown in the

figure.
Tightening torque:

2.5 N·m (0.3 kgf-m, 1.8 ft-lb)

(A) Fuel filler pipe gasket
(B) Fuel saucer

(C) Fuel filler ring
(D) Rubber gasket

FU-04419

(A)

(B)

(C)

(D)

FU-03835

(1) Hose
(2) Clamp or clip
(3) Spool
(4) Pipe

(B)

FU-05755

(A)

(B)

FU-05646

(1)

(2)

(4)

L

L/2

(3)

FU(STI)-79

Fuel Filler Pipe

FUEL INJECTION (FUEL SYSTEMS)

5) Install  the  fuel  filler  pipe  assembly  to  vehicle

body.
Tightening torque:

7.5 N·m (0.8 kgf-m, 5.5 ft-lb)

6) Install  the  rear  sub  frame.  <Ref.  to  RS-18,  IN-

STALLATION, Rear Sub Frame.>

7) Install the rear mud guard RH. <Ref. to EI-30, IN-

STALLATION, Mud Guard.>

8) Lower the vehicle.

9) Install the rear wheel RH.
Tightening torque:

100 N·m (10.2 kgf-m, 73.8 ft-lb)

10) Connect the battery ground terminal.

11) Inspect the wheel alignment and adjust if nec-

essary.

C: DISASSEMBLY

1) Remove the shut valve from the fuel filler pipe.

<Ref. to EC(STI)-18, REMOVAL, Shut Valve.>

2) Remove the evaporation pipe from the fuel filler

pipe.

D: ASSEMBLY

Assemble in the reverse order of disassembly.
Tightening torque:

7.5 N·m (0.8 kgf-m, 5.5 ft-lb)

E: INSPECTION

1) Check  that  the  fuel  filler  pipe  and  evaporation

pipe have no deformation, cracks or other damag-

es.

2) Check that the hose has no cracks, damage or

loose part.

FU-03426

IN-00203

FU-03428


Content   ..  39  40  41  42   ..