SsangYong Rexton. Manual - part 350
M161 ENGINE MECHANICAL 1B2-83
SSANGYONG Y200
YAD1B980
YAD1B990
YAD1B0A0
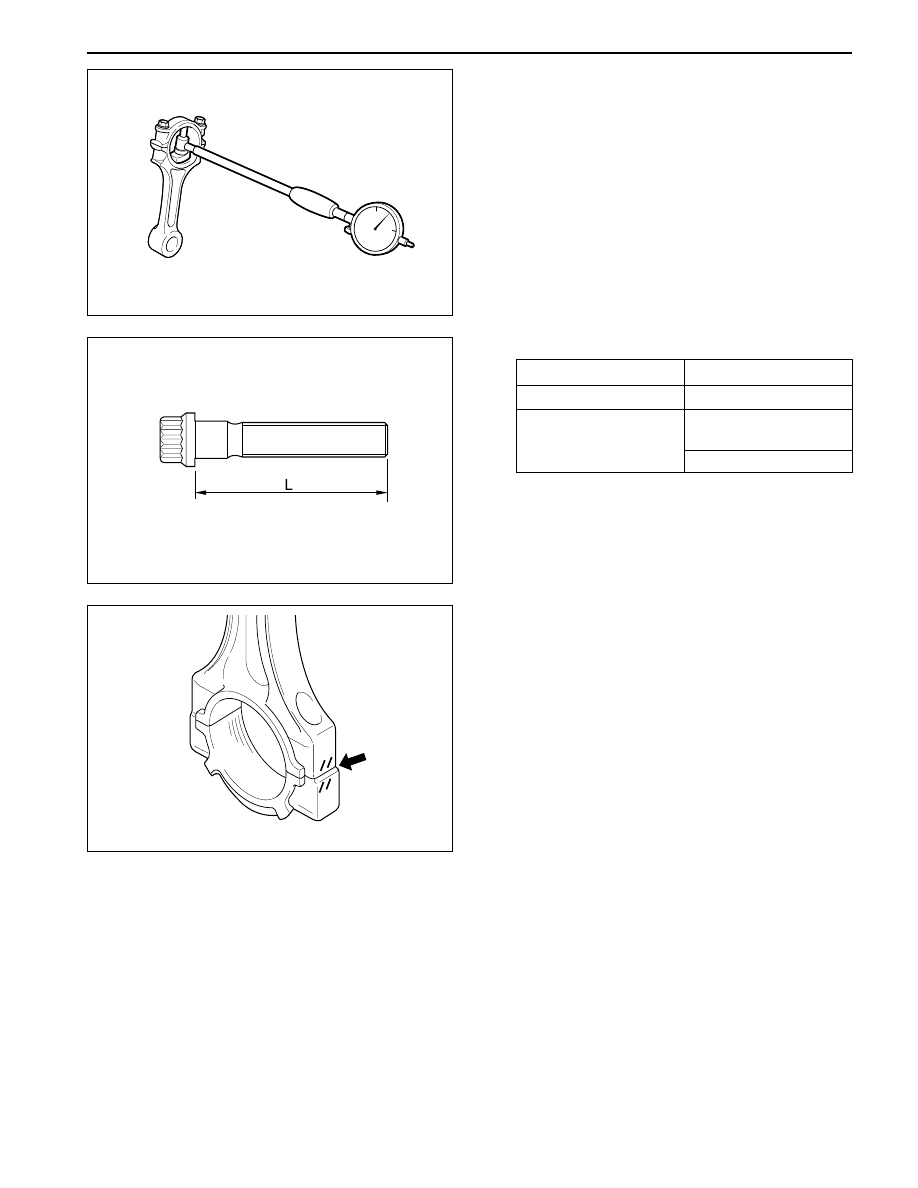
Inspection
1. Measure the basic bore of the connecting rod
bearing.
Notice: If the basic bore exceeds the value of
51.614 mm, replace the bearing or check the
connecting rod.
3. C h e c k t h e a s s e m b l y m a r k ( i n d i c a t i o n / / o r
number:arrow) of the connecting rods and the
bearing cap when installing.
Notice:
•
Make sure it doesn’t exceed over 4g with other
connecting rods when replacing the connecting
rods.
•
Check if the connecting rod and the bearing
cap are accurately seated on the groove when
replacing the bearing.
2. Check connecting rod bolts.
51.7 - 52 mm
52.9 mm
1st step : 40 N•m
(30 lb-ft)
2nd step : 90°
Notice: If the length exceeds max. length, replace
it.
Length When New (L)
Max. Length (L)
Tightening Torque