Seat Ateca (2022 year). Manual in english - page 5
 

  Index      Manuals     Seat Ateca (2022 year). Manual in english


Search            copyright infringement  


Content      ..     3      4      5      6     ..


Seat Ateca (2022 year). Manual in english - page 5


Operation

WARNING

If messages are ignored, the vehicle may
stall in traffic and cause accidents and se-
vere injuries.

Never ignore the messages displayed.

Stop the vehicle at the next opportunity

and in a safe place.

Note

To avoid affecting the correct operation of
the system, take the following points into
consideration:

Regularly clean the area of vision of the

camera and keep it in a clean state, without
snow or ice.

Do not cover the field of vision of the

camera.

Always replace damaged or worn blades

when required to avoid lines on the cam-
era's field of vision.

Check that the windscreen is not dam-

aged in the area of the camera's field of vi-
sion.

The use of outdated maps on the naviga-

tion system may cause the system to show
traffic signs incorrectly.

In the waypoints mode of the navigation

system, the traffic sign detection system is
only partly available.

Failure to heed the control lamps and

corresponding text messages when they

light up may result in damage to the vehi-
cle.

Eco-efficient driving assistance

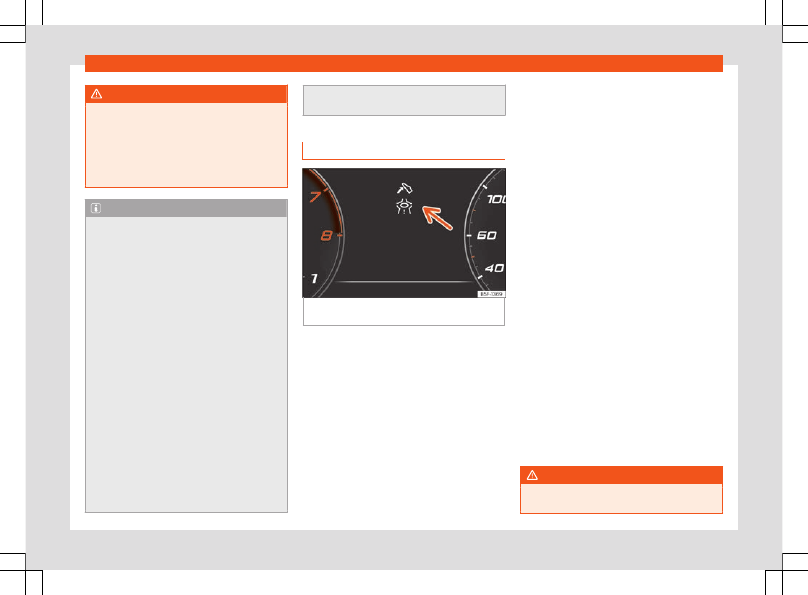
Fig. 58 

Eco-efficient driving assistance indi-

cation (schematic representation).

Eco-efficient driving assistance helps you
drive with care and with low energy con-
sumption by following instructions superim-
posed in the digital cockpit, depending on the
situation.

When you approach places such as a junc-
tion, a roundabout or a section of road with a
speed limit, the symbol 

 is displayed along

with an event in the digital cockpit 

››› 

Fig. 58

.

As soon as you follow the indication and take
your foot off the accelerator, the vehicle
adapts, based on the selected driving profile

and distance to the incident, brake energy re-
cuperation and speed.

Eco-efficient driving assistance uses the trip
data from the infotainment system and the
sensors of some assist systems. If no destina-
tion guidance is active, the most likely route is
used.

Pressing the accelerator can cancel the in-
tervention of the assistance at any time.

Eco-efficient driving assistance can be
switched on and off in the infotainment sys-
tem, in the assist system settings

››› 

page 89

.

Eco-efficient driving assistance is temporarily
switched off if:

The gear selector is in the 

S

 position.

The sport driving program is used.

Driving with adaptive cruise control (ACC)

or cruise control (GRA).

When these conditions no longer exist, the
assistance is reactivated if it is switched on in
the assist system settings.

Eco-efficient driving assistance is available
depending on the equipment, although not in
all countries.

WARNING

The system is not a replacement for driver
awareness.

76

Instruments and warning/control lamps

Adapt your speed and driving style at all

times to suit visibility, weather, road and
traffic conditions.

Traffic signs on the road and traffic regu-

lations have priority over eco-driving notes.

Note

The appearance of the symbols may vary

slightly depending on the equipment and
model. System updates may modify or ex-
pand the symbols.

When the system is switched on, eco-ef-

ficient driving assistance can also increase
recuperation without any indication being
displayed. This can occur in situations such
as when the accelerator pedal is released
when a vehicle is driving in front. In this
case, energy recuperation is adapted
match the speed of the vehicle in front
without any indication being displayed.

Time

Setting the time on the infotainment sys-
tem

Press 

 > 

 Settings

.

Select the menu option 

Time and date

 to

set the time 

››› 

page 85

.

Setting the time on analogue the instru-
ment panel

To set the time (for all vehicle clocks), press

and hold the button 



 on the instrument

panel until the 

Time

 is displayed.

Release the button 



. The time is dis-

played on the instrument panel display and
the hours field is highlighted.

Afterwards, press the button 



 until the

desired time is displayed. To scroll quickly,
hold the button 



.

When they have finished setting the hour,

wait until the minute field is marked on the in-
strument panel display.

Afterwards, press the button 



 until the

desired time is displayed. To scroll quickly,
hold the button 



.

Release the button 



 in order to finish

setting the time.

Revolution counter

The rev counter indicates the number of en-
gine revolutions per minute.

Together with the gear-change indicator, the
rev counter offers you the possibility of using
the engine of your vehicle at a suitable
speed.

The beginning of the red zone of the rev
counter indicates the maximum speed in any

gear after running-in and with the engine hot.
However, it is advisable to change up a gear
or move the selector lever to 

D

 (or lift your

foot off the accelerator) before the needle
reaches the red zone 

››› 

.

We recommend that you avoid high revs and
that you follow the recommendations on the
gear-change indicator. Consult the addition-
al information in 

››› 

page 223, Selecting the

optimal gear

.

CAUTION

To prevent damage to the engine, the rev

counter needle should only remain in the
red zone for a short period of time.

When the engine is cold, avoid high revs

and heavy acceleration and do not make
the engine work hard.

For the sake of the environment

Changing up a gear early will help you to
save fuel and minimise emissions and en-
gine noise.

77

Operation

Fuel gauge

Fig. 59 

Analogue instrument panel: fuel

gauge

Fig. 60 

Digital instrument panel: fuel gauge.

Control lamps

It lights up, and in addition, the

lower diode lights up in red

Fuel tank almost empty. The fuel reserve level has
been reached 

››› 

. Refuel as soon as you have the

opportunity.
When the fuel level is very low, the lower diode flash-

es red.

It lights up yellow

Presence of water in diesel.

Turn off the engine and seek professional assistance.

The display only works when the ignition is
switched on.

The fuel range is displayed on the instrument
panel.

You can consult the tank capacity of your ve-
hicle in the 

››› 

page 350

 section.

WARNING

When driving with low fuel, the vehicle may
stall in traffic and cause accidents and se-
vere injuries.

If the fuel tank level is too low, fuel could

reach the engine irregularly, particularly
when driving up or down slopes.

The steering system and the driver assis-

tance systems and brakes do not work
when the engine is running irregularly or

switches off due to lack of fuel or an irregu-
lar supply thereof.

SEAT recommends always refuelling

when the tank is approximately one quarter
full, to prevent the vehicle from stopping
due to a lack of fuel.

CAUTION

Never run the fuel tank completely dry. An
irregular fuel supply can cause misfiring
and unburnt fuel could enter the exhaust
system. The catalytic converter or the par-
ticulate filter may get damaged!

Note

The small arrow on the fuel gauge next to
the fuel pump symbol points out towards
the side of the vehicle with the fuel tank
flap.

78

Instruments and warning/control lamps

Engine coolant temperature indica-
tor.

Fig. 61 

Analogue instrument panel: engine

coolant temperature indicator.

Fig. 62 

Digital instrument panel: engine cool-

ant temperature indicator.

Cool zone.

 The engine has not reached

operating temperature yet. Avoid high
speeds and stressing the engine if it has
not reached operating temperature.

A

Normal zone.

 At high outside tempera-

tures and when making the engine work
hard, the diodes may continue lighting up
and reach the upper zone. This is no
cause for concern, provided the control
lamp does not light up 

Warning area.

 When the engine is work-

ing hard, especially at high outside tem-
peratures, the diodes may light up in the
warning area.

The coolant temperature gauge only works
when the ignition is switched on.

Control and warning lamp

It lights up red


Do not carry on driving!

Engine coolant level too low, coolant temperature too
high.

Flashes red

Fault in the engine coolant system.

Stop the vehicle, switch off the engine and

let it cool down.

Check the engine coolant level

››› 

page 314

.

If the warning lamp does not switch off even

if the coolant level is correct, request assis-
tance from specialised personnel.

B

C

CAUTION

To ensure a long useful life for the engine,

avoid high revs, driving at high speed and
making the engine work hard for approxi-
mately the first 15 minutes when the engine
is cold. The phase until the engine is warm
also depends on the outside temperature. If
necessary, use the engine oil temperature

››› 

page 71

 as a guide.

Additional lights and other accessories in

front of the air inlet reduce the cooling ef-
fect of the coolant. At high outside temper-
atures and high engine loads, there is a risk
of the engine overheating.

The front spoiler also ensures proper dis-

tribution of the cooling air when the vehicle
is moving. If the spoiler is damaged this can
reduce the cooling effect, which could
cause the engine to overheat. Seek spe-
cialist assistance.

Service intervals

The service interval display appears on the
instrument cluster screen and in the infotain-
ment system.

There are different versions of instrument
panels and infotainment systems, so the ver-
sions and instructions on the screens may
vary.

SEAT distinguishes between services 

with

 en-

gine oil change (e.g. Oil change service) and

»

79

Operation

services 

without

 engine oil change (e.g. In-

spection).

In vehicles with 

Services established by

time or mileage

, the service intervals are al-

ready pre-defined.

In vehicles with 

LongLife Service

, the inter-

vals are determined individually. Thanks to
technological progress, maintenance work
has been greatly reduced. Because of the
technology used by SEAT, with this service
you only need to change the oil when the ve-
hicle so requires. To calculate this variation
(max. 2 years), the vehicle's conditions of use
and individual driving styles are considered.
The advance warning first appears 20 days
before the date established for the corre-
sponding service. The kilometres (miles) re-
maining until the next service are always
rounded up to the nearest 100 km (miles) and
the time is given in complete days. The cur-
rent service message cannot be viewed until
500 km after the last service. Prior to this, on-
ly lines are visible on the display.

Inspection reminder

If a service or an inspection has to be carried
out soon, a 

service reminder

 will be dis-

played when the ignition is switched on.

The figure displayed are the kilometres that
can still be travelled or the time until the next
service.

Service due

When 

the time for a service

 or an 

inspec-

tion

 comes, an audible warning will be emit-

ted when the ignition is switched on and the
fixed key symbol 

 may appear on the in-

strument panel for a few seconds, along with
one of the following messages:

Service now!

Please have your vehicle inspec-

ted.

Oil change service due!

Oil change service and inspection

due!

Consult a service notification

With the ignition switched on, the engine off
and the vehicle at a standstill, the current

service notification

 can be read:

Check the date of the current service on the
infotainment system

Press the function button 

 Data > Set-

tings > Service

OR


 > Vehicle sta-

tus


››› 

page 85

.

Select the 

Service

 menu option to display

information about the services.

Vehicles with analogue instrument panel

Press and hold the button 



››› 

Fig. 54 

4

 for more than 5 seconds to con-

sult the service message

Vehicles with digital instrument panel

The date of the service can only be read

through the Service menu 

››› 

page 70

.

Resetting service interval display

If the service was 

not

 carried out by a SEAT

dealership, the display can be reset as fol-
lows:

Vehicles with analogue instrument panel

Switch off the ignition, press and hold but-

ton 




››› 

Fig. 54 

4

.

Switch ignition back on.

Release the 



 button and press it

again for the next 20 seconds.

Vehicles with digital instrument panel

The service interval display can only be re-

set through the Service menu 

››› 

page 70

.

Do not

 restart the indicator between the

service intervals, otherwise the information
displayed will be incorrect.

If the oil change service is reset manually, the
service interval display changes to a fixed
service interval, also in vehicles with 

Flexible

oil change service

.

Note

The service message disappears after a

few seconds, when the engine is started or
when 



 button is pressed on the wiper

80

Instruments and warning/control lamps

lever, or the 



 button on the multifunction

steering wheel.

In vehicles with the LongLife system in

which the battery has been disconnected
for a long period of time, it is not possible to
calculate the date of the next service.
Therefore the service interval display may
not be correct. In this case, bear in mind the
maximum service intervals permitted

››› 

page 332

.

If you reset the display manually, the next

service interval will be indicated as in vehi-
cles with fixed service intervals. For this
reason we recommend that the service in-
terval display be reset by a SEAT author-
ised Dealer.

Using the instrument panel

Introduction

With the ignition switched on, it is possible to
read the different functions of the display by
scrolling through the menus.

In vehicles with multifunction steering wheel,
the multifunction display can only be operat-
ed with the steering wheel buttons.

Some menu options can only be read when
the vehicle is at a standstill.

WARNING

Distracting the driver in any way can lead
to an accident and cause injuries.

Never use the menus on the instrument

panel display while the vehicle is in motion.

Note

After loading or changing the 12-volt bat-
tery, check the system settings. If the pow-
er supply is interrupted, the system settings
might be incorrect or deleted.

Operation using the multifunction
steering wheel

Fig. 63 

Right side of the multifunction steering

wheel: buttons to the menus and information

displays on the instrument panel.

As long as a priority 1 

››› 

page 72

 warning is

active, it will not be possible to access any

menu. Some warnings can be confirmed and
hidden with the button  



 of the multifunction

steering wheel 

››› 

Fig. 63

.

Select a menu or an informative display

Switch the ignition on.

If a message or vehicle symbol is displayed,

press the button  




››› 

Fig. 63

; if necessary,

several times.

To change menus, use buttons  

 or  

››› 

Fig. 63

.

To open the menu or the information dis-

played, press the button  




››› 

Fig. 63

 or wait

a few seconds until the menu or the informa-
tive display opens automatically.

Changing menu settings

In the menu displayed, turn the right thumb-

wheel of the multifunction steering wheel

››› 

Fig. 63

 until the desired option of the menu

is highlighted. The option appears framed.

Press the button  




››› 

Fig. 63

 to make the

required modifications. A mark indicates that
the system or function is activated.

Back to menu selection

Press the button 

 or 


››› 

Fig. 63

.

81

Operation

Operation with the wiper lever

Fig. 64 

Wiper lever: control keys.

As long as a priority 1 

››› 

page 72

 warning is

active, it will not be possible to access any
menu. Some warnings can be confirmed and
hidden with the button 

››› 

Fig. 64 

1

 .

Select a menu or an informative display

Switch the ignition on.

If a message or vehicle symbol is displayed,

press button 

1

; if necessary, several times.

To display the menus 

››› 

page 69

 or to re-

turn to the selection of menus from a menu or
from an informative display, hold down the
rocker button 

2

.

To change from one menu to another, press

the upper or lower part of the rocker switch.

To open the menu or the informative display

shown, press button 

1

 or wait a few seconds

until the menu or the informative display
opens automatically.

Changing menu settings

In the menu displayed, press the upper or

lower part of the rocker switch 

2

 until the re-

quired menu option is checked. The option
appears framed.

Press button 

1

 to make the required modi-

fications. A mark indicates that the system or
function is activated.

Back to menu selection

Select 

Back

 on the corresponding menu to

exit.

Note

If when switching on the ignition warnings
are shown about existing faults, it might not
be possible to change the settings or show
the information as described. In this case,
go to a specialised workshop and request a
repair.

Button for the driver assistance
systems

Fig. 65 

On the turn signal and main beam lev-

er: button for driver assistance systems (de-

pending on versions).

Fig. 66 

Left side of the multifunction steering

wheel: button for driver assistance systems

(depending on versions).

With the turn signal and main beam headlight
lever button, you can activate or deactivate

82

Instruments and warning/control lamps

the driver assistance systems displayed in the

Assistance systems

 menu .

Activating or deactivating a driver assis-
tance system using the turn signal lever
and main beam headlight

Briefly press the 

››› 

Fig. 65


1

 button to

open the 

Assistants

 menu.

Select the driver assistance system and ac-

tivate or deactivate it 

››› 

page 81

. A mark indi-

cates that driver assistance system is switch-
ed on.

Afterwards, mark or confirm the selection

with button 



 on the windscreen wiper

lever or button 



 on the multifunction steer-

ing wheel .

Activating or deactivating a driver assis-
tance system using the multifunction
steering wheel

Press the button 


››› 

Fig. 66

 to open the

Aids

 menu.

Select the driver assistance system and ac-

tivate or deactivate it. A mark indicates that
driver assistance system is switched on.

Next, confirm the selection by pressing the 



 button on the multifunction steering wheel.

The driver assistance systems can also be
switched on and off in the infotainment sys-
tem, in the menu Vehicle settings

››› 

page 89

.

Control lamps

Control and warning lamps

The control and warning lamps are indicators
of warnings 

››› 

, faults or certain functions.

Some control and warning lamps come on
when the ignition is switched on, and switch
off when the engine starts running, or while
driving.

Depending on the model, additional text
messages may be viewed on the instrument
panel display. These may be purely informa-
tive or they may be advising of the need for
action 

››› 

page 64, Instrument panel

.

Depending upon the equipment fitted in the
vehicle, instead of a warning lamp, some-
times a symbol may be displayed on the in-
strument panel.

When certain control and warning lamps are
lit, an audible warning is also heard.

Red warning lamps

Notification central lamp: additional infor-
mation on the instrument panel display

Parking brake on 

››› 

page 258

.

Fault in the brake system 

››› 

page 258

.

Fault in the steering system 

››› 

page 224

.

Driver or passenger has not fastened seat

belt 

››› 

page 16

.

Engine cooling fluid 

››› 

page 79

.

Engine oil pressure 

››› 

page 312

.

Anomaly in the alternator 

››› 

page 319

.

Press the foot brake 

››› 

page 240

.

AdBlue level too low, 

OR

 fault in the SCR

system 

››› 

page 303

 .

Yellow warning lamps

Notification central lamp: additional infor-

mation on the instrument panel display

Front brake pads worn 

››› 

page 258

.

Fault in the ESC or the system caused it to
switch off; 

OR

 ESC or ASR operating

››› 

page 263

.

ASR switched off manually; 

OR

 ESC in

Sport mode 

››› 

page 263

.

Fault in the ABS 

››› 

page 263

.

Rear fog light switched on 

››› 

page 114

.

Fault in the emission control system

››› 

page 305

.

Pre-heating of the diesel engine; 

OR

 fault

in the management of the diesel engine

››› 

page 305

.

»

83

Operation



Fault in the petrol engine management

››› 

page 305

.

Particulate filter blocked 

››› 

page 305

.

Fault in the steering system 

››› 

page 224

.

Tyre pressure monitor system

››› 

page 328

.

Fuel tank almost empty 

››› 

page 78

.

Adblue level low, 

OR

 fault in the SCR sys-

tem 

››› 

page 303

.

Fault in airbag system and seat belt ten-
sioners 

››› 

page 25

.




Front passenger front airbag disabled

››› 

page 25

.




Front passenger airbag switched on

››› 

page 25

.

Defective active cruise control (ACC)

››› 

page 245

Lane Assist (lane keeping system)

››› 

page 248

.

Error in the lane assist warning system

››› 

page 248

.

Travel Assist error 

››› 

page 252

.

Fault in the lighting of the vehicle

››› 

page 114

.

Low engine oil level 

››› 

page 312

.

Fault in the gearbox 

››› 

page 221

.

Green indicator lamps

Turn lights or emergency lights on

››› 

page 114

.

Trailer turn signals 

››› 

page 114

.

Auto Hold activated 

››› 

page 262

.

Press the foot brake 

››› 

page 215

.

Cruise control system (GRA) 

››› 

page 234

;

OR

 speed limiter 

››› 

page 236

.

Adaptive cruise control (ACC)

››› 

page 241

.

Lane assist active (Lane Assist) warning

››› 

page 248

.

Travel Assist active 

››› 

page 251

.

Blue indicator lamps

Main beam on or flasher on 

››› 

page 114

.

Other warning lamps

Door(s), rear lid or bonnet open or not
properly closed 

››› 

page 68

.

Main beam assist (Light Assist)

››› 

page 114

.

Hill descent control (HDC) 

››› 

page 223

.

Service interval display 

››› 

page 79

.

Mobile phone connected by Bluetooth® .

Mobile telephone battery charge status.

Risk of freezing 

››› 

page 68

.

Start-Stop system activated 

››› 

page 212

.

Start-Stop system unavailable

››› 

page 212

.

Low consumption driving status

››› 

page 69

.

WARNING

If the warning lamps and messages are ig-
nored, faults may occur in the vehicle, it
may stall in traffic, or accidents and seri-
ous injuries may occur.

Never ignore the warning lamps or text

messages.

Stop the vehicle safely as soon as possi-

ble.

A faulty vehicle represents a risk of acci-

dent for the driver and for other road users.
If necessary, switch on the hazard warning
lamps and put out the warning triangle to
advise other drivers.

Before opening the bonnet, switch off the

engine and allow it to cool.

In any vehicle, the engine compartment is

a hazardous area and could cause severe
injuries 

››› 

page 307

.

84

Instruments and warning/control lamps

Infotainment system

Introduction

The infotainment system brings together im-
portant vehicle functions and systems into a
single central control unit, e.g. air condition-
ing, menu settings, radio equipment and the
navigation system.

The actual number of menus available and
the name of the various options will depend
on the vehicle’s electronics and equipment.

General operating information

General information on the operation of the
infotainment system, as well as on the warn-
ing and safety instructions that must be taken
into account, is found in 

››› 

page 161

.

How to move through the different menus
and select them

Switch the ignition on.

If the infotainment system is off, switch it on.

The different menus are selected directly

on the touch screen using texts, icons or but-
tons.

If the box is checked 

, the function is activa-

ted.

Pressing the menu button 

 will always take

you to the last menu used.

Any changes made using the settings menus
are automatically saved on closing those
menus.

Scroll bar

: Some menus and functions show

more content above or below those dis-
played on the screen at that time, for exam-

ple, long lists of settings. Press on the scroll
bar and pull up or down.

Tutorial

The first time you connect the infotainment
system, a system tutorial will open with a brief
description of the main functions and how to
use it.

Help

In the 

Help

 menu can be found more informa-

tion and tips for using the infotainment sys-
tem.

WARNING

Any distraction may lead to an accident,
with the risk of injury. Operating the Info-
tainment system while driving could dis-
tract you from traffic.

85

Operation

Explanation of the function buttons

Fig. 67 

Schematic representation: Overview of the

possible function buttons on the screen

Top part of the screen

Current time
Driving profile and navigation informa-
tion

. If the user has an active route, both

the time and the distance to the destina-
tion are displayed. If there is no active
route, the driving profile is displayed. On
vehicles with no available driving profile,
the current address is displayed whenev-
er there is no active route.

Information on air conditioning


(valid

for the Connect System)

. In vehicles with

heated steering wheels or windscreen
heating, the corresponding icon is dis-
played when these functions are ena-

A

B

C

bled. If not, the current outside tempera-
ture is displayed.

Telephone information

. Information re-

garding your mobile device is displayed:
available network signal strength, estab-
lished Bluetooth connection, unanswered
calls, new messages, battery status, etc.

System customisation based on user
and notifications.

 Some settings can be

saved in the user accounts of the person-
alization function and can therefore be
changed automatically when switching
user accounts.

D

E

Lower part of the screen (valid for the
Connect System)

Main menu display mode:

: main menu with the 6 main functions

divided into 2 screens (3 + 3, customisa-
ble by the user by pressing on the func-
tion).

: main menu in mosaic mode (all func-

tions of the Infotainment system)
Direct accesses to the functions of the In-
fotainment system (up to 10 functions, 5 +
5, customisable by the user). By pressing
on the icon, you can select/deselect the
functions in question.

F

G

86

Instruments and warning/control lamps

Initial configuration wizard

Fig. 68 

Schematic representation: Initial configu-

ration wizard

The initial configuration wizard will help you
to set up your Infotainment system the first
time you switch it on.

Every time you switch on the Infotainment
system, the initial setup screen will be dis-
played 

››› 

Fig. 68

 if any parameters have not

been set (marked with “

”) or if the 

Don't

show again

 function button has not been

pressed.

Function button: Function

Closes the Configuration Wizard.

Function button: Function

A

Press to set day and time.

B

Press to search and store to memory
the radio stations that have the best
reception at that moment.

C

Press to go to the Online Media set-
tings.

D

Press to link your mobile phone to
the Infotainment system.

Function button: Function

E

Press to select your home address
using your current position or by
manually entering an address.

Don't show
again

Disables the possibility of changing

the settings of the Infotainment sys-

tem. If you want to run the initial con-
figuration, it can be accessed
through 

 Settings > Initial con-

figuration wizard

.

Start

Starts up the Configuration Wizard.

End

Once one or more settings have
been applied, press to finalise the
setup in the main menu of the wizard.

87

Operation

Vehicle information

Fig. 69 

Schematic representation: Vehicle infor-

mation and status

Pressing on 

 > Selection

 and then on 

Vehicle info

 opens the 

Vehicle information

menu with the following submenus:

Driving data.

 The average consump-

tion, average speed, distance travelled,
trip duration and autonomy are shown. It
has 3 memories: “Since start”, “Long-
term” and “Since refuel” 

››› 

page 70

.

Vehicle status.

 The warnings regarding

faults, incidents, memorisation of the
tyre pressure or information of the next
inspection service are displayed.


88

Instruments and warning/control lamps

Assist systems and vehicle settings

Fig. 70 

Schematic representation: Assist systems

and vehicle settings

The number of assist systems and settings
depend on the version and the country in
question.

Driver assistance

Automatic parking brake activation

››› 

page 260

.

Park assist 

››› 

page 267

.

Activate / deactivate ESC, stabilisation
systems and brake assist 

››› 

page 263

.

Activate / deactivate the Start-Stop sys-
tem 

››› 

page 212

.

Adaptive cruise control (ACC)

››› 

page 240

.

Lane Assist (lane keeping system)

››› 

page 248

.

Emergency brake assistance system
(Front Assist) 

››› 

page 237

.

Fatigue detection 

››› 

page 72

.

Traffic sign recognition 

››› 

page 73

.

Lane assist 

››› 

page 254

.

89

Operation

Multifunction steering wheel

Functions

Fig. 71 

Controls on the steering wheel.

Fig. 72 

Controls on the steering wheel.

The steering wheel includes multifunction
modules from where it is possible to control
the audio, telephone, navigation, voice con-
trol and assist functions without the driver
needing to be distracted from the road.

Buttons available depending on the version

Symbol

Function

1

Turn:

 Turn volume up/down

Press:

 Mute volume

2

Turn:

 Search in the instrument panel

menu. In Navigation mode, turn to in-
crease/decrease map size in SEAT
Digital Cockpit

Press:

 Select the highlighted option in

the instrument panel


Radio:

 Search for the previous/next

station.

Media:

 Short press: previous/next

track; long press: fast forward/rewind

Activate phone menu (answer call,
end call)

Switch between media and radio
sources


Change the instrument panel menu
(previous/next)

Enable/disable voice control



Analogue Panel:

 No function

Digital Panel (SEAT Digital Cockpit):

Change digital panel views

››› 

page 66

Activate or deactivate steering wheel
heating 

››› 

page 154

Connect/disconnect the Cruise con-
trol system 

››› 

page 234

 / ACC

››› 

page 240

 / Speed limiter

››› 

page 235

Symbol

Function








: Activate ACC / Cruise control sys-

tem / Limiter



: Reset programmed ACC speed or

cruise control system


: Increase programmed speed

: Decrease programmed speed

Open the drive assist menu in the in-
strument panel

Modify the programmed ACC dis-
tance

Switching Travel Assist on and off

››› 

page 250

90

Opening and closing

Opening and closing

Set of vehicle keys

Vehicle key

Fig. 73 

Vehicle key

Fig. 74 

Vehicle key with alarm button.

Key to the 

››› 

Fig. 73

››› 

Fig. 74

Unlock the vehicle

1

Lock the vehicle
Unlock only the rear lid. Press the button
until all the turn signals on the vehicle
flash briefly. You have 2 minutes to open
the rear lid. Once this time has passed, it
will lock again. In addition, the lamp on
the key flashes.
Control lamp
Alarm button. Only press in the event of
an emergency! When the alarm button is
pressed, the vehicle's sounds and the turn
signals light up for a short time. Press
again to disconnect.

With the vehicle key the vehicle may be
locked or unlocked remotely 

››› 

page 94

.

The vehicle key includes an emitter and bat-
tery. The receiver is in the interior of the vehi-
cle. The range of the vehicle key with remote
control and new battery is several metres
around the vehicle.

If it is not possible to open or close the vehicle
using the remote control key, this should be
re-synchronised 

››› 

page 93

 or the battery

changed 

››› 

page 93

.

Different keys belonging to the vehicle may
be used.

Control lamp on the vehicle key

When a button on the vehicle key is briefly
pressed, the indicator lamp flashes 

4

››› 

Fig. 73

 once briefly, but if the button is held

2

3

4

5

down for a longer period it will flash several
times, such as for convenience opening.

If the vehicle key control lamp does not light
up when the button is pressed, replace the
key's battery 

››› 

page 93

.

Spare key

To obtain a spare key and other vehicle keys,
the vehicle ID number is required.

Each new key contains a microchip which
must be coded with the data from the vehicle
electronic immobiliser. A vehicle key will not
work if it does not contain a microchip or the
microchip has not been encoded. This is also
true for keys which are specially cut for the
vehicle.

The vehicle keys or new spare keys can be
obtained from a SEAT Official Service, a spe-
cialised workshop or an approved key service
qualified to create this kind of key.

New keys or spare keys must be synchronised
before use 

››› 

page 93

.

WARNING

Never leave children or disabled persons

in the vehicle. In case of emergency, they
may not be able to leave the vehicle or
manage on their own.

An uncontrolled use of the key could start

the engine or activate any electric equip-
ment (e.g. electric windows), causing risk

»

91


Content      ..     3      4      5      6     ..