Renault Laguna (2012 year). Instruction - part 5
lighting:
exterior ............................................(up to the end of the DU)
instrument panel ....................................................(current page)
lights:
side lights .........................................................(current page)
lights:
dipped beam headlights ...................................(current page)
hazard warning lights signal ..................................(current page)
signals and lights ..................................(up to the end of the DU)
lighting:
instrument panel ..............................................(current page)
lights:
daytime running lights ......................................(current page)
1.66
ENG_UD20268_1
Eclairage et signalisation extérieurs (X91 - B91 - K91 - Renault)
ENG_NU_936-5_BK91_Renault_1
Exterior lighting and signals
daytime running lights
function
(only relates to front lights)
Depending on the vehicle, the lights
come on without using stalk 1 when the
engine is started. To activate or deacti-
vate this function, refer to the informa-
tion on the “Vehicle settings personali-
sation menu” in Section 1.
á
main beam headlights
With the dipped beam head-
lights lit, pull stalk 1 towards you. This
indicator light on the instrument panel
comes on.
To return to the dipped headlight posi-
tion, pull stalk 1 towards you again.
EXTERIOR LIgHTINg ANd sIgNALs
(1/3)
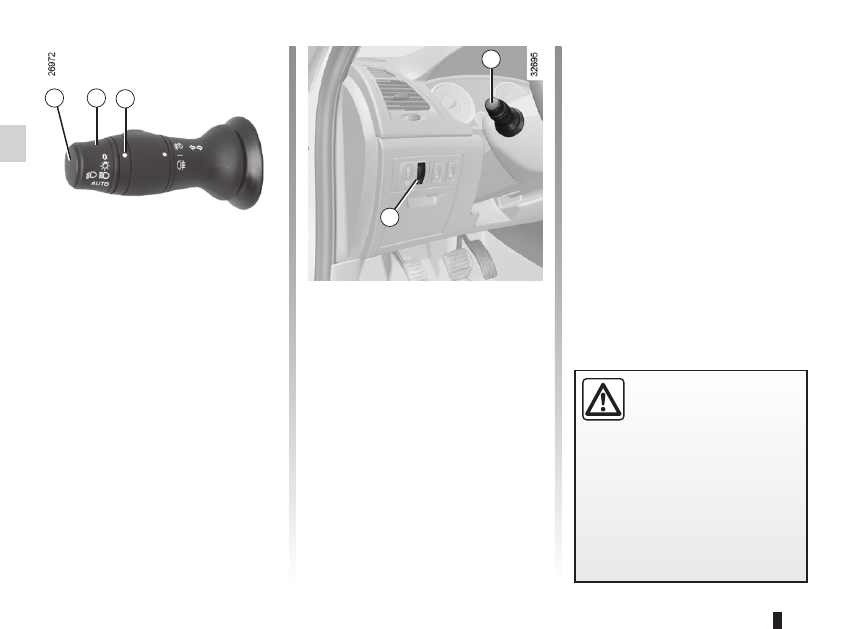
u
side lights
Turn the ring 2 until the symbol
is opposite mark 3.
The instrument panel will light up. The
brightness can be adjusted by turning
the control knob 4.
k
dipped beam
headlights
manual operation
Turn the ring 2 until the symbol is oppo-
site mark 3. This indicator light on the
instrument panel comes on.
Automatic operation
(depending on vehicle)
Turn ring 2 until the AUTO symbol is op-
posite mark 3: with the engine running,
the dipped beam headlights switch on
or off automatically depending on the
brightness of the light outside, without
touching stalk 1.
Before driving at night:
check the electrical equip-
ment is operating cor-
rectly, and depending on
the vehicle, adjust your headlights
(if your vehicle is not carrying its
normal load). As a general precau-
tion, check that the lights are not
obscured (by dirt, mud, snow or ob-
jects being transported).
4
1
3
1
2