Renault Espace (2016 year). Instruction - part 16
4.11
Replacing the battery
As this operation is complex, we advise
you to contact an approved Dealer.
BATTERY
(2/2)
The battery is a speci-
fic type, please ensure it
is replaced with the same
type. Consult an approved
dealer.
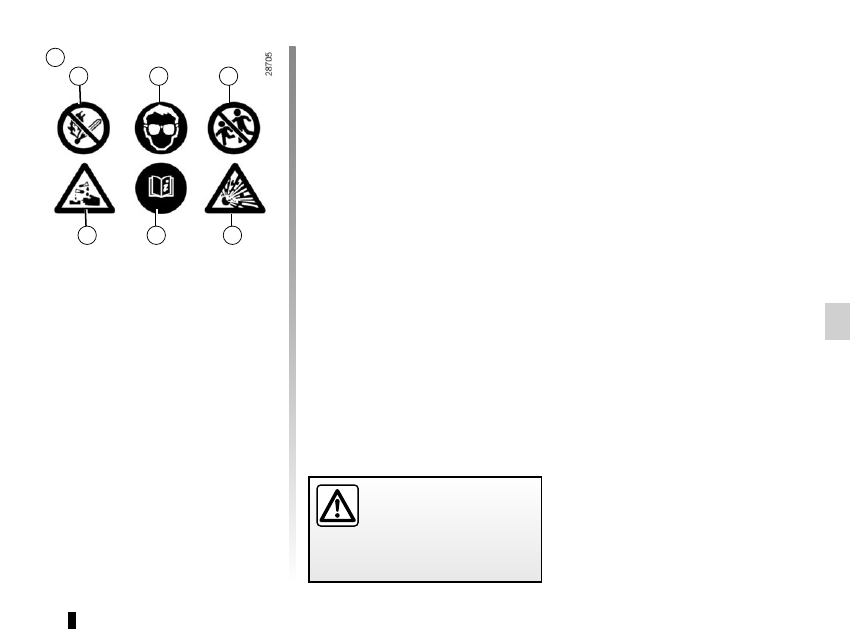
A
2
3
4
5
6
7
Label A
Observe the indications on the battery:
– 2 Naked flames and smoking are for-
bidden;
– 3 eye protection required;
– 4 keep away from children;
– 5 explosive materials;
– 6 refer to the handbook;
– 7 corrosive materials.