Peugeot 208 (2024 year). Manual in english - page 1
Contents
Overview ■
Rear screen demisting/defrosting
52
Installing child seats
83
Temperature pre-conditioning (Electric)
52
Child lock
86
Eco-driving ■
Interior fittings
53
Courtesy lamps
55
Driving 6
Dashboard instruments 1
Interior ambient lighting
56
Driving recommendations
87
Warning and indicator lamps
13
Panoramic glass sunroof
57
Starting / Switching off the engine with
Indicators
19
Boot fittings
57
the key
89
Manual test
23
Starting/Switching off the engine with
Total distance recorder
23
Lighting and visibility 4
Keyless Entry and Start
90
Lighting dimmer
23
Exterior lighting control stalk
58
Manual parking brake
92
Trip computer
24
Direction indicators
59
Electric parking brake
92
Touch screen
25
Headlamp beam height adjustment
60
5-speed manual gearbox
95
Remotely operable additional functions
Automatic illumination of headlamps
60
6-speed manual gearbox
95
(Electric)
29
Guide-me-home and welcome lighting
61
Automatic gearbox (EAT6)
95
Automatic lighting systems - General
Automatic gearbox (EAT8)
97
Access 2
recommendations
61
Automatic gearbox (Hybrid)
99
Remote control / Key
30
Automatic headlamp dipping
62
Drive selector (Electric)
103
Proximity Keyless Entry and Start
32
Wiper control stalk
63
Driving modes
104
Central locking
34
Changing a wiper blade
65
Hill start assist
105
Back-up procedures
35
Automatic wipers
65
Gear shift indicator
106
Doors
37
Stop & Start (Petrol)
106
Boot
38
Safety 5
e-Auto mode (Hybrid)
108
Alarm
38
General safety recommendations
67
Tyre under-inflation detection
108
Electric windows
40
Event Data Recording system
67
Driving and manoeuvring aids - General
Hazard warning lamps
68
recommendations
110
Horn
68
Shortcuts for driving aids
111
Ease of use and comfort 3
Pedestrian horn (Electric)
68
Road signs recognition
112
PEUGEOT i-Cockpit
42
Emergency or assistance
69
Speed limiter
116
Front seats
42
Electronic stability control (ESC)
71
Cruise control - Specific recommendations
118
Steering wheel adjustment
44
Seat belts
73
Cruise control
118
Mirrors
44
Airbags
75
Drive Assist Plus
120
Rear bench seat
46
Child seats
77
Adaptive cruise control
120
Heating and Ventilation
47
Deactivating the front passenger airbag
80
Lane positioning assist
123
Manual air conditioning
48
ISOFIX child seats
80
Lane keeping assist
127
Automatic air conditioning
49
i-Size child seats
81
Blind spot monitoring
130
Front demisting/defrosting
52
2
Contents
Active Safety Brake with Collision Risk Alert and
12 V battery / Accessory battery
185
PEUGEOT Connect Nav 12
Intelligent emergency braking assistance
132
Towing the vehicle
192
First steps
229
Distraction detection
135
Steering mounted controls
230
Parking sensors
137
Technical data
9
Menus
230
Visiopark 1 - Visiopark 2 (with PEUGEOT
Engine technical data and towed loads
195
Voice commands
232
i-Connect Advanced - PEUGEOT i-Connect)
140
Petrol engines
196
Navigation
235
Hybrid engines
198
Connected navigation
238
Practical information 7
Electric engines
199
Applications
240
Compatibility of fuels
145
Dimensions
200
Radio
243
Refuelling
145
Identification markings
200
DAB (Digital Audio Broadcasting) radio
244
Electrified vehicles - General
Media
244
recommendations
146
Touch screen 10" & Bluetooth Radio &
10
Telephone
246
Hybrid system
146
Telephone
Settings
248
Charging system (Electric)
148
First steps
201
Frequently asked questions
250
Charging the traction battery (Electric)
155
Steering mounted controls
202
Towing device
159
Menus
202
PEUGEOT i-Connect
Advanced -
13
Towing device with quickly detachable towball
160
Radio
203
PEUGEOT i-Connect
Roof bars
162
DAB (Digital Audio Broadcasting) radio
205
First steps
254
Snow chains
163
Media
205
Customisation
257
Very cold climate screens
164
Telephone
206
Steering mounted controls
258
Energy economy mode
165
Applications
210
Applications
258
Bonnet
165
Settings
211
Voice commands
259
Engine compartment
166
Frequently asked questions
213
Navigation
260
Checking levels
167
Connectivity
261
Checks
169
PEUGEOT Connect Radio 11
Mirror Screen
263
Free-wheeling
170
First steps
216
Media
265
Advice on care and maintenance
172
Steering mounted controls
217
Phone
266
Menus
218
Settings
267
In the event of a breakdown 8
Applications
219
Help
268
Warning triangle
175
Radio
219
Tool kit
175
DAB (Digital Audio Broadcasting) radio
221
Vehicle data recording and privacy 14
Temporary puncture repair kit
176
Media
221
Spare wheel
178
Telephone
222
Alphabetical index ■
Changing a bulb
182
Settings
225
Fuses
185
Frequently asked questions
227
Appendix ■
3
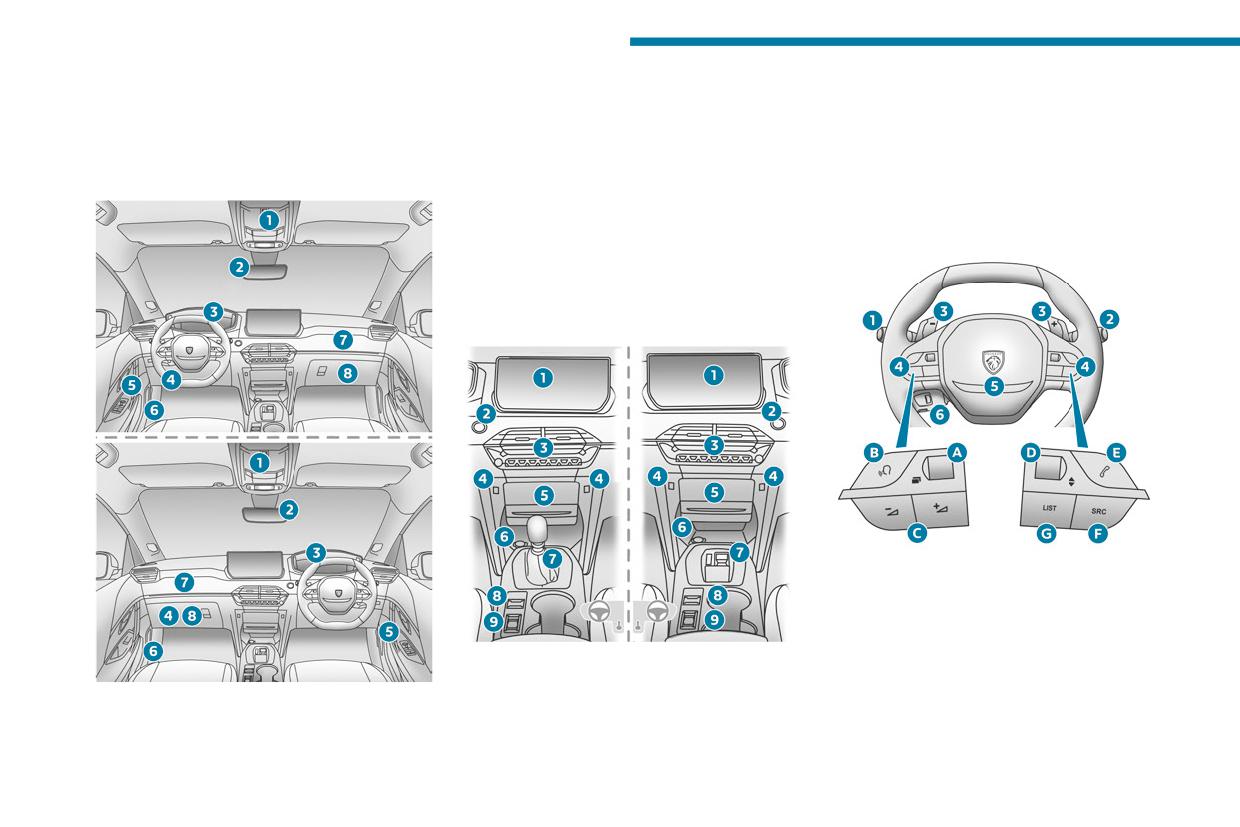
Overview
Instruments and controls
1. Courtesy lamp/Front reading lamps
5. Storage compartment or Wireless
Emergency and assistance call buttons
smartphone charger
These illustrations and descriptions are intended
Warning lamps display for seat belts and front
6. Storage compartment/12 V socket
as a guide. The presence and location of certain
passenger airbag
7. Gearbox or drive selector
elements may vary, depending on the version or
2. Interior rear view mirror
8. Electric parking brake
trim level.
3. Instrument panel
9. Choice of driving mode
4. Fusebox
Steering-mounted controls
5. Electric windows
Electric door mirrors
6. Bonnet release
7. Front passenger airbag
8. Glove box
1. Exterior lighting controls/Direction indicators/
Service indicator
2. Wiper/Screenwash/Trip computer controls
3. Automatic gearbox control paddles
4. Audio system controls
1. Touch screen
A. Select the instrument panel display mode
2. Switching the engine on/off
B. Voice commands
3. Central controls
C. Decrease/Increase volume
4. USB socket(s)
4
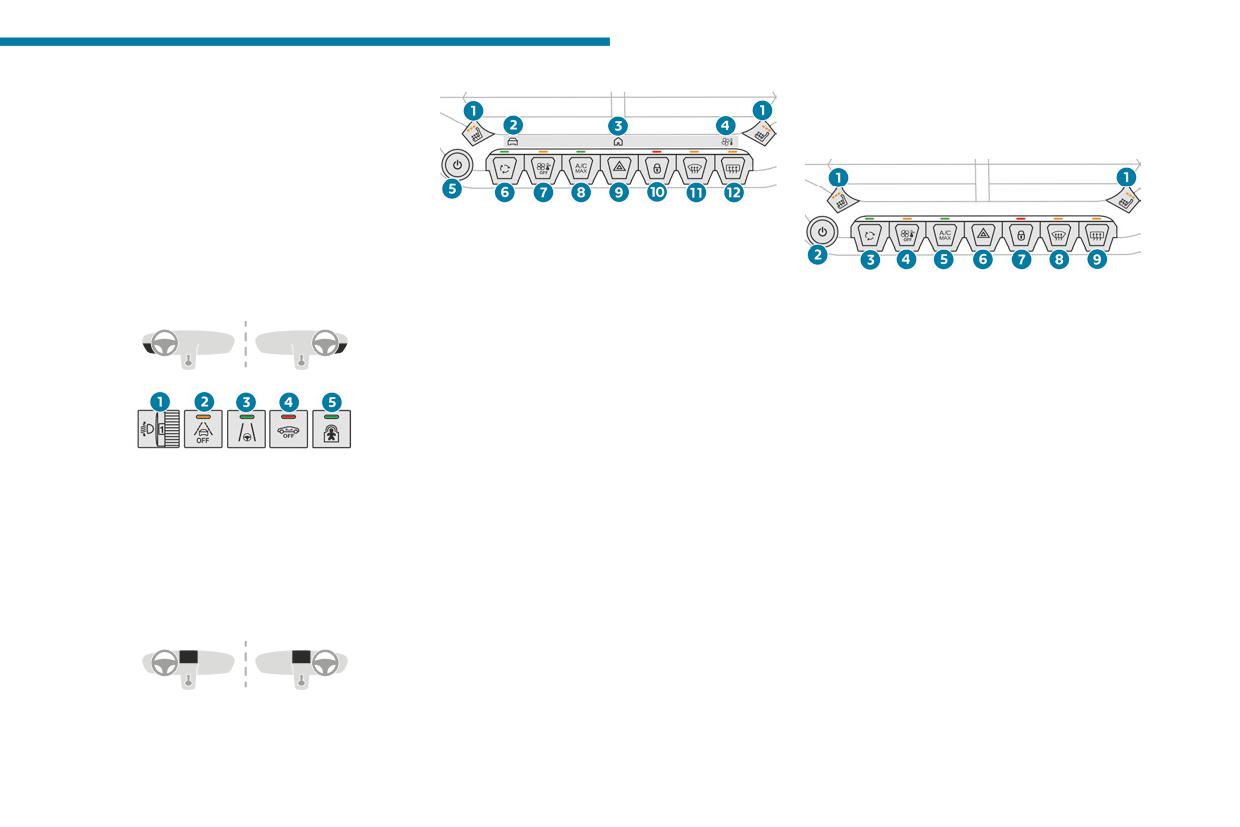
Overview
D. Select previous/next media
12. Rear screen de-icing
Confirm a selection
PEUGEOT Connect Radio / PEUGEOT
E. Access the Telephone menu
Connect Nav
Manage calls
F. Select an audio source
G. Display the list of radio stations/audio tracks
5. Horn/Driver front airbag
1.
Heated seats
6. Controls for Cruise control/Speed limiter/
2.
With Touch screen 10" & Bluetooth Radio &
Adaptive cruise control
Telephone:
Side controls
Direct acces to the Driving menu
1.
Heated seats
With PEUGEOT i-Connect Advanced -
2.
Touch screen on/off/Adjust volume
PEUGEOT i-Connect:
3.
Interior air recirculation
Access to the Shortcuts for driving aids
4.
Thermal comfort system switch-off
3.
With Touch screen 10" & Bluetooth Radio &
5.
Maximum air conditioning
Telephone:
6.
Hazard warning lamps
Access to the touch screen menus
7.
Central locking
With PEUGEOT i-Connect Advanced -
8.
Front demisting/de-icing
PEUGEOT i-Connect:
9.
Rear screen de-icing
1. LED technology headlamps beam height
Access to the HOME pages
adjustment
4.
With Touch screen 10" & Bluetooth Radio &
2. Lane keeping assist (depending on version)
Telephone:
3. Lane positioning assist
Direct access to the Climate menu
4. Alarm
With PEUGEOT i-Connect Advanced -
5. Electric child lock (depending on version)
PEUGEOT i-Connect:
Direct access to the Climate application
Central controls
5.
Touch screen on/off/Adjust volume
6.
Interior air recirculation
7.
Thermal comfort system switch-off
8.
Maximum air conditioning
Touch screen 10" & Bluetooth Radio &
9.
Hazard warning lamps
Telephone / PEUGEOT i-Connect Advanced -
10.
Central locking
PEUGEOT i-Connect
11.
Front demisting/de-icing
5
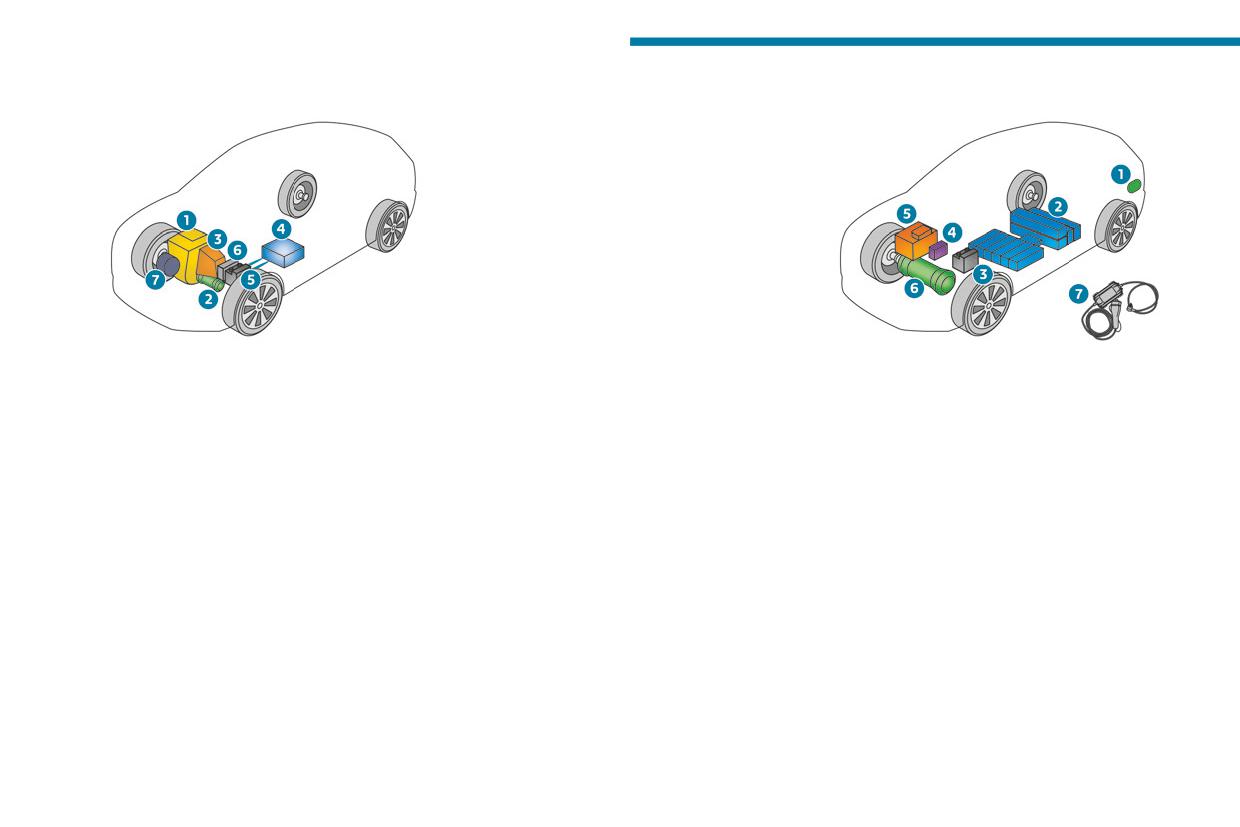
Overview
- The vehicle always starts with the petrol
Hybrid system
Electric drive system
engine to ensure the efficiency of the catalytic
converter and the availability of the brake assist.
- In normal driving, the petrol engine and
electric motor work together or separately to
optimise fuel consumption and electrical energy
or to charge the traction battery.
- During the acceleration phases, the electric
motor provides an additional boost to reach
the torque needed as fast as possible and to
improve the acceleration at low speed.
- During the deceleration phases, the electric
motor charges the traction battery, using the
1.
Petrol engine
inertia of the vehicle.
1. Charging connectors
2.
Electric motor
- The driving in all-electric is possible for parking
2. Traction battery
3.
6-speed electric dual-clutch automatic
manoeuvring, for 20 mph (30 km/h) speed zones
3. Accessory battery
gearbox (e-DCS6)
in city, on urban and country roads with smooth
4. Heat pump (depending on version)
4.
48 V traction battery
driving and on motorways in slight deceleration
5. On-board charger
5.
12 V accessory battery
or downhill.
6. Electric motor
6.
DC/DC converter
The electric motor is integrated into the
7. Charging cable
7.
Belt starter
automatic gearbox.
The charging connectors 1 enable 3 types of
The DC/DC converter provides the link between
The 48 V hybrid technology requires no
charging:
the 12 V accessory power supply and the 48 V
connection to charge the traction battery.
- Domestic charging in mode 2 using a
traction power supply.
The Hybrid system does not operate
domestic socket and associated charging cable
The belt starter restarts the petrol engine after
continuously, but is activated according to
7.
driving in all-electric.
the state of the vehicle, the state of charge
- Accelerated charging in mode 3 using an
of the traction battery, the thermal comfort of
accelerated charging unit (Wallbox).
the passenger compartment (switching on
- Superfast charging in mode 4 using a fast
the heating or air conditioning), the driving
public charger.
conditions (acceleration, deceleration, braking,
The 400 V traction battery 2 uses Lithium-Ion
engine start-up) and the road conditions (uphill,
technology. It stores and supplies the energy
downhill):
required for the operation of the electric motor,
6
Overview
air conditioning and heating. Its charge level is
represented by an indicator and a reserve power
"Practical information - Charging system
warning lamp on the instrument panel.
(Electric)" section:
The 12 V accessory battery 3 powers the
vehicle’s conventional electrical system. It is
recharged automatically by the traction battery
"Safety - General safety recommendations -
via the on-board charger.
Installing electrical accessories" section:
The heat pump 4 provides passenger
compartment heating and regulates traction
battery and on-board charger cooling.
The on-board charger 5 manages the domestic
charging (mode 2) and accelerated charging
"Safety - Child seats - Deactivating the front
(mode 3) of the traction battery as well as the
passenger airbag" section:
recharging of the 12 V accessory battery.
"Practical information - Charging the traction
The electric motor 6 provides propulsion in
battery (Electric)" section:
accordance with the selected driving mode and
driving conditions. It recovers energy during
vehicle braking and deceleration phases.
"Practical information - Bonnet" section:
Labels
"Practical information - Checking levels -
"Safety - ISOFIX mountings" section:
“Ease of use and comfort - Rear bench seat -
Engine coolant" section:
Rear head restraints” section:
i-Size
TOP TETHER
"Driving - Electric parking brake" section:
"In the event of a breakdown - Temporary
"Ease of use and comfort - Front fittings -
puncture repair kit" section:
Wireless smartphone charger" section:
"Driving - Stop & Start" section:
"Lighting and visibility - Exterior lighting
"Practical information - Compatibility of
control stalk" and "In the event of a
fuels" section:
breakdown - Changing a bulb" sections:
7
Overview
"In the event of a breakdown - Spare wheel"
section:
"In the event of a breakdown - 12 V battery/
Accessory battery" section:
24V
12V
8
Eco-driving
Favour the use of the "Eco" driving mode by
As a passenger, avoid connecting your
Eco-driving
selecting it using the "DRIVE MODE" control.
multimedia devices (e.g. film, music, video
Eco-driving refers to a range of everyday
With an EAT8 gearbox, with the gear selector in
game) to help reduce the consumption of energy.
practices that allow the motorist to optimise
mode D, and except in Sport mode, favour "free-
Disconnect all portable devices before leaving
the vehicle's energy consumption (fuel and/or
wheeling" by gradually lifting your foot fully off
the vehicle.
electricity) and CO2 emissions.
the accelerator pedal in order to save fuel.
Limit the causes of excess consumption
Optimise your use of the gearbox
When the traffic is flowing smoothly, select the
Spread loads throughout the vehicle. Place the
cruise control.
With a manual gearbox, move off gently and
heaviest items in the boot as close as possible to
change up promptly. While accelerating, change
Control the use of electrical equipment
the rear seats.
up early.
Before moving off, if the passenger compartment
Limit the loads carried in the vehicle and
With an automatic gearbox, favour automatic
is too warm, ventilate it by opening the windows
minimise wind resistance (e.g. roof bars, roof
mode. Do not depress the accelerator pedal
and air vents before using the air conditioning.
rack, bicycle carrier, trailer). Preferably, use a
heavily or suddenly.
At speeds above 31 mph (50 km/h), close the
roof box.
The gear shift indicator prompts you to engage
windows and leave the air vents open.
Remove roof bars and roof racks after use.
the most suitable gear. Whenever this indication
Consider using equipment that can help keep
At the end of winter, remove snow tyres and refit
is displayed on the instrument panel, follow it
the temperature in the passenger compartment
summer tyres.
straight away.
down (e.g. sunroof blind, window blinds).
Avoid using Sport mode for too long, in order to
With an automatic gearbox, this indicator
Unless automatically regulated, switch off the air
limit your energy consumption.
appears only in manual mode.
conditioning as soon as the desired temperature
Comply with the servicing instructions
Drive smoothly
has been reached.
Check tyre pressures regularly, with the tyres
Maintain a safe distance between vehicles, use
Switch off the demisting and defrosting functions,
cold, referring to the label in the door aperture on
engine braking rather than the brake pedal and
if they are not managed automatically.
the driver's side.
press the accelerator gradually. These practices
Switch off the heated seat as soon as possible.
Carry out this check in particular:
help to save on energy consumption, reduce
Adapt your use of the headlamps and/or
- before a long journey.
CO2 emissions and decrease general traffic
foglamps to the level of visibility, in accordance
- at each change of season.
noise.
with current legislation in the country in which
- after a long period out of use.
With a hybrid engine, engine braking is more
you are driving.
Do not forget the spare wheel and, where
efficient. Anticipate slowing down as much as
Avoid running the engine before moving off,
applicable, the tyres on your trailer or caravan.
you can and, if possible, favour deceleration with
particularly in winter (other than in severe wintry
Have your vehicle serviced regularly (e.g. engine
engine braking in order to charge the traction
conditions: temperature below -23°C). The
oil, oil filter, air filter, passenger compartment
battery, to increase all-electric driving and to
vehicle will warm up much faster while driving.
filter, etc.). Observe the schedule of operations in
reduce fuel consumption.
the manufacturer's service schedule.
9
Eco-driving
When filling the fuel tank, do not continue after
Program a destination into the vehicle's GPS
the third cut-out of the nozzle, to avoid overflow.
navigation system to optimise consumption
You will only see the fuel consumption of your
during a journey.
new vehicle settle down to a consistent average
Anticipate the need to slow down, and brake
after the first 1,900 miles (3,000 kilometres).
smoothly, whenever possible using engine
braking with the regenerative braking function,
Optimising the driving range of electrified
which will move the power indicator into the
vehicles
"CHARGE" zone.
The vehicle's consumption of electrical energy
Use the air conditioning rather than the heating
greatly depends on the route profile, speed and
to demist the passenger compartment.
driving style, as well as the use of the heating/air
conditioning.
Favour the ECO and CHARGE zones of the
power indicator by driving smoothly and at a
steady speed.
Hybrid vehicles
Maximise the vehicle's inertia by releasing the
accelerator pedal so that the vehicle slows
down by itself (e.g. when driving downhill or
approaching a traffic light).
When the accelerator pedal is released, provided
that the slider on the power indicator in the
instrument panel is still moving in the CHARGE
zone, energy recovery is optimal.
Energy recovery makes it possible to make
efficient use of the "passive" phases of driving
(deceleration).
The recovered energy is used to recharge the
traction battery and is then used for all-electric
driving or further acceleration.
When the traction battery is almost full, the
energy recovery is gradually reduced.
Electric vehicles
10
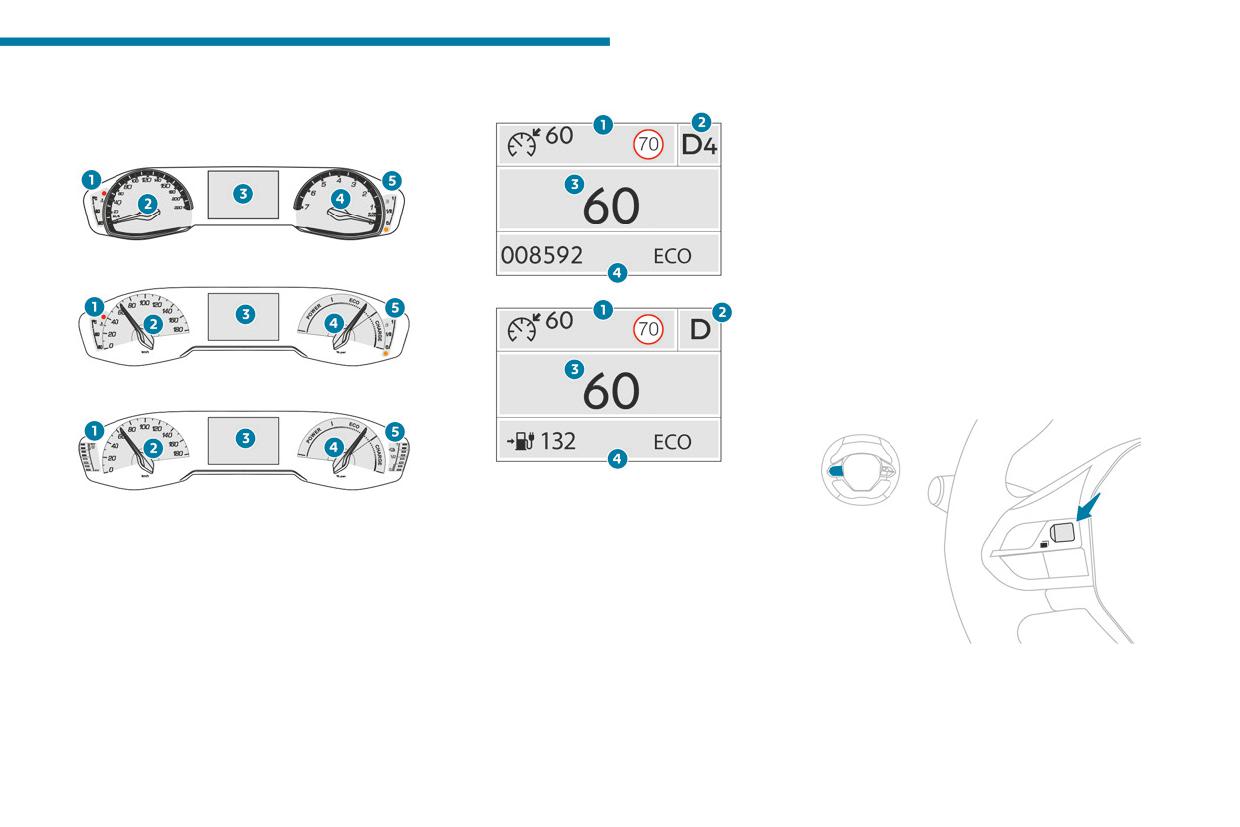
Dashboard instruments
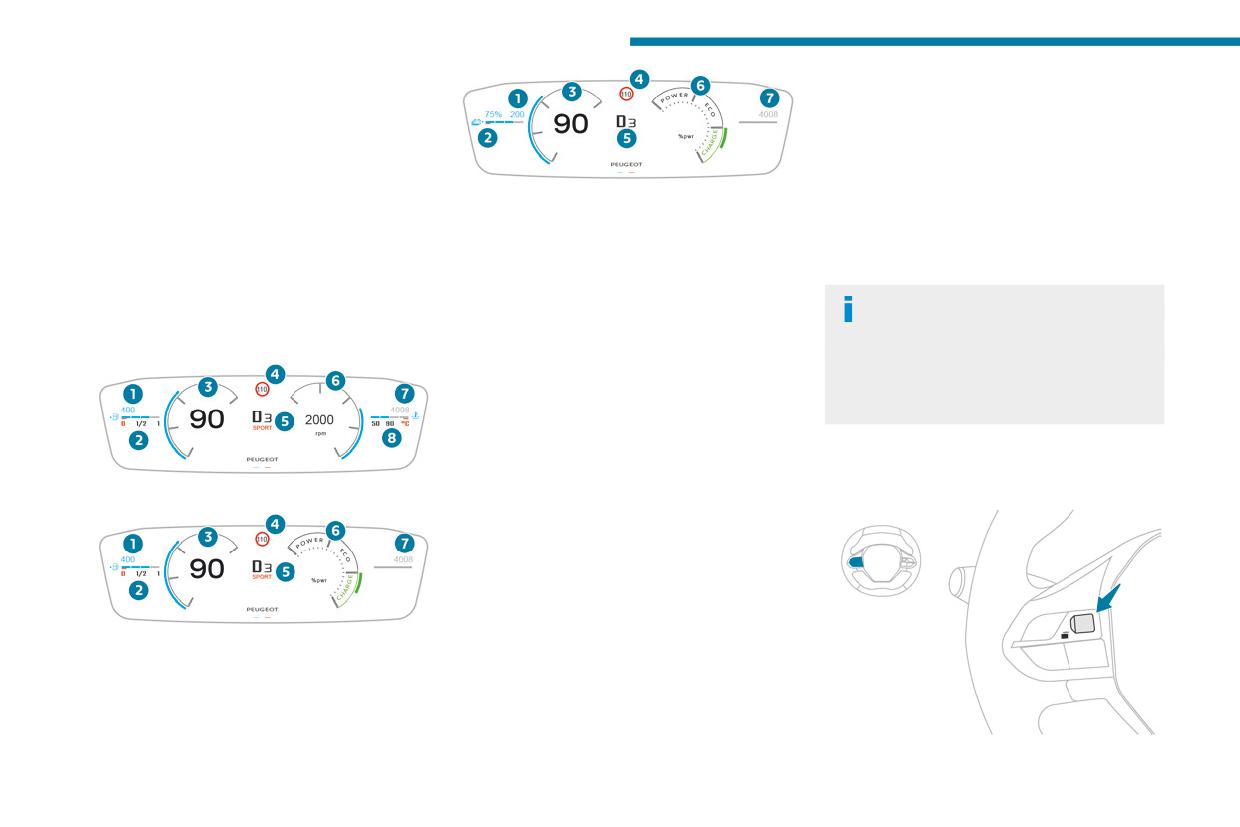
Matrix instrument panel
Matrix display
3. Personalisable area:
1
- Digital speedometer (mph or km/h)
- Display of driving aids
Dials
- Trip computer information
- Power flow / vehicle charge state (Electric)
4. Service indicator, then total distance recorder
(miles or km)
Remaining range (Electric)
Petrol
These functions are displayed in turn when
the ignition is switched on.
Driving mode selected (other than "Normal"
mode)
Choosing the displayed
Hybrid
page
The matrix display can be personalised using a
Electric
system of pages.
1. Coolant temperature indicator (°C) (Petrol or
1. Cruise control / speed limiter settings
Hybrid)
Display of speed limit signs
Thermal comfort consumption indicator
2. Gear shift indicator (arrow and recommended
(Electric)
gear)
2. Analogue speedometer (mph or km/h)
Selector position and gear on automatic
3. Matrix display
gearbox (Petrol or hybrid)
4. Rev counter (x 1,000 rpm), graduation
Drive selector position (Electric)
► Turn the thumbwheel on the left of the
depends on the engine (Petrol)
steering wheel to display and scroll through the
Power indicator (Electric or Hybrid)
various pages.
5. Fuel gauge (Petrol or Hybrid)
► Press the thumbwheel to confirm.
Charge level indicator (Electric)
11
Dashboard instruments
If you do not press the thumbwheel, the selected
Information displayed on
page is automatically applied after a few
the instrument panel
moments.
The information displayed on the instrument
panel (e.g. warning lamps, indicators) may have
Digital instrument panels
a fixed or variable location depending on the
Electric
page or the driving aid activated.
With PEUGEOT i-Connect Advanced -
1. Remaining range (miles or km)
For the functions that have indicator lamps for
PEUGEOT i-Connect
2. Fuel gauge (Petrol or hybrid)
both operation and deactivation, there is only
This head-up 2D or 3D digital instrument panel
Charge level indicator (Electric)
one dedicated location.
can be personalised.
3. Digital speedometer (mph or km/h)
Depending on the display mode selected, some
4. Cruise control/speed limiter settings
Display language and units
information is hidden or presented differently.
Display of speed limit signs
These depend on the touch screen
Example with the "Dials" display mode:
5. Gear shift indicator (arrow and recommended
settings.
When travelling abroad, the speed must be
gear)
shown in the official units of the country you
Selector position and gear on automatic
are driving in (mph, miles or km/h, km).
gearbox (Petrol or hybrid)
Drive selector position (Electric)
Choice of the displayed page
Driving mode selected (other than "Normal"
mode)
By default, pages are memorised in the
Petrol
6. Rev counter (x 1,000 rpm) (Petrol)
instrument panel.
Power indicator (Hybrid or Electric)
7. Total distance recorder (miles or km)
8. Coolant temperature indicator (°C) (Petrol)
The default pages are as follows:
- Dials.
- Minimal.
Hybrid
- Energy flows (Electric).
- Driving aids.
- Navigation (depending on equipment).
- Personal 1.
– Personal 2.
12
Dashboard instruments
► Turn the thumbwheel on the left of the
- Media.
occurred: refer to the description of each lamp
1
steering wheel to display and scroll through the
- Trip computer.
for further information.
various pages on the instrument panel.
- Driving aids.
When the ignition is switched on
► Press the thumbwheel to confirm the page.
- Navigation.
Certain red or orange warning lamps come on
The new page is applied immediately.
The type of information selected in the
for a few seconds when the ignition is switched
If there is no action on the thumbwheel, the
"Personal 1" page is not available in the
on. These warning lamps should go off as soon
selected display page is applied automatically
"Personal 2" page.
as the engine is started.
after a few moments.
For more information on a system or a function,
The settings are changed via the
When a message is displayed in a
refer to the corresponding section.
Settings > Customization touch screen
temporary window, pressing this
application.
thumbwheel will cause this window to
Persistent warning lamp
For more information on Personalisation -
disappear immediately.
If a red or orange warning lamp comes on, there
Instrument Panel, refer to the corresponding
may be fault which needs further investigation.
section for the Audio equipment and telematics
Settings for displayed pages
If a lamp remains lit
systems.
The available settings operations are: addition,
The references (1), (2) and (3) in the warning
deletion and layout of pages.
and indicator lamp description indicate whether
It is possible to memorise up to 5 pages.
Warning and indicator
you should contact a qualified professional in
The colour can also be configured according to
lamps
addition to the immediate recommended actions.
the selected driving mode.
(1): You must stop the vehicle.
The settings are changed via the
Displayed as symbols, the warning and indicator
Stop as soon as it is safe to do so and switch off
Settings > Customization touch screen
lamps inform the driver of the occurrence of a
the ignition.
application.
malfunction (warning lamps) or of the operating
(2): Contact a PEUGEOT dealer or a qualified
status of a system (operation or deactivation
Settings for a "Personal" display page
workshop.
indicator lamps). Certain lamps light up in two
In the two additional personal pages, the types of
(3): Go to a PEUGEOT dealer or a qualified
ways (fixed or flashing) and/or in several colours.
information available are as follows:
workshop.
Associated warnings
- Dynamic (Torque, Boost, Power).
- G-metres.
The illumination of a lamp may be accompanied
- Engine temperatures (Petrol).
by an audible signal and/or a message displayed
- Rev counter (Petrol).
in a screen.
- Energy flows (Hybrid or Electric).
Relating the type of alert to the operating status
- Power indicator (Hybrid or Electric).
of the vehicle allows you to determine whether
– Accessories consumption (Electric).
the situation is normal or whether a fault has
13
Dashboard instruments
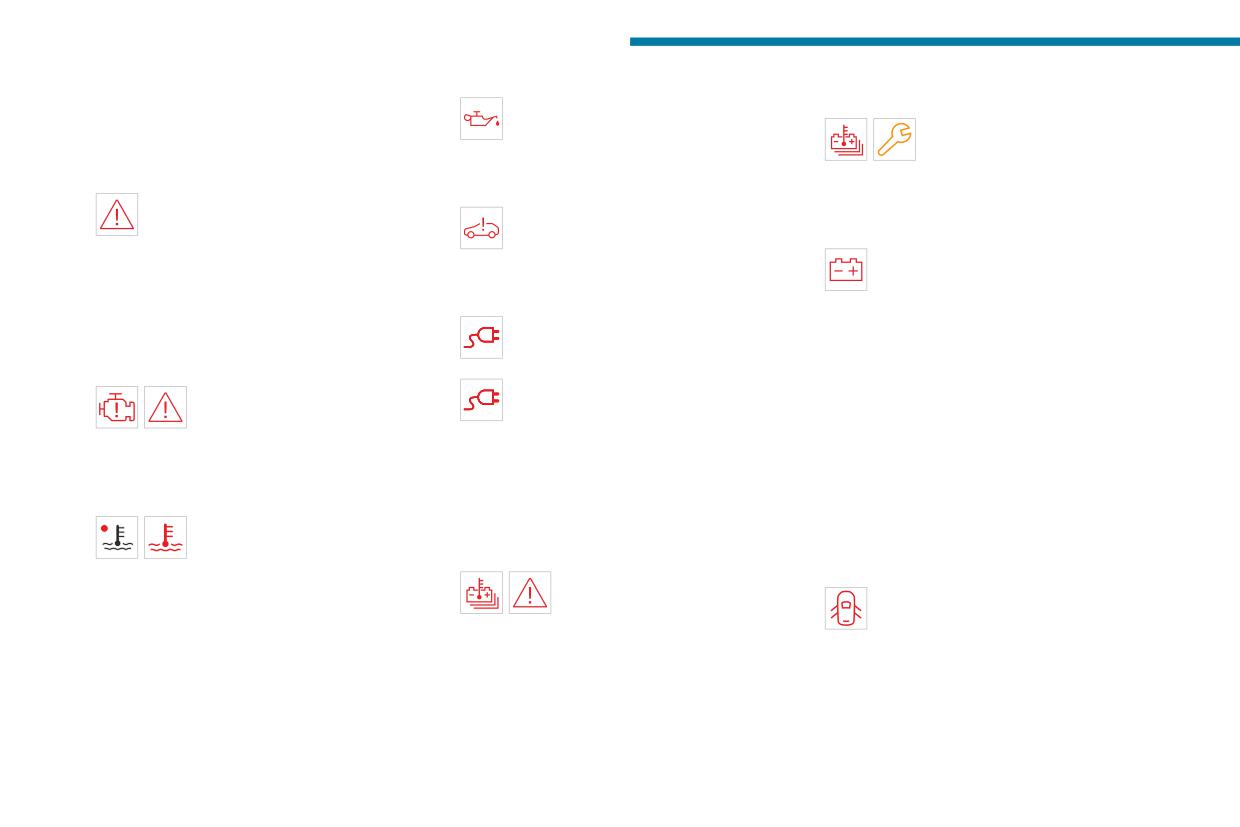
List of warning and
Engine oil pressure (Petrol or hybrid)
Traction battery malfunction (Hybrid or
Fixed.
Electric)
indicator lamps
There is a fault with the engine lubrication
Fixed, combined with the Service
Red warning/indicator lamps
system.
warning lamp, accompanied by the
Carry out (1) and then (2).
display of a message.
STOP
The traction battery has a fault.
System malfunction (Hybrid or Electric)
Fixed, associated with another warning
Carry out (2).
Fixed.
lamp, accompanied by the display of a
A fault has been detected in the system
12 V battery charge
message and an audible signal.
(electric motor or traction battery).
Fixed.
A serious fault with the engine, braking system,
Carry out (1) and then (2).
The battery charging circuit is faulty
power steering or automatic gearbox or a major
electrical fault has been detected.
Cable connected (Electric)
(e.g. dirty terminals, loose or severed alternator
Carry out (1) and then (2).
Fixed when the ignition is switched on.
belt).
The charging cable is connected to the
Carry out (1).
Engine self-diagnostics system (Petrol or
vehicle's connector.
If the electric parking brake stops working,
hybrid)
Fixed when the ignition is switched on,
immobilise the vehicle:
Fixed.
accompanied by a message.
► With the manual gearbox, engage a gear.
A major engine fault has been
It is not possible to start the vehicle while the
► With the EAT6 automatic gearbox, move the
detected.
charging cable is connected to the vehicle’s
gear selector to position P.
Carry out (1) and then (2).
connector.
► With the EAT8 automatic gearbox or drive
Maximum coolant temperature (Petrol or
selector, fit the chock against one of the wheels.
Disconnect the charging cable and close the
hybrid)
Clean and tighten the terminals. If the warning
flap.
Fixed with display blocks lit in red
lamp does not go off when the engine is started,
Traction battery overheating (Hybrid or
(with matrix instrument panel).
carry out (2).
Electric)
or
Door(s) open
Fixed, combined with the STOP
Fixed (except on matrix instrument panel).
Fixed, associated with a message
warning lamp, accompanied by the
The temperature of the cooling system is too
identifying the access.
display of a message and an audible signal.
high.
A door or the tailgate is not properly closed
The traction battery's temperature is too high.
Carry out (1), then wait until the engine has
(speed less than 6 mph (10 km/h)).
Carry out (1).
cooled down before topping up the level, if
Evacuate the vehicle as quickly as possible
necessary. If the problem persists, carry out (2).
and move to a safe distance.
Carry out (2).
14
Dashboard instruments
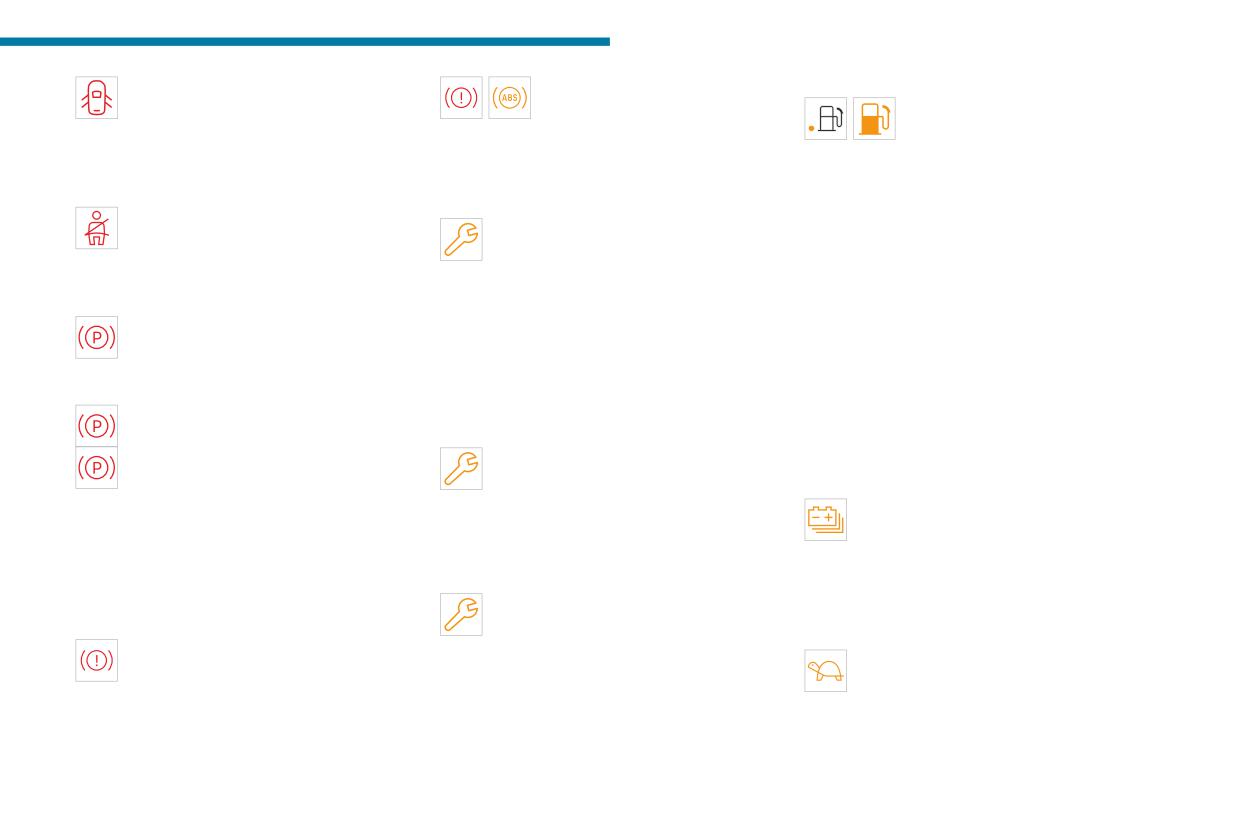
Fixed, associated with a message
Fixed.
Low fuel level (Petrol or hybrid)
1
identifying the access, accompanied by
The electronic brake force
Fixed, with the blocks lit red,
an audible signal.
distribution (EBFD) system is faulty.
accompanied by an audible signal
A door or the tailgate is not properly closed
Carry out (1) and then (2).
(with the matrix instrument panel)
(speed above 6 mph (10 km/h)).
or
Orange warning/indicator lamps
Fixed, with the reserve level shown in red,
Seat belts not fastened/unfastened
Service
accompanied by an audible signal and the
Fixed or flashing, accompanied by an
Temporarily on, accompanied by the
display of a message (except with the matrix
increasing audible signal.
display of a message.
instrument panel).
A seat belt has not been fastened or has been
One or more minor faults, for which there is/are
When it first comes on, there are approximately
unfastened.
no specific warning lamp(s), have been detected.
5 litres of fuel remaining in the tank (reserve).
Manual parking brake
Identify the cause of the fault using the message
Until the fuel level is topped up, this alert will
Fixed.
displayed on the instrument panel.
be repeated every time the ignition is switched
The parking brake is applied or not
You may be able to deal with some faults
on, with increasing frequency as the fuel level
properly released.
yourself, such as changing the battery in the
decreases and approaches zero.
Electric parking brake
remote control.
Refuel without delay to avoid running out of fuel.
Fixed.
For other faults, such as with the tyre under-
Never drive until completely empty, as
The electric parking brake is applied.
inflation detection system, carry out (3).
this could damage the emissions control and
Flashing.
Fixed, accompanied by the display of a
injection systems.
Application/release is faulty.
message.
Low traction battery level (Electric)
Carry out (1): park on flat ground (on a level
One or more major faults, for which there is/are
Fixed, accompanied by an audible signal.
surface).
no specific warning lamp(s), have been detected.
The state of charge of the traction battery
With a manual gearbox, engage a gear.
Identify the cause of the fault using the message
is low.
With an automatic gearbox or drive selector,
displayed on the instrument panel, then carry
View the remaining range.
select mode P.
out (3).
Put the vehicle on charge as soon as possible.
Switch off the ignition and carry out (2).
Fixed, accompanied by the message
Tortoise mode with limited driving range
Braking
"Parking brake fault".
(Electric)
Fixed.
Automatic release of the electric parking brake is
Fixed.
The brake fluid level in the braking circuit
unavailable.
The state of charge of the traction battery
has dropped significantly.
Carry out (2).
is critical.
Carry out (1), then top up with fluid that complies
The engine power gradually decreases.
with the manufacturer's recommendations. If the
You must put the vehicle on charge.
problem persists, carry out (2).
15
Dashboard instruments
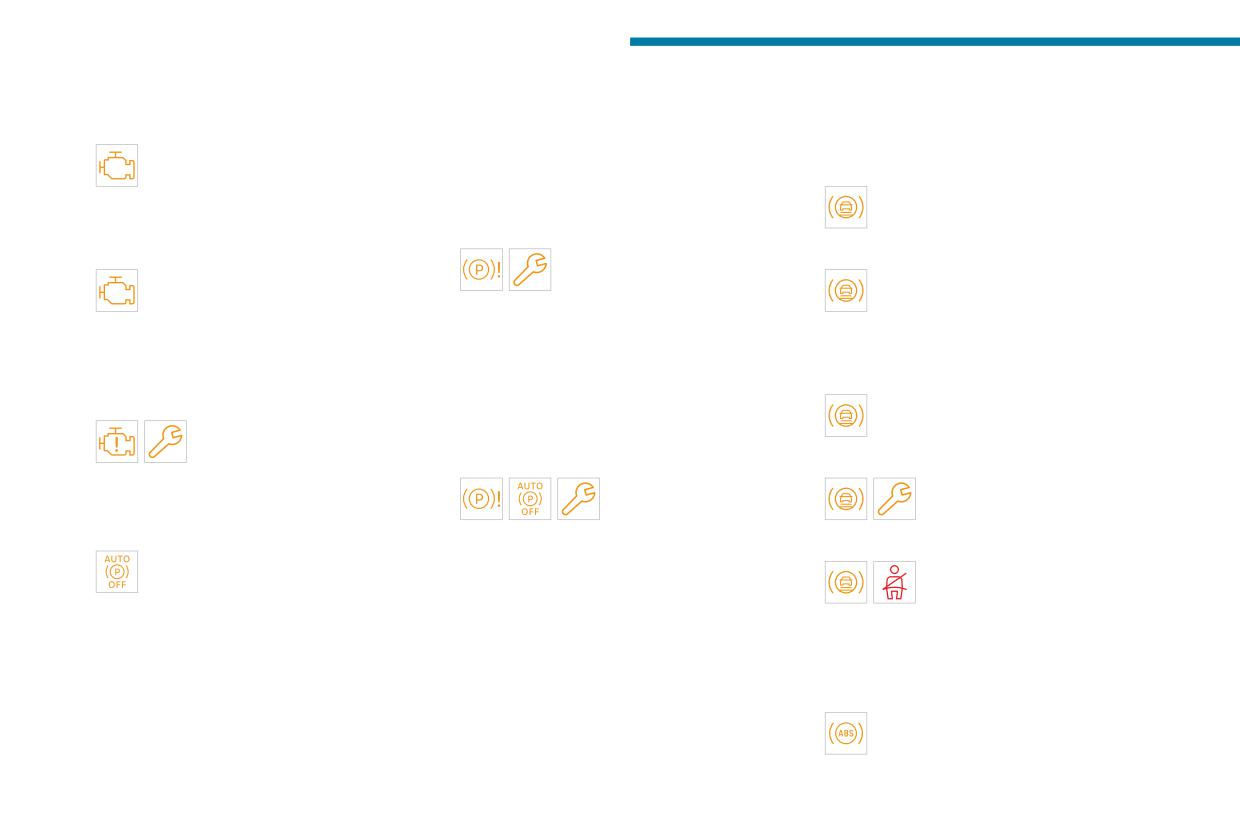
If the warning lamp remains lit, carry out (2).
► Hold the control pressed in the release
► With an automatic gearbox or drive selector,
direction for between 10 and 15 seconds.
select mode P, then place the supplied chock
Engine self-diagnostic system (Petrol or
► Release the control.
against one of the wheels.
hybrid)
► Depress and hold the brake pedal.
Then carry out (2).
Flashing.
► Pull the control in the application direction for
The engine management system has a
Collision Risk Alert/Active Safety Brake
2 seconds.
fault.
Fixed, accompanied by the display of a
► Release the control and the brake pedal.
There is a risk that the catalytic converter will be
message.
destroyed.
Malfunction (with electric parking brake)
The system has been deactivated via the touch
You must carry out (2).
Fixed, accompanied by the
screen.
Fixed.
message "Parking brake fault".
Flashing.
The emissions control system has a fault.
The vehicle cannot be immobilised with the
The system activates and brakes the
The warning lamp should go off when the engine
engine running.
vehicle momentarily to reduce the speed of
is started.
If manual application and release commands are
collision with the vehicle in front.
Carry out (3) without delay.
not working, the electric parking brake control is
For more information, refer to the Driving
Engine self-diagnostics system (Petrol of
faulty.
section.
hybrid)
The automatic functions must be used at all
Fixed, accompanied by a message and
Fixed.
times and are automatically reactivated in the
an audible signal.
A minor engine fault has been
event of a fault with the control.
The system has a fault.
detected.
Carry out (2).
Carry out (3).
Carry out (3).
Fixed, accompanied by the
Fixed.
message "Parking brake
The system has a fault.
Automatic functions deactivated (electric
fault".
If these warning lamps come on after the engine
parking brake)
The electric parking brake is faulty: manual and
is switched off and then restarted, carry out (3).
Fixed.
automatic functions may not be working.
Fixed.
The "automatic application" (on switching
When stationary, to immobilise the vehicle:
The system is deactivated
off the engine) and "automatic release" (on
► Pull the electric parking brake control and
temporarily because the driver and/or front
acceleration) functions are deactivated.
hold it for approximately 7 to 15 seconds, until
passenger (depending on version) has been
If automatic application/release is no longer
the indicator lamp lights up on the instrument
detected as present but the corresponding seat
possible:
panel.
belt has not been fastened.
► Start the engine.
If this procedure does not work, secure the
Anti-lock braking system (ABS)
► Use the control to apply the electric parking
vehicle:
Fixed.
brake.
► Park on a level surface.
The anti-lock braking system has a fault.
► Take your foot fully off the brake pedal.
► With a manual gearbox, engage a gear.
16
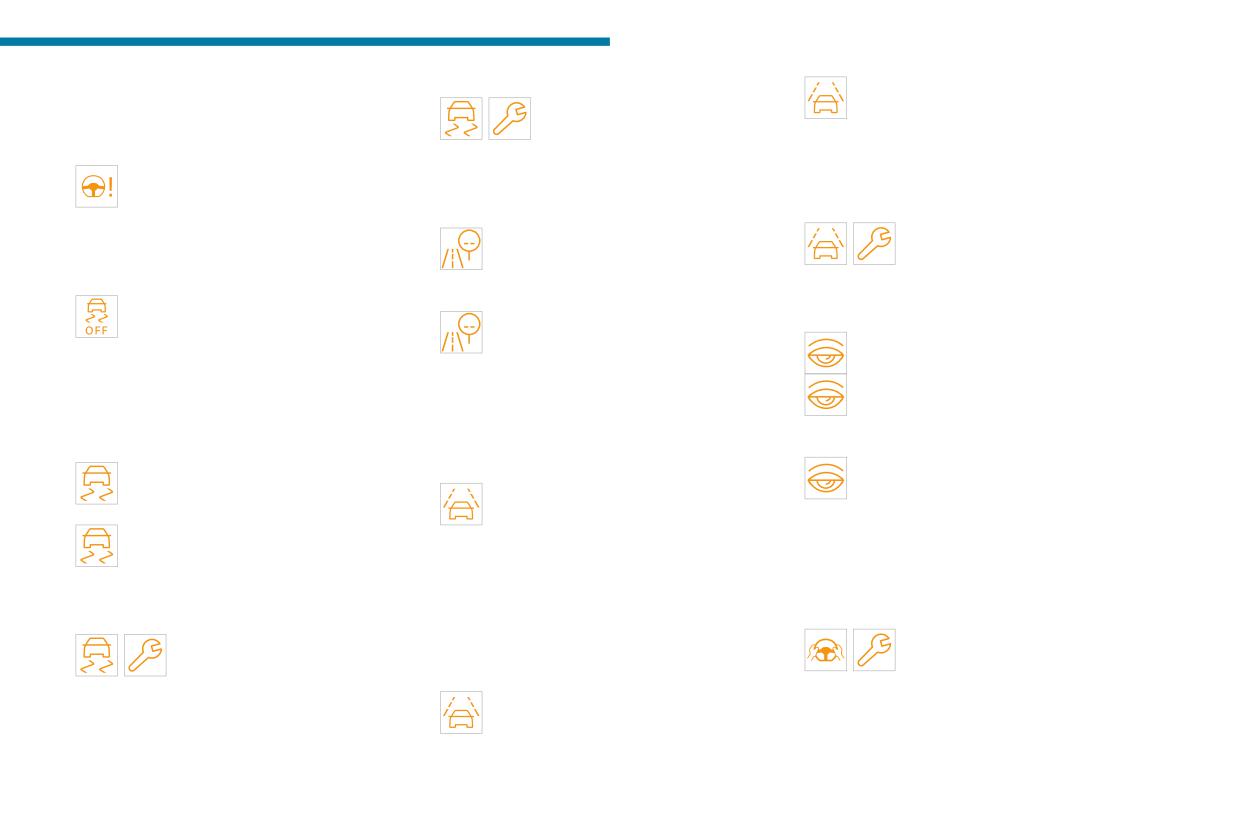
Dashboard instruments
The vehicle retains conventional braking.
Hill start assist
Fixed, accompanied by the display of the
1
Drive carefully at moderate speed, then carry
Fixed, accompanied by the
message "Driving Assistance Sensor
out (3).
message "Anti roll-back system
blind: Clean sensor, see User Manual ".
fault".
The sensor is masked.
Power steering
The system has a fault.
Stop as soon as it is safe to do so and switch off
Fixed.
Carry out (3).
the ignition.
The power steering has a fault.
Clean the front camera.
Drive carefully at moderate speed, then carry
Road signs recognition
Fixed.
out (3).
Fixed, accompanied by the display of a
The system has a fault.
Dynamic stability control (DSC)/Anti-slip
message and an audible signal.
Carry out (3).
regulation (ASR)
The system has a fault.
Fixed.
Carry out (3).
Driver Attention Warning by Camera
The system is deactivated.
Fixed, accompanied by the display of the
(Distraction detection)
The DSC/ASR system is reactivated
message "Driving Assistance Sensor
Fixed.
automatically when the vehicle is restarted,
blind: Clean sensor, see User Manual ".
The system is deactivated.
and at speeds above approximately 31 mph
The sensor is masked.
Fixed, accompanied by the display of a
(50 km/h).
Stop as soon as it is safe to do so and switch off
message and an audible signal.
At speeds below 31 mph (50 km/h), it can be
the ignition.
The system has a fault.
reactivated manually.
Clean the front camera.
Carry out (3).
Flashing.
Lane keeping assist
Fixed, accompanied by the display of the
DSC/ASR system regulation is activated
Flashing.
message "Driving Assistance Sensor
in the event of a loss of grip or trajectory.
You are about to cross a broken
blind: Clean sensor, see User Manual ".
Fixed.
lane marking without operating the direction
The sensor is masked.
The DSC/ASR system has a fault.
indicators.
Stop as soon as it is safe to do so and switch off
Carry out (3).
The system is activated, then corrects the
the ignition.
trajectory if it detects a risk of unintentionally
Clean the front camera.
Emergency brake malfunction (with
crossing a line or hard shoulder (depending on
Lane positioning assist
electric parking brake)
version).
Fixed, accompanied by the
Fixed, accompanied by the
For more information, refer to the Driving
Service warning lamp.
message "Parking brake fault".
section.
The system has a fault.
Emergency braking does not deliver optimal
Fixed.
Carry out (3).
performance.
The system has been automatically
If automatic release is not available, use manual
deactivated or placed on standby.
release or carry out (3).
17
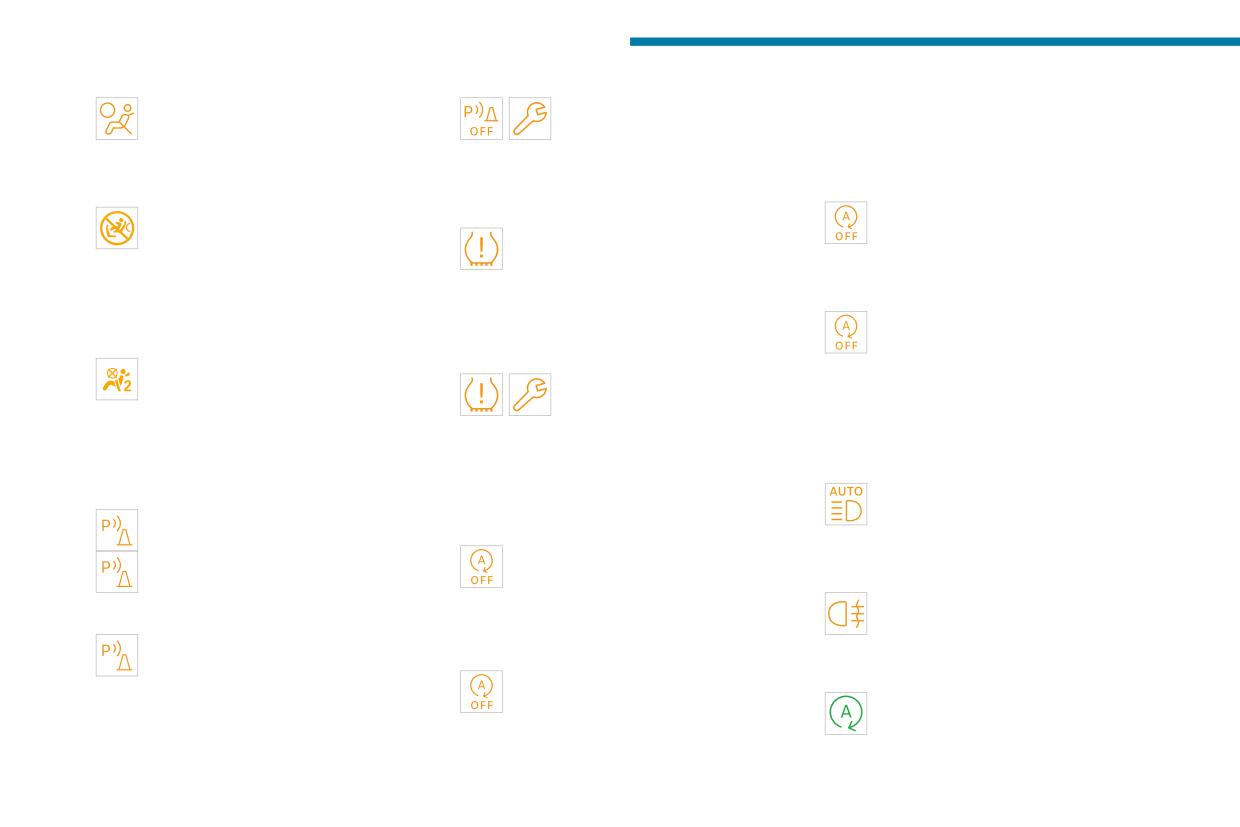
Dashboard instruments
Airbags
Clean the front and/or rear sensors.
The engine will not switch off at the next traffic
Fixed.
Fixed, associated with the Service
stop, if the exterior temperature is:
One of the airbags or seat belt
warning lamp, accompanied by the
- below 0°C.
pyrotechnic pretensioners is faulty.
display of a message and an audible signal.
- above +35°C.
Carry out (3).
The system has a fault.
For more information, refer to the Driving
Carry out (3).
section.
Front passenger airbag (ON)
Flashing then fixed, accompanied by a
Fixed.
Under-inflation
message.
The front passenger airbag is activated.
Fixed.
The system has a fault.
The control is set to the "ON" position.
The pressure in one or more tyres is too
Carry out (3).
In this case, do not install a "rearward facing"
low.
child seat on the front passenger seat - risk
Check the pressure of the tyres as soon as
e-Auto mode (Hybrid)
of serious injury!
possible.
Fixed, accompanied by the display of a
Front passenger airbag (OFF)
Reinitialise the detection system after adjusting
message.
Fixed.
the pressure.
The e-Auto mode has been deactivated
The front passenger airbag is deactivated.
Under-inflation warning lamp
manually.
The control is set to the “OFF” position.
flashing then fixed and Service
The petrol engine will not switch off at the next
A "rearward facing" child seat can be installed,
warning lamp fixed.
release of the accelerator pedal or at the next
unless there is a fault with the airbags (Airbags
The tyre pressure monitoring system is faulty.
traffic stop.
warning lamp on).
Under-inflation detection is no longer monitored.
Automatic headlamp dipping
Check the tyre pressures as soon as possible
Fixed, accompanied by an audible signal
Parking sensors
and carry out (3).
and a message.
Flashing.
Stop & Start (Petrol)
A function or camera malfunction is detected.
The system detects an obstacle.
Fixed, accompanied by the display of a
Carry out (2).
Fixed, accompanied by the display of a
message.
message and an audible signal.
Rear foglamp
The Stop & Start system has been deactivated
The system has a fault.
Fixed.
manually.
Carry out (3).
The lamp is on.
The engine will not switch off at the next traffic
Fixed, accompanied by the display of the
Green warning/indicator lamps
stop.
message "Parking Assistance Sensor
Fixed.
Stop & Start (Petrol)
blind: Clean sensor, see User Manual ".
The Stop & Start system has been
Fixed.
The sensor is masked.
deactivated automatically.
When the vehicle stops, the Stop & Start
Stop as soon as it is safe to do so and switch off
the ignition.
system puts the engine into STOP mode.
18
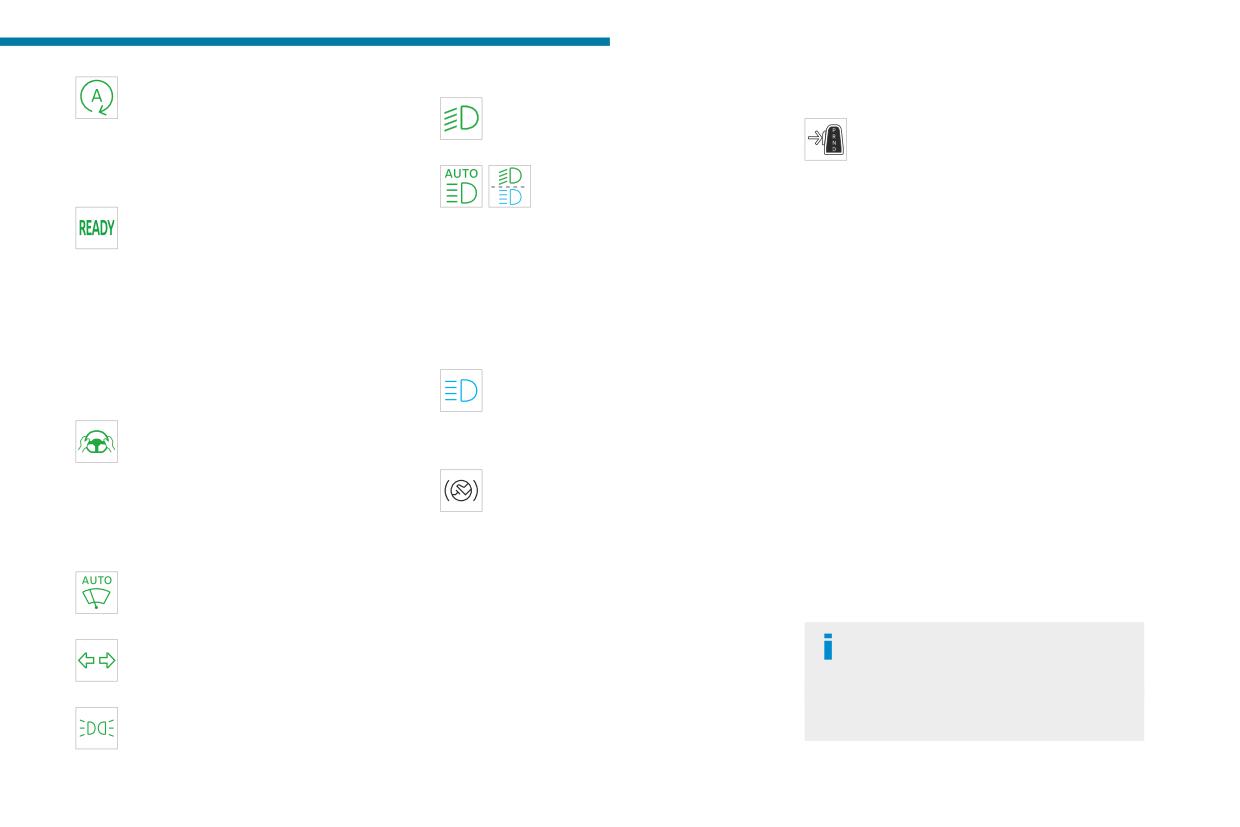
Dashboard instruments
Flashing temporarily.
Dipped beam headlamps
Automatic gearbox (EAT8/Hybrid) or Drive
1
STOP mode is momentarily unavailable
Fixed.
selector (Electric)
or START mode is automatically triggered.
The lamps are on.
Fixed.
For more information, refer to the Driving
The automatic gearbox is locked.
Automatic headlamp dipping
section.
The drive selector is locked.
Fixed.
You must press the Unlock button to unlock it.
Vehicle ready to drive (Electric)
The function has been activated
Fixed, accompanied by an audible signal
via the touch screen.
when it comes on.
The lighting control stalk ring is in the “AUTO”
Indicators
The vehicle is ready to drive and the thermal
position.
comfort systems are available.
For more information, refer to the Lighting and
Service indicator
The indicator lamp goes out upon reaching a
visibility section.
The servicing information is expressed in terms
speed of approximately 3 mph (5 km/h) and
Blue warning/indicator lamps
of distance (miles or kilometres) and/or time
lights up again when the vehicle stops moving.
Main beam headlamps
(months or days).
The lamp will go out when you switch off the
Fixed.
The alert is given at whichever of these two
motor and exit the vehicle.
The lamps are on.
terms is reached first.
Lane positioning assist
The servicing information is displayed in the
Fixed.
Black/white warning lamps
instrument panel. Depending on the version of
The function has been activated.
Foot on the brake
the vehicle:
All conditions have been met: the system is
Fixed.
- The distance recorder display line indicates
operating.
Insufficient or no pressure on the brake
the distance remaining before the next service
For more information, refer to the Driving
pedal.
is due, or the distance travelled since it was due
section.
With the EAT6 automatic gearbox, with the
preceded by the "-" sign.
Automatic wiping
engine running, before releasing the parking
- An alert message indicates the distance
Fixed.
brake, to move out of position P.
remaining, as well as the period before the next
Automatic windscreen wiping is activated.
With the EAT8 automatic gearbox or the drive
service is due or how long it is overdue.
Direction indicators
selector, it may be necessary to depress the
The value indicated is calculated
Flashing with audible signal.
brake pedal to unlock the gearbox from mode N.
according to the distance covered and
The direction indicators are on.
This warning lamp will remain on if you attempt
the time elapsed since the last service.
to release the parking brake without depressing
Sidelamps
The alert may also be triggered close to a
the brake pedal.
Fixed.
due date.
The lamps are on.
19
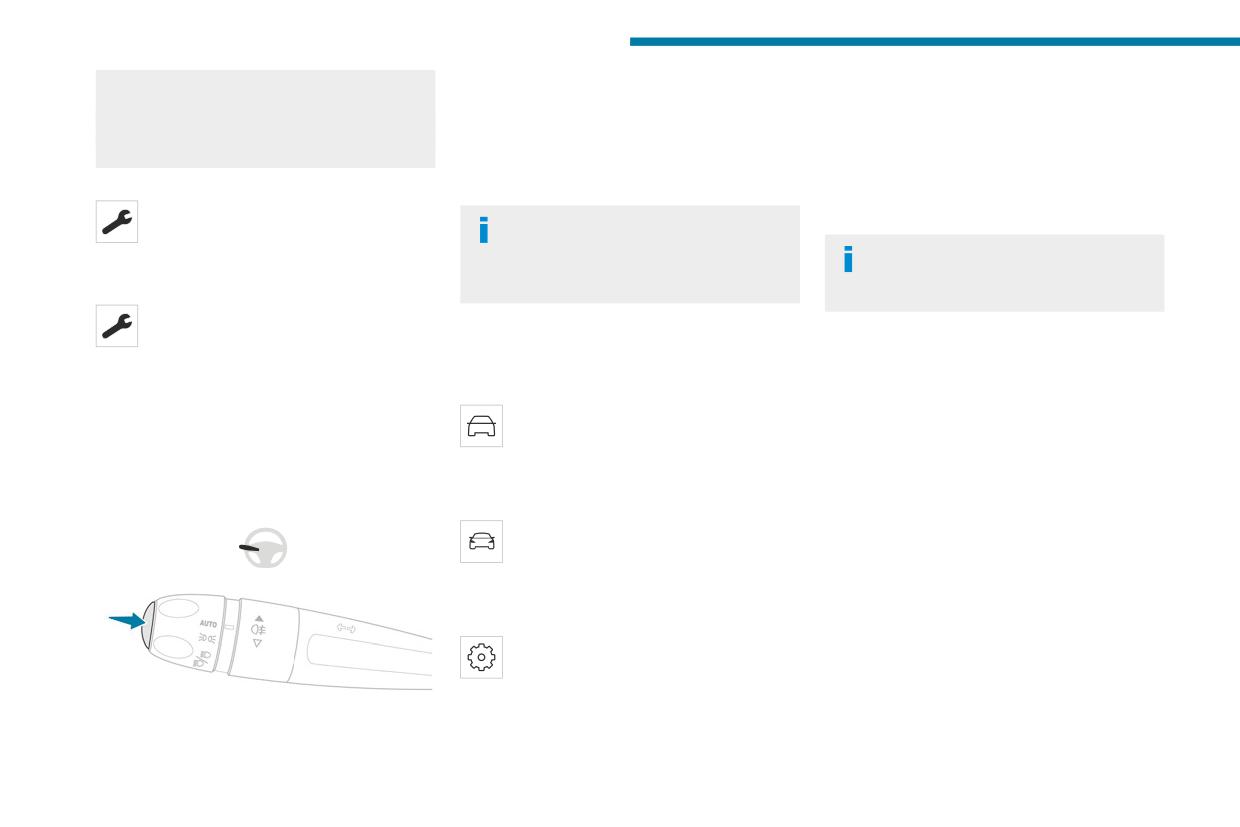
Dashboard instruments
In accordance with the vehicle's maintenance
► Without pressing the brake pedal, press the
Engine oil level indicator
plan, the service may consist of either:
START/STOP button once; a temporary display
(Depending on version)
- A yearly visit.
window appears and a countdown begins.
On versions fitted with an electric gauge, the
- A complete service.
► When the display indicates =0, release the
engine oil level status is displayed on the
lighting control stalk button; the spanner symbol
instrument panel for a few seconds when
Service spanner
disappears.
the ignition is switched on, after the servicing
On temporarily when the ignition is
If you disconnect the battery following
information.
switched on.
this operation, lock the vehicle and wait
Between 1,860 and 620 miles (3,000 and
The level read will only be correct if the
at least 5 minutes for the reset to be
1,000 km) or 60 and 21 days remain before the
vehicle is on level ground and the engine
registered.
next service is due.
has been off for more than 30 minutes.
Fixed, when the ignition is switched on.
The next service is due in less than
Reminder of the servicing information
Low oil level
620 miles (1,000 km) or 21 days.
This is indicated by the display of "OIL" or by
With Touch screen 10" & Bluetooth Radio
Have your vehicle serviced very soon.
the message "Oil level incorrect" (depending
& Telephone
on the instrument panel), accompanied by the
Resetting the service indicator
Servicing information is accessible by
lighting of the Service warning lamp and an
The service indicator must be reset after each
pressing the "Check" button in the
audible signal.
service.
Driving touch screen menu.
If a low oil level is confirmed by a check using
If you have serviced your vehicle yourself:
With PEUGEOT Connect Radio / PEUGEOT
the dipstick, the level must be topped up to avoid
► Switch the ignition off.
Connect Nav
damage to the engine.
Servicing information is accessible by
For more information on Checking levels, refer
pressing the "Check" button in the
to the corresponding section.
Driving/Vehicle touch screen menu.
Oil gauge malfunction
With PEUGEOT i-Connect Advanced -
This is indicated by the display of "OIL_ _"
PEUGEOT i-Connect
or by the message "Oil level measurement
Servicing information is accessible using
invalid" (depending on the instrument panel),
the Settings > Vehicle application on the
accompanied by the lighting of the Service
touch screen.
warning lamp and an audible signal.
► Then select Safety > Diagnostics.
Consult a PEUGEOT dealer or a qualified
► Press and hold the button located on the end
workshop.
of the lighting control stalk.
20
Dashboard instruments
In the event of a malfunction of the
After switching off the ignition, carefully
ECO
Optimal use of energy (internal
1
electric gauge, the oil level is no longer
open the bonnet and check the coolant
combustion or electric).
monitored.
level.
The slider is located in this zone
If the system is faulty, you must check the
when driving under electric power and
engine oil level using the manual dipstick
For more information on Checking
when optimal use is being made of
located in the engine compartment.
levels, refer to the corresponding
the petrol engine, both accessible by
For more information on Checking levels,
section.
adopting a suitable driving style.
refer to the corresponding section.
CHARGE Energy recovery for recharging the
traction battery.
Power indicator (Hybrid or
The slider is located in this zone
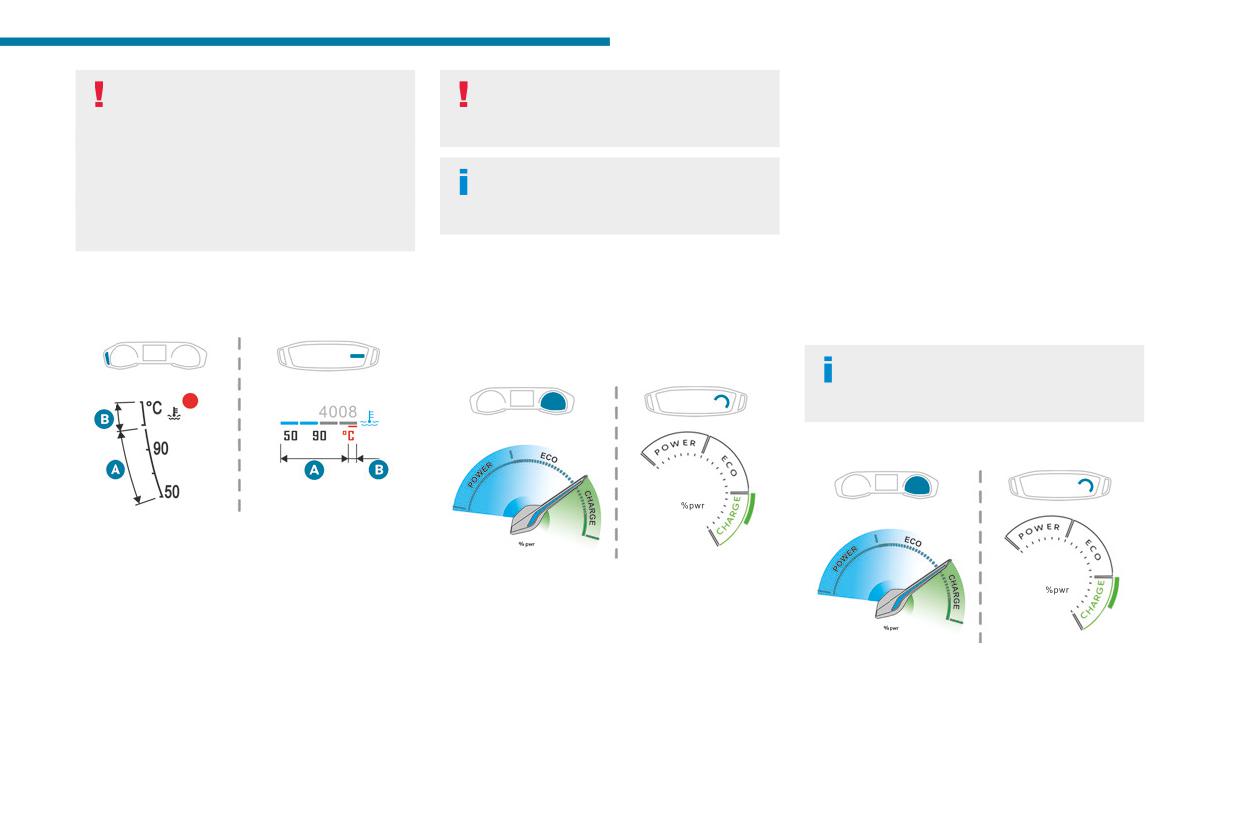
Coolant temperature
Electric)
during deceleration: taking your foot
indicator
The power indicator shows in real time the power
off the accelerator pedal or braking.
demanded from the vehicle.
There are 3 zones:
When the ignition is switched on and
before the engine is started, the power
indicator only displays "OFF".
For electric versions
With the engine running:
- In zone A, the temperature is correct.
- In zone B, the temperature is too high. The
For hybrid versions
associated warning lamp and the STOP warning
lamp light up in red on the instrument panel,
POWER High power demand, using the
accompanied by the display of a message and
combined capabilities of the petrol
an audible signal.
engine and the electric motor.
CHARGE Traction battery charging during
You must stop the vehicle as soon as it is
The slider is located in this zone
deceleration and braking.
safe to do so.
during more dynamic driving phases
ECO
Moderate energy consumption and
Wait a few minutes before switching off the
when high levels of performance are
optimised driving range.
engine.
being demanded.
21
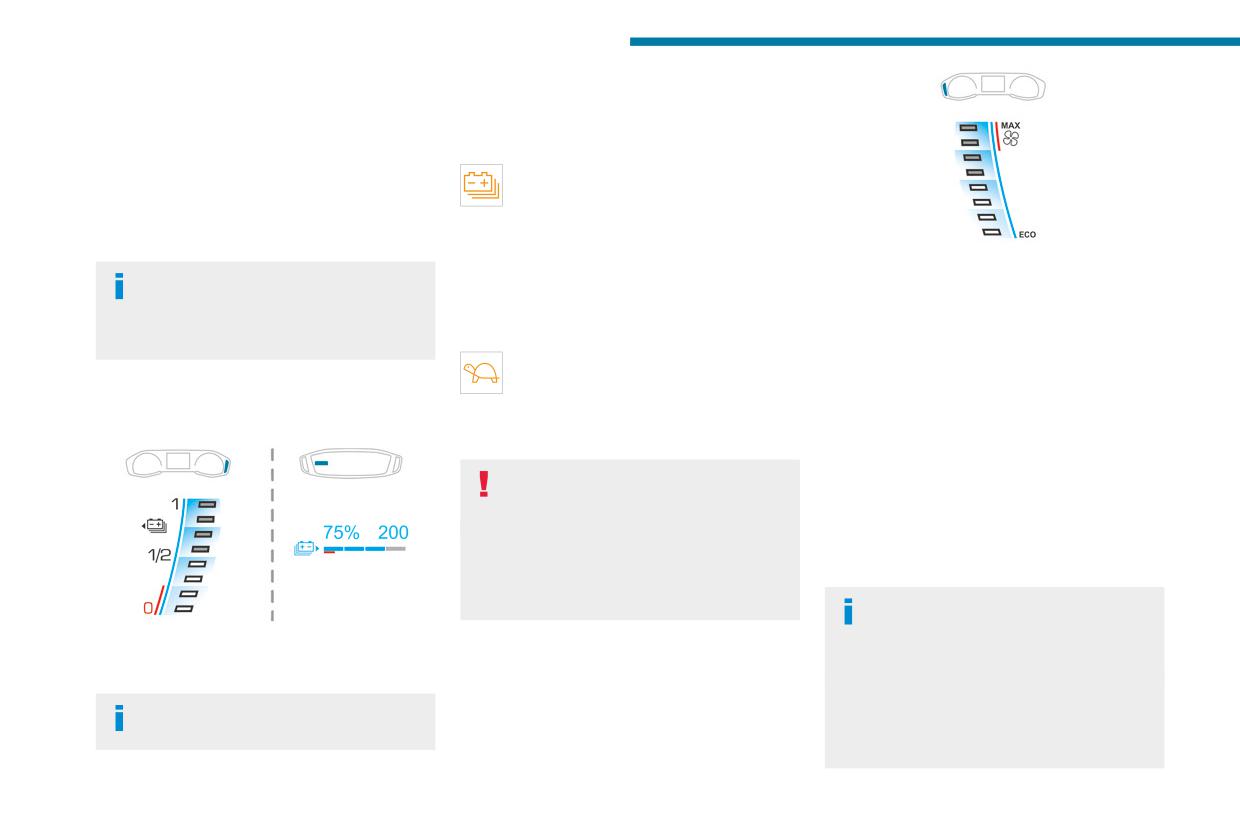
Dashboard instruments
Associated warning lamps
POWER Energy consumption by the drive train
during acceleration.
Two successive alert levels indicate that the
energy available has dropped to a low level:
NEUTRAL
1st level: Reserve
When the ignition is switched on, the vehicle’s
The state of charge of the traction battery
electric drive train neither consumes nor
is low.
generates energy; after sweeping over the
Fixed and indicator in the red zone,
indicator, the needle or the cursor returns to its
accompanied by an audible signal.
"neutral" position: between ECO and CHARGE.
► View the remaining range on the instrument
The gauge shows the consumption of the
With the ignition off, opening the driver's
panel.
traction battery's electrical energy by the thermal
door activates the indicator, which moves
► Put the vehicle on charge as soon as
comfort devices in the passenger compartment.
to the "neutral" position: between ECO and
possible.
With a digital instrument panel, the gauge only
CHARGE.
2nd level: Critical
appears in "Personal" mode.
The state of charge of the traction battery
The devices in question are the heating and air
is critical.
conditioning systems.
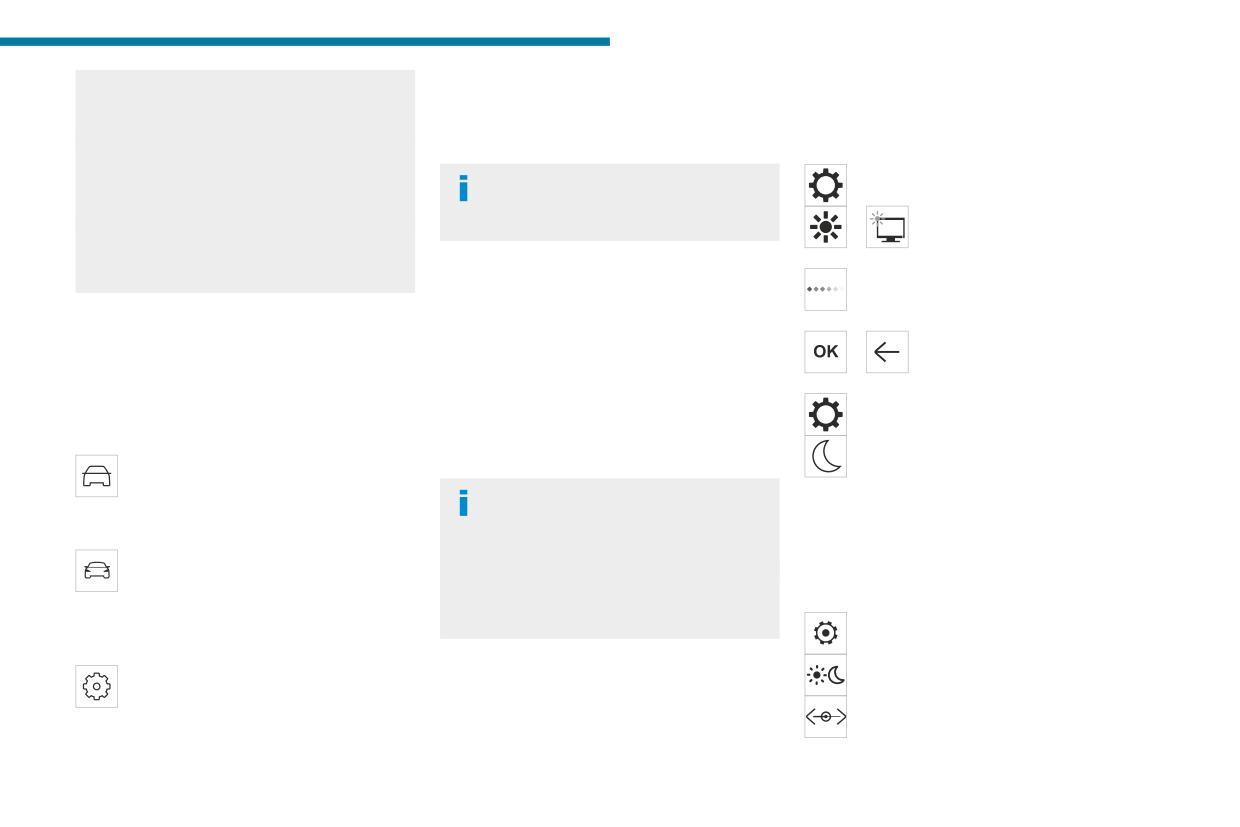
Charge level indicator
Fixed, together with the reserve warning lamp,
This equipment can be used:
(Electric)
accompanied by an audible signal.
- If the vehicle is not plugged in, when the
► You must put the vehicle on charge.
READY lamp is lit.
- If the vehicle is plugged in, when the ignition is
The remaining range is no longer
switched on ("Lounge" mode).
calculated. The drive train power
Selecting ECO mode limits the performance of
gradually decreases.
some of this equipment. The needle or cursor on
The heating and air conditioning are switched
the thermal comfort consumption indicator then
off (even if the needle or cursor indicating
moves into the "ECO" zone.
their consumption is not at the "ECO"
position).
To quickly heat or cool the passenger
compartment, feel free to temporarily
The traction battery's actual charge level and
select the maximum heating or cooling
the remaining range are displayed continuously
Thermal comfort
setting.
when the vehicle is started.
consumption indicator
When the heating is on maximum, the gauge
With the ignition off, opening the driver's
on the thermal comfort consumption indicator
(Electric)
door activates the indicator.
is in the MAX zone. When the air conditioning
(Depending on version)
is on maximum, it stays in the ECO zone.
22
Dashboard instruments
Excessive use of thermal comfort equipment,
- Tyre pressures.
With Touch screen 10"
1
particularly at low speed, can significantly
- Engine oil level (depending on engine).
& Bluetooth Radio &
decrease the vehicle's range.
- Next service due.
Remember to optimise equipment settings
- Current alerts.
Telephone
upon achieving the desired level of comfort,
► Press Settings from the status bar or
This information is also displayed
and adjust them if necessary whenever you
from the menus buttons.
automatically every time the ignition is
start the vehicle.
/
► Select "Brightness" or
switched on.
After an extended period without using the
"Screen configuration",
heating, you may notice a slight odour during
depending on equipment.
the first few minutes of use.
► Adjust the instrument panel and
Total distance recorder
screen brightness by using the arrows or
The total distance recorder measures the total
moving the slider.
Manual test
distance travelled by the vehicle since its initial
/
► Press this button to save and
registration.
exit, depending on equipment.
This function allows you to check certain
With the ignition on, the total distance is
You can also switch off the screen:
indicators and display the alerts log.
displayed at all times. It remains displayed for
► Press Settings from the status bar or
With Touch screen 10" & Bluetooth Radio
30 seconds after switching off the ignition. It is
from the menus buttons.
& Telephone
displayed when the driver's door is opened, and
► Select "Turn off screen" or "Dark",
It can be accessed via the "Check" button
when the vehicle is locked or unlocked.
depending on equipment.
in the Driving touch screen menu.
The screen goes off completely.
When travelling abroad, you may have to
With PEUGEOT Connect Radio / PEUGEOT
► Press the screen again (anywhere on its
change the distance units (miles or km):
Connect Nav
surface) to turn it on.
the displayed speed must be in the local
It can be accessed via the "Check" button
country’s official unit (mph or km/h).
With PEUGEOT Connect
in the Driving/Vehicle touch screen
The unit is changed via the screen's
menu.
configuration menu, with the vehicle
Radio
stationary.
► Press this button to select the
With PEUGEOT i-Connect Advanced -
Settings menu.
PEUGEOT i-Connect
► Select "Brightness".
It can be accessed via the Settings>
Lighting dimmer
Vehicle touch screen application.
► Adjust the brightness by pressing the
► Select Safety > Diagnostics.
This system allows the brightness of the
arrows or moving the slider.
The following information is displayed on the
instruments and controls to be adjusted manually
The settings are applied immediately.
instrument panel:
to suit the ambient light level.
23
Dashboard instruments
► Press outside the settings window to exit.
With PEUGEOT i-Connect
You can also switch off the screen:
Advanced - PEUGEOT
► Press this button to select the
Settings menu.
i-Connect
► Select "Dark".
It is configured in the Settings >
Brightness touch screen application.
The screen goes off completely.
► In the "Cockpit" category, press or move the
► Press the screen again (anywhere on its
slider to the desired setting.
surface) to turn it on.
Trip computer
► Pressing the button located on the end of the
With PEUGEOT Connect
wiper control stalk displays the following tabs in
Displays information related to the current trip
Nav
turn:
(range, fuel consumption, average speed, etc.).
With the lamps switched on:
- Current information:
► Press this button to select the
• Driving range (Petrol).
Data displayed on the
Settings menu.
• Current consumption.
► Select "OPTIONS".
instrument panel
• Stop & Start time counter (Petrol).
► Select "Screen configuration".
With instrument panels with dials
• Percentage of the current journey travelled in
Pressing the end of the wiper control stalk
all-electric driving mode (Hybrid).
► Select the "Brightness” tab.
displays the trip computer data.
- Trips "1" then "2":
► Adjust the instrument panel and
With digital instrument panel
• Average speed.
screen brightness by using the arrows or
Trip computer data is permanently displayed
• Average fuel consumption.
moving the slider.
when the "Personal" display mode is selected.
• Distance travelled.
► Press this button to save and exit.
In all other display modes, pressing the end of
End of trip page
the wiper control stalk will cause this data to
(Depending on version)
You can also switch off the screen:
appear temporarily in a specific window.
When the ignition is switched off, the instrument
► Press this button to select the
Display of the various tabs
panel automatically displays an additional page
Settings menu.
of the trip computer that recapitulates information
► Select "Turn off screen".
about the last trip.
The end of trip page contains the following
The screen goes off completely.
information:
► Press the screen again (anywhere on its
- Range.
surface) to turn it on.
- Trip time.
24
Dashboard instruments
- Distance travelled.
Consult a PEUGEOT dealer or a qualified
The time counter is reset each time the ignition is
1
- Percentage of the current journey travelled in
workshop.
switched on.
all-electric driving mode (Hybrid).
- Average consumption.
Current consumption
Touch screen
(mpg or l/100 km or km/l)
Trip reset
(miles/kWh or kWh/100 km or km/kWh) (Electric)
This system gives access to the following
► When the desired trip is displayed,
/
Calculated during the last few
elements:
press the button on the end of the wiper
seconds.
- Permanent display of the time and outside
control stalk for more than 2 seconds.
This function is only displayed at speeds above
temperature (a blue warning lamp appears if
Trips "1" and "2" are independent and are used
19 mph (30 km/h) (Petrol).
there is a risk of ice).
in the same way.
- Heating/air conditioning system controls.
Average fuel consumption
- Vehicle functions and equipment setting
Definitions
(mpg or l/100 km or km/l)
menus.
(miles/kWh or kWh/100 km or km/kWh)
- Audio system and telephone controls and
Range
Calculated since the last trip
display of related information.
computer reset.
- Display of visual manoeuvring aid functions
(miles or km)
(visual parking sensor information, etc.).
(Traction battery charge level percentage)
Average speed
- Internet services and display of related
(Electric)
(mph or km/h)
information.
Distance that can still be travelled with the
Calculated since the last trip computer
- Navigation system controls and
fuel remaining in the tank (based on the
reset.
display of related information (depending on
average fuel consumption over the last few miles
version).
(kilometres) travelled).
Distance travelled
This value may vary following a change in driving
For safety reasons, always stop the
style or terrain, leading to a significant change in
(miles or km)
vehicle before performing operations
current fuel consumption.
Calculated since the last trip computer
that require sustained attention.
When the range falls below 19 miles (30 km),
reset.
Some functions are not accessible while
dashes are displayed.
driving.
Stop & Start time counter
After filling with at least 5 litres of fuel, the range
is recalculated and is displayed if it exceeds 62
(minutes/seconds or hours/minutes)
miles (100 km).
Recommendations
Dashes appearing permanently in place of
If your vehicle is fitted with the Stop & Start
This screen uses capacitive sensing technology.
numbers while driving indicates a malfunction.
function, a time counter calculates the time spent
- Do not use pointed objects on the touch
in STOP mode during a journey.
screen.
25
Dashboard instruments
- Do not touch the touch screen with wet hands.
Confirm
Access to certain configurable equipment.
- Use a soft, clean cloth to clean the touch
screen.
Return to the previous page or confirm
With PEUGEOT Connect
Radio / PEUGEOT Connect
With Touch screen 10"
Volume adjustment/mute
Nav
& Bluetooth Radio &
Telephone
Menus
Principles
Some menus may display across two pages:
Principles
Press the touch screen with three fingers
press the "OPTIONS" button to access the
to show all of the menu buttons.
Access to the menus
second page.
If no action is performed on the second
Direct access to the Climate menu
For more information about the menus,
page, the first page is displayed
refer to the sections describing the audio
automatically.
Direct access to the Driving menu
and telematics systems.
To deactivate/activate a function, select "OFF"
Radio/Media
► Use the buttons arranged below the touch
or "ON".
screen to access the menus, then press the
Configure a function.
Climate
buttons that appear on the touch screen.
Settings for temperature, air flow, etc.
Some menus may display across two pages:
Access additional information on the
For more information on Manual air
press the "OPTIONS" button to access the
function.
conditioning or Automatic air conditioning,
second page.
Confirm.
refer to the corresponding section.
After a few moments with no action on
Navigation via CarPlay® or Android Auto
Return to the previous page or confirm.
the second page, the first page is
(Depending on equipment)
displayed automatically.
Driving
Activation, deactivation and settings for
To deactivate/activate a function, select "OFF"
Menus
certain functions.
or "ON".
The functions are organised in 2 tabs: "Driving
Press the touch screen with three fingers
Configuring a function
functions" and "Vehicle settings".
to show all of the menu buttons.
Telephone
Access to additional information on the
function
Applications
26
Dashboard instruments
For more information about the menus,
- Time and outside temperature (a blue warning
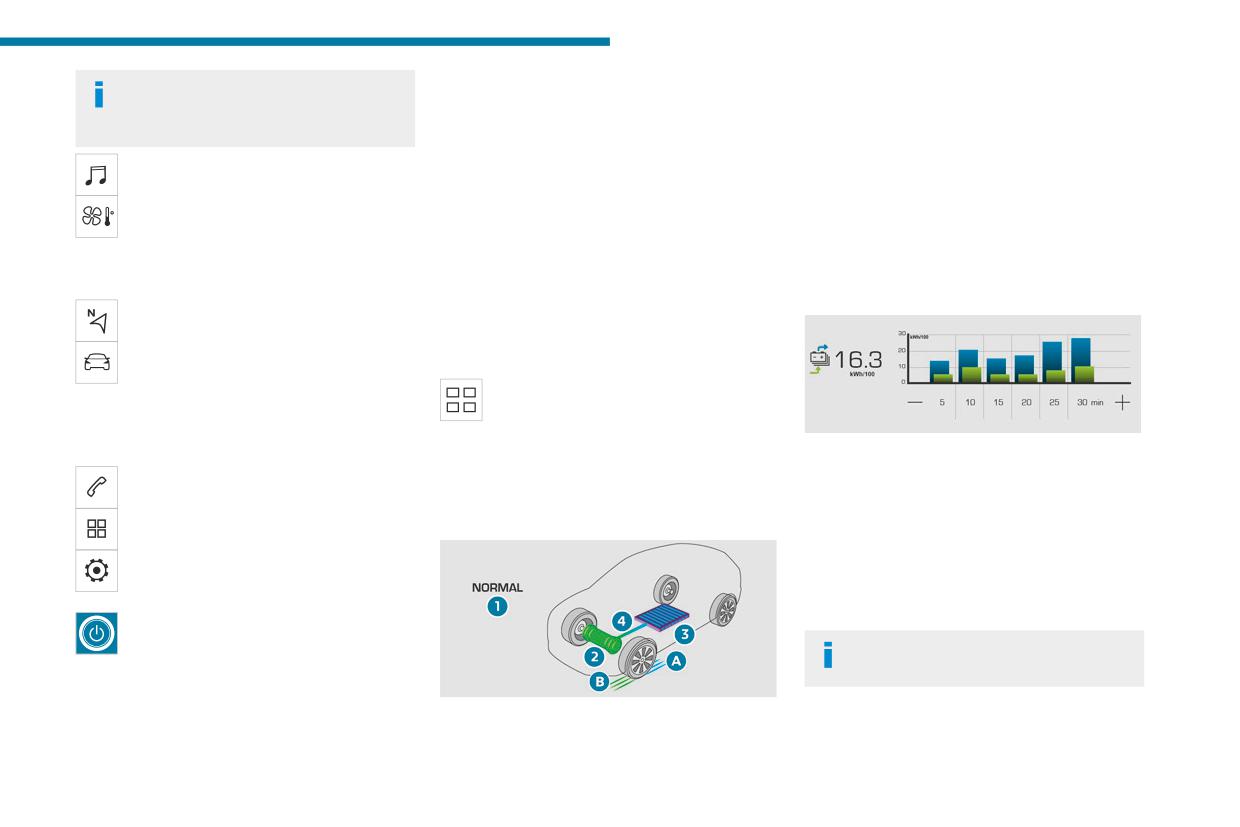
3. Estimated traction battery charge level
1
refer to the sections describing the audio
lamp appears if there is a risk of ice).
4. Energy flows
and telematics systems.
- Reminder of the air conditioning information,
The energy flows have a specific colour for each
and direct access to the corresponding menu.
Radio/Media
type of driving:
- Reminder of the information in the
Radio Media and Telephone menus.
A. Blue: energy consumption
Climate
B. Green: energy recovery
- Notifications.
Settings for temperature, air flow, etc.
- Access to the Settings for the touch screen
For more information on Manual air
Statistics
and the digital instrument panel (date/time,
conditioning or Automatic air conditioning,
languages, units, etc.).
This page shows electrical energy consumption
refer to the corresponding section.
statistics.
Navigation (depending on equipment)
Energy menu (Electric)
This menu is only available with PEUGEOT
Driving/Vehicle (depending on
Connect Nav.
equipment)
Activation, deactivation and settings for certain
This is accessible via the Applications
functions.
menu.
The functions are organised in 2 tabs: "Driving
Flow
- Blue bar chart: directly consumed energy
functions" and "Vehicle settings".
supplied by the traction battery.
Telephone
With 3D Connected Navigation, the page
- Green bar chart: energy recovered during
displays a real-time representation of the electric
deceleration and braking, used to recharge the
Applications
drive train’s operation.
battery.
Access to certain configurable equipment.
The average result for the current trip is stated in
Settings
kWh/100 km.
Main settings for the audio system, touch
► You can change the displayed time scale by
screen and digital instrument panel.
pressing the - or + buttons.
Volume adjustment/mute
A current trip is any trip of more than 20
minutes without switching off the ignition.
Information banner(s)
Certain information is displayed permanently in
1. Active driving mode
the touch screen banner(s).
2. Electric motor
27
Dashboard instruments
Charging
Return to the previous page
Settings
Main settings for the audio system, touch
This page allows you to programme deferred
► To change the status of a function, press the
screen and digital instrument panel.
charging.
description for the corresponding line (change
Activation/Deactivation and configuration of
For more information on Charging the traction
confirmed by the slider moving to the right/left:
the exterior lighting, vehicle access and safety
battery, refer to the corresponding section.
function activated/deactivated).
functions.
Access additional information on the
Energy
With PEUGEOT i-Connect
function
Access to the charging system features
Advanced - PEUGEOT
Access to function parameters
(energy flow, consumption statistics, deferred
charging).
i-Connect
Adding/Removing shortcuts
Energy application
Main controls
Short press, ignition off: system on/off.
Access to one of the home pages
Flow
Short press, ignition on: mute/restore
Return to the first home page
sound.
The page displays a real-time representation of
Direct access to the Climate application
Long press, ignition on: start standby mode
the electric drive train’s operation.
(mute sound, screens and clock display off).
Direct access to the Shortcuts for
Rotation: volume adjustment.
driving aids
► Swipe down from the upper edge of the touch
Applications
screen to access a list of quick settings (e.g.
Press this button to access the
Brightness, Diagnostics).
applications wall.
► Depending on the pages displayed on the
To obtain information about the other
screen, with or without the context menu, scroll
applications not listed here, refer to the sections
the text by swiping with your finger, as with a
describing the audio and telematic systems.
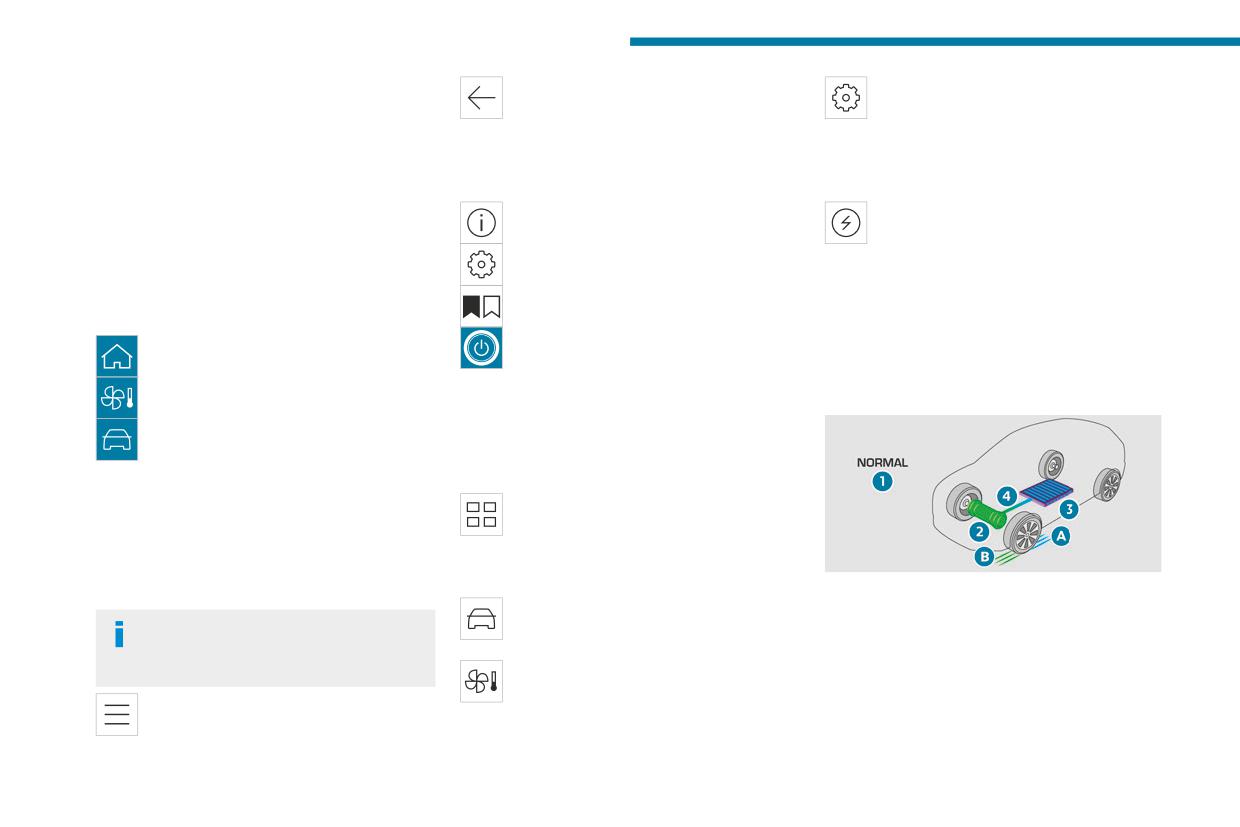
1. Active driving mode
smartphone.
ADAS
2. Electric motor
From any page, press the touch screen
Activation/Deactivation and configuration
3. Estimated traction battery charge level
with three fingers to display the
of the driving aid functions.
4. Energy flows
applications wall.
Climate
The energy flows have a specific colour for each
Settings for temperature, air flow, etc.
Show/Hide context menu
type of driving:
For more information on Air conditioning, refer
A. Blue: energy consumption
to the corresponding section.
B. Green: energy recovery
28
Dashboard instruments
Statistics
vehicle is located in an area covered by the
Remotely operable
1
mobile network.
This page shows electrical energy consumption
additional functions
A lack of network coverage may prevent
statistics.
communication with the vehicle (for example,
(Electric)
if it is in an underground car park). In such
(Depending on country of sale)
cases, the application will display a message
indicating that the connection with the vehicle
could not be established.
The following functions are
available from the MYPEUGEOT
APP application, which is
accessible from a smartphone:
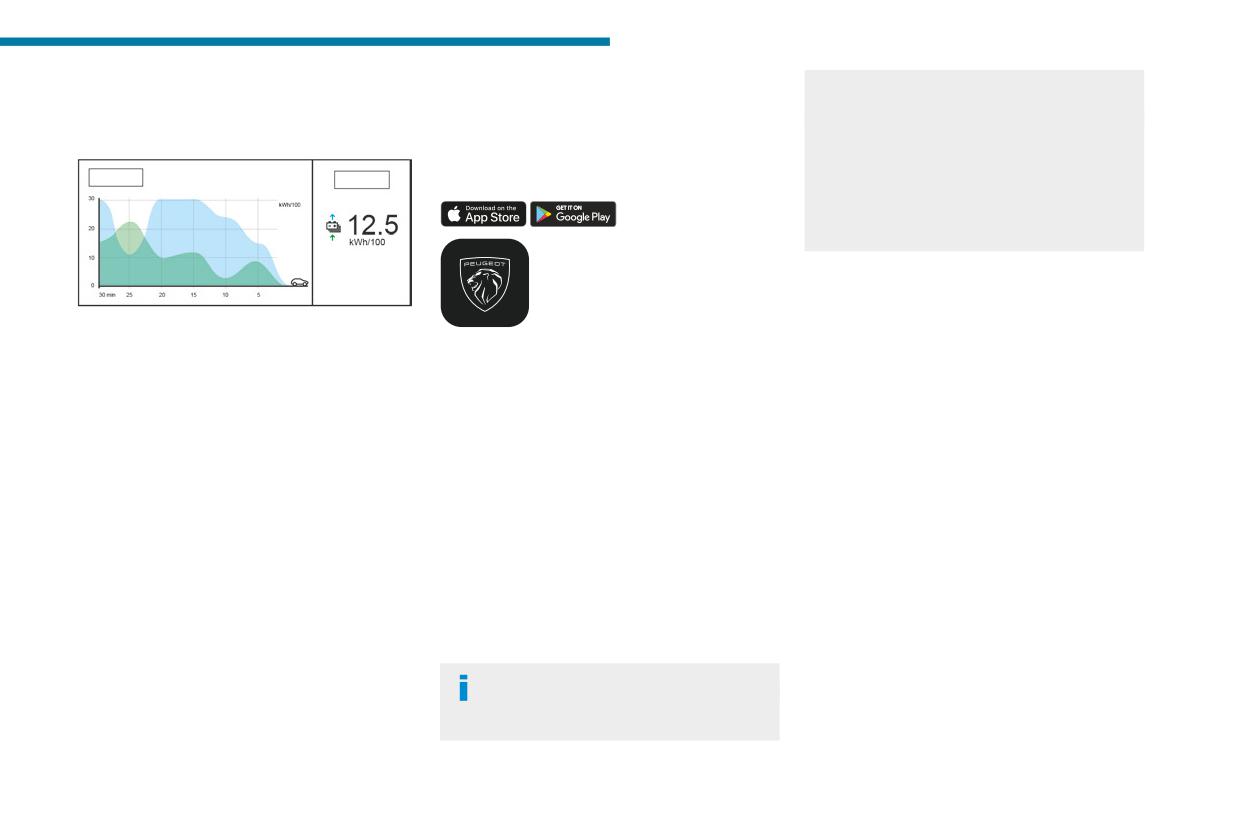
- Blue graph: energy consumed directly from
the traction battery.
- Managing the traction battery charging
- Green graph: energy regenerated during
(deferred charging).
deceleration and braking phases used to
- Managing the temperature pre-conditioning.
recharge the traction battery.
- Viewing statistics (depending on availability).
The average result for the current trip is stated in
- Viewing the state of charge and range of the
kWh/100 km.
vehicle.
Installation procedure
Charging
► Download the MYPEUGEOT APP application
This page allows you to programme deferred
from the appropriate online store for your
charging.
smartphone.
For more information on Charging the traction
► Create an account.
battery (Electric), refer to the corresponding
► Enter the vehicle identification number
section.
(available on the vehicle registration certificate).
For more information on Identification
markings, refer to the corresponding section.
Network coverage
In order to be able to use the various
remotely operable features, ensure that your
29
Access
Remote control / Key
Built-in key
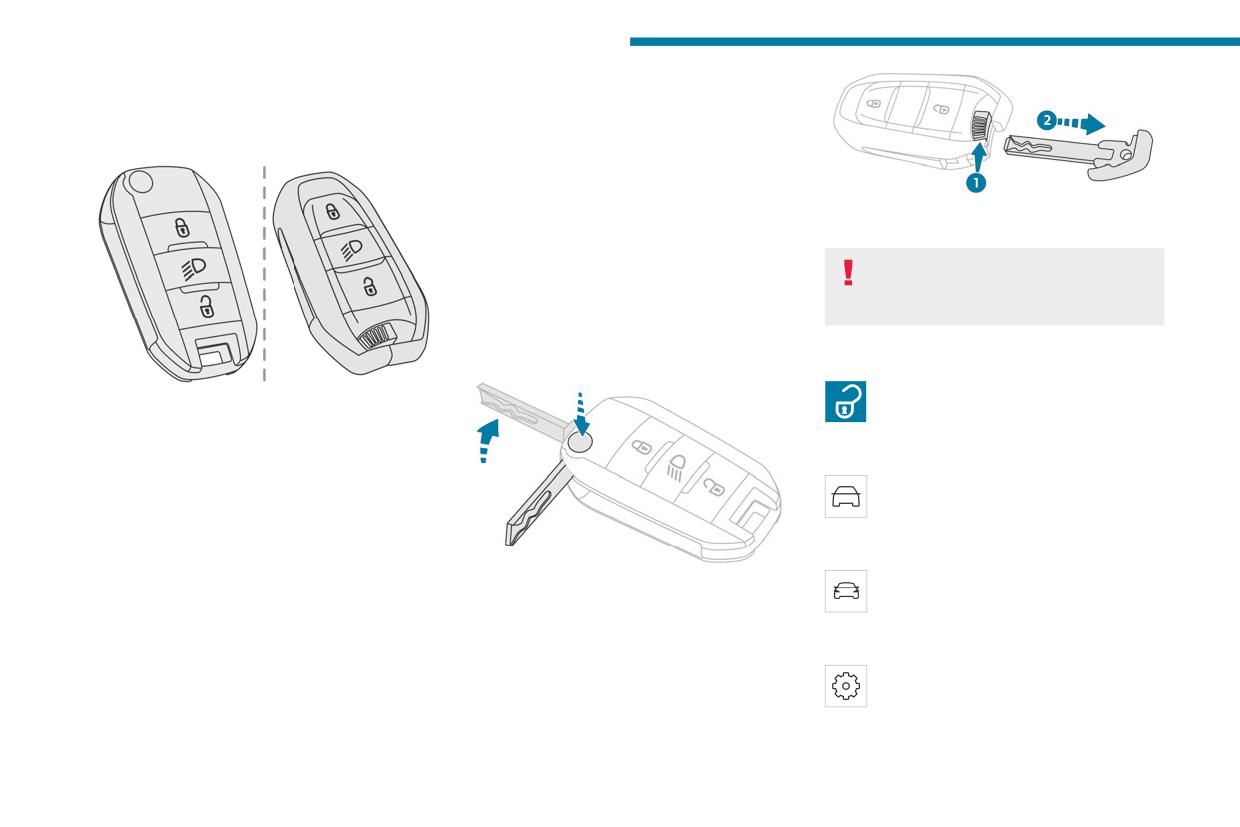
Using the remote control built-in key, you can
Remote control function
perform the following operations (depending on
version):
- Unlocking/Locking/Deadlocking the vehicle.
- Activation/Deactivation of the manual child
► To eject the key or put it back in place, pull
lock.
and hold the button.
- Activation/Deactivation of the front passenger
airbag.
Once the built-in key is ejected, always
- Back-up Unlocking/Locking of the doors.
keep it with you to be able to carry out
- Switching on the ignition and starting/switching
the corresponding back-up procedures.
off the engine.
Without Keyless Entry and Start
Unlocking the vehicle
The remote control can be used to perform
the following remote functions (depending on
With Touch screen 10" & Bluetooth Radio
version):
& Telephone
- Unlocking/Locking/Deadlocking the vehicle.
- Remote operation of lighting.
Selective unlocking is configured in the
- Folding/Unfolding the door mirrors.
Driving touch screen menu.
- Activating/Deactivating the alarm.
With PEUGEOT Connect Radio / PEUGEOT
- Locating the vehicle.
Connect Nav
- Closing the windows.
Selective unlocking is configured in the
- Activating the vehicle’s electronic immobiliser.
► To unfold or fold the key, press the button.
Driving/Vehicle touch screen menu.
Back-up procedures allow the vehicle to be
With Keyless Entry and Start
With PEUGEOT i-Connect Advanced -
locked/unlocked in the event of a failure of the
remote control, the central locking, the battery,
PEUGEOT i-Connect
etc. For more information on the Back-up
Selective unlocking is configured in the
procedures, refer to the corresponding section.
Settings > Vehicle touch screen
application.
30
Access
Complete unlocking
vehicle. However, if the vehicle is fitted with
When closing windows, ensure that no
2
► If the selective unlocking is deactivated,
an alarm, it will be activated after 45 seconds.
person or object could prevent their
press the unlocking button.
If the vehicle is unlocked but the doors or boot
correct closure.
are not subsequently opened, the vehicle
To leave the windows partly open on versions
Selective unlocking
will automatically lock itself again after about
with alarm, you must first deactivate the
Driver's door
30 seconds. If the vehicle is fitted with an
interior volumetric monitoring.
► Press the unlocking button.
alarm, it will be reactivated automatically.
For more information on the Alarm, refer to
The driver's door and the fuel filler flap are
the corresponding section.
unlocked (Petrol or Hybrid).
Deadlocking
The driver's door and the charging flap are
Locating the vehicle
unlocked (Electric).
This function helps you to spot your vehicle from
► Press it again to unlock the other doors and
a distance, with the vehicle locked:
the boot.
Deadlocking renders the interior door
- The direction indicators or sidelamps and/or
The charging nozzle can be unplugged on the
controls inoperative. It also disables the
daytime running lamps, depending on version,
second press.
central locking button.
flash for approximately 10 seconds.
Complete or selective unlocking and alarm
The horn remains operational.
- The door mirror spotlamps come on.
deactivation is confirmed by the flashing of the
Never leave anyone inside the vehicle
- The courtesy lamps come on.
sidelamps and/or daytime running lamps.
when it is deadlocked.
► Make a long press on this button.
Depending on version, the door mirrors unfold.
► Press the locking button.
Locking the vehicle
► Press the locking button again within 3
Remote lighting of the
seconds to deadlock the vehicle (confirmed by
the temporary lighting of the direction indicators).
lamps
For the vehicles equipped with the Proximity
(Depending on version)
Normal locking
Keyless Entry and Start system, a double
► Press this button. The sidelamps,
audible signal indicates that the vehicle is not
dipped beam headlamps, number plate
► Press the locking button.
deadlocked.
lamps and door mirror spotlamps come on for 30
The locking, and the activation of the alarm
seconds.
depending on version, is confirmed by the
Closing the windows
Pressing again before the end of the timed
lighting of the direction indicators.
(Depending on version)
period switches off the lamps immediately.
Depending on version, the door mirrors fold.
Holding the locking button pressed for
An access (door or boot) that is not
more than 3 seconds closes the windows.
properly closed prevents locking of the
31
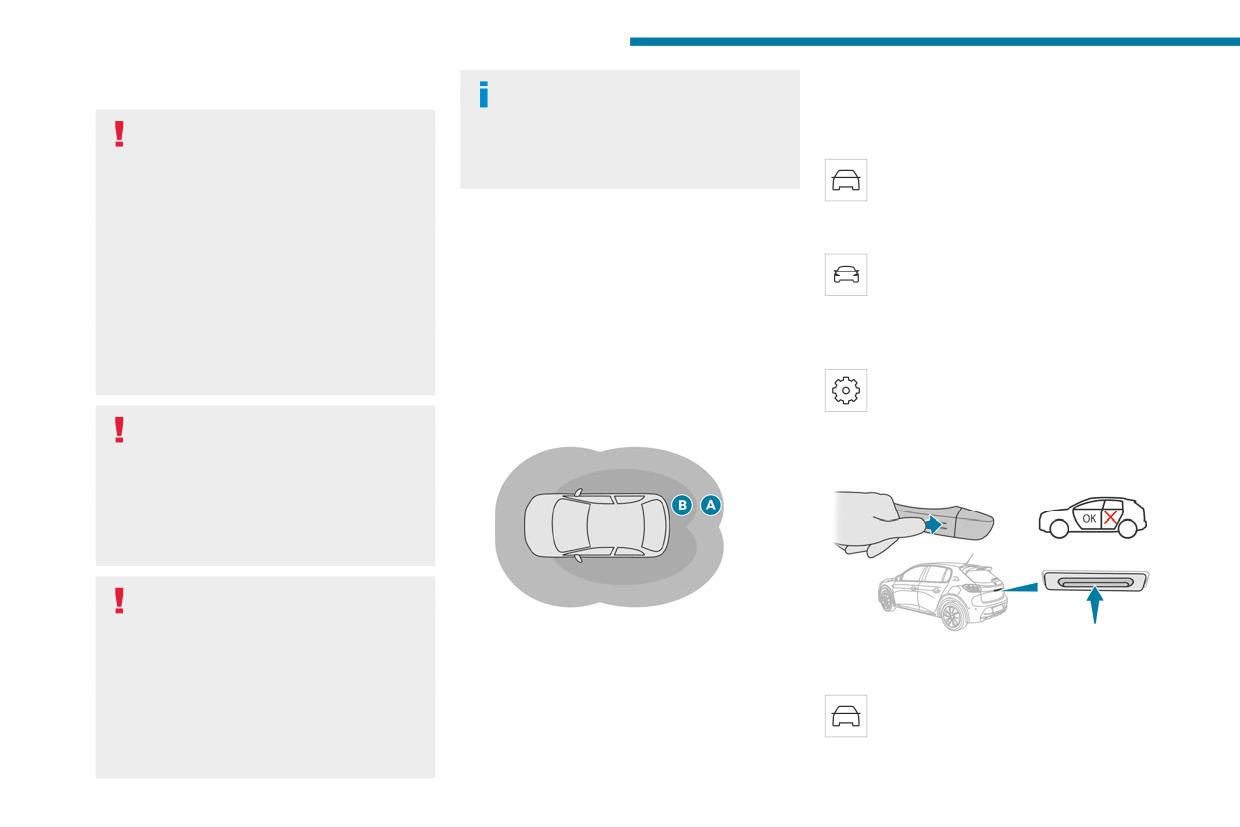
Access
Advice
Purchasing a second-hand vehicle
Activation/Deactivation
Have the key codes memorised by a
Remote control
PEUGEOT dealer, to ensure that the keys
With Touch screen 10" & Bluetooth Radio
The remote control is a sensitive, high-
in your possession are the only ones able to
& Telephone
frequency device; avoid handling it in your
start the vehicle.
The automatic functions are configured
pocket, due to the risk of unintentionally
via the Driving touch screen menu.
unlocking the vehicle.
With PEUGEOT Connect Radio / PEUGEOT
Avoid pressing the remote control buttons
Proximity Keyless Entry
Connect Nav
while out of range of the vehicle, due to
and Start
The automatic functions are configured
the risk of rendering the remote control
via the Driving/Vehicle touch screen
inoperative. It would then be necessary to
This is a Keyless Entry and Start system.
menu.
reset it.
It enables automatic vehicle locking/unlocking
The remote control does not work when the
With PEUGEOT i-Connect Advanced -
simply by detecting the electronic key.
key is in the ignition switch, even when the
PEUGEOT i-Connect
As long as the driver has the electronic key
ignition is switched off.
on their person, the vehicle unlocks as they
The automatic functions are configured in
approach and locks when they walk away.
the Settings > Vehicle touch screen
Anti-theft protection
Key recognition zones:
application.
Do not modify the electronic vehicle
immobiliser, as this might result in
Unlocking the vehicle
malfunctions.
For vehicles with a key ignition switch,
remember to remove the key and turn the
steering wheel to engage the steering lock.
Locking the vehicle
Driving with the doors locked could make
Zone A: automatic locking on moving away from
it more difficult for the emergency services
the vehicle (about 2 metres from the vehicle).
to enter the passenger compartment in an
With Touch screen 10" & Bluetooth Radio
Zone B: automatic unlocking and welcome
emergency.
& Telephone
lighting on approaching the vehicle (between 1
As a safety precaution, remove the key from
Selective unlocking is configured in the
and 2 metres from the vehicle).
the ignition or take the electronic key with you
Driving touch screen menu.
For more information on Welcome lighting,
when leaving the vehicle, even for a short
please refer to the corresponding section.
time.
32
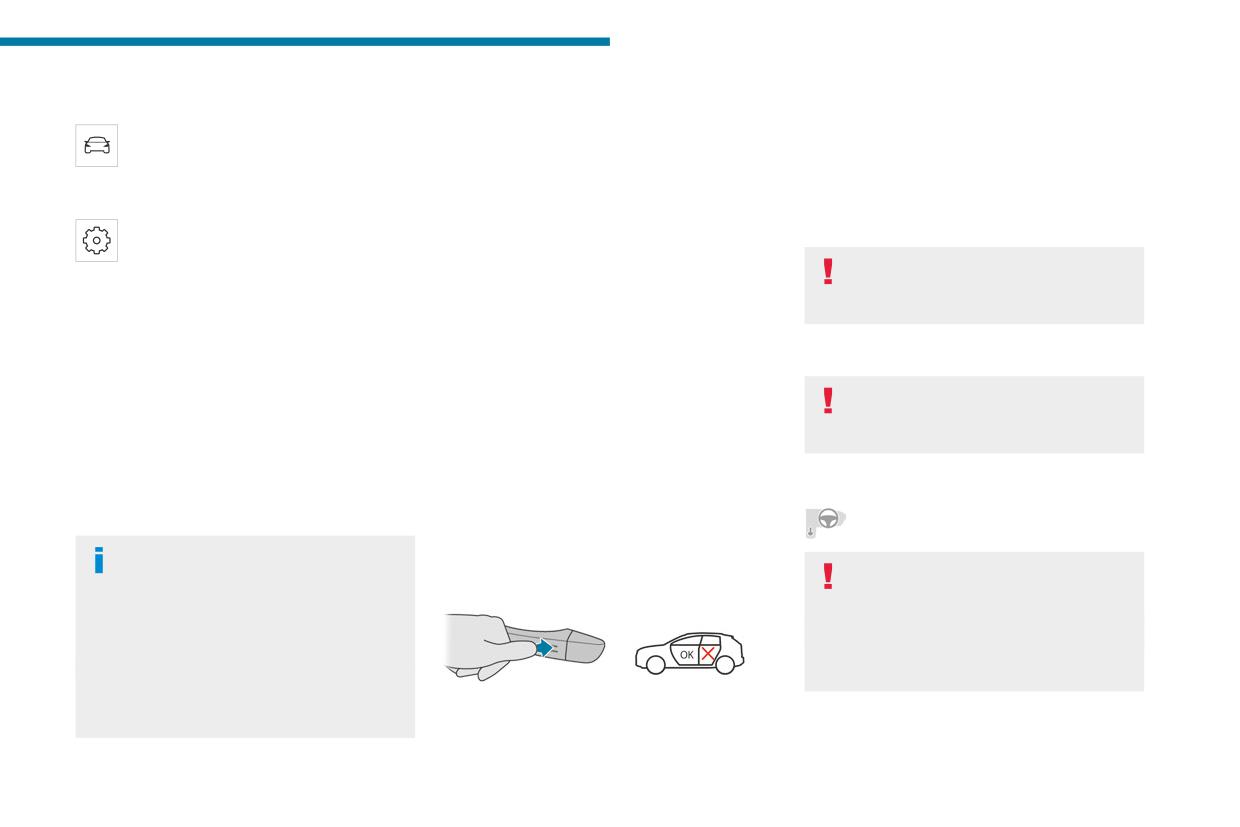
Access
With PEUGEOT Connect Radio / PEUGEOT
Selective unlocking
► Either automatically, upon leaving zone A, if
2
Connect Nav
Driver’s door
the automatic functions are activated.
Servicing unlocking is configured in the
It operates:
► Or by gently pressing the driver's door
Driving/Vehicle touch screen menu.
► Either automatically when approaching the
handle.
driver’s door, if the automatic functions are
Locking is confirmed by the lighting of the
With PEUGEOT i-Connect Advanced -
activated.
direction indicators, and by a double audible
PEUGEOT i-Connect
► Or by gently pressing the driver's door
signal when the vehicle is locked upon walking
Selective unlocking is configured in the
away.
handle.
Settings > Vehicle touch screen
The driver's door and the fuel filler flap are
The alarm does not activate when
application.
unlocked (Petrol or Hybrid).
locking automatically from a distance (the
The driver's door and the charging flap are
Complete unlocking
direction indicators do not light up).
unlocked (Electric).
The vehicle (doors and boot) unlocks:
► Once inside the vehicle, to unlock all
It is not possible to lock the vehicle if the
► Either automatically as the driver approaches
accesses, press the central locking button or pull
electronic key is left inside the vehicle.
in zone B, if the automatic functions are
the opening control on any door.
activated.
For safety and theft protection reasons,
► Or by gently pressing the driver's door handle
Selective unlocking of the boot
never leave the electronic key in the
or the button on the boot.
vehicle, even when you are close to it.
The boot unlocks automatically as you approach
Unlocking, and alarm deactivation (depending
the rear of the vehicle.
on version), is confirmed by the flashing of the
► Press the tailgate control to open the boot.
Deadlocking
sidelamps and/or daytime running lamps.
The doors remain locked.
Depending on version, the door mirrors unfold.
Locking the vehicle
If the electronic key remains around the
vehicle (zones A or B) for more than 15
Deadlocking renders the interior door
Normal locking
controls inoperative. It also deactivates
minutes without action, the automatic
functions are deactivated. To unlock or lock
the central locking button.
the vehicle, use the remote control or press
The horn remains operational.
one of the door handles.
Never leave anyone inside the vehicle
If using the door handle does not lock/unlock
when it is deadlocked.
the vehicle, bring the electronic key closer
With the doors and boot closed, the vehicle
and repeat the desired action.
locks:
33
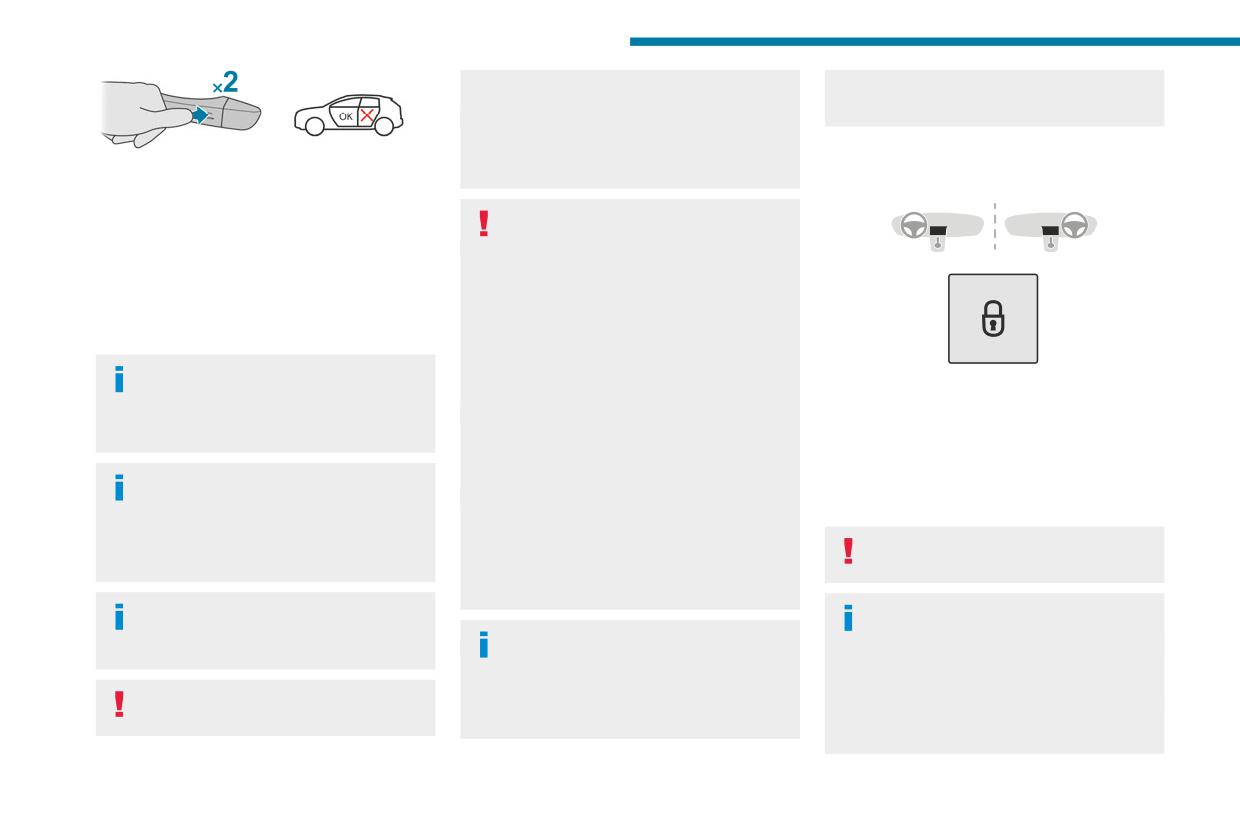
Access
taking the Keyless Entry and Start system’s
occurs, move the electronic key away from
electronic key with you.
the electronic device.
Be aware of the risk of theft of the vehicle if
the key is present in one of the defined areas
► Gently press the driver's door handle to lock
while the vehicle is unlocked.
Central locking
the vehicle.
► Press it again within 3 seconds to deadlock
In order to preserve the battery in the
the vehicle (confirmed by the temporary lighting
electronic key and the vehicle's battery:
of the direction indicators).
- The unlocking on approach function
A double audible signal indicates that the vehicle
(zone B) automatically switches to hibernation
is not deadlocked.
mode after several days (approximately one
week) without being used. To unlock the
Advice
vehicle, use the remote control or press on
one of the front door handles. The next time
If one of the doors or the boot is still open
the vehicle is started, the automatic unlocking
or if the electronic key for the Keyless
and locking functions will be reactivated.
Manual
Entry and Start system has been left inside
- If the welcome lighting is triggered
the vehicle, central locking will not take place.
► Press this button to lock/unlock the vehicle
several times in succession without the
(doors and boot) from inside the passenger
vehicle subsequently being started, it will be
compartment.
If the vehicle is unlocked but the doors or
deactivated.
The indicator lamp comes on to confirm the
boot are not subsequently opened, the
- All "hands-free" functions switch to
central locking of the vehicle.
vehicle will automatically lock itself again after
hibernation mode after 21 days without being
about 30 seconds. If the vehicle is fitted with
Central locking does not take place if any
used. To restore these functions, unlock the
an alarm, it will be reactivated automatically.
of the doors are open.
vehicle using the remote control and start the
engine.
The automatic door mirror folding/
When locking/deadlocking from the
unfolding function is configured via the
outside
Electrical interference
touch screen’s Driving/Vehicle menu.
When the vehicle is locked or deadlocked
The electronic key may not work if it is
close to an electronic device (e.g. mobile
from the outside, the indicator lamp flashes
As a safety measure, never leave the
telephone (switched on or on standby), laptop
and the button is deactivated.
vehicle, even for a short time, without
computer, strong magnetic fields). If this
► After normal locking, pull one of the
interior door controls to unlock the vehicle.
34
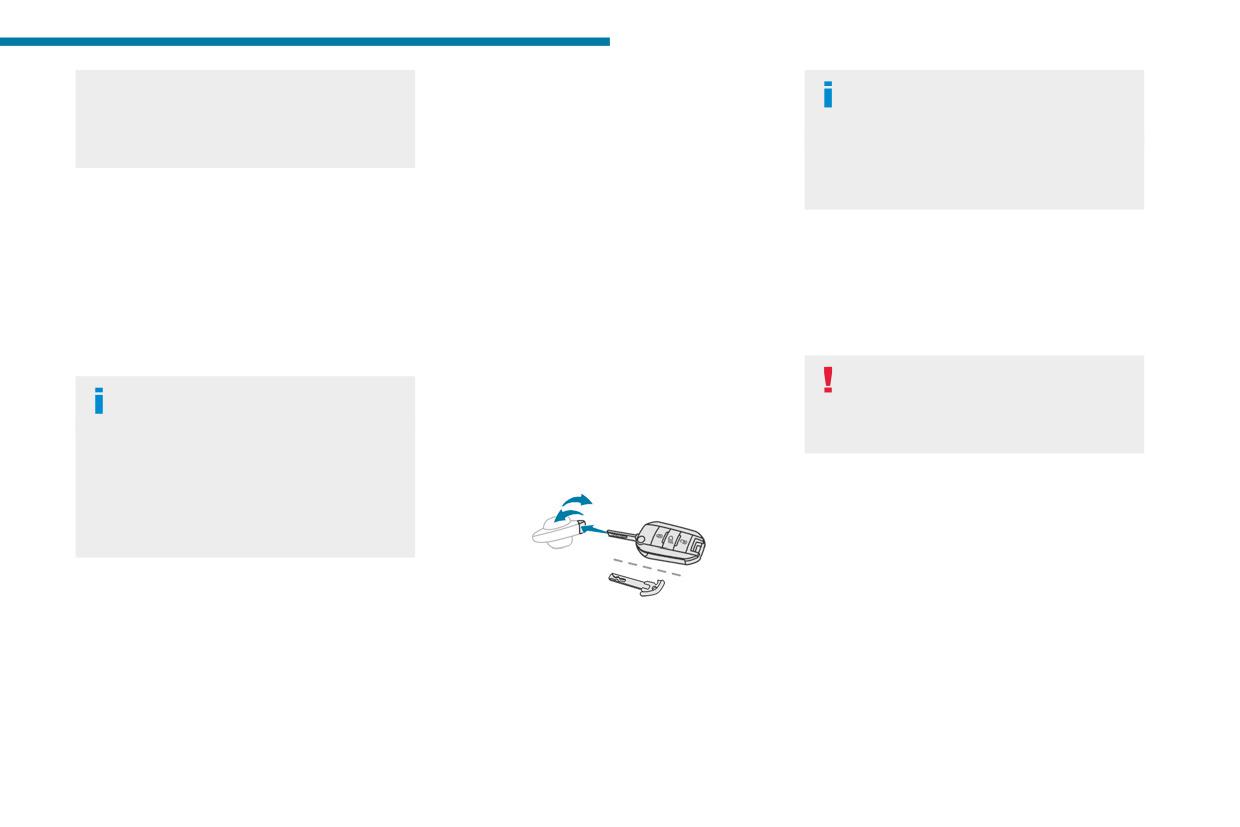
Access
► After deadlocking, you must use the
identification documents and if possible, the label
If the vehicle is fitted with an alarm, it will
2
remote control, the "Keyless Entry and
bearing the key code.
not be activated when locking with the
Start" system or the built-in key to unlock the
The PEUGEOT dealer will be able to retrieve the
key.
vehicle.
key code and the transponder code, enabling a
If the alarm is activated, the siren sounds
new key to be ordered.
when the door is opened; switch on the
ignition to stop it.
Automatic (anti-intrusion
Complete unlocking/locking
security)
of the vehicle with the key
Central locking not
The doors and boot lock automatically while
Use this procedure in the following situations:
driving (speed above 6 mph (10 km/h)).
functioning
- Remote control battery discharged.
To deactivate/reactivate this function (activated
Use these procedures in the following cases:
- Remote control malfunction.
by default):
- Central locking malfunction.
- Vehicle battery discharged.
► Press the button until a confirmation
- Battery disconnected or discharged.
- Vehicle in an area subject to strong
message appears.
electromagnetic interference.
In the event of a malfunction of the
Transporting long or voluminous
In the first case, change the remote control
central locking system, the battery must
objects
battery.
be disconnected to ensure that the vehicle is
Press the central locking control to drive
In the second case, reinitialise the remote
locked fully.
with the boot open and the doors locked.
control.
Otherwise, every time the speed of the
Refer to the corresponding sections.
Driver's or front left-hand door
vehicle exceeds 6 mph (10 km/h), the sound
(depending on version)
of the locks rebounding will be heard and an
alert will be displayed.
► Insert the key into the door lock.
► Turn the key towards the rear of the vehicle
to lock it, or towards the front to unlock it.
Back-up procedures
Other doors
► Insert the key into the door lock.
► Turn the key towards the front/rear to unlock/
Unlocking
Lost keys, remote control,
lock the vehicle.
► Pull the interior door opening control.
electronic key
► Turn the key towards the rear again within
Go to a PEUGEOT dealer with the vehicle's
3 seconds to deadlock the vehicle.
registration certificate, your personal
35
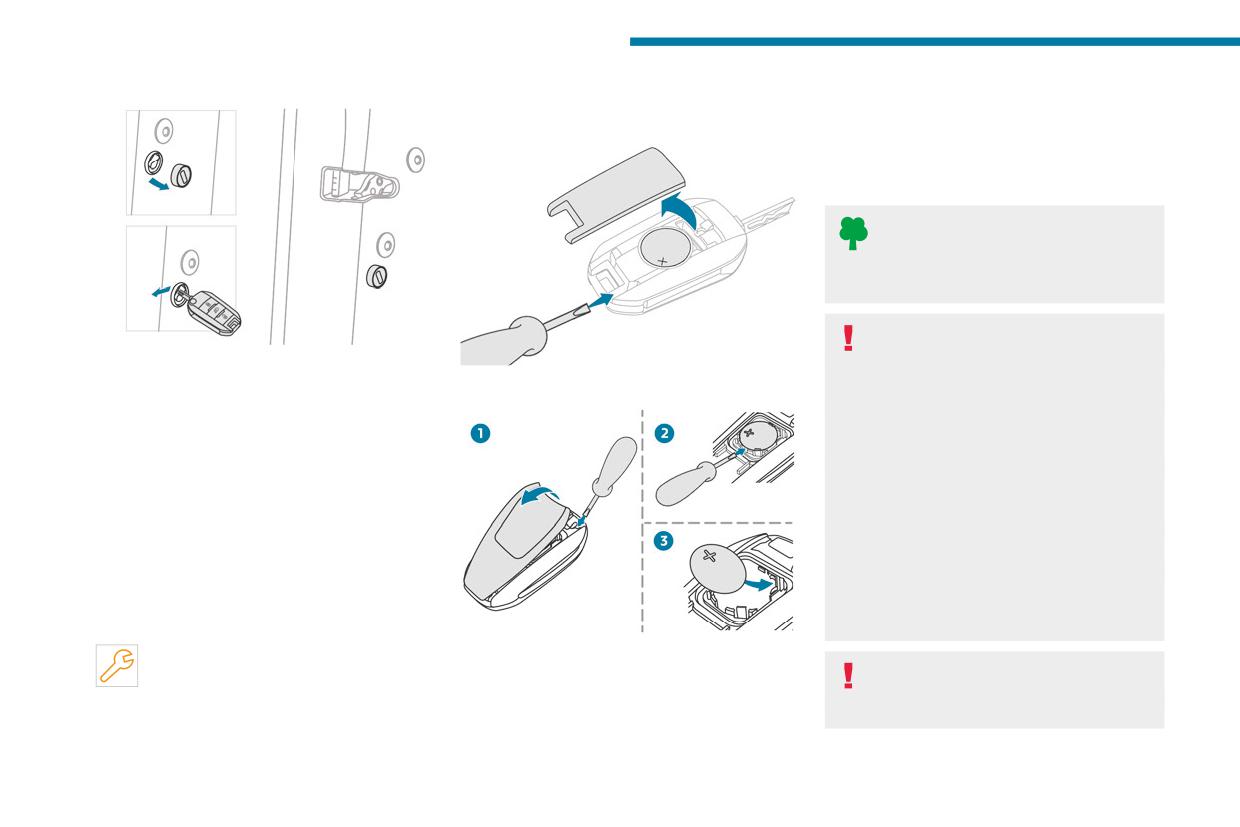
Access
Locking
Battery type: CR2032/3 volts.
located in the corner, then clip the cover onto
the unit.
Without Keyless Entry and Start
► Reinitialise the remote control.
For more information on Reinitialising the
remote control, refer to the corresponding
section.
Do not throw remote control batteries
away, as they contain metals that are
harmful to the environment. Take them to an
approved disposal point.
This equipment contains a button type
battery.
► Open the doors.
Do not swallow the battery. Risk of chemical
► For the rear doors, check that the child lock
With Keyless Entry and Start
burns!
is not on.
Swallowing the battery can cause serious
Refer to the corresponding section.
internal burning in only 2 hours and can be
► Remove the black cap, located on the edge
fatal.
of the door, using the key.
If batteries have been swallowed or inserted
► Insert the key into the socket without forcing
into a part of the body, seek immediate
it, then turn the latch towards the inside of the
medical advice.
door.
Keep new and used batteries out of the reach
► Remove the key and refit the black cap.
of children.
► Close the doors and check from the outside
If the battery compartment does not close
that the vehicle is locked.
properly, stop using the product and keep it
out of the reach of children.
Changing the battery
If the battery is flat, this warning lamp
► Unclip the cover by inserting a small
screwdriver in the slot and lift the cover.
Risk of explosion if the battery is
comes on, accompanied by an audible
► Remove the flat battery from its housing.
replaced with an incorrect type!
signal and the display of a message.
► Put the new battery in place, respecting the
Replace the battery with the same type.
polarity. Start by inserting it into the contacts
36
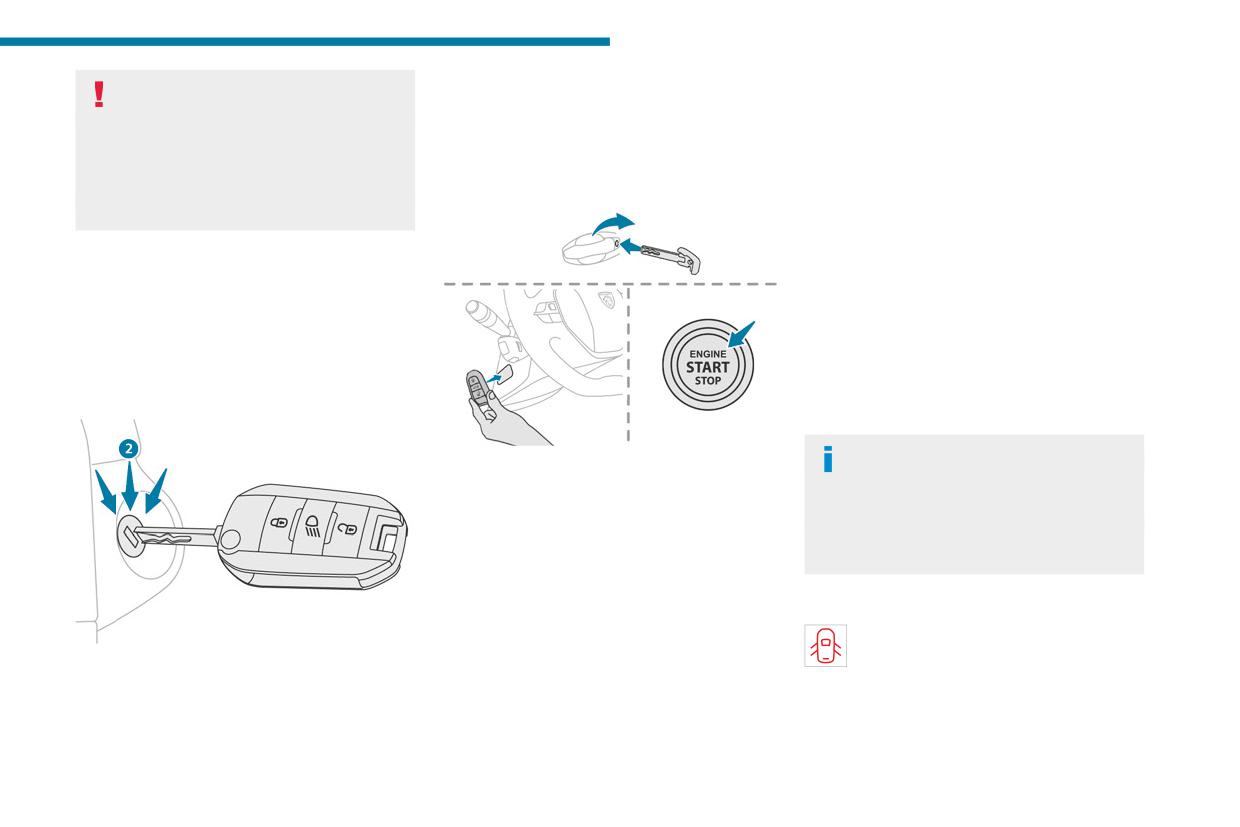
Access
Risk of explosion or leaking of
► Switch off the ignition and remove the key
If the fault persists after reinitialisation, contact
2
inflammable liquid or gas!
from the ignition switch.
a PEUGEOT dealer or a qualified workshop
Do not use in/store in/place in an environment
The remote control is now fully operational
without delay.
where the temperature is extremely high or
again.
where the pressure is extremely low due to
Doors
very high altitude.
With Keyless Entry and Start
Do not try to burn, crush or cut a used battery.
Opening
Reinitialising the remote
From outside
control
► After unlocking the vehicle or with the
Following replacement of the battery or in
"Keyless Entry and Start" system electronic key
the event of a fault, it may be necessary to
in the recognition zone, pull the door handle.
reinitialise the remote control.
From inside
Without Keyless Entry and Start
► Pull the interior opening control of a door; this
unlocks the vehicle completely.
With selective unlocking activated:
► Insert the mechanical key (incorporated into
- Opening the driver's door unlocks
the remote control) into the lock to open the
the driver's door only (if the vehicle has not
vehicle.
already been completely unlocked).
► Place the electronic key against the back-up
- Opening one of the passenger doors
reader on the steering column and hold it there
unlocks the rest of the vehicle.
until the ignition is switched on.
► With a manual gearbox, place the gear lever
in neutral then fully depress the clutch pedal.
Closing
► With an automatic gearbox or drive
If a door is not properly closed, this
selector, while in mode P, depress the brake
warning lamp comes on accompanied by
► Switch the ignition off.
pedal.
a message if the engine is running, and an
► Turn the key to position 2 (Ignition on).
► Switch on the ignition by pressing the
audible signal when the vehicle is travelling at
► Immediately press the closed padlock button
START/STOP button.
more than 6 mph (10 km/h).
for a few seconds.
37
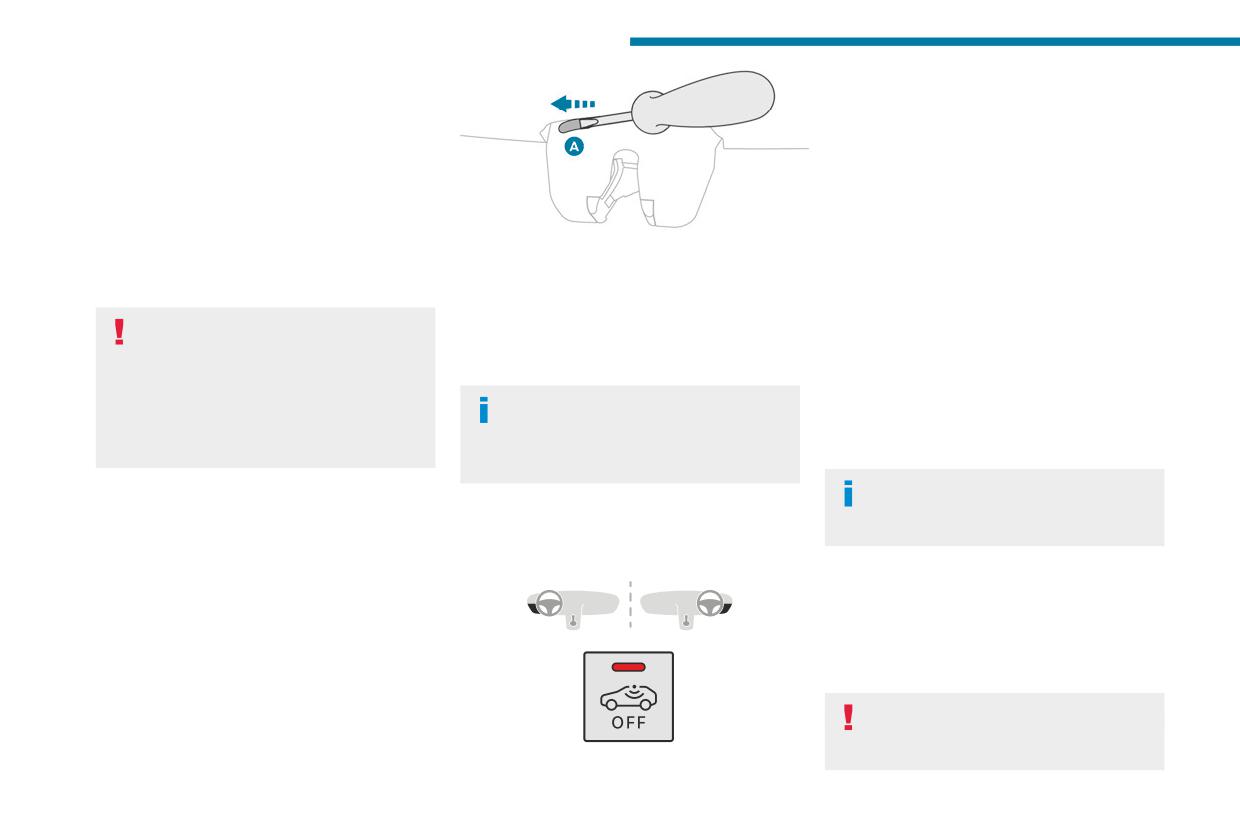
Access
System which protects and provides a deterrent
Boot
against theft and break-ins.
Exterior perimeter monitoring
Opening
► After unlocking the vehicle or just the boot
The system checks for opening of the vehicle.
(depending on version), press the opening
The alarm is triggered if anyone tries to open a
control and then lift the tailgate.
door, the boot or the bonnet, for example.
Interior volumetric monitoring
Closing
► Insert a small screwdriver into hole A of the
The system checks for any variation in volume in
► Lower the tailgate using one of the interior
lock to unlock the boot.
the passenger compartment.
grab handles.
► Move the latch to the left.
The alarm is triggered if anyone breaks a
window, enters the passenger compartment or
In the event of a malfunction or if you
Locking after closing
moves inside the vehicle.
experience difficulty opening or closing
If the fault persists after closing again, the boot
the tailgate, have it checked by a PEUGEOT
Anti-tilt monitoring
will remain locked.
dealer or a qualified workshop without delay,
The system checks for any change in the attitude
to avoid the issue deteriorating and prevent
In the event of a fault with the central
of the vehicle.
any risk of the tailgate dropping, potentially
locking system, it is essential to
The alarm goes off if the vehicle is lifted or
causing serious injury.
disconnect the battery to lock the boot and so
moved.
ensure complete locking of the vehicle.
When the vehicle is parked, the alarm
Back-up release
will not be triggered if the vehicle is
To manually unlock the boot in the event of a
Alarm
knocked.
battery or central locking failure.
(Depending on version)
Self-protection function
Unlocking
The system checks whether any of its
► Fold the rear seats to gain access to the lock
components are out of service.
from inside the boot.
The alarm is triggered if the battery, the central
control or the siren wiring is put out of service or
damaged.
Work on the alarm system
Consult a PEUGEOT dealer or a
qualified workshop.
38
Access
Locking the vehicle with full
The monitoring system is deactivated: the
Only the exterior perimeter monitoring is
2
indicator lamp in the button goes off and the
activated; the button's red indicator lamp flashes
alarm system
sidelamps and/or the daytime running lamps
once every second.
flash for about 2 seconds.
Activation
To take effect, this deactivation must be
After unlocking using the remote
carried out after each time the ignition is
► Switch off the ignition and exit the vehicle.
control
switched off.
► Lock or deadlock the vehicle using the
If the vehicle automatically locks itself again
remote control or by pressing on the driver's
(as happens if a door or the boot is not
door handle.
Reactivating the interior volumetric
opened within 30 seconds of unlocking), the
When the monitoring system is active, the red
and anti-tilt monitoring
monitoring system is automatically activated.
indicator lamp in the button flashes once per
► Deactivate the exterior perimeter monitoring
second and the direction indicators come on for
by unlocking the vehicle using the remote control
about 2 seconds.
Locking the vehicle
or the Keyless Entry and Start system.
The exterior perimeter monitoring is activated
The indicator lamp in the button goes off.
after 5 seconds and the interior volumetric and
with exterior perimeter
► Reactivate all monitoring by locking the
anti-tilt monitoring after 45 seconds.
monitoring only
vehicle using the remote control or the Keyless
The alarm does not activate when
Deactivate the interior volumetric and anti-tilt
Entry and Start system.
locking automatically from a distance.
monitoring to avoid the unwanted triggering of
The red indicator lamp in the button once again
the alarm, in certain cases such as:
flashes every second.
- Slightly open window.
Door, boot or bonnet
- Washing the vehicle.
Triggering of the alarm
If an opening is not properly closed,
- Changing a wheel.
the vehicle is not locked, but the exterior
This is indicated by sounding of the siren
- Towing the vehicle.
perimeter monitoring will be activated after
and flashing of the direction indicators for 30
- Transport on a ship or ferry.
45 seconds, at the same time as the interior
seconds.
volumetric and anti-tilt monitoring.
Depending on the country of sale, certain
Deactivating the interior volumetric
monitoring functions remain active until the alarm
and anti-tilt monitoring
has been triggered eleven times consecutively.
Deactivation
► Switch off the ignition and within 10 seconds
When the vehicle is unlocked using the remote
► Press the remote control unlocking
press the alarm button until its red indicator lamp
control or the Keyless Entry and Start system,
button.
is on fixed.
rapid flashing of the red indicator lamp in the
or
► Get out of the vehicle.
button informs you that the alarm was triggered
► Unlock the vehicle by pressing the driver’s
► Immediately lock the vehicle using the remote
door handle.
control or the Keyless Entry and Start system.
39
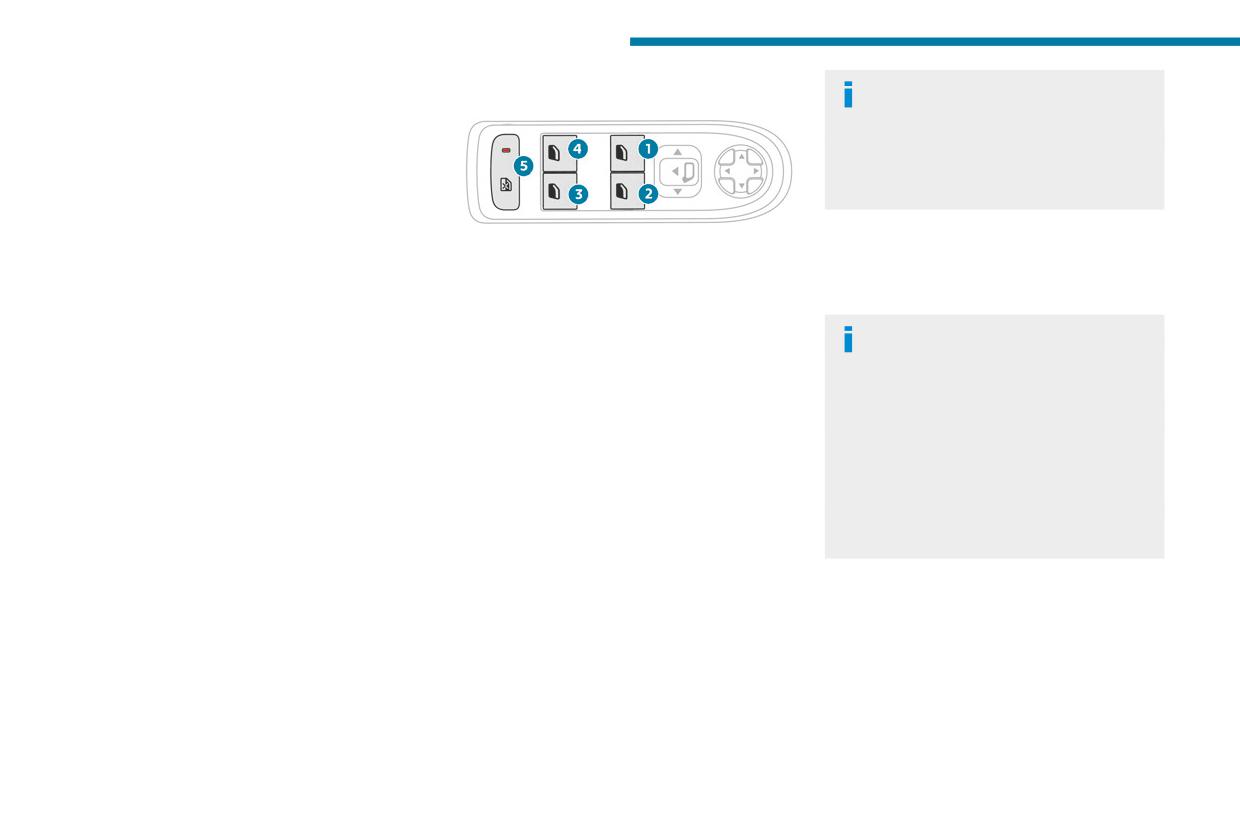
Access
during your absence. When the ignition is
Window controls remain operational for
Electric windows
switched on, this flashing stops.
approximately 45 seconds after switching
off the ignition or after locking the vehicle.
Failure of the remote control
After that time, the controls are disabled.
To deactivate the monitoring functions:
To reactivate them, switch on the ignition or
► Unlock the vehicle using the key in the
unlock the vehicle.
driver's door lock.
► Open the door; the alarm is triggered.
Anti-pinch
1. Left-hand front
► Switch on the ignition; this stops the alarm.
(Depending on version)
2. Right-hand front
The indicator lamp in the button goes off.
If the window meets an obstacle while rising, it
3. Right-hand rear (depending on version)
4. Left-hand rear (depending on version)
stops and immediately partially lowers again.
Locking the vehicle without
5. Deactivation of electric window controls
Overtaking of the anti-pinch
activating the alarm
located by rear seats
After triggering the anti-pinch, check
► Lock or deadlock the vehicle using the key
that there are no obstacles blocking the
(built-in the remote control) in the driver's door
Manual operation
movement of the window.
lock.
Try to close the window again.
► To open/close the window, press/pull the
switch without passing the point of resistance;
If the window closing is interrupted by the
Malfunction
the window stops as soon as the switch is
anti-pinch 3 times in a row (max. 10 seconds
When the ignition is switched on, the fixed
between each action), the anti-pinch function
released.
lighting of the red indicator lamp in the button
becomes inoperable.
indicates a system malfunction.
Automatic operation
Without this protection, the window can only
Have it checked by a PEUGEOT dealer or a
be closed manually - risk of injury!
(Depending on version)
qualified workshop.
► To open/close the window, press/pull the
switch past its resistance point: the window
Automatic activation
opens/closes completely when the switch is
(Depending on version)
released.
The system is activated automatically 2 minutes
Operating the switch again stops the movement
after the last door or the boot is closed.
of the window.
► To avoid triggering the alarm on entering the
vehicle, first press the unlocking button on the
remote control or unlock the vehicle using the
"Keyless Entry and Start" system.
40
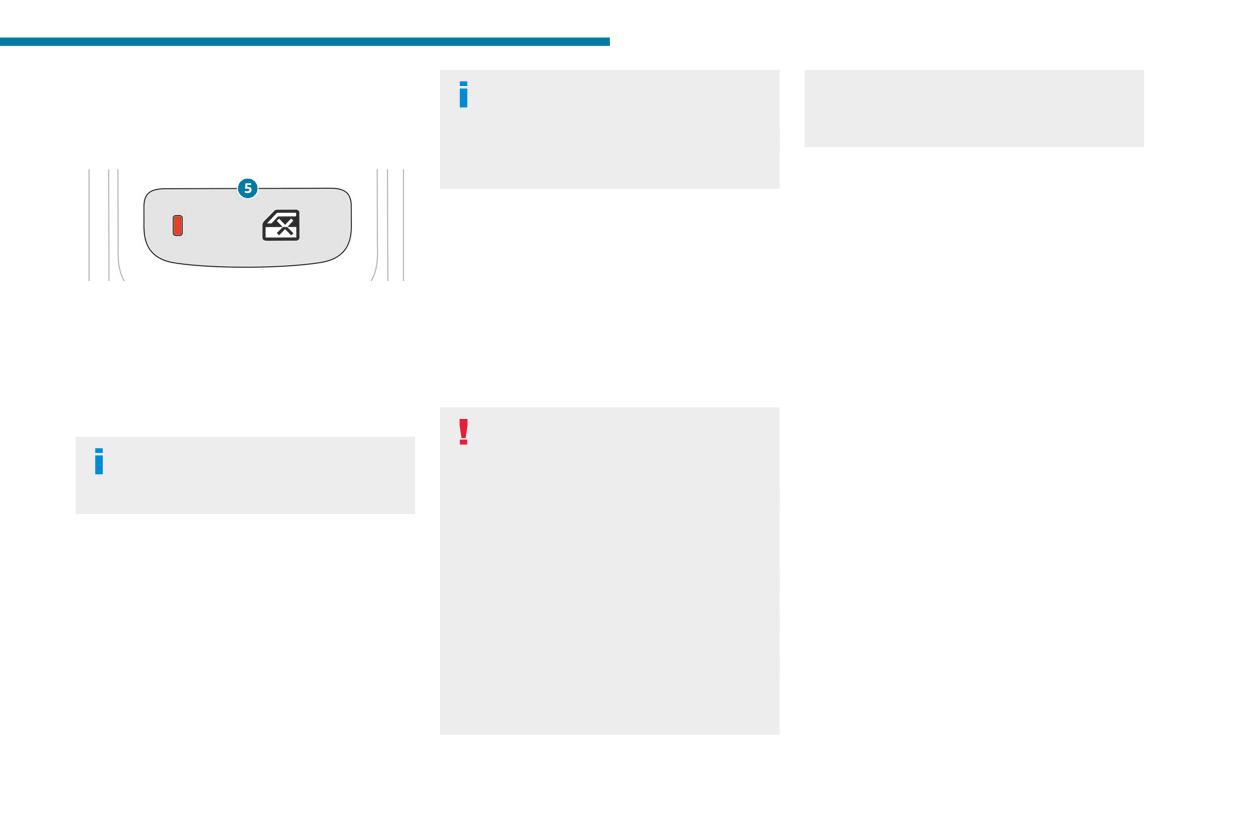
Access
Deactivating the rear
Automatic window closing is no longer
Do not put your head or arms through the
2
available, only manual closing is
open windows when the vehicle is moving -
controls for the rear electric
possible.
risk of serious injury!
windows
Remote window closing with the electronic
key is also no longer available in this case.
The anti-pinch function is inoperable during
the following sequence of operations.
For each window:
► Lower the window fully, then raise it; it will
rise in steps of a few centimetres each time the
For your children's safety, ignition on or engine
control is pressed. Repeat the operation until the
on, press control 5 to deactivate the controls for
window is fully closed.
the rear electric windows, irrespective of their
► Continue to pull the control for at least one
positions.
second after the window reaches the closed
The red indicator lamp in the button comes on.
position.
The rear electric windows can still be controlled
using the driver's controls.
If an electric window meets an obstacle
during operation, the movement of the
In the event of a serious impact, use of
window must be reversed. To do this, press
the rear electric window controls is
the relevant control.
re-enabled, if they had been deactivated.
When the driver operates the passengers’
electric window controls, it is important to
Reinitialising the electric
ensure that nothing can prevent the window
from closing properly.
windows
It is important to ensure that passengers use
After reconnecting the battery, or in the event
the electric windows correctly.
of abnormal window movement, the anti-pinch
Pay particular attention to children when
function must be reinitialised.
operating the windows.
Be aware of passengers and/or other persons
present when closing windows remotely using
the electronic key.
41
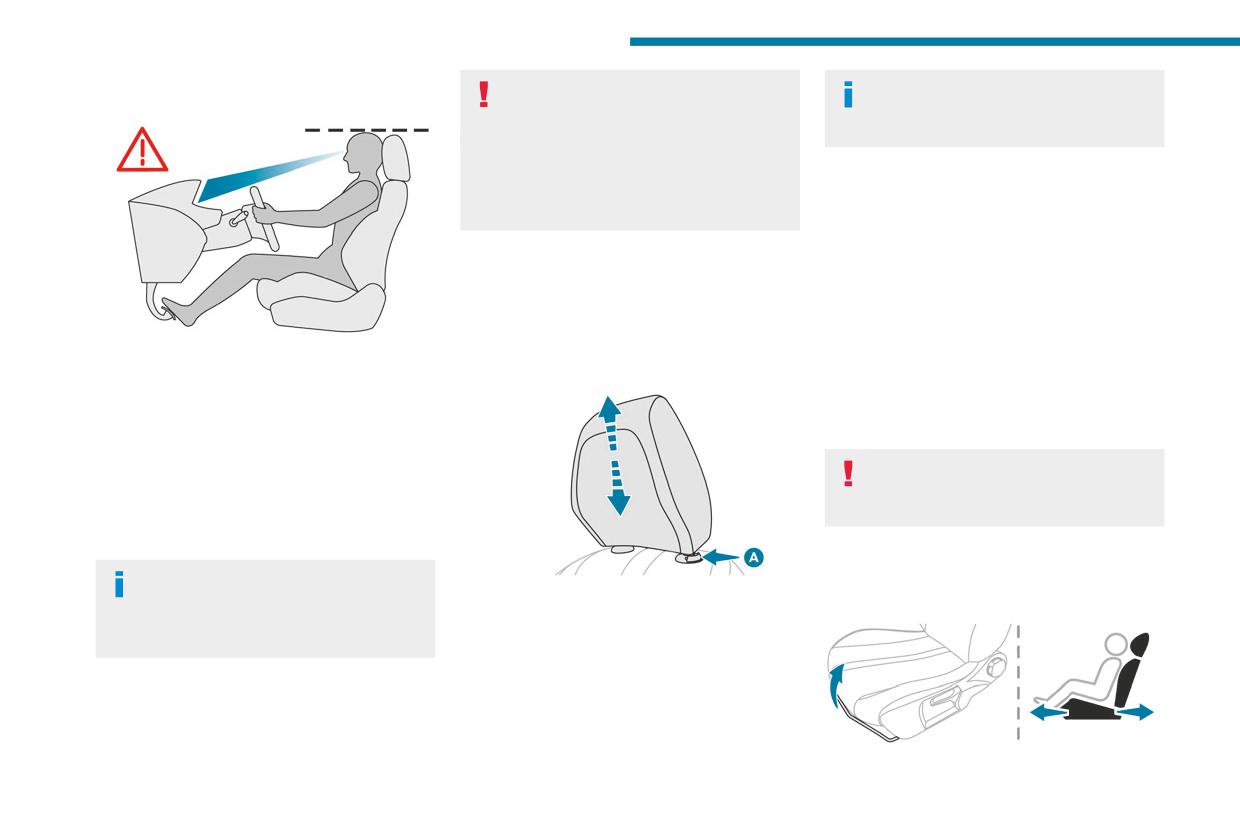
Ease of use and comfort
Before moving the seat backwards,
The head restraint is correctly adjusted
PEUGEOT i-Cockpit
ensure that there is no person or object
when its upper edge is level with the top
that might prevent the full travel of the seat.
of the occupant's head.
There is a risk of trapping or pinching
passengers if present in the rear seats or of
Removing a head restraint
jamming the seat if large objects are placed
► Pull the head restraint fully up.
on the floor behind the seat.
► Press lug A to release the head restraint and
raise it fully.
► Stow the head restraint securely.
Front seats
Refitting a head restraint
Front head restraints
► Insert the head restraint rods into the guides
in the corresponding seat backrest.
Before taking to the road and to make the
Adjusting the height
► Push the head restraint fully down.
most of the ergonomic layout of the PEUGEOT
► Press the lug A to release the head restraint
i-Cockpit, carry out these adjustments in the
and push it down.
following order:
► Adjust the height of the head restraint.
- head restraint height.
- seat backrest angle.
Never drive with the head restraints
- seat cushion height.
removed; they should be in place and
- longitudinal seat position.
adjusted for the occupant of the seat.
- steering wheel reach and then height.
- rear view mirror and door mirrors.
Manually-adjustable seats
Once these adjustments have been
Upwards:
made, check that the "head-up"
Longitudinal
► Pull the head restraint up to the desired
instrument panel can be viewed correctly over
position; you can feel the head restraint clicking
the smaller diameter steering wheel.
into position.
Downwards:
► Press lug A to lower the head restraint.
42
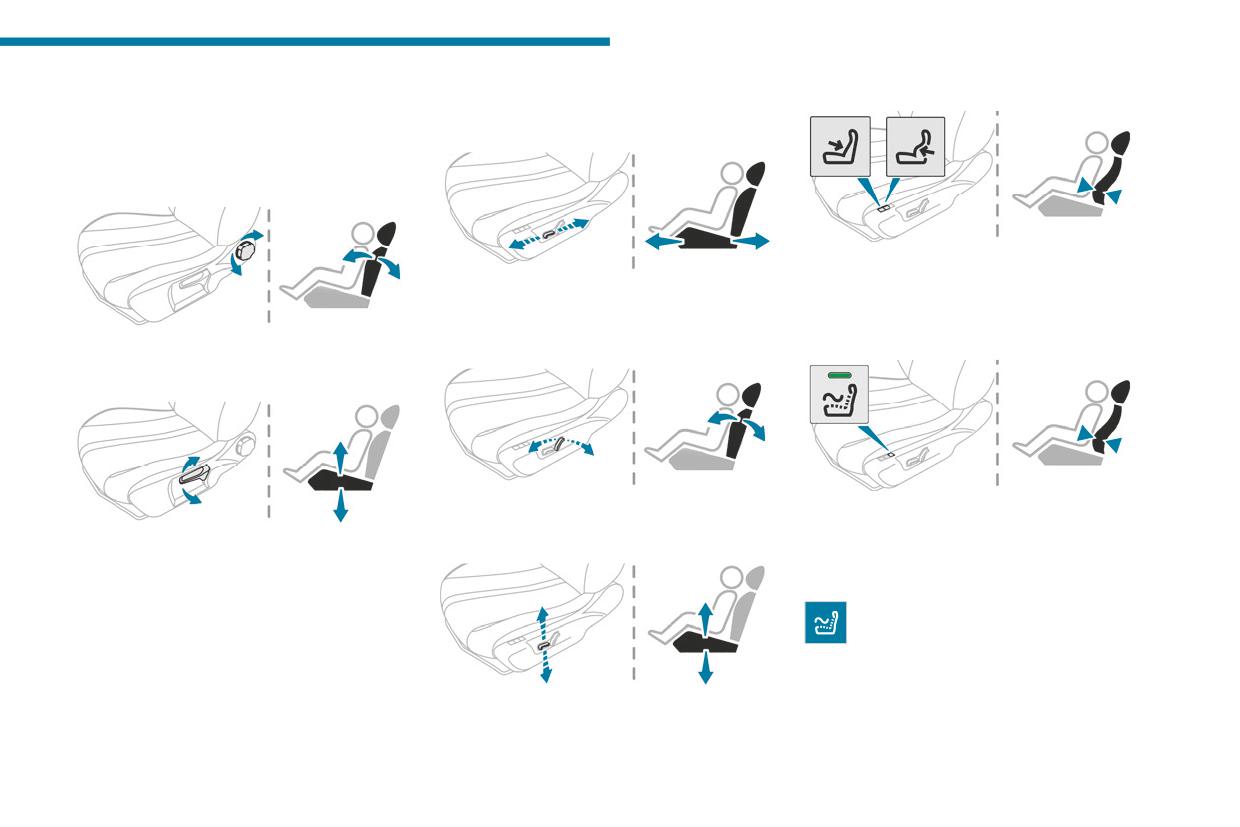
Ease of use and comfort
► Raise the control bar and slide the seat
Electrically-adjustable seats
Electric lumbar adjustment
3
forwards or backwards.
► Release the control bar to lock the seat in
Longitudinal
position on one of the notches.
Backrest angle
► Press the + or - control to obtain the desired
lumbar support.
► Push the control forwards or backwards to
slide the seat.
Massage function
► Turn the knob to obtain the desired angle.
Backrest angle
(Driver’s seat only)
Height
► Tilt the control forwards or rearwards.
This function provides lumbar massage; it only
operates when the engine is running as well as
► Pull the control upwards to raise or push it
Cushion height and angle
in STOP mode of the Stop & Start system.
downwards to lower, until you obtain the position
required.
Activation/Deactivation
► Press this button to activate/deactivate
the function.
Upon activation, the indicator lamp comes on.
The massage function is activated for a period
of one hour.
► Tilt the rear of the control upwards or
During this time, massage is performed in
downwards to obtain the required height and
6 cycles of 10 minutes (6 minutes of massage
angle.
followed by a 4-minute break).
43
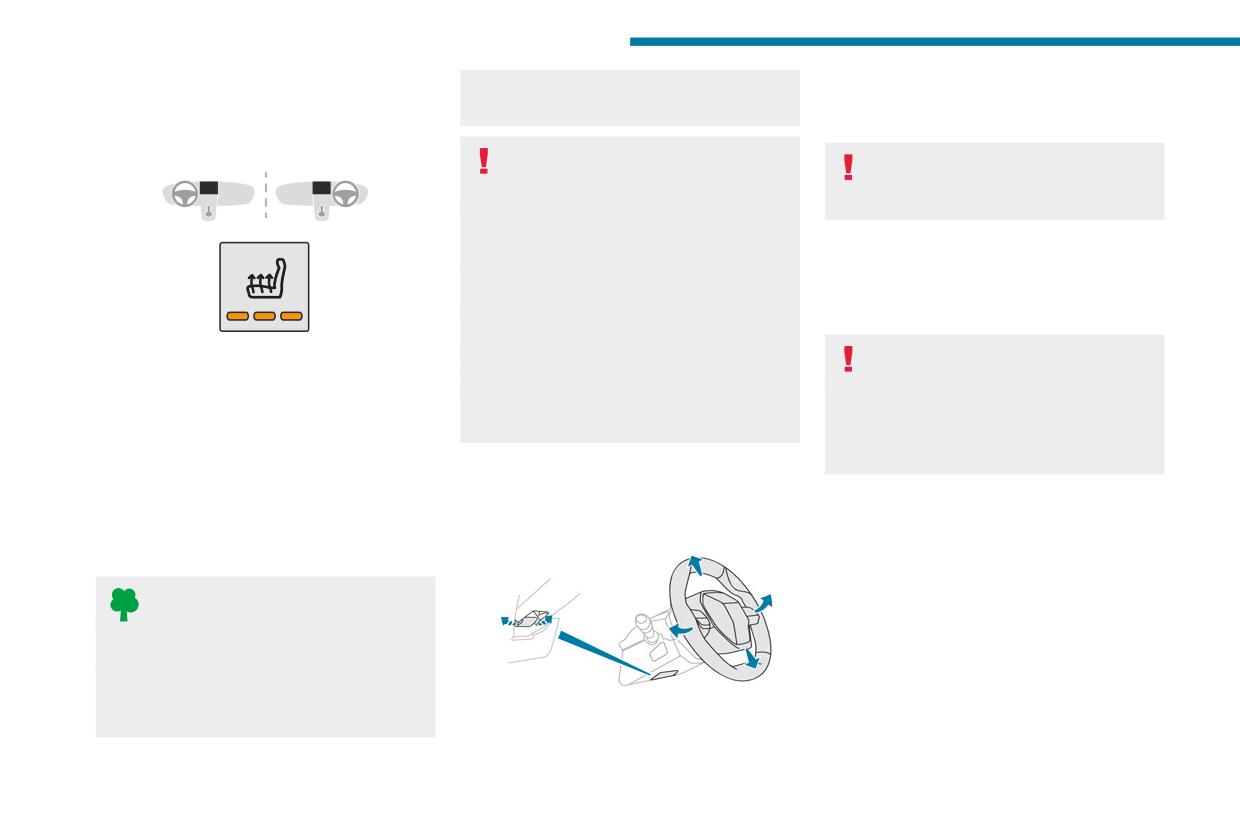
Ease of use and comfort
After one hour, the function is deactivated; the
consumption in turn decreases energy
► Adjust the height and reach to suit your
indicator lamp goes off.
consumption.
driving position.
► Push the control to lock the steering wheel.
Heated seats
Prolonged use of heated seats is not
For safety reasons, these adjustments
recommended for people with sensitive
must only be carried out with the vehicle
skin.
stationary.
There is a risk of burns for people whose
perception of heat is impaired (e.g. illness,
taking medication).
Mirrors
To keep the heated pad intact and to prevent
a short circuit:
- Do not place heavy or sharp objects on the
Door mirrors
seat.
The function is active only with the engine
As a safety measure, the mirrors should
- Do not kneel or stand on the seat.
running and when the outside temperature is
be adjusted to reduce the "blind spots".
- Do not spill liquids onto the seat.
below 20°C.
The objects that you see in the mirrors are
- Never use the heating function if the seat
► Press the button corresponding to the seat.
in fact closer than they appear. Take this
is damp.
► Each press changes the heating level; the
into account in order to correctly judge the
corresponding number of indicator lamps come
distance of vehicles approaching from behind.
on.
Steering wheel
► To switch off the heating, press the button
Manual adjustment
until all of the indicator lamps are off.
adjustment
► Move the adjustment lever in any of the four
The system status is memorised when the
directions to position the mirror.
ignition is switched off.
Do not use the function when the seat
is not occupied.
Reduce the heating intensity as soon as
possible.
When the seat and passenger compartment
have reached a satisfactory temperature,
► When stationary, pull the control to release
switch the function off; reducing electrical
the steering wheel.
44
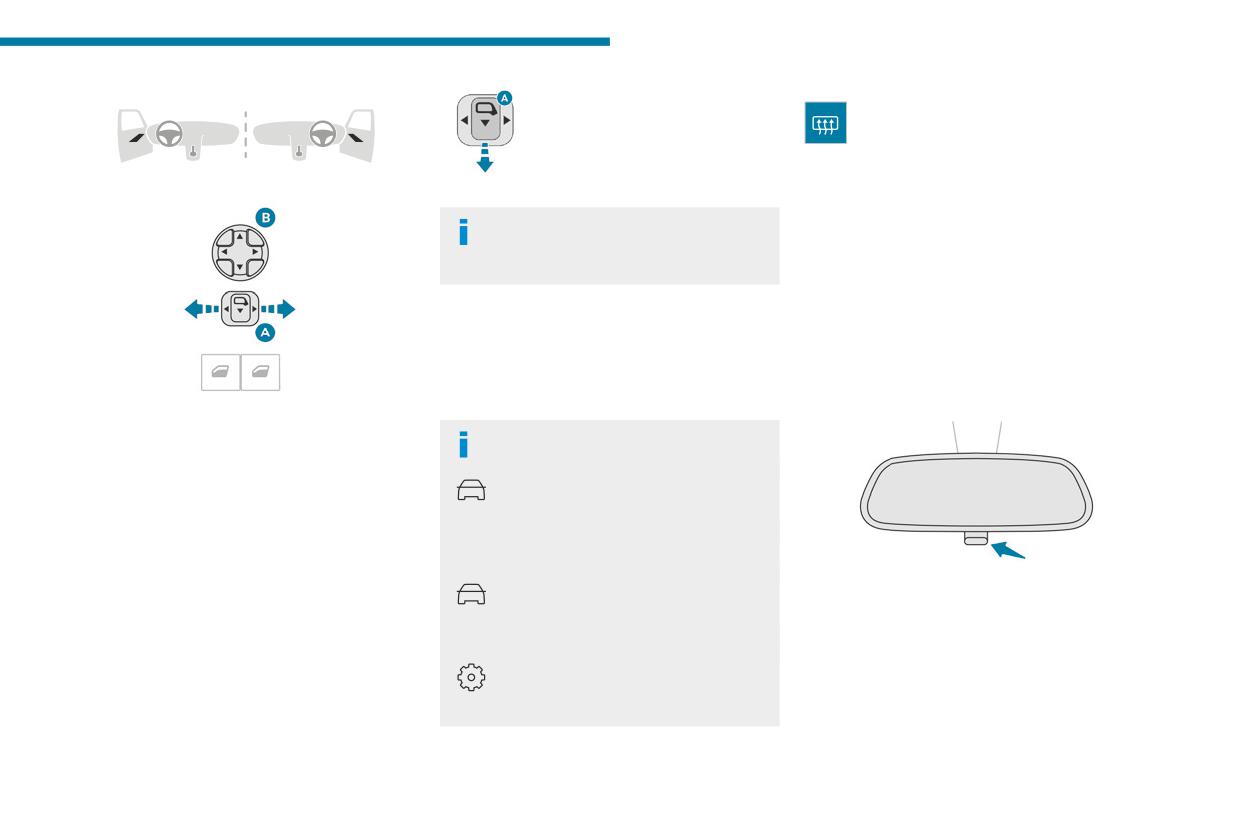
Ease of use and comfort
Electric adjustment
Demisting/Defrosting
► From the inside, with the
3
The demisting/defrosting of the door
ignition on, place control A in the
mirrors works with the demisting/
central position.
defrosting of the rear screen.
► Pull control A backwards.
For more information on Rear screen
► Lock the vehicle from the outside.
demisting/defrosting, refer to the
corresponding section.
If the mirrors are folded using control A,
they will not unfold when the vehicle is
Interior rear view mirror
unlocked.
Equipped with an anti-dazzle system, which
darkens the mirror glass and reduces the
Electric unfolding
nuisance to the driver caused by the sun,
► From outside: unlock the vehicle.
headlamps of other vehicles, etc.
► From inside: with the ignition on, place
control A in the central position and then pull it
Manual model
rearwards.
Day/night position
► Move control A to the right or to the left to
select the corresponding mirror.
With Touch screen 10" & Bluetooth
► Move control B in any of the four directions
Radio & Telephone
to adjust.
The automatic door mirror folding/
► Return control A to its central position.
unfolding function is configured in the
Driving touch screen menu.
Manual folding
With PEUGEOT Connect Radio / PEUGEOT
The mirrors can be folded manually (parking
Connect Nav
obstruction, narrow garage, etc.).
The automatic door mirror folding/
► Pull the lever to change to the anti-dazzle
► Turn the mirror towards the vehicle.
unfolding function is configured in the
"night" position.
Driving/Vehicle touch screen menu.
► Push the lever to change to the normal "day"
Electric folding
With PEUGEOT i-Connect Advanced
position.
Depending on equipment, the door mirrors can
The automatic door mirror folding/
Adjustment
be folded electrically.
unfolding function is configured in the
► Adjust the mirror to the normal "day" position.
Settings > Vehicle touch screen application.
45
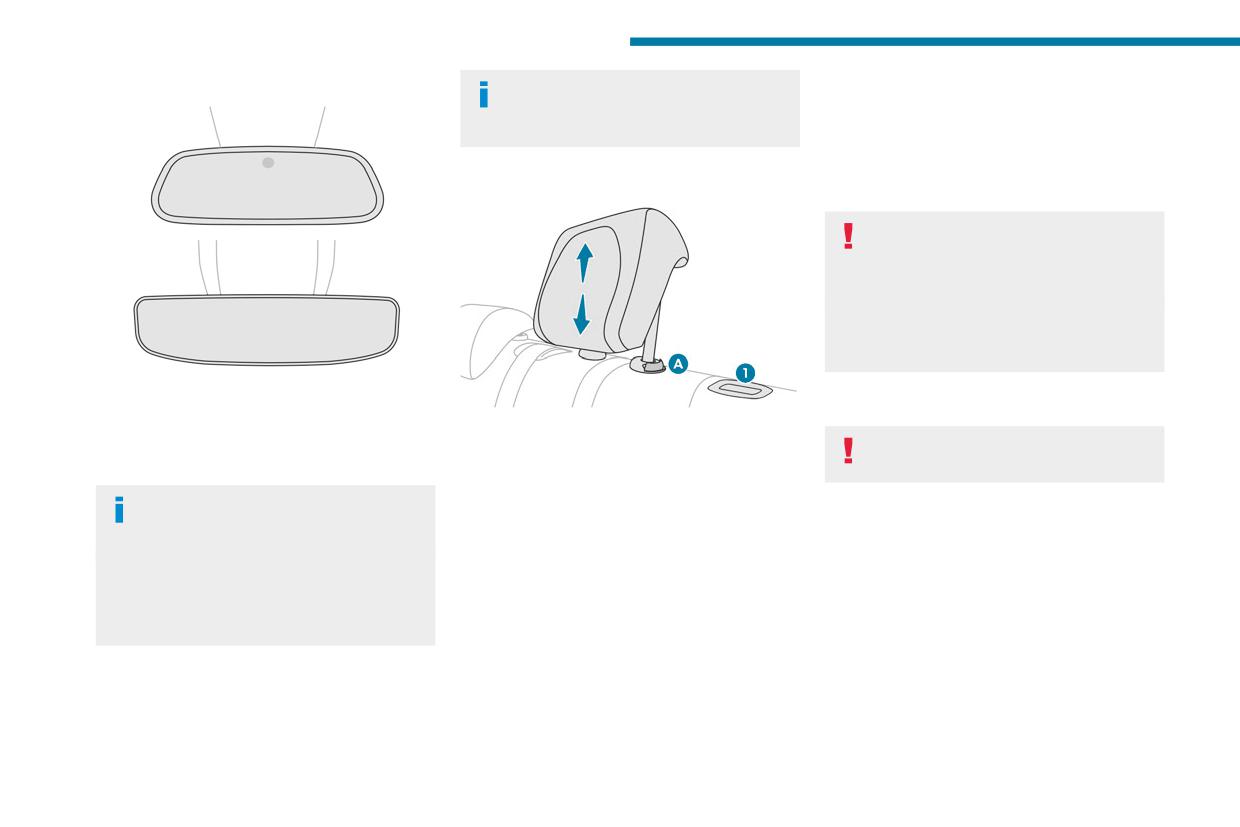
Ease of use and comfort
Automatic "electrochrome" models
The rear seat cushion remains fixed. To
Refitting a head restraint
increase the boot loading volume, tilt the
► Insert the head restraint rods into the guides
bench seat backrest.
in the corresponding backrest.
► Push the head restraint fully down.
► Press the lug A to release the head restraint
Rear head restraints
and push it down.
Never drive with passengers seated at
the rear when the head restraints are
removed; the head restraints should be in
place and in the high position.
The head restraint for the centre seat
and those for the outer seats are not
interchangeable.
The electrochrome system uses a sensor that
detects the level of exterior brightness and that
Folding the backrests
They have two positions:
coming from the rear of the vehicle, in order to
- A high position, for when the seat is in use:
Manoeuvring the backrests should only
automatically and gradually switch between day
► Pull the head restraint fully up.
be done when the vehicle is stationary.
and night usage.
- A low position, for stowing, when the seat is
To ensure optimum visibility while
First steps:
not in use:
manoeuvring, the mirror automatically
► Lower the head restraints.
► Press the lug A to release the head
brightens when reverse gear is engaged.
► If necessary, move the front seats forward.
restraint and push it down.
The system is deactivated if the load in the
► Check that no person or object might interfere
The rear head restraints can be removed.
boot exceeds the height of the load space
with the folding of the backrests (e.g. clothing,
Removing a head restraint
cover or if the load space cover has items
luggage).
placed on it.
► Release the backrest using control 1.
► Check that the seat belts are free, not
► Tilt the backrest slightly forwards.
engaged in the buckles. Release them so that
► Pull the head restraint fully up.
the backrest can be moved.
► Press the lug A to release the head restraint
Rear bench seat
and remove it completely.
Bench seat with fixed cushions and split folding
backrests (2/3-1/3) to adapt the boot load space.
46
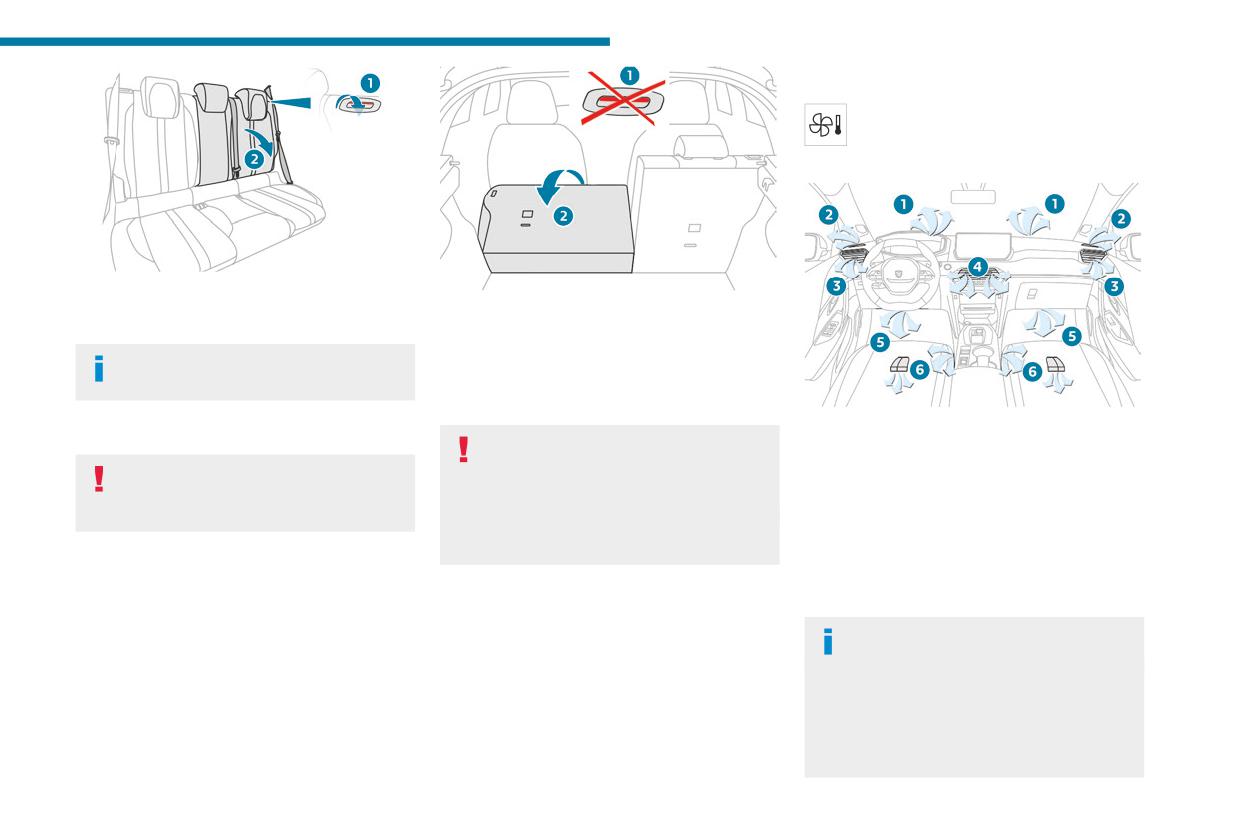
Ease of use and comfort
Controls
3
The controls are accessible in the touch
screen and on the centre console panel.
Air distribution
► Press the backrest release grip 1.
► Guide the backrest 2 down to the horizontal
► Put the backrest 2 in the upright position and
position.
push it firmly to latch it home.
► Check that the red indicator is no longer
When the backrest is released, the red
visible in the release grip 1.
indicator in the release grip is visible.
► Ensure that the outer seat belts were not
trapped during the operation.
1. Windscreen demisting/de-icing vents
Repositioning the backrests
Please note: an incorrectly latched
2. Front side window demisting/de-icing vents
backrest compromises the safety of
3. Adjustable and closable side air vents
First check that the outer seat belts are
passengers in the event of sudden braking or
4. Adjustable and closable central air vents
lying vertically flat alongside the backrest
an accident.
5. Air outlets to the front footwells
latching rings.
The contents of the boot may be thrown
6. Air outlets to the rear footwells (depending on
forwards - risk of serious injury!
version)
Advice
Heating and Ventilation
Using the ventilation and air
Air intake
conditioning system
The air circulating in the passenger compartment
► To ensure that air is distributed evenly,
is filtered and originates either from the
keep the external air intake grilles at the base
exterior, via the grille located at the base of the
of the windscreen, the nozzles, the vents, the
windscreen, or from the inside in air recirculation
air outlets and the air extractor in the boot
mode.
free from obstructions.
47
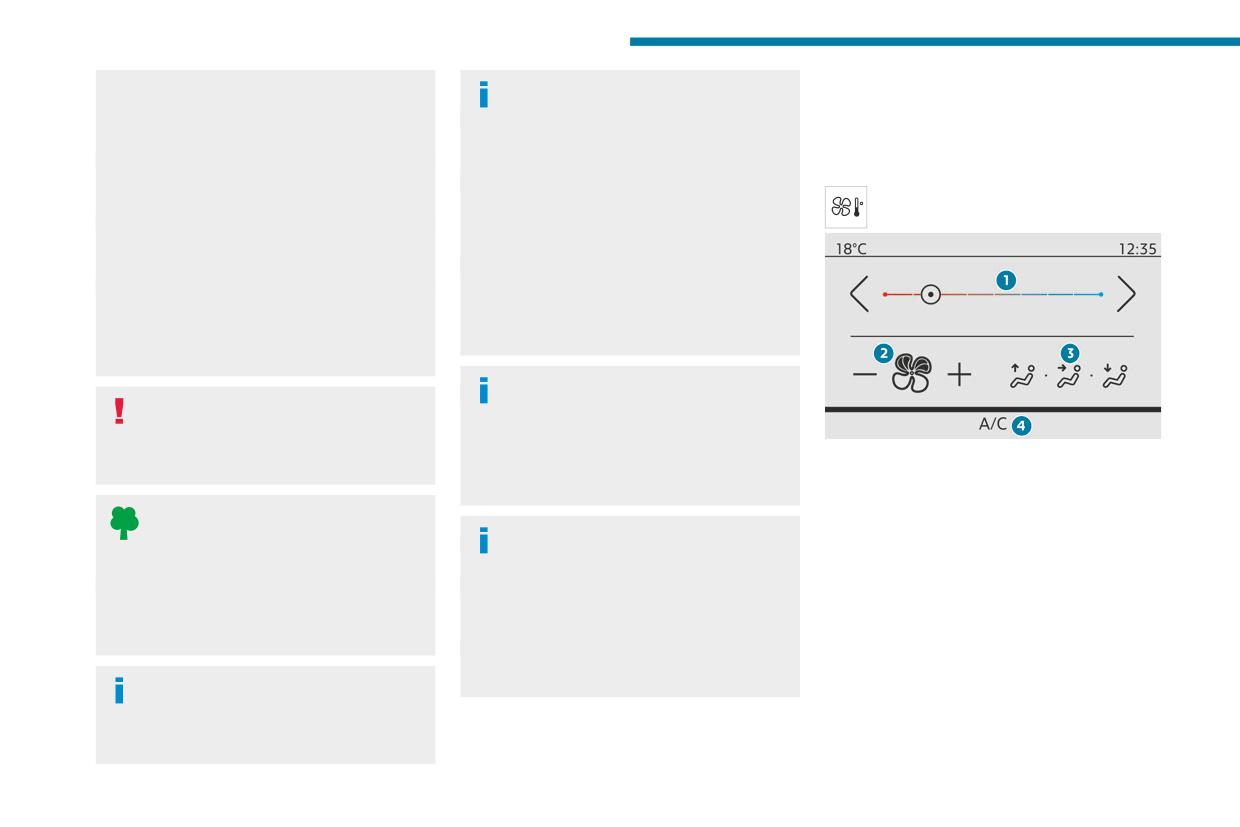
Ease of use and comfort
► Do not cover the sunshine sensor located
Servicing the ventilation and air
Manual air conditioning
on the dashboard; this sensor is used to
conditioning system
regulate the automatic air conditioning
► Ensure that the passenger compartment
With Touch screen 10" & Bluetooth Radio
system.
filter is in good condition and have the filter
& Telephone / PEUGEOT Connect Radio /
► Operate the air conditioning system for at
elements replaced regularly.
PEUGEOT Connect Nav
least 5 to 10 minutes once or twice a month to
We recommend using a composite passenger
Press the Climate button to display the
keep it in good working order.
compartment filter. Its specific active additive
system controls page.
► If the system does not produce cold air,
helps protect against polluting gases and bad
switch it off and contact a PEUGEOT dealer
smells.
or a qualified workshop.
► To ensure correct operation of the
When towing a large load on a steep gradient
air conditioning system, have it checked
in high temperatures, switching off the air
according to the recommendations in the
conditioning increases the available engine
Manufacturer’s service schedule.
power, enhancing the towing capacity.
ECO driving mode
Avoid driving for too long with the
Selecting this mode reduces electrical
ventilation off or with prolonged operation
energy consumption, but restricts the
of interior air recirculation. Risk of misting and
performance of the heating and air
1. Temperature adjustment
deterioration of the air quality!
conditioning systems, although it does not
2. Air flow adjustment
deactivate them.
3. Air distribution adjustment
If the interior temperature is very high
4. Air conditioning on/off
after the vehicle has stood for a long
Stop & Start / e-Auto mode
time in the sunshine, air the passenger
The heating and air conditioning systems
Adjusting the temperature
compartment for a few moments.
only operate when the engine is running.
Put the air flow control at a setting high
Temporarily deactivate the corresponding
► Press one of the buttons 1 (- or +) to set the
enough to quickly change the air in the
system to maintain a comfortable temperature
temperature.
passenger compartment.
in the passenger compartment.
For more information, refer to the
Air flow adjustment
Condensation created by the air
corresponding section.
► Press one of the buttons 2 (- or +) or turn the
conditioning results in a discharge of
knob 2 to decrease or increase the speed of the
water underneath the vehicle. This is perfectly
fan.
normal.
48
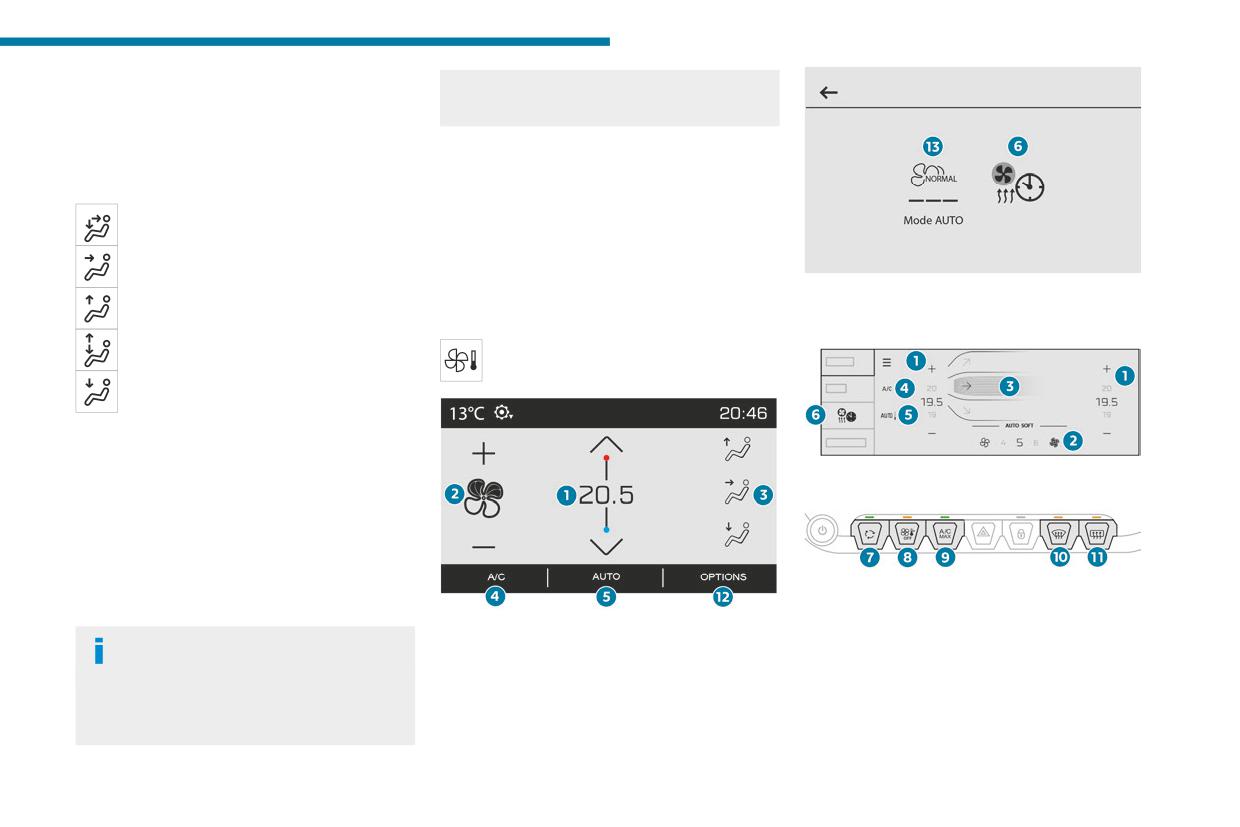
Ease of use and comfort
When the air flow is reduced to a minimum,
Switching off the air conditioning may result in
3
ventilation stops.
some discomfort (humidity or misting).
Air distribution adjustment
► Press button 3 to adjust the air flow
Automatic air conditioning
distribution inside the passenger compartment.
This system automatically controls the activation
Central and side air vents, footwells
of the air conditioning system, regulating the
temperature, air flow and air distribution inside
Central and side air vents
the passenger compartment.
This system works with the engine running, but
With Touch screen 10" & Bluetooth Radio
Windscreen
access to the ventilation and its controls remains
& Telephone / PEUGEOT Connect Radio /
possible with the ignition on.
PEUGEOT Connect Nav
Windscreen, footwells
Press the Climate application button to
display the system controls page.
Footwells
Air conditioning on/off
The air conditioning system is designed to
With PEUGEOT i-Connect Advanced -
operate effectively in all seasons, with the
PEUGEOT i-Connect
windows closed:
- It lowers the temperature in summer.
- It increases the effectiveness of the demisting,
in winter, above 3°C.
► Press button 4 to activate/deactivate the air
1. Temperature adjustment
conditioning system.
2. Air flow adjustment
3. Air distribution adjustment
Air conditioning does not operate when
4. Air conditioning on/off
the air flow is deactivated.
5. Automatic air conditioning on/off and setting
To obtain cool air more quickly, enable interior
(AUTO SOFT/AUTO NORMAL/AUTO
air recirculation for a brief period. Then return
FAST)
to the intake of exterior air.
49
Ease of use and comfort
► Press button 5-AUTO to activate/deactivate
With PEUGEOT i-Connect Advanced -
6. Temperature pre-conditioning (depending
the automatic mode of the air conditioning
PEUGEOT i-Connect
on version)
system.
7. Interior air recirculation
To change the AUTO mode, press button
The indicator lamp in the button lights up
8. Switching the system off
5-AUTO successively.
when the air conditioning system is operating
9. Maximum air conditioning
To ensure passenger comfort in the rear seats,
automatically.
10. Front demisting/defrosting
favour settings AUTO NORMAL and AUTO
The intensity of the automatic air conditioning
11. Rear screen demisting/defrosting
FAST.
is modulated by choosing one of the following
12. Access to the secondary page
settings:
In cold weather with the engine cold, the
13. Selection of settings for the Automatic air
- AUTO SOFT: provides soft and quiet
air flow is increased gradually until the
conditioning (AUTO SOFT/AUTO NORMAL/
operation by limiting air flow.
comfort setting has been reached, in order to
AUTO FAST)
- AUTO NORMAL: offers the best compromise
limit the delivery of cold air into the passenger
between a comfortable temperature and quiet
compartment.
Temperature adjustment
On entering the vehicle, if the interior
operation (default setting).
The driver and front passenger can each choose
- AUTO FAST: provides dynamic and efficient
temperature is much colder or warmer than
their own temperature setting.
air distribution.
the comfort setting requested, there is no
The value indicated corresponds to a level of
need to alter the value displayed to more
With Touch screen 10" & Bluetooth Radio
comfort and not to a precise temperature.
quickly reach the required level of comfort.
& Telephone / PEUGEOT Connect Radio /
► Press one of the buttons 1 (+ or -) or drag
The system automatically corrects the
PEUGEOT Connect Nav
vertically to increase or decrease the value.
temperature difference as quickly as possible.
It is possible to go beyond the minimum and
To change the current setting (shown by the
maximum values by selecting respectively Low
corresponding indicator lamp), press button 13
repeatedly until the desired setting is displayed.
Automatic air conditioning
or High.
It is recommended that you avoid a difference of
To ensure passenger comfort in the rear seats,
manual settings
more than 3°C in the settings for left and right.
favour "Normal" and "Fast" settings.
It is possible to manually adjust one or more
This setting is associated with automatic mode
of these functions, while the system retains
Automatic air conditioning
only. However, on deactivation of AUTO mode,
automatic control of the other functions:
the indicator lamp for the most recently selected
This automatic mode ensures optimum
- air flow.
setting remains on.
management of the passenger compartment
- air distribution.
Changing the setting does not reactivate AUTO
temperature, air flow and air distribution, based
The indicator lamp in the "AUTO” button goes
mode if it was deactivated.
on the selected comfort level.
out if a setting is changed.
► Press button 5-AUTO again to reactivate
automatic air conditioning.
50
Ease of use and comfort
Adjusting the air flow
- It increase the effectiveness of the demisting,
Its indicator lamp lights up and all the other
3
► Press one of the buttons 2 (fan) or drag
in winter, above 3°C.
indicator lamps of the air conditioning system
horizontally to increase or decrease air flow.
► Press button 4-A/C to switch the air
go off.
It is also possible to directly press one of the
conditioning on/off.
This action deactivates all of the functions of the
values.
When the function is switched on, "A/C" changes
air conditioning system.
colour.
The temperature is no longer regulated. A slight
Switching off the air conditioning
flow of air can still be felt, due to the forward
system
Air conditioning does not operate when
movement of the vehicle.
When the air flow is reduced to a minimum,
the air flow is deactivated.
ventilation stops.
To obtain cool air more quickly, enable interior
“OFF" is displayed alongside the fan.
air recirculation for a brief period. Then return
Interior air recirculation
to the intake of exterior air.
The intake of exterior air prevents the formation
Switching off the air conditioning may result in
of mist on the windscreen and side windows.
Adjusting the air distribution
some discomfort (humidity or misting).
Recirculating the interior air isolates the
► Press the buttons 3 to adjust the air flow
passenger compartment from outside odours
distribution inside the passenger compartment.
Maximum air conditioning
and fumes and allows the desired passenger
Windscreen and side windows
compartment temperature to be achieved more
This function automatically adjusts the
rapidly.
Central and side air vents
temperature setting to the lowest possible, the
► Press this button to activate/deactivate
air distribution towards the central and side air
the function (confirmed by the
Footwells
vents, the air flow to maximum and, if necessary,
illumination/extinction of the indicator lamp).
activates interior air recirculation.
A symbol is activated to display the presence of
► Press this button to activate/deactivate
This function is activated automatically
blown air in the direction indicated.
the function (confirmed by the
when reverse gear is engaged.
It is possible to activate all three buttons
illumination/extinction of the indicator lamp).
simultaneously, for uniform distribution
Once the function is deactivated, the system
throughout the passenger compartment.
returns to the previous settings.
Maximum air conditioning
Air conditioning on/off
Switching off the air
This function automatically adjusts the
temperature setting to the lowest possible, the
The air conditioning system is designed to
conditioning system
air distribution towards the central and side air
operate effectively in all seasons, with the
► Press button 8-OFF.
vents, the air flow to maximum and, if necessary,
windows closed:
activates interior air recirculation.
– It lowers the temperature in summer.
51
Ease of use and comfort
► Press this button to activate/deactivate
and air intake, and provides optimum distribution
electrical consumption in turn decreases
the function (confirmed by the
towards the windscreen and side windows.
energy consumption.
illumination/extinction of the indicator lamp).
It is possible to manually change the air flow
Once the function is deactivated, the system
without deactivating the automatic Visibility
returns to the previous settings.
programme.
Temperature pre-
With Stop & Start, when demisting has
conditioning (Electric)
Switching off the thermal
been activated, STOP mode is not
This function allows you to programme the
available.
comfort system
temperature in the passenger compartment to
reach a pre-defined, non-modifiable temperature
► Press this button.
In wintry conditions, before moving off, it
(approx. 21°C) before you enter the vehicle, on
is essential to remove any snow or ice
the days and at the times of your choice.
Its indicator lamp comes on and all of the other
from the windscreen around the camera.
This function is available when the vehicle is
indicator lamps for the system go off.
Otherwise, the operation of the equipment
connected or not connected.
This action deactivates all of the functions of the
using the camera may be affected.
air conditioning system.
Programming
The temperature is no longer regulated. A slight
flow of air can still be felt, due to the forward
With Touch screen 10" & Bluetooth Radio
Rear screen demisting/
movement of the vehicle.
& Telephone / PEUGEOT Connect Radio /
defrosting
PEUGEOT Connect Nav
Front demisting/defrosting
This demisting/de-icing only works with the
In the Climate > OPTIONS menu:
engine running.
Select Temperature conditioning.
Depending on version, it also demists/de-ices
Automatic Visibility
the door mirrors.
► Press + to add a programme.
programme
► Press this button to activate/deactivate
► Select the time of entry into the vehicle and
This mode allows the windscreen and side
the function (confirmed by the indicator
the desired days. Press OK.
windows to be demisted or defrosted as quickly
lamp coming on/switching off).
► Press ON to activate this programme.
as possible.
Demisting/defrosting switches off automatically
With PEUGEOT i-Connect Advanced -
► Press this button to activate/deactivate
to prevent an excessive consumption of
PEUGEOT i-Connect
the mode (confirmed by the illumination/
electrical current.
In the Climate touch screen application,
extinction of the indicator lamp).
Switch off demisting/defrosting when
select the Preconditioning tab.
The programme automatically manages the air
you no longer need it; reducing
► Press + to add a programme.
conditioning (depending on version), air flow
52
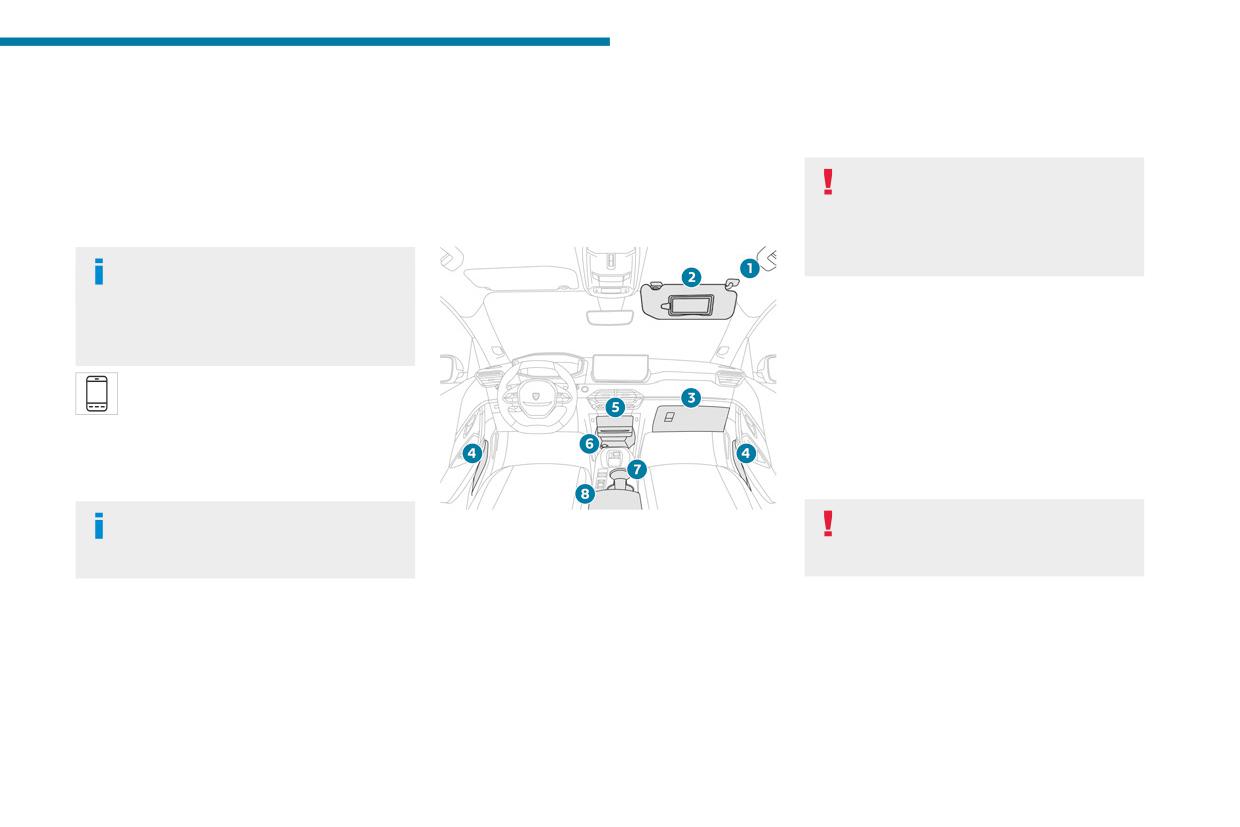
Ease of use and comfort
► Select the time of entry into the vehicle and
- When the vehicle is not connected and a
7. Cup holder
3
the desired days. Press OK.
recurring programme is active (e.g. from Monday
8. Centre armrest with storage compartment
► Press ON to activate this programme.
to Friday), if two temperature pre-conditioning
Rear USB socket(s) (depending on version)
The temperature pre-conditioning sequence
sequences are run without the vehicle being
begins approximately 45 minutes before the
used, the programme will be deactivated.
Make sure you do not leave any item in
programmed time when the vehicle is connected
the passenger compartment which could
(20 minutes when it is not connected) and is
act like a magnifying glass under the effect of
Interior fittings
maintained for 10 minutes after.
the sun's rays and cause a fire - risk of fire or
damage to interior surfaces!
You can set multiple programmes.
Each one is saved in the system.
To optimise the driving range, we recommend
Sun visor
starting a programme while the vehicle is
► With the ignition on, raise the concealing
connected.
flap; depending on the version, the mirror is
Programming can also be carried out
illuminated automatically.
from a smartphone using the
This sun visor is also equipped with a ticket
MYPEUGEOT APP application.
holder.
For more information on Remotely operable
additional functions, refer to the corresponding
Glove box
section.
► To open the glove box, lift the handle.
The fan noise that occurs during
Never drive with the glove box open
1.
Grab handle
temperature pre-conditioning is perfectly
when a passenger is at the front. It may
2.
Sun visor
normal.
cause injury during sharp deceleration!
3.
Glove box
4.
Door pockets
Operating conditions
5.
Storage compartment or Storage
compartment with flap or Wireless
- The function is only activated when the
smartphone charger with flap (depending on
ignition is switched off and the vehicle
version)
locked.
► Press the top centre of the flap to open it.
- When the vehicle is not connected, the
6.
Storage compartment with 12 V accessory
function is only activated if the battery charge
socket
level is greater than 30%.
53
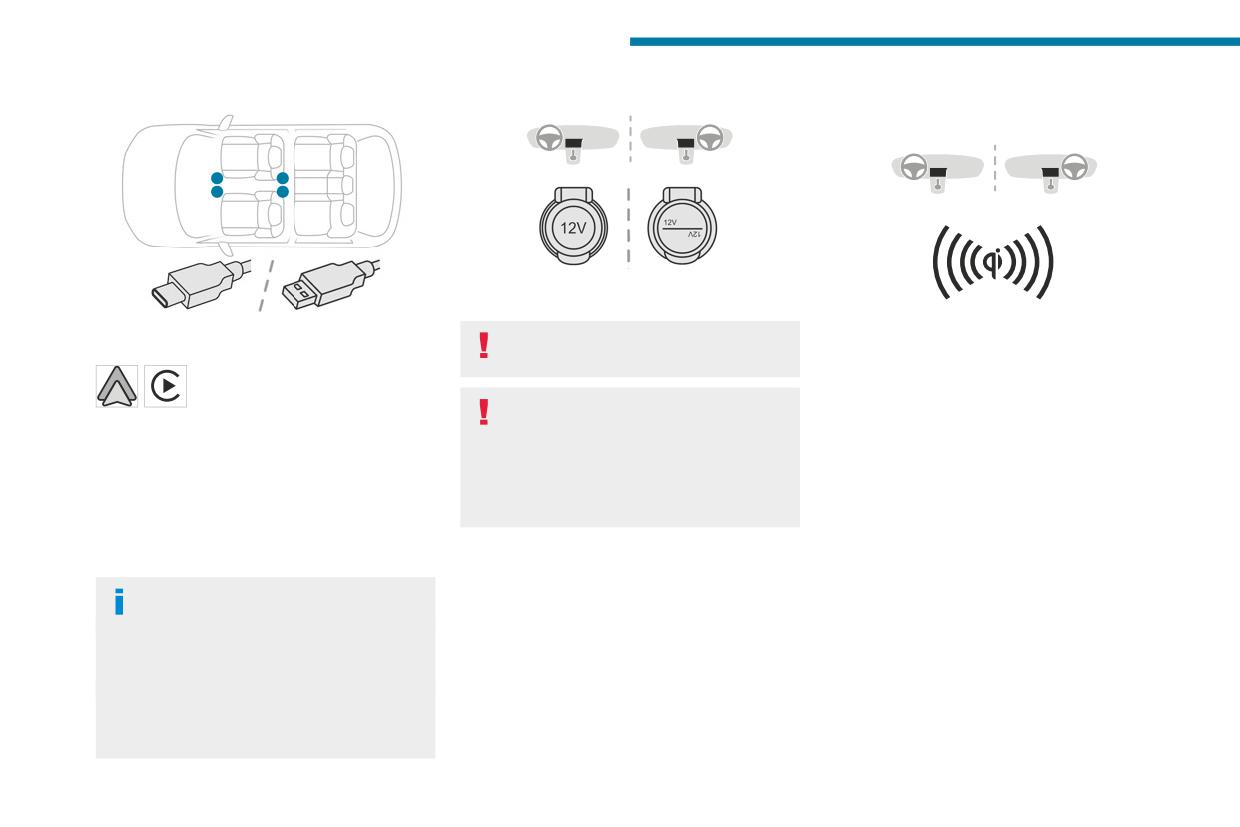
Ease of use and comfort
USB sockets
12 V accessory socket
Wireless smartphone
charger
► Plug in a 12 V accessory (with a maximum
rated power of 120 W) using a suitable adapter.
This system allows wireless charging of a
Depending on equipment, the vehicle is fitted
Observe the maximum power rating to
portable device such as a smartphone, using the
with USB-A and/or USB-C sockets.
avoid damaging the accessory.
magnetic induction principle, in accordance with
The USB socket at the front on the
the Qi.
right-hand side also allows a
The connection of an electrical device
The portable device to be charged must be
smartphone to be connected by Android Auto® or
not approved by PEUGEOT, such as a
compatible with the Qi standard, either by design
CarPlay®, enabling certain smartphone
USB charger, may adversely affect the
or by using a compatible holder or shell.
applications to be used on the touch screen.
operation of vehicle electrical systems,
A mat can also be used provided that it is
For best results, use a cable made or approved
causing faults such as poor radio reception or
approved by the Manufacturer.
by the device manufacturer.
interference with displays in the screens.
The charging area is identified by the Qi symbol.
These applications can be managed using the
The charger works with the engine running and
steering-mounted controls or the audio system
with the Stop & Start system in STOP mode.
controls.
Charging is managed by the smartphone.
When the USB socket is used, the
With the Keyless Entry and Start system, the
portable device charges automatically.
charger’s operation may be briefly disrupted
While charging, a message is displayed if the
when a door is opened or the ignition is switched
power drawn by the portable device exceeds
off.
the current supplied by the vehicle.
For more information about how to use this
equipment, refer to the sections describing
the audio and telematics systems.
54
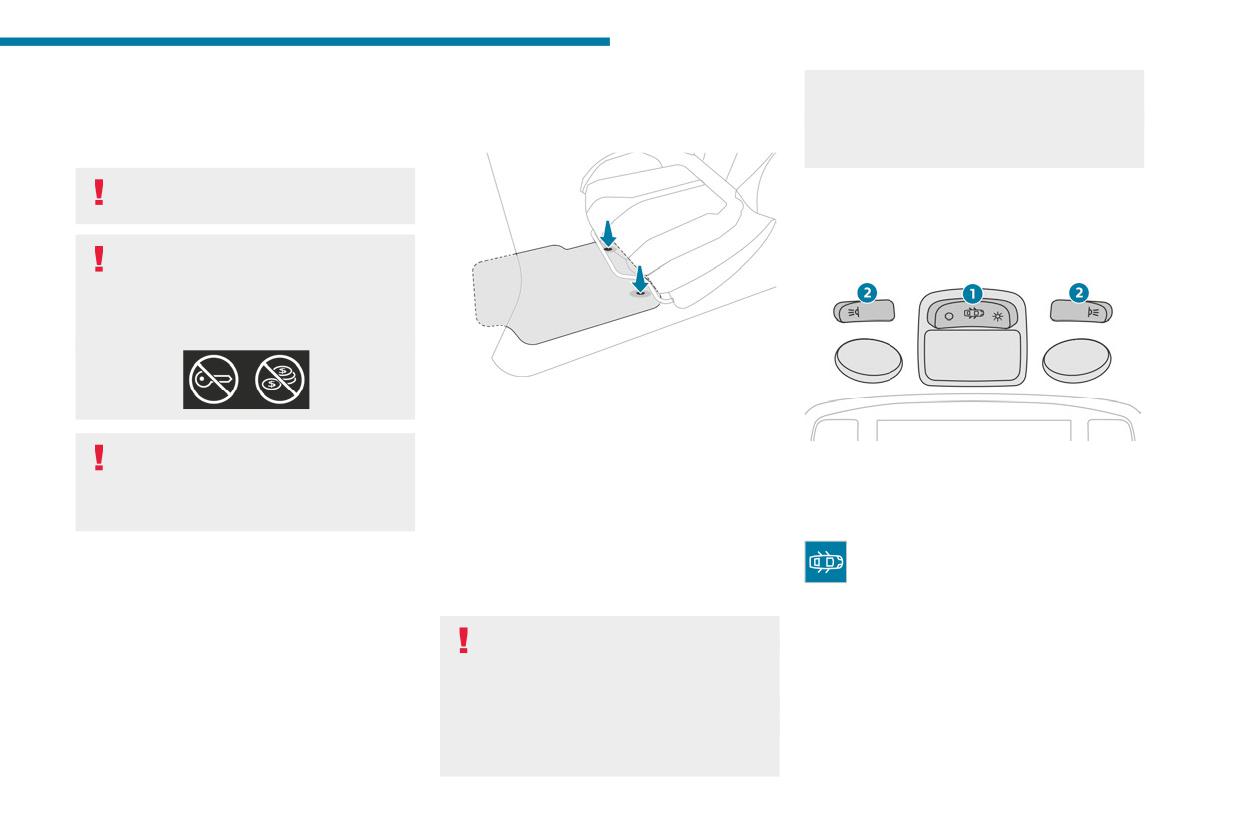
Ease of use and comfort
Charging
Mats
hinder the operation of the cruise control/
3
► Open the flap to access the charging area.
speed limiter.
► With the charging area clear, place a device
Fitting
The approved mats have two fasteners
in its centre.
located underneath the seat.
The system is not designed to charge
multiple devices simultaneously.
Courtesy lamps
Do not leave metal objects (e.g. coins,
Non touch-sensitive version
keys, vehicle remote control) in the
charging area while a device is being charged
- Risk of overheating or interrupting the
charging!
When fitting it on the driver's side, only use
the mountings present on the carpet (a "click"
indicates proper locking).
When using applications for a long time
The other mats are simply laid over the carpet.
1. Front courtesy lamp
in combination with wireless charging,
2. Front reading lamps (depending on version)
some smartphones may switch to thermal
Removing/refitting
safety and cause some functions to stop.
► To remove it on the driver's side, move the
Front courtesy lamp
seat backwards and unclip the fasteners.
In this position, the courtesy lamp comes
► To refit it, position the mat and secure it by
on gradually:
pressing down.
- when the vehicle is unlocked.
► Check that the mat is secured correctly.
- when the key is removed from the ignition
To avoid any risk of jamming the pedals:
switch.
- Only use mats which are suited to the
- when a door is opened.
fixings already present in the vehicle; these
- when the remote control locking button is
fixings must be used.
activated, in order to locate the vehicle.
- Never fit one mat on top of another.
It switches off gradually:
The use of mats not approved by PEUGEOT
- when the vehicle is locked.
may interfere with access to the pedals and
- when the ignition is switched on.
55
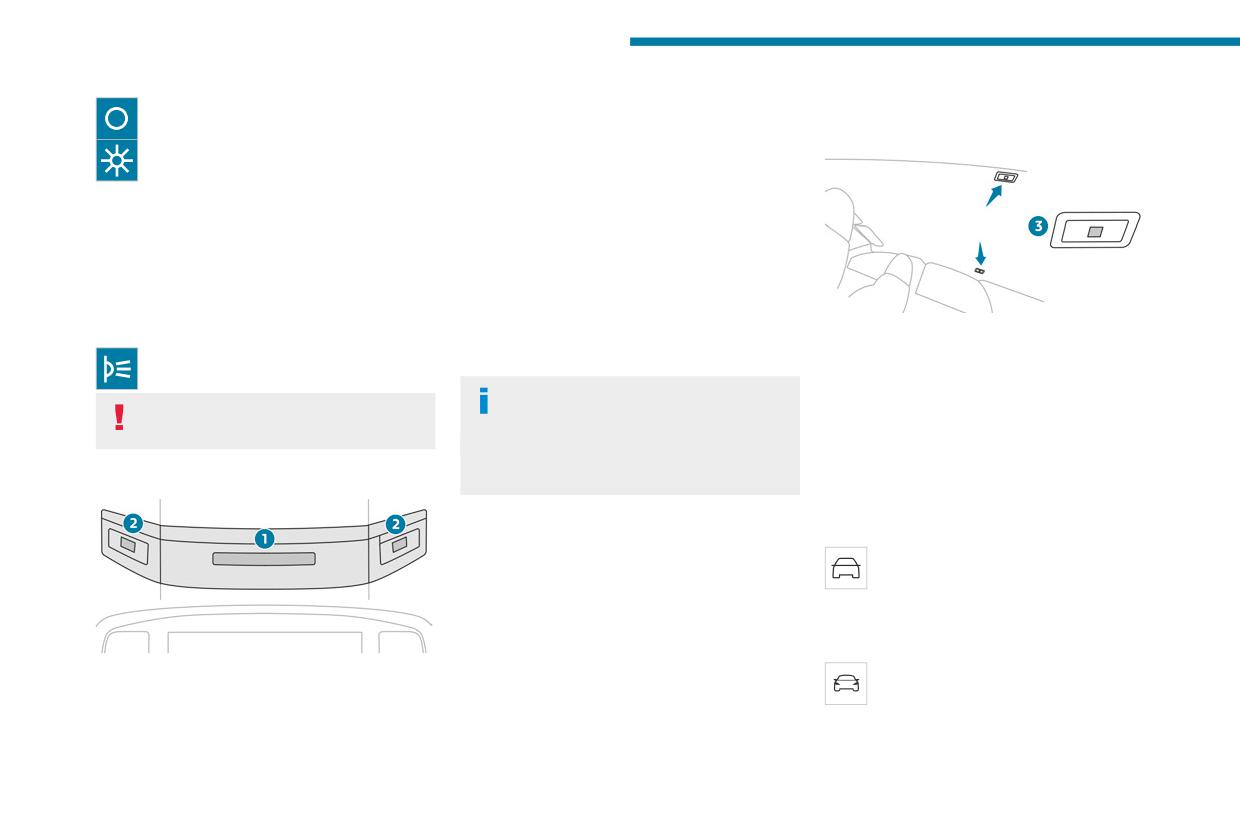
Ease of use and comfort
- 30 seconds after the last door is closed.
Touch-sensitive courtesy lamp
Touch-sensitive reading
Permanently off.
It comes on:
lamps
- when the vehicle is unlocked.
Permanent lighting.
- when the ignition is switched off.
- when a door is opened.
In "Permanent lighting" mode, the lighting time
- when the remote control locking button is
varies according to the circumstances:
activated, in order to locate the vehicle.
- With the ignition off, approximately 10 minutes.
It switches off:
- In energy saving mode, approximately 30
- when the vehicle is locked.
seconds.
- when the ignition is switched on.
- With the engine running, unlimited.
- 30 seconds after the last door is closed.
The front and rear touch-sensitive reading lamps
Reading lamps
3. Rear touch-sensitive reading lamps
come on and go off at the same time as the
► With the ignition on, operate the
courtesy lamp.
► With the ignition on, press the corresponding
corresponding switch.
reading lamp.
A long press on the front touch-sensitive
Do not place anything against the
courtesy lamp completely deactivates it
courtesy lamps.
(confirmed by the "OFF" symbol).
Interior ambient lighting
The front and rear touch-sensitive reading
Soft passenger compartment lighting improves
lamps still remain operational.
Touch version with LED
visibility inside the vehicle in low-light conditions.
With Touch screen 10" & Bluetooth Radio
& Telephone
Activation/deactivation and adjustment of
the brightness are set via the Driving
touch screen menu.
With PEUGEOT Connect Radio / PEUGEOT
Connect Nav
1. Front touch-sensitive courtesy lamp
Activation/deactivation and adjustment of
2. Front touch-sensitive reading lamps
the brightness are set via the Driving/
Vehicle touch screen menu.
56
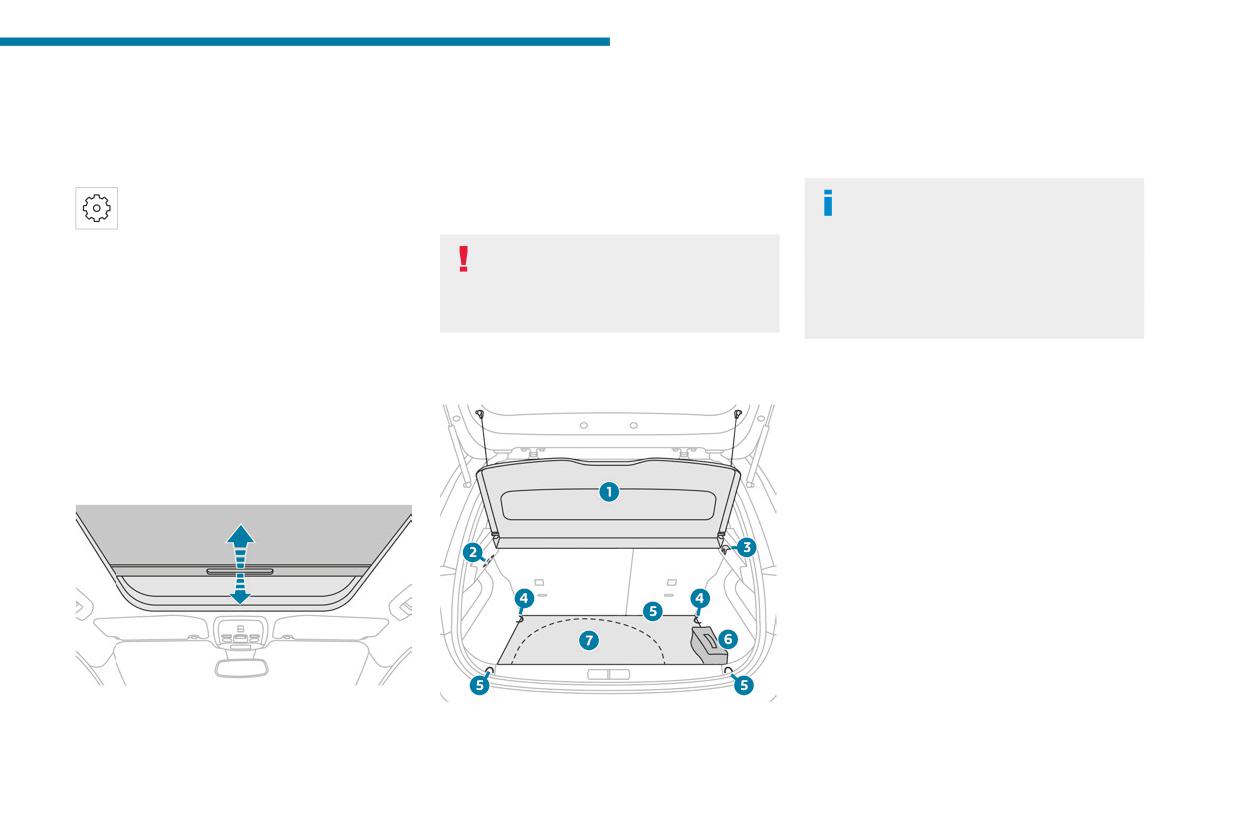
Ease of use and comfort
With PEUGEOT i-Connect Advanced -
Advice on care
4. Stowing rings
3
PEUGEOT i-Connect
To preserve the properties of the glazed roof,
5. Boot mat
By default, the colour of the interior ambient
wipe and dry-clean the inner glass using a clean,
6. Tool kit (depending on equipment)
lighting is linked to that of the screens,
soft cloth.
7. Storage well
depending on the driving mode selected.
For stubborn stains, clean the glass using
Activation/deactivation and adjustment of
screenwash fluid, rinse with clean water, then dry
The stowing rings are designed to secure
the brightness are set via the Settings >
with a clean, soft cloth.
luggage using different types of retaining
Brightness touch screen application.
nets.
Never use soapy water, abrasive
The colour is selected via the Settings >
These retaining nets are available as an
products, petrol, solvents or detergents
Customization touch screen application.
accessory.
(particularly ammonia-based or strongly
For more information, contact a PEUGEOT
alcoholic products).
dealer or a qualified workshop.
Panoramic glass sunroof
It has a tinted glass panoramic surface to
increase brightness and vision inside the vehicle.
Boot fittings
Storage well
It is equipped with a manual blind which helps to
► Lift the boot carpet as far as possible to
maintain a comfortable temperature and reduce
access the storage well.
the noise.
Depending on version, it includes:
- A temporary puncture repair kit with the tool
Opening/closing the blind
kit.
- A spare wheel with or without the tool kit.
Boot lamp
It comes on automatically when the boot is
opened and goes off automatically when the
boot is closed.
The lighting time varies according to the
circumstances:
- When the ignition is off, approximately 10
minutes.
► To open/close the blind, take it by its handle
- In energy saving mode, approximately 30
and pull it backwards/forwards to the required
1. Load space cover
seconds.
position.
2. Boot lamp
- With the engine running, unlimited.
3. Bag hook
57
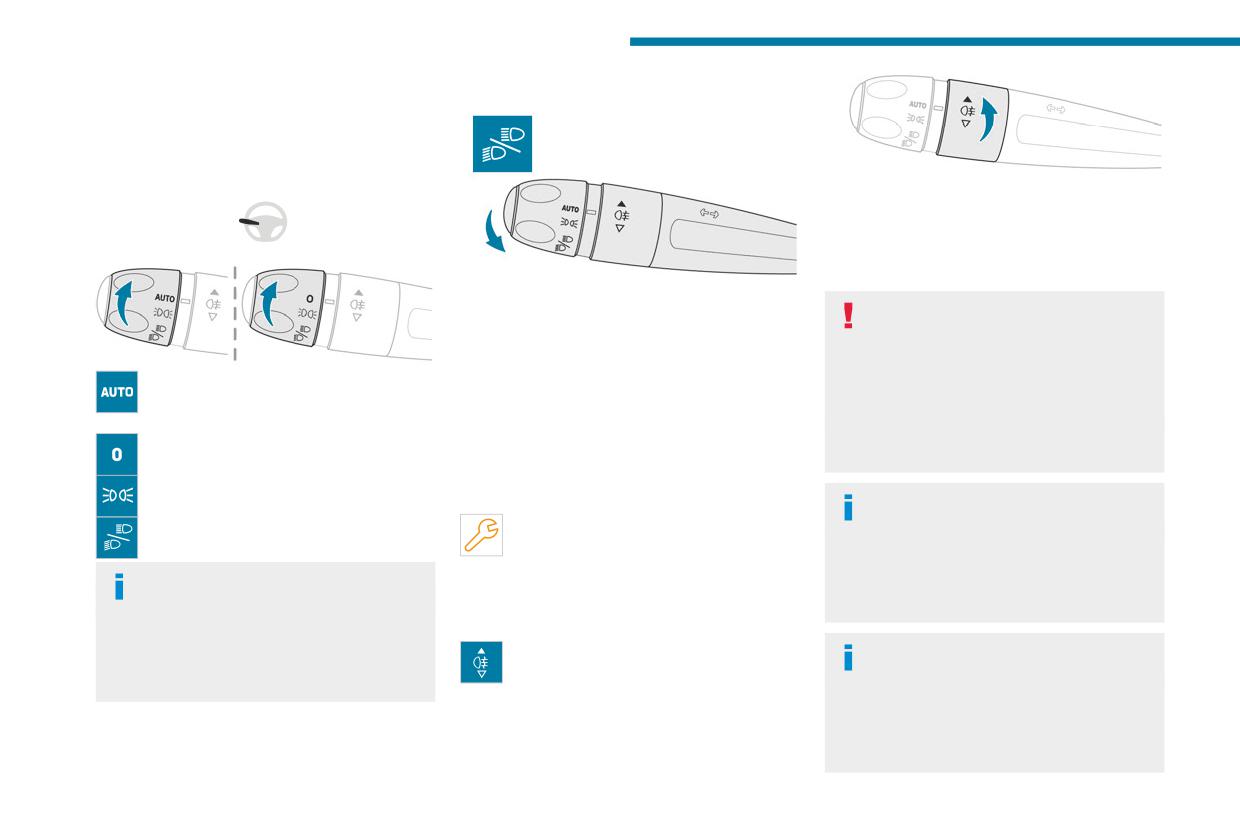
Lighting and visibility
Headlamp dipping
Exterior lighting control
stalk
Main lighting
► Rotate the ring forwards/backwards to turn
it on/off.
When the lighting is switched off automatically
("AUTO" position) the foglamp and the
sidelamps remain on.
► Pull the lighting control stalk to switch
Switching on the foglamps is prohibited
between dipped and main beam headlamps.
in clear weather or in rain, both day and
In lamps off or "AUTO" modes, depending on
night. In these situations, the power of their
version, and in sidelamps mode, pull the lighting
beams may dazzle other drivers. They must
Automatic illumination of lamps/daytime
control stalk to switch the main beam headlamps
only be used in fog or falling snow (rules may
running lamps
on directly ("headlamp flash").
vary depending on country).
or
Display
Do not forget to switch off the foglamps when
Lamps off (ignition off)/
they are no longer necessary.
Daytime running lamps (engine running)
Illumination of the corresponding indicator
Sidelamps only
lamp on the instrument panel confirms that the
selected lighting is on.
Switching off of the lighting when the
A fault with a lamp is signalled by the
ignition is switched off
Dipped or main beam headlamps
permanent illumination of this warning
When the ignition is switched off, all of the
lamp, accompanied by the display of a message
lamps turn off immediately, except for the
"Highway function"
and an audible signal.
dipped beam headlamps if automatic guide-
(Depending on country of sale)
me-home lighting is activated.
With "Full LED" technology headlamps, the
Rear foglamp
range of the dipped beam headlamps is
It only works if the dipped or main beam
Switching on the lamps after
automatically increased once the speed of the
headlamps are on.
switching off the ignition
vehicle is above 68 mph (110 km/h).
To reactivate the lighting control, rotate the
ring, depending on version, to the "0" position
- lamps off, or to the "AUTO" position, then to
the desired position.
58
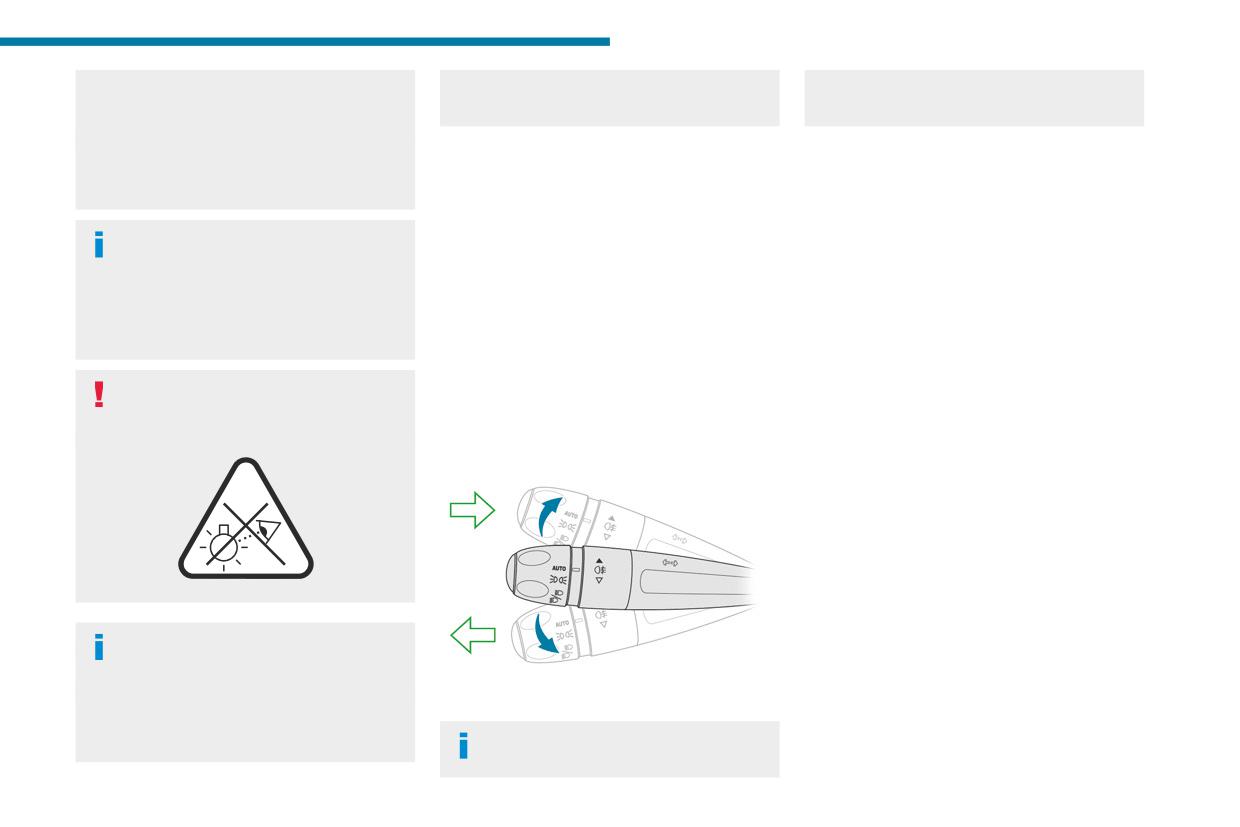
Lighting and visibility
If the driver's door is opened, a temporary
avoid dazzling oncoming drivers. Consult a
audible signal will increase if the speed is
4
audible signal warns the driver that the lamps
PEUGEOT dealer or a qualified workshop.
above 50 mph (80 km/h).
are on.
They will go off automatically after a period
Daytime running lamps/
Three flashes
of time that depends on the level of charge in
the battery (entering energy economy mode).
Sidelamps
► Press briefly upwards or downwards, without
going beyond the point of resistance; the
These LED lamps at the front and rear of the
direction indicators will flash 3 times.
In some weather conditions (e.g. low
vehicle light up automatically when the engine
temperature or humidity), misting on the
starts.
Parking lamps
internal surface of the glass of the headlamps
They perform the following functions:
(Depending on version)
and rear lamps is normal, and will disappear
- Daytime running lamps (lighting control stalk
Vehicle side marking by lighting the sidelamps
after the lamps have been on for a few
at position "0" or "AUTO" with adequate ambient
on the traffic side only.
minutes.
light).
► Within one minute after switching off the
- Sidelamps (lighting control stalk at position
ignition, operate the lighting control stalk
Never look too closely at the light beam
"AUTO" with low ambient light or "Sidelamps
upwards or downwards, depending on the side
of LED technology lamps - risk of serious
only" or "Dipped/main beam headlamps").
of the traffic (e.g. when parking on the right, push
eye injury!
the lighting control stalk down to light up on the
Direction indicators
left).
This is confirmed by an audible signal and the
lighting of the corresponding direction indicator
lamp on the instrument panel.
► To switch off the parking lamps, return the
lighting control stalk to the central position.
Travelling abroad
Vehicles equipped with manual
headlamp beam height adjustment:
► Left or right: lower or raise the lighting control
If planning to use your vehicle in a country
stalk, beyond the point of resistance.
that drives on the other side of the road, the
If you keep the direction indicators on for
dipped beam headlamps must be adjusted to
more than 20 seconds, the volume of the
59
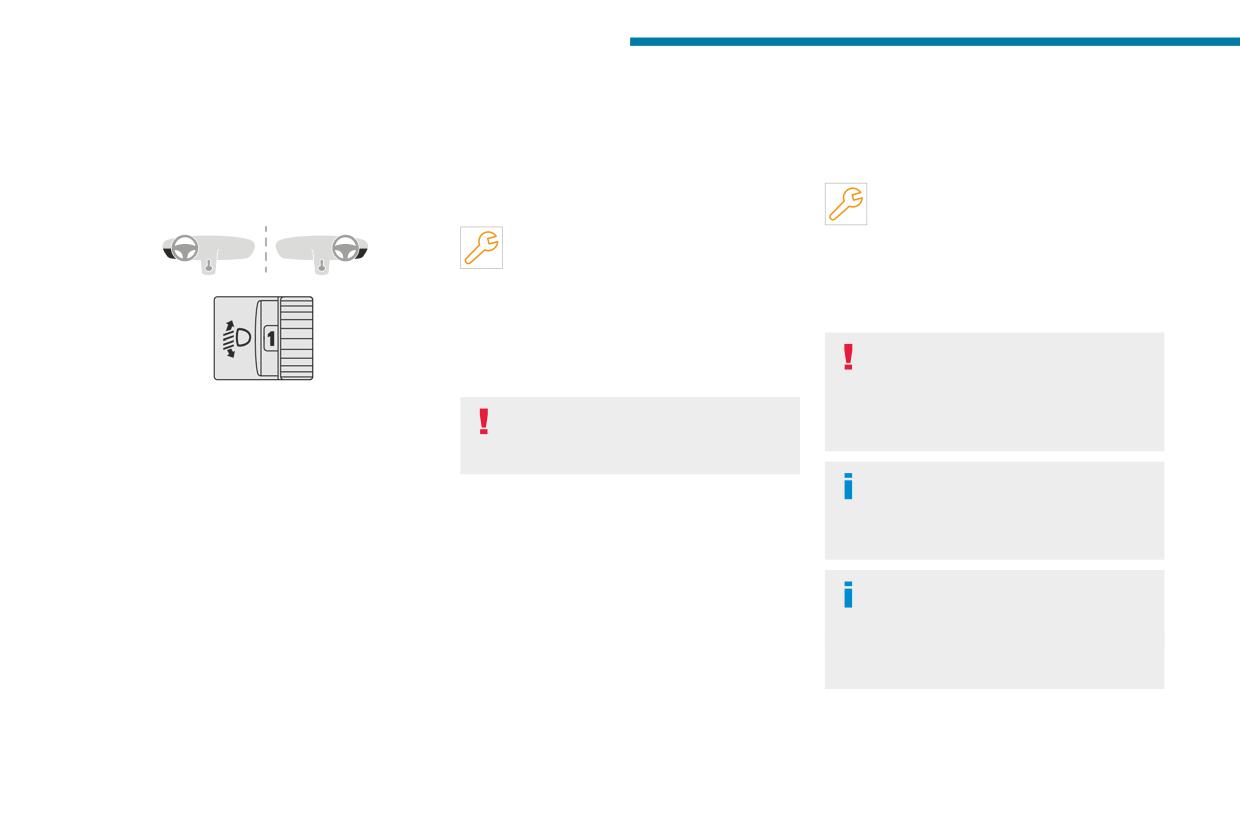
Lighting and visibility
Headlamp beam height
Automatic adjustment of
As soon as the brightness returns to a sufficient
level or after the windscreen wipers are switched
adjustment
the Full LED technology
off, the lamps are switched off automatically.
headlamps
Manual headlamp
This system automatically adjusts the height
Malfunction
of the headlamp beams according to different
In the event of a malfunction of the rain/
adjustment
parameters (e.g. vehicle load).
sunshine sensor, the vehicle’s lamps
In the event of a malfunction, this warning
come on and this warning lamp is displayed on
lamp lights up on the instrument panel,
the instrument panel, accompanied by an
accompanied by the display of a message and
audible signal and/or the display of a message.
an audible signal.
Have it checked by a PEUGEOT dealer or a
The system places the headlamp beams in the
qualified workshop.
lowest position.
Do not cover the rain/sunshine sensor
Have it checked by a PEUGEOT dealer or a
located at the top centre of the
qualified workshop.
windscreen behind the interior rear view
To avoid dazzling other road users, the height
Do not touch the LED or Full LED
mirror; the associated functions would no
of the headlamp beams must be adjusted
technology headlamps - risk of
longer be controlled.
according to the load in the vehicle.
electrocution!
0
(Initial setting)
In fog or snow, the rain/sunshine sensor
Driver only or driver + front passenger
may detect sufficient light. For this
1
5 people
Automatic illumination of
reason, the lighting will not come on
2
5 people + load in the boot
automatically.
3
Driver only + load in the boot
lamps
4 5 6
Not used
With the lighting control stalk in the “AUTO”
The inner surface of the windscreen may
This information is provided as a guide only.
position and if a low level of exterior brightness
become misted up and affect the proper
Depending on version, the unused positions may
is detected by the rain/sunshine sensor, the
operation of the rain/sunshine sensor.
be required.
number plate lamps, sidelamps and dipped
In humid and cold weather, demist the
beam headlamps are switched on automatically,
windscreen regularly.
without any action on the part of the driver. They
may also come on if rain is detected, at the same
time as automatic operation of the windscreen
wipers.
60
Lighting and visibility
Manual
With PEUGEOT Connect Radio / PEUGEOT
Guide-me-home and
4
Connect Nav
welcome lighting
You can activate/deactivate this function
and adjust the welcome lighting duration
Guide-me-home lighting
in the Driving/Vehicle touch screen menu.
Automatic
With PEUGEOT i-Connect Advanced -
PEUGEOT i-Connect
With the ring of the lighting control stalk in the
"AUTO” position and when the light is poor, the
You can activate/deactivate this function
dipped beam headlamps come on automatically
and adjust the duration of the welcome
when the ignition is switched off.
lighting in the Settings > Vehicle touch screen
► With the ignition off, pull the lighting control
With Touch screen 10" & Bluetooth Radio
application.
stalk toward you ("headlamp flash") to activate/
& Telephone
deactivate the function.
Door mirror spotlamps
You can activate/deactivate this function
Manual guide-me-home lighting goes off
These spotlamps facilitate access to the vehicle
and adjust the guide-me-home lighting
automatically after a period of time.
by lighting the ground near the front doors.
duration in the Driving touch screen menu.
The spotlamps come on automatically:
Welcome lighting
With PEUGEOT Connect Radio / PEUGEOT
- when the vehicle is unlocked.
Connect Nav
When the vehicle is unlocked, if the ambient
- when a door is opened.
light is low and the "Automatic illumination of
You can activate/deactivate this function
- when a request to locate the vehicle is
headlamps" function is activated, this system
and adjust the guide-me-home lighting
received from the remote control.
automatically turns on certain exterior lamps
duration in the Driving/Vehicle touch screen
They also come on with the welcome lighting
as well as certain lamps in the passenger
menu.
and guide-me-home lighting functions.
compartment.
With PEUGEOT i-Connect Advanced -
They go off automatically after 30 seconds.
With Touch screen 10" & Bluetooth Radio
PEUGEOT i-Connect
& Telephone
You can activate/deactivate this function
Automatic lighting
You can activate/deactivate this function
and adjust the duration of the guide-me-
and adjust the welcome lighting duration
systems - General
home lighting in the Settings > Vehicle touch
in the Driving touch screen menu.
screen application.
recommendations
The automatic lighting systems use a detection
camera, located at the top of the windscreen.
61
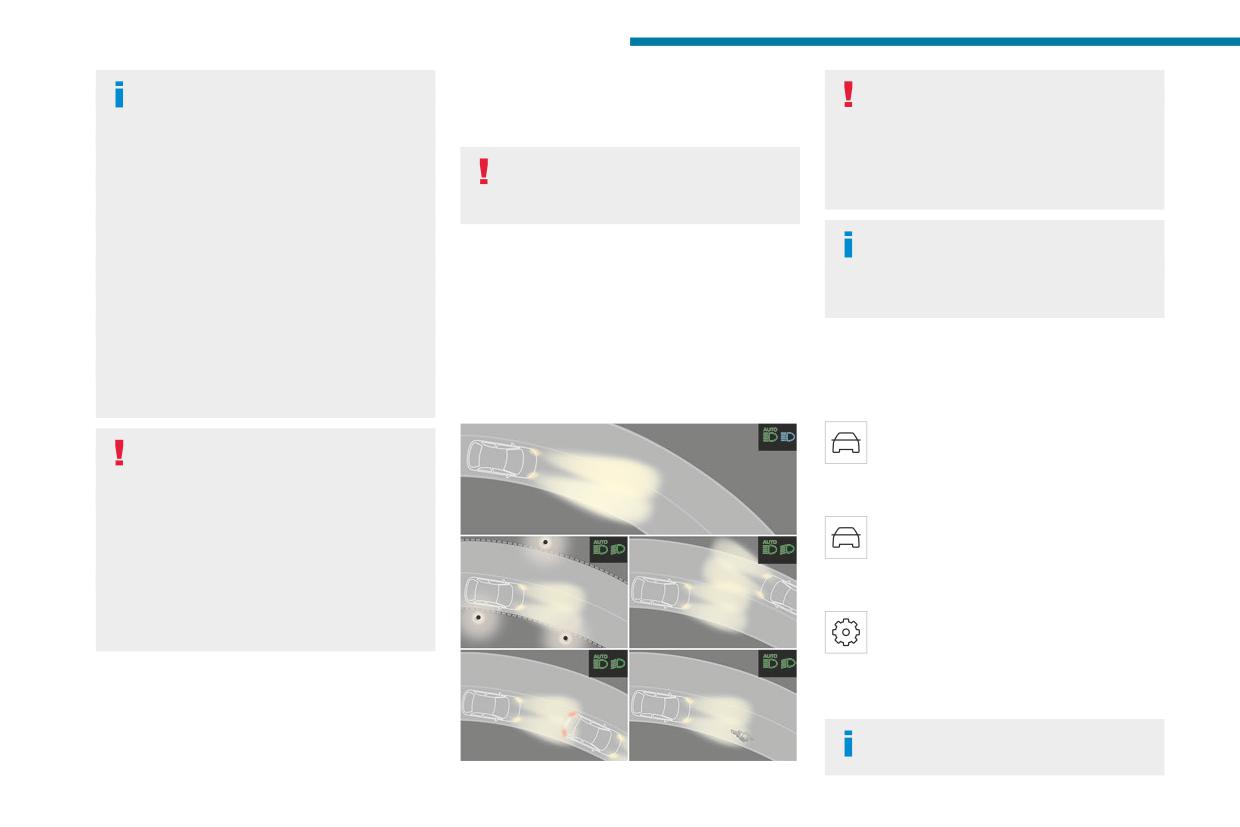
Lighting and visibility
Operating limits
This system is a driving aid.
Automatic headlamp
The system may be disrupted or not work
The driver remains responsible for
correctly:
dipping
the vehicle's lighting, its correct use in the
- When visibility conditions are poor
prevailing light, visibility and traffic conditions,
For more information, refer to the
(e.g. snowfall, heavy rain).
and for compliance with driving and vehicle
General recommendations for
- If the windscreen is dirty, misted-up or
regulations.
automatic lighting systems.
masked (e.g. sticker) in front of the camera.
- If the vehicle is facing highly reflective signs
The system becomes operational when
Available only on versions equipped with Full
or safety barrier reflectors.
the vehicle exceeds 16 mph (25 km/h).
LED technology headlamps.
The system is not able to detect:
When the speed falls below 9 mph (15 km/h),
With the ring of the lighting control stalk in the
- Road users that do not have their own
the function is no longer operational.
"AUTO" position and the function activated on
lighting, such as pedestrians.
the touch screen, this system automatically
- Vehicles with hidden lighting (e.g. travelling
switches between dipped and main beam
behind a safety barrier on the motorway).
Activation/Deactivation
headlamps, according to lighting and traffic
- Vehicles at the top or bottom of a steep
conditions, using a camera located at the top of
With Touch screen 10" & Bluetooth Radio
slope, on winding roads, on crossroads.
the windscreen.
& Telephone
The settings are changed via the Driving
Maintenance
touch screen menu.
Clean the windscreen regularly,
With PEUGEOT Connect Radio / PEUGEOT
particularly the area in front of the camera.
Connect Nav
The internal surface of the windscreen can
also become misted around the camera.
The settings are changed via the Driving/
In humid and cold weather, demist the
Vehicle touch screen menu.
windscreen regularly.
With PEUGEOT i-Connect Advanced -
Do not allow snow to accumulate on the
PEUGEOT i-Connect
bonnet or roof of the vehicle as this could
The settings are changed via the
obstruct the camera.
Settings > Vehicle touch screen
application.
The state of the system is stored when the
ignition is switched off.
When the system detects thick fog, it
temporarily deactivates the function.
62
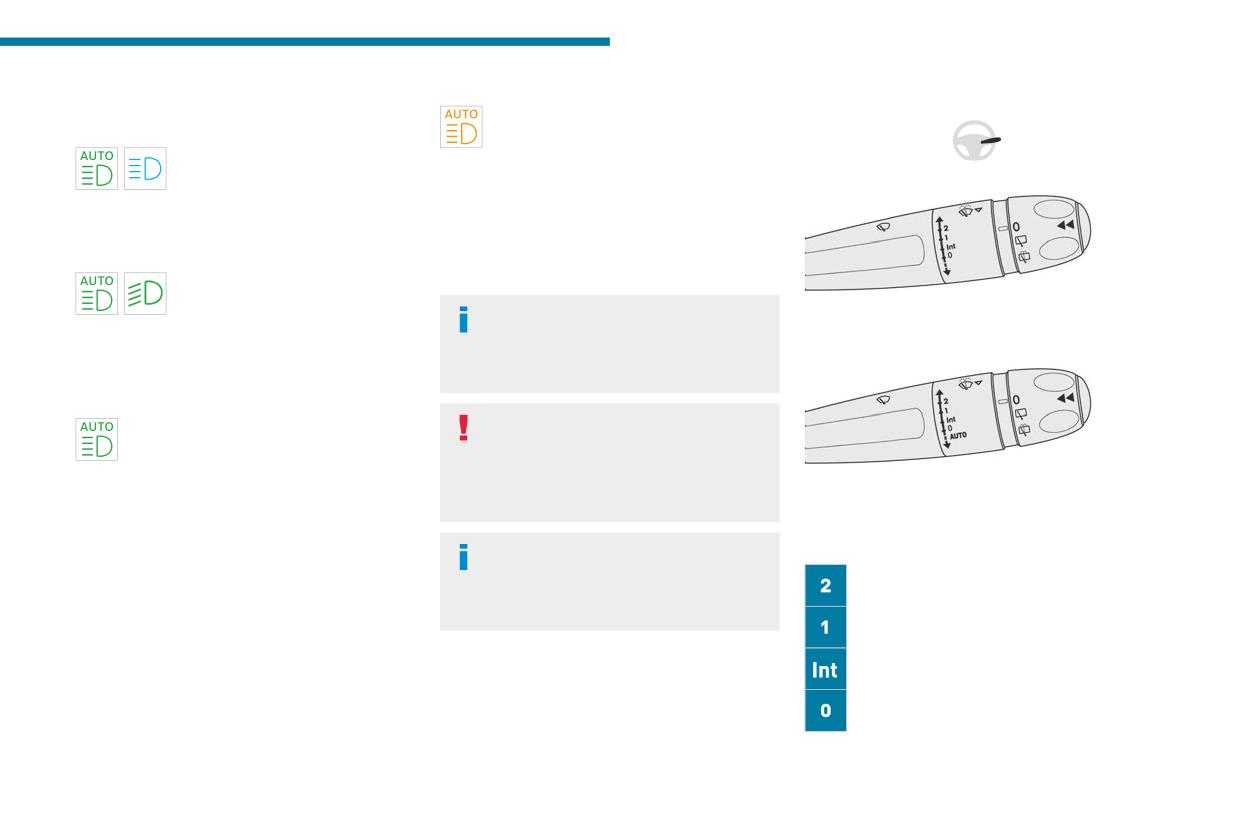
Lighting and visibility
Operation
Malfunction
Without AUTO wiping
4
If the ambient light level is very low and traffic
If a malfunction occurs with the system or
conditions permit:
the camera, this warning lamp lights up
- The main beam headlamps
on the instrument panel, accompanied by an
come on automatically. These
audible signal and a message.
indicator lamps light up on the instrument panel.
Have it checked by a PEUGEOT dealer or a
If the ambient light level is sufficient and/or the
qualified workshop.
traffic conditions do not allow the main beam
headlamps to be lit:
Wiper control stalk
- The dipped beam headlamps
remain lit. These indicator lamps
Before operating the wipers in wintry
light up on the instrument panel.
conditions, clear any snow, ice or frost
With AUTO wiping
The function is deactivated if the foglamps are
from the windscreen and around the wiper
switched on.
arms and blades.
When the foglamps are switched off, the function
is automatically reactivated.
Do not operate the wipers on a dry
This indicator lamp goes out when the
windscreen. In extremely hot or cold
function is deactivated.
weather, check that the wiper blades are not
stuck to the windscreen before operating the
Pause
wipers.
If the situation requires a change of headlamp
Windscreen wipers
beam, the driver can take over at any time.
► To select the wiping speed: raise or lower the
After using an automatic car wash, you
► Switch the headlamps manually between
stalk to the desired position.
may temporarily notice abnormal noises
dipped and main beam to pause the function.
Fast wiping (heavy rain)
and poorer wiping performance. You do not
If the "AUTO" and "Dipped beam" indicator
need to replace the wiper blades.
lamps were on, the system changes to main
Normal wiping (moderate rain)
beam.
If the "AUTO" and "Main beam" indicator lamps
Intermittent wiping (proportional to the
were on, the system changes to dipped beam.
vehicle’s speed)
► To reactivate the function, once again switch
Switching off
the headlamps manually between dipped and
main beam.
63
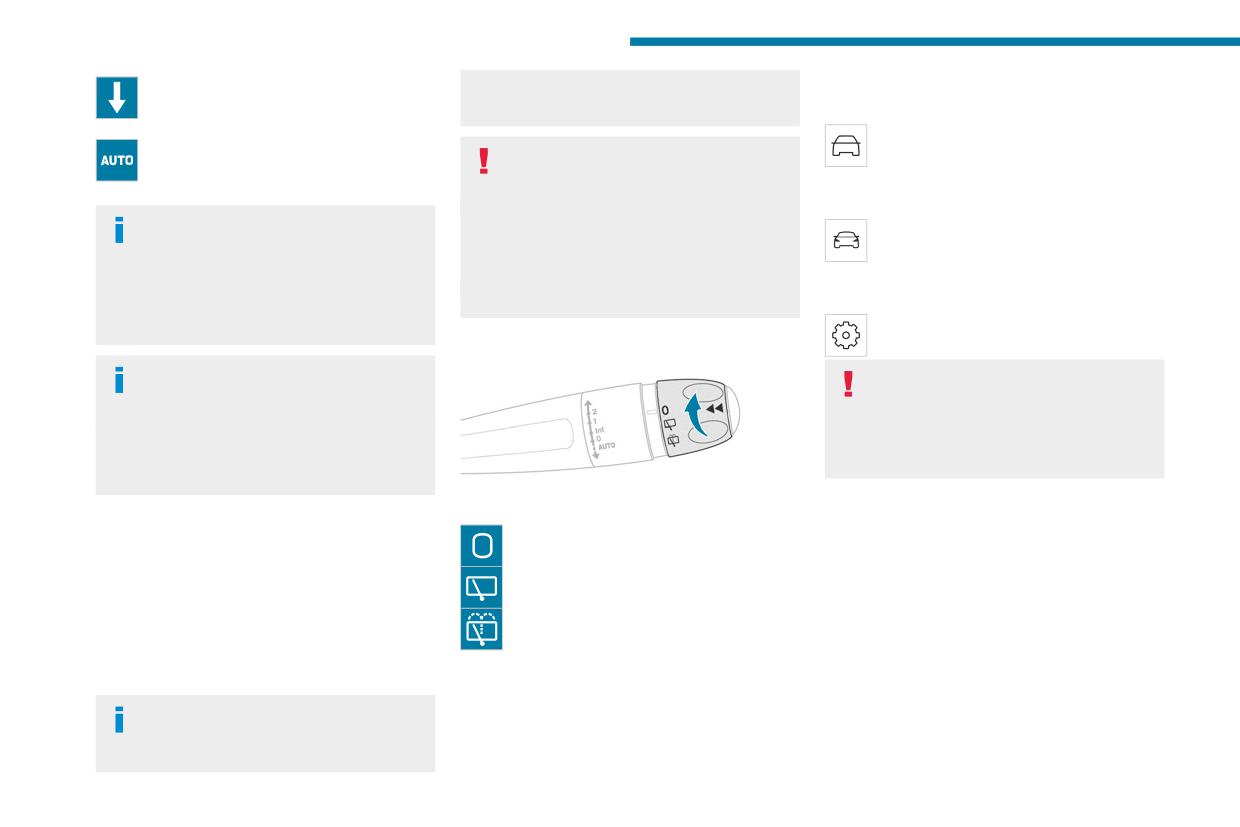
Lighting and visibility
Single wipe (press down and release).
protect the passenger compartment from any
With Touch screen 10" & Bluetooth Radio
odour.
& Telephone
or
It is configured via the Driving touch
Automatic wiping
To avoid damaging the wiper blades, do
screen menu.
not operate the screenwash if the
With PEUGEOT Connect Radio / PEUGEOT
Refer to the corresponding section.
screenwash reservoir is empty.
Connect Nav
Only operate the screenwash if there is no
If the ignition has been switched off with
It is configured via the Driving/Vehicle
risk of the fluid freezing on the windscreen
the windscreen wipers active, you must
touch screen menu.
and hindering visibility. During the winter
operate the control stalk again to reactivate
period, use "very cold climate" rated products.
With PEUGEOT i-Connect Advanced -
wiping when the ignition is switched on again
Never top up with water.
PEUGEOT i-Connect
(unless the ignition was off for less than
a minute).
It is configured in the Settings > Vehicle
touch screen application.
Rear wiper
In position 1 or 2, the wiping frequency is
In the event of accumulation of snow or
automatically reduced when the speed of
hard frost or if a bicycle carrier is fitted to
the vehicle drops below 3 mph (5 km/h).
a towing device, deactivate the automatic rear
When the speed is above 6 mph (10 km/h)
wiper via the touch screen’s Driving/Vehicle
again, the wiping frequency returns to the
menu.
original frequency (fast or normal).
► Turn the ring to align the desired symbol with
the marking.
Rear screenwash
Single wipe
Off
► Turn the ring as far as it will go and hold it in
► Pull the stalk briefly towards you.
position.
Intermittent wiping
The screenwash and the wiper operate for as
Windscreen wash
long as the ring remains turned.
► Pull the wiper control stalk towards you and
Screenwash-wipe
A final wiping cycle is performed when screen
hold.
washing ends.
A final wiping cycle is performed when
screenwashing ends.
Reverse gear
Special position of the
When reverse gear is engaged, the rear wiper
With automatic air conditioning, any
windscreen wipers
will come into operation automatically if the front
action on the screenwash control results
This maintenance position is used while cleaning
windscreen wipers are operating.
in temporary closure of the air intake to
or replacing the wiper blades. It can also be
64
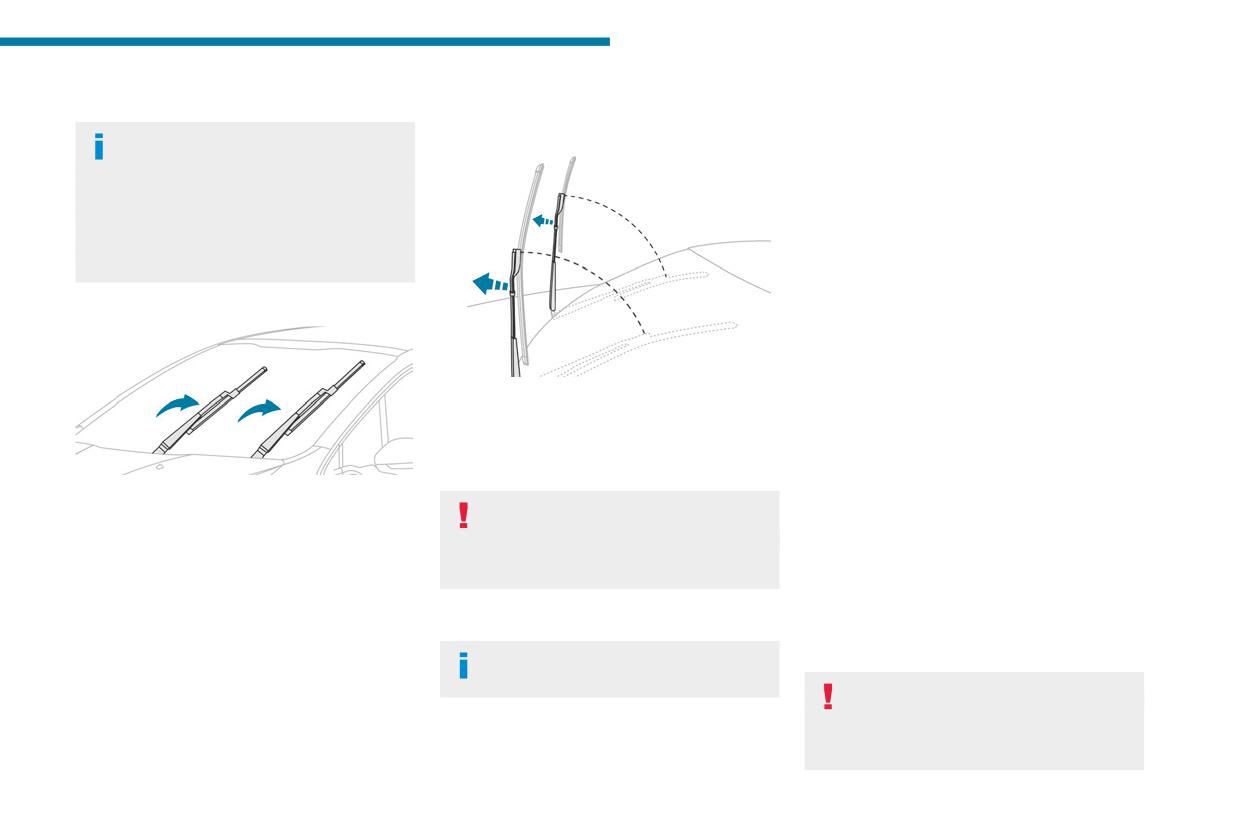
Lighting and visibility
useful, in wintry weather (ice, snow), to release
Changing a wiper blade
► Install the new wiper blade and clip it to the
4
the wiper blades from the windscreen.
arm.
Removing/Refitting at the front
► Repeat the procedure for the other wiper
To maintain the effectiveness of the flat
blade.
wiper blades, it is advisable to:
► Starting with the wiper blade closest to you,
- handle them with care.
once again hold each arm by the rigid section,
- clean them regularly using soapy water.
then guide it carefully onto the windscreen.
- avoid using them to hold cardboard on the
windscreen.
Removing/refitting at the rear
- replace them at the first signs of wear.
► Hold the arm by the rigid section and raise it
as far as possible.
Before removing a windscreen wiper blade
► Clean the rear screen using screenwash
fluid.
► Unclip the worn wiper blade and remove it.
► Install the new wiper blade and clip it to the
► Carry out these wiper blade replacement
arm.
operations from the driver's side.
► Once again hold the arm by the rigid section,
► Starting with the wiper blade farthest from
then guide it carefully onto the rear screen.
you, hold each arm by the rigid section and raise
it as far as possible.
Operating the wiper control stalk immediately
Automatic windscreen
after switching off the ignition will place the wiper
Do not touch the wiper blades - risk of
wipers
blades in a vertical position.
irreparable deformation.
► Proceed with the desired operation or the
Do not release them while moving them. Risk
In AUTO mode, the windscreen wipers operate
replacement of the wiper blades.
of damaging the windscreen!
automatically and adapt to the intensity of the
rainfall.
After refitting a windscreen wiper blade
► Clean the windscreen using screenwash
Detection is via a rain/brightness sensor, located
► To return the wiper blades to their initial
fluid.
at the top centre of the windscreen behind the
position after the operation, switch on the ignition
Do not apply "Rain X" type water-
rear view mirror.
and operate the wiper control stalk.
repellent products.
Do not cover the rain/sunshine sensor.
When using an automatic car wash,
► Unclip the worn wiper blade closest to you
switch off the automatic wipers and the
and remove it.
ignition.
65
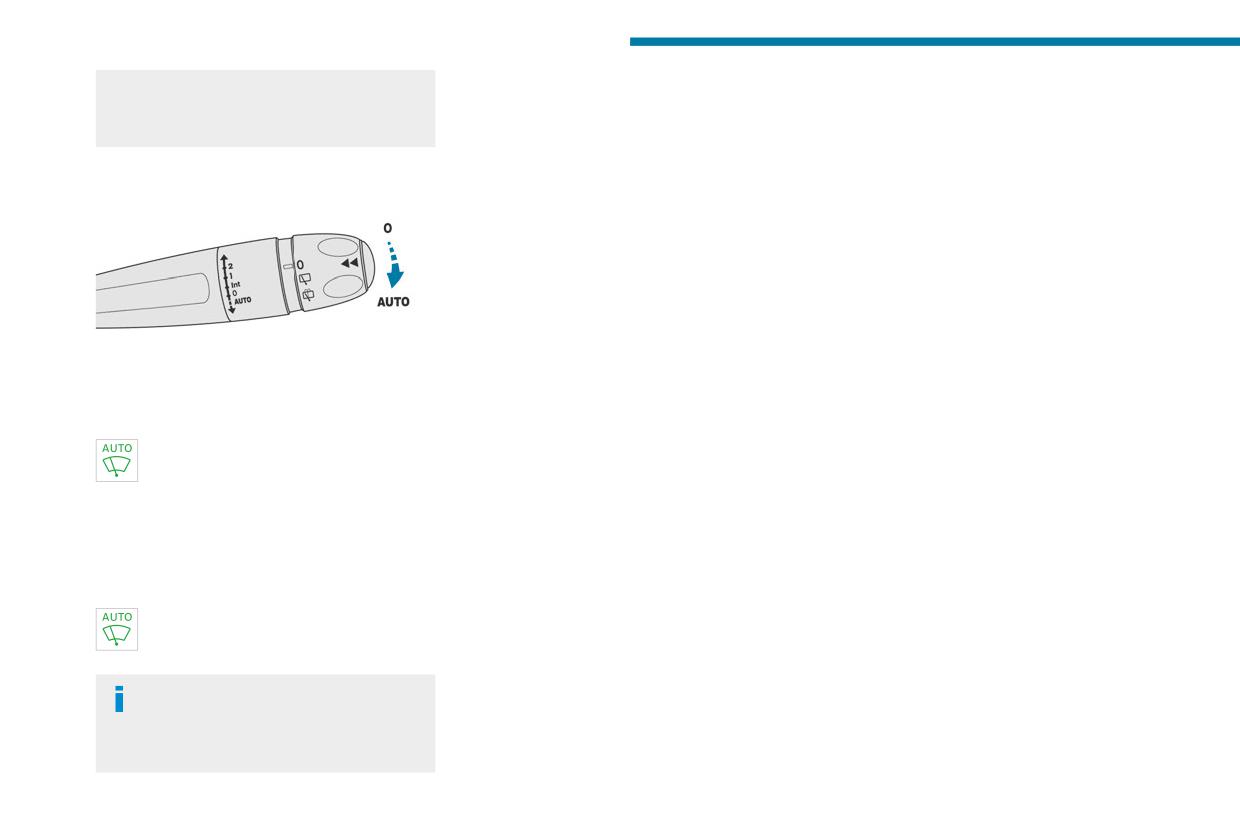
Lighting and visibility
In winter, wait until the windscreen is
Malfunction
completely clear of ice before activating the
If a fault occurs with the automatic wipers, the
automatic wipers.
wipers operate in intermittent mode.
Have it checked by a PEUGEOT dealer or a
Switching on
qualified workshop.
► Give a short downwards push to the control
stalk.
A wiping cycle confirms that the instruction has
been accepted.
This indicator lamp lights up on the
instrument panel, accompanied by a
message.
Switching off
► Give the control stalk another brief push
downwards or set the control stalk to another
position (Int, 1 or 2).
This indicator lamp goes off on the
instrument panel, accompanied by a
message.
If the ignition has been off for more than
one minute, the automatic wipers must
be reactivated by pushing the control stalk
downwards.
66
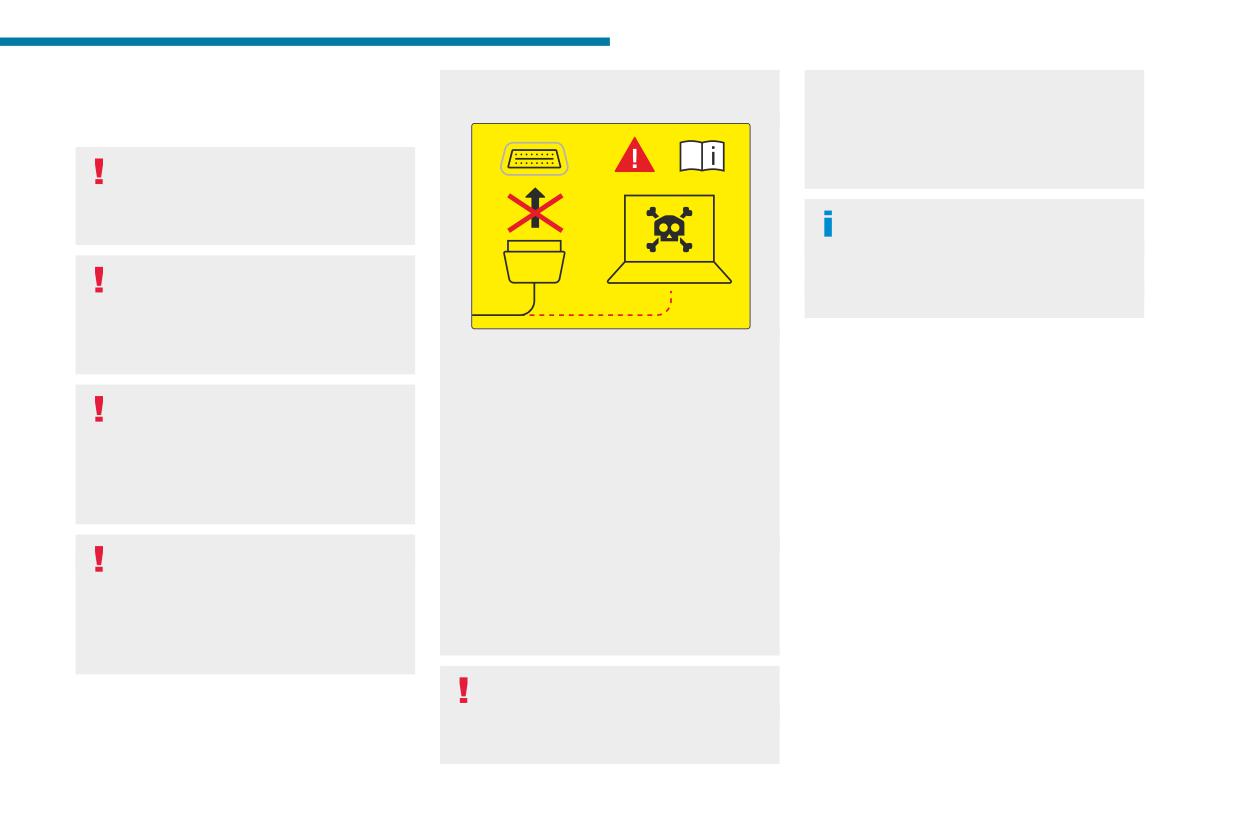
Safety
for information on the range of approved
without fail contact a PEUGEOT dealer for
General safety
5
accessories.
the specification of transmitters which can
recommendations
be fitted (frequency, maximum power, aerial
position, specific installation requirements), in
Do not remove the labels attached in
line with the UN ECE Regulation 10.
different places on your vehicle. They
include safety warnings as well as
Declarations of conformity for radio
identification information for the vehicle.
equipment
The relevant certificates are available on the
For all work on your vehicle, use a
brand website:
qualified workshop that has the technical
information, skills and equipment required, all
of which a PEUGEOT dealer is able to
As a safety measure, access to the
provide.
diagnostic socket, used for the vehicle's
Event Data Recording
electronic systems, is reserved strictly for
Depending on country regulations,
system
PEUGEOT dealers or qualified workshops,
certain safety equipment may be
equipped with the special tools required (risk
(Depending on country of sale)
mandatory: high visibility safety vests,
of malfunctions of the vehicle's electronic
This vehicle is fitted with an accident data
warning triangles, breathalysers, spare bulbs,
systems that could cause breakdowns or
recording system, also called Event Data
spare fuses, fire extinguisher, first aid kit, mud
serious accidents). The Manufacturer cannot
Recorder (EDR).
flaps at the rear of the vehicle, etc.
be held responsible if this advice is not
This system gathers and records certain vehicle
followed.
data over a short period (a few seconds) before,
Installing electrical accessories
Any modification or adaptation not intended
during and after an event such as an accident or
The fitting of electrical equipment or
or authorised by PEUGEOT or carried out
collision.
accessories not approved by PEUGEOT may
without meeting the technical requirements
In order to gain a better understanding of the
cause excessive current consumption and
defined by the Manufacturer will result in the
circumstances surrounding the event, this
faults and failures with the electrical system
suspension of the commercial warranty.
system records how the vehicle’s various
of your vehicle. Contact a PEUGEOT dealer
systems are operating at the time of the event,
including:
Installation of accessory radio
- Any deployment of a restraint system
communication transmitters
(e.g. airbag, seat belt).
Before installing a radio communication
- The status of the seat belts of all the
transmitter with an external aerial, you must
occupants (fastened/unfastened).
67
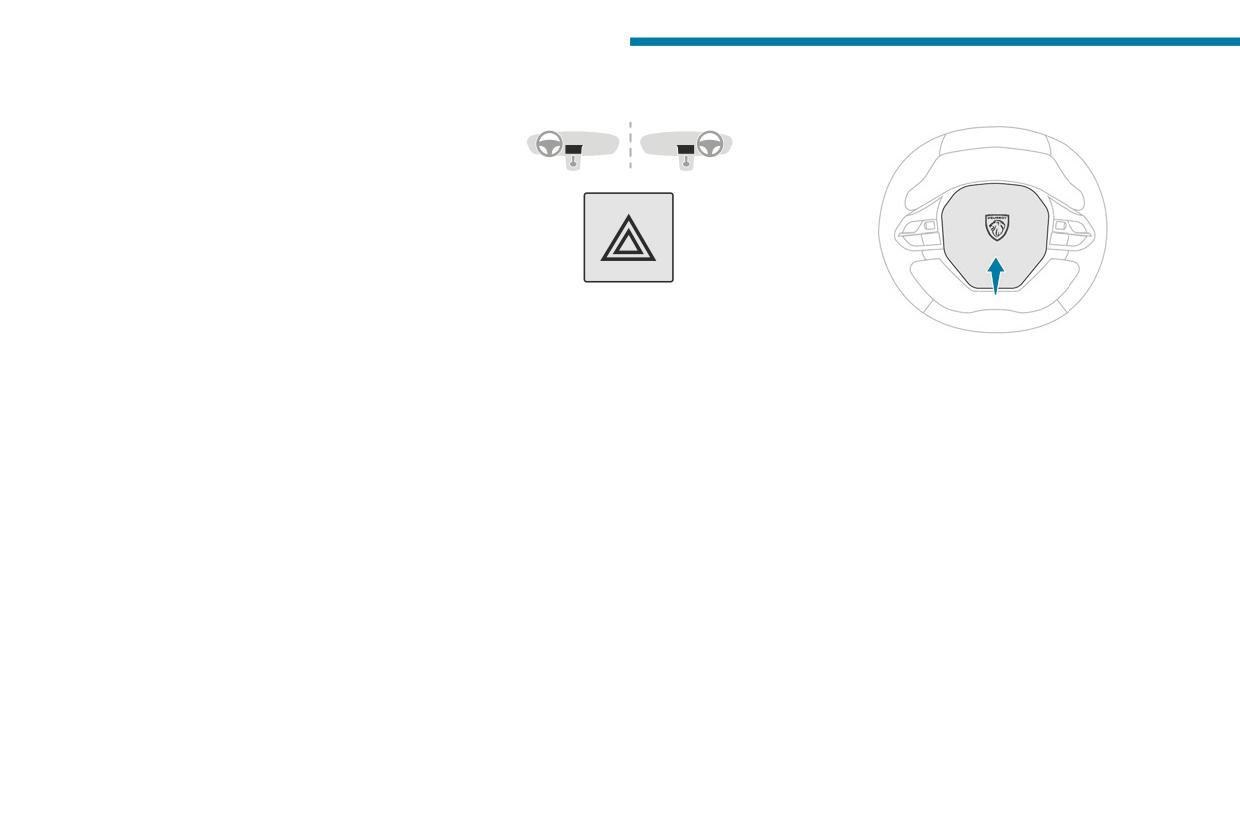
Safety
- The contact or intensity of pressure exerted on
Hazard warning lamps
Horn
the pedal(s) engaged by the driver.
- The speed of the vehicle.
- The status of some driving and manoeuvring
aids systems.
The following are not recorded by the system:
- Data on normal driving conditions, in other
words data not directly related to the event.
- Personal data on the driver and any other
occupants.
- The geographical location of the vehicle at the
► Pressing this red button causes all the
time of the event.
direction indicators to flash.
The reading of data recorded by the system
They can work with the ignition switched off.
requires the following:
► Press the central part of the steering wheel.
- Access to the interior of the vehicle or to the
Automatic operation of
system.
hazard warning lamps
Pedestrian horn (Electric)
And
- Special equipment that can be purchased from
When braking in an emergency, depending on
This system alerts pedestrians that the vehicle is
the manufacturer BOSCH (www.BoschCDRTool.
the rate of deceleration, the hazard warning
approaching.
com).
lamps come on automatically. They switch off
The pedestrian horn operates once the vehicle
Aside from the vehicle Manufacturer, other
automatically when you next accelerate.
is moving and at speeds of up to 19 mph
parties such as law enforcement agencies may
They can be switched off by pressing the button.
(30 km/h), in forward or reverse gear.
access this data in order to analyse the event.
This function cannot be deactivated.
68
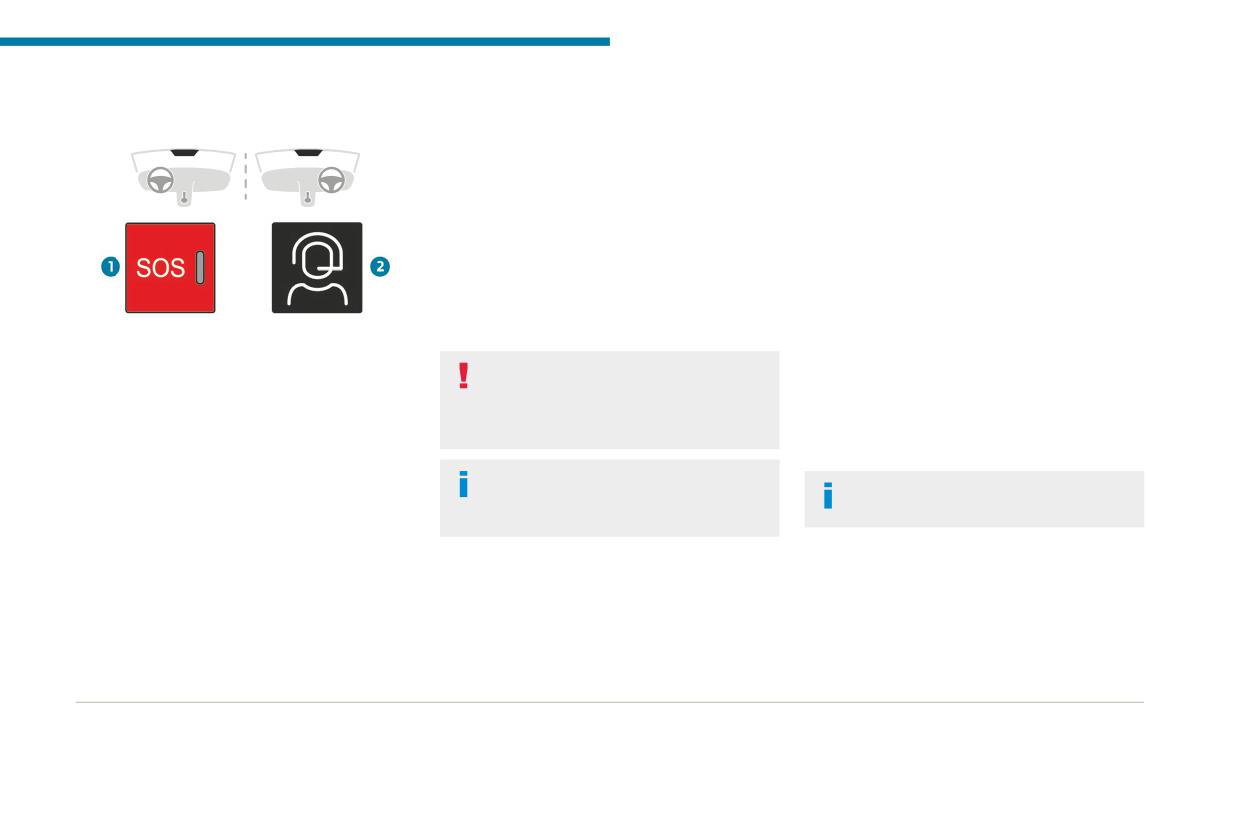
Safety
► To make an emergency call manually, press
Operation of the system
Emergency or assistance
5
button 1 for more than 2 seconds.
Vehicles equipped with Touch screen
call
The lit indicator lamp and a voice message
10" & Bluetooth Radio & Telephone /
confirm that the call has been made to the
PEUGEOT Connect Radio / PEUGEOT
emergency services*.
Connect Nav
The eCall (SOS) system immediately locates
your vehicle and puts you in contact with the
- Upon switching on the ignition, the indicator
appropriate emergency services**.
lamp lights up red, then green, and then goes
► Pressing again immediately cancels the
out: the system is operating correctly.
request.
- The indicator lamp flashes red: replace the
The indicator lamp flashes while the vehicle
back-up battery.
data is being sent, and then remains lit when
- The indicator lamp is fixed red: system
1. eCall (SOS)
communication is established.
malfunction. The emergency and assistance call
2. ASSISTANCE
services may not work.
In the event that a serious accident is
- If the indicator lamp does not come on when
detected by the sensors built into the
the ignition is switched on, this also means that
eCall (SOS)
vehicle, such as the airbag control unit, an
there is a system malfunction.
Your vehicle may be fitted with the eCall (SOS)
emergency call is made automatically.
If the problem persists, contact a qualified
system either as standard or as an option.
workshop as soon as possible.
The eCall (SOS) system provides direct contact
The eCall (SOS) system is a public
A system malfunction does not prevent
to the emergency services and is fully built
service of general interest and is
the vehicle from being driven.
into the vehicle. This contact is made either
free-of-charge.
automatically via the sensors built into the
Vehicles equipped with PEUGEOT
vehicle, or by pressing button 1.
i-Connect Advanced - PEUGEOT i-Connect
According to the country of sale, the eCall (SOS)
system corresponds to the systems PE112,
- Upon switching on the ignition, the indicator
ERAGLONASS, 999, etc.
lamp lights up for a few seconds and then goes
The eCall (SOS) system is activated by default.
out: the system is operating correctly.
* In accordance with the general conditions of use of the service, available from dealers and subject to technological and technical limitations.
** Depending on the geographic coverage provided by the "eCall (SOS)" and "ASSISTANCE" systems.
The list of countries covered and the telematic services provided is available from dealers or on the website for your country.
69
Safety
- The indicator lamp flashes red: emergency
subject, in accordance with Article 6 (1) d)
necessary for the normal functioning of the
battery is flat. This will be recharged after a few
GDPR.
system, are stored.
minutes' driving.
The processing of personal data is strictly
When an emergency call is triggered, the data
- The indicator lamp is fixed red: system
limited to the purpose of handling the eCall
log is stored for no more than 13 hours.
malfunction. The emergency and assistance call
(SOS) function used with the "112" single
services may not work.
European emergency call number.
Access to data
- If the indicator lamp does not light up when
The eCall (SOS) function is only able to
You have the right of access to data and
the ignition is turned on, this is also a system
collect and process the following data
as appropriate to request the rectification,
malfunction.
relating to the vehicle: vehicle identification
erasure or restriction of processing of any
If the problem persists, contact a qualified
number, vehicle type (passenger vehicle or
personal data not processed in accordance
workshop as soon as possible.
light commercial vehicle), fuel type or power
with the provisions of GDPR. Third parties
source, three most recent locations and
to which data has been disclosed shall
A system malfunction does not prevent
direction of travel, number of passengers
be notified of any rectification, erasure or
the vehicle from being driven.
and a timestamped log file of the automatic
restriction carried out in compliance with
activation of the system and its timestamp.
the corresponding GDPR, unless it proves
When an onboard system update is
The recipients of the processed data are the
impossible or involves a disproportionate
being performed, the eCall (SOS)
emergency call handling centres designated
effort.
function is not available.
by the relevant national authorities in the
You also have the right to lodge a complaint
territory in which they are located, enabling
with the respective data protection
Data processing
priority routing and handling of calls to the
supervisory authority.
All processing of personal data by
"112" emergency number.
If you want to claim your above-mentioned
the eCall (SOS) function complies with
rights please contact us per email at:
the framework for protection of personal
Data storage
privacyrights@stellantis.com.
information established by Regulation
Data contained in the system’s memory
For more information regarding our contact
2016/679 (General Data Protection
is not accessible from outside the system until
details please take a look at our Privacy &
Regulation - GDPR) or by UK GDPR
a call is made. The system is not traceable
Cookies Policy on the brand's website.
(Data Protection, Privacy and Electronic
and is not continuously monitored in its
Communications) Regulations 2019 and
normal operating mode.
Directive 2002/58/EC of the European
The data in the system's internal memory is
Parliament and the Council, and in particular,
automatically and continuously erased. Only
seeks to protect the vital interests of the data
the vehicle’s three most recent locations,
70
Safety
ASSISTANCE
provided to customers, the Manufacturer
- Emergency braking assistance (EBA).
5
reserves the right to carry out updates to the
- Anti-slip regulation (ASR).
► If the vehicle breaks down, press button 2
vehicle's on-board telematics system at any
- Dynamic stability control (DSC).
for more than 2 seconds to request assistance
time.
- Trailer stability assist (TSA).
(confirmed by a voice message*).
► Pressing again immediately cancels the
Anti-lock braking system
request.
Vehicles equipped with PEUGEOT
i-Connect Advanced
(ABS)/Electronic brake force
Privacy mode allows you to manage the
During an update to the vehicle's on-board
level of sharing (data and/or location)
distribution (EBFD)
telematics system, the ASSISTANCE system
between your vehicle and PEUGEOT.
These systems enhance the vehicle’s stability
will be unavailable.
It can be configured in the Settings touch
and handling during braking, and enable greater
screen menu or application, depending on the
control while cornering, particularly on poor or
If you benefit from the Peugeot Connect
audio equipment.
slippery road surfaces.
Packs offer with the SOS and Assistance
By default, depending on equipment,
ABS prevents wheel locking in the event of
Pack included, there are additional services
deactivate/reactivate geolocation by
emergency braking.
available to you in your personal space, via
simultaneously pressing the 2 buttons, then
Electronic brake force distribution (EBFD)
the website for your country.
press the "ASSISTANCE" button to confirm.
manages overall braking pressure on each
For information about the SOS and
individual wheel.
Assistance Pack, please refer to the general
If you purchased your vehicle outside the
► When braking in an emergency, depress
conditions for these services.
PEUGEOT dealer network, you are
the pedal very firmly and maintain this
invited to have a dealer check the
pressure.
configuration of these services and, if desired,
Electronic stability control
Normal operation of the ABS may make
modify it as required. In a multilingual country,
itself felt by slight vibrations of the brake
services can be configured to use the official
(ESC)
pedal.
national language of your choice.
The electronic stability control programme
The fixed illumination of this warning lamp
includes the following systems:
For technical reasons and in particular to
signals that there is a fault with the ABS.
- Anti-lock braking system (ABS) and Electronic
improve the quality of telematics services
The vehicle retains conventional braking. Drive
brake force distribution (EBFD).
carefully at a moderate speed.
* Depending on the geographic coverage of the "eCall (SOS)" and "ASSISTANCE" systems and the official national language chosen by the owner of the
vehicle.
The list of countries covered and the telematic services provided is available from dealers or on the website for your country.
71
Safety
Have it checked by a PEUGEOT dealer or a
Anti-slip regulation (ASR)/
The ASR system is deactivated/
qualified workshop.
reactivated in the Driving touch screen
Dynamic stability control
This warning lamp, when lit together with
menu.
the STOP and ABS warning lamps,
(DSC)
With PEUGEOT Connect Radio / PEUGEOT
accompanied by a message and an audible
Anti-slip regulation (or traction control) optimises
Connect Nav
signal, indicates an EBFD malfunction.
traction by using engine braking and by applying
The ASR system is deactivated/
You must stop the vehicle.
the brakes on the driving wheels to avoid one
reactivated in the Driving/Vehicle touch
Stop as soon as it is safe to do so and switch off
or more wheels spinning. It also enhances the
screen menu.
the ignition.
vehicle's directional stability.
With PEUGEOT i-Connect Advanced -
Contact a PEUGEOT dealer or a qualified
If there is a difference between the vehicle’s
PEUGEOT i-Connect
workshop.
trajectory and the path desired by the driver, the
The ASR system is deactivated/
dynamic stability control system automatically
reactivated in the ADAS touch screen
When changing wheels (tyres and rims),
uses engine braking and the brakes on one or
application.
ensure that these are approved for your
more wheels to return the vehicle to the desired
Deactivation of the ASR system is
vehicle.
path, within the limits of the laws of physics.
indicated by this indicator lamp on the
These systems are activated automatically every
instrument panel coming on and the display of a
After an impact
time the vehicle is started.
message.
Have it checked by a PEUGEOT dealer
These systems are activated in the event
The ASR system is automatically reactivated
or a qualified workshop.
of a problem with grip or trajectory
every time the ignition is switched off or at
(confirmed by this warning lamp flashing on the
speeds over 31 mph (50 km/h)
Emergency braking
instrument panel).
Reactivation is manual below 31 mph (50 km/h).
assistance (EBA)
Deactivation/Reactivation
Malfunction
In an emergency, this system enables you
In the event of a malfunction, this warning
In exceptional conditions (e.g. moving a vehicle
to reach the optimum braking pressure more
lamp lights up on the instrument panel,
that is bogged down in mud, stuck in snow, on
quickly and therefore reduce the stopping
accompanied by the display of a message and
loose soil), it may prove useful to deactivate the
distance.
an audible signal.
ASR system, so that the wheels can move freely
It is triggered in relation to the speed at which
Have it checked by a PEUGEOT dealer or a
and regain grip.
the brake pedal is pressed. This is felt by a
qualified workshop.
Reactivate the system as soon as the level of
reduction in the resistance of the pedal and an
grip permits.
ASR/DSC
increase in braking efficiency.
With Touch screen 10" & Bluetooth Radio &
These systems enhance safety during
Telephone
normal driving, but should not encourage
72
Safety
the driver to take extra risks or drive at high
The electronic stability control system (ESC)
conditions of operation (e.g. excessive load,
5
speed.
must not have any faults.
exceeded nose weight, worn or under-inflated
It is in conditions of reduced grip (rain, snow,
The vehicle speed must be between 37 and 99
tyres, faulty braking system) or driving at
ice) that the risk of loss of grip increases. It
mph (60 and 160 km/h).
excessive speed.
is therefore important for your safety to keep
If the system detects that the trailer is
In certain cases, the system may not detect
these systems activated in all conditions, and
snaking, it applies the brakes to stabilise
trailer snaking, particularly with a light trailer.
particularly in difficult conditions.
the trailer and reduces engine power, if
When driving on slippery or poor surfaces, the
Correct operation of these systems depends
necessary, to slow the vehicle (indicated by the
system may not be able to prevent sudden
on compliance with the manufacturer's
flashing of this warning lamp on the instrument
trailer snaking.
recommendations relating to the wheels
panel and the brake lamps coming on).
(tyres and rims), braking and electronic
For more information on weights and towed
components, as well as the assembly and
loads, refer to the Engine technical data
Seat belts
repair procedures provided by PEUGEOT
and towed loads section or your vehicle’s
Inertia reel
dealers.
registration certificate.
The seat belts are equipped with an inertia
In order to ensure that these systems remain
To ensure safe driving with a Towing device,
reel which allows the strap length to adjust
effective in wintry conditions, the use of snow
refer to the corresponding section.
automatically to the shape of the user. The seat
or all-season tyres is recommended. All four
Malfunction
belt returns to its storage automatically when it
wheels must be fitted with tyres approved for
is not used.
your vehicle.
If a fault occurs, this warning lamp lights
The inertia reels are fitted with a device which
All tyre specifications are listed on the
up on the instrument panel, accompanied
automatically locks the strap in the event of a
tyre/paint label. For more information
by a message and an audible signal.
collision, emergency braking or if the vehicle rolls
on Identification markings, refer to the
To continue towing a trailer, reduce speed and
over. It can be released by pulling the strap firmly
corresponding section.
drive carefully!
and then releasing it so that it reels in slightly.
Have it checked by a PEUGEOT dealer or a
Pyrotechnic pretensioning
qualified workshop.
Trailer stability assist (TSA)
This system improves safety in the event of a
The trailer stability control system
frontal or side impact.
When towing, this system reduces the risk of the
provides an extra safety feature under
Depending on the severity of the impact, the
vehicle or trailer snaking.
normal driving conditions, when following the
pyrotechnic pretensioning system instantly
Operation
recommendations for use of trailers and
tightens the seat belts against the body of the
current legislation in force in your country. It
occupants.
The system is activated automatically when the
must not encourage the driver to take extra
The pyrotechnic pretensioning seat belts are
ignition is switched on.
risks, such as using a trailer in unsuitable
enabled when the ignition is on.
73
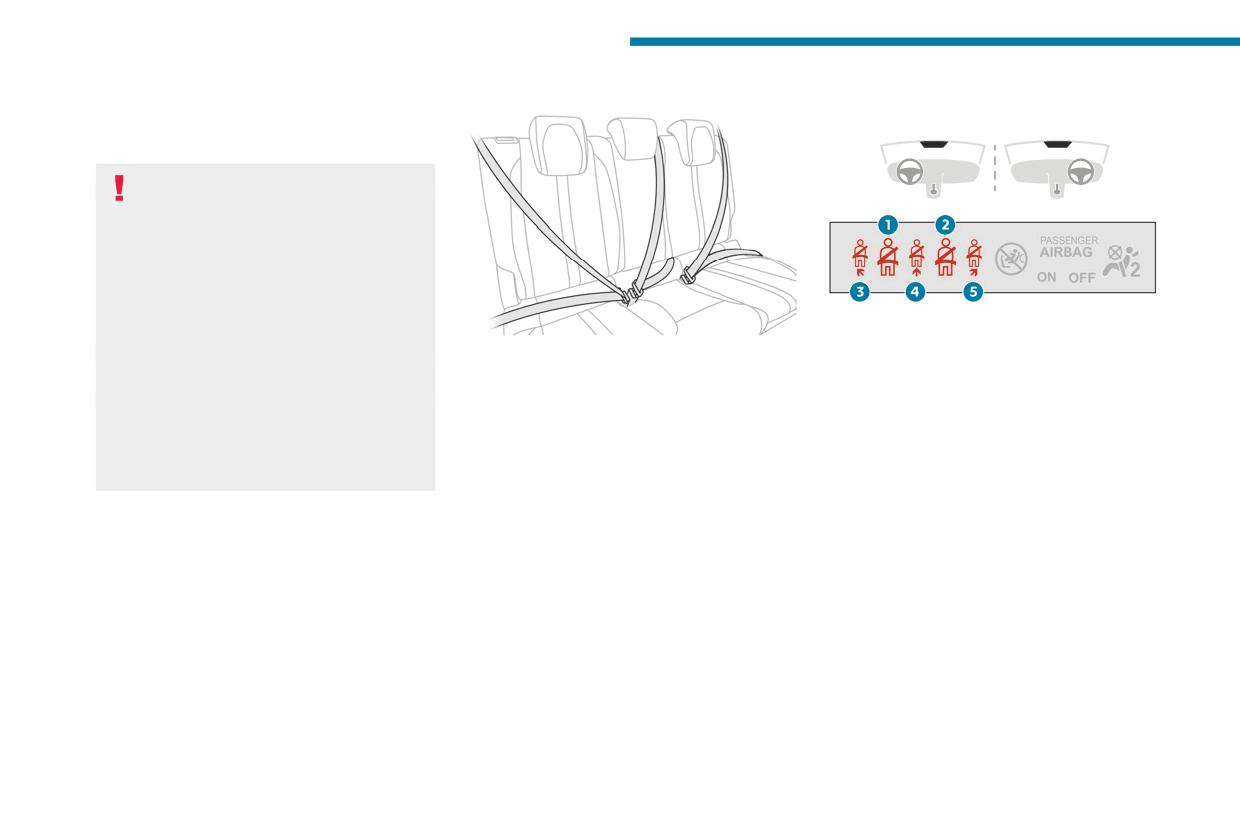
Safety
Force limiting system
Rear seat belts
Seat belt not fastened/
This system reduces the pressure of the seat
unfastened alerts
belt on the chest of the occupant, thus improving
their protection.
In the event of an impact
Depending on the nature and
seriousness of the impacts, the pyrotechnic
device may trigger before and independently
of airbag deployment. Deployment of the
pretensioners is accompanied by a slight
discharge of harmless smoke and a noise,
due to the activation of the pyrotechnic
1. Front left seat belt warning lamp
cartridge incorporated in the system.
2. Front right seat belt warning lamp
Each of the rear seats has a three-point seat belt
In all cases, the airbag warning lamp comes
3. Rear left seat belt warning lamp
with inertia reel.
on.
4. Rear centre seat belt warning lamp
The outer seats are fitted, depending on the
Following an impact, have the seat belt
5. Rear right seat belt warning lamp
version, with a pyrotechnic pretensioning and
system checked, and if necessary replaced,
force limiting system.
Not fastened at the front
by a PEUGEOT dealer or a qualified
workshop.
When the ignition is switched on, the warning
Fastening
lamp and the corresponding indicator lamps light
► Pull the strap, then insert the tongue into the
up if the driver and/or the front passenger have
Front seat belts
buckle.
not fastened their seat belts.
► Check that the seat belt is fastened correctly
The front seat belts are fitted with a pyrotechnic
At a speed greater than 12 mph (20 km/h),
by pulling on the strap.
pretensioning system, depending on version,
these warning lamps flash, accompanied by an
and a force limiting system.
increasing audible signal for approximately two
Unfastening
minutes. After two minutes, these warning lamps
► Press the red button on the buckle.
remain on as long as the front seatbelts are not
► Guide the seat belt as it is reeled in.
fastened.
Not fastened at the rear
When the ignition is switched on and with the
engine running or the vehicle moving at a speed
below 12 mph (20 km/h), the warning lamp and
74
Safety
the corresponding indicator lamps light up for
Installation
the skills and equipment needed, which a
5
1 minute, if one or more rear seat belts are not
The lower part of the strap must be
PEUGEOT dealer is able to provide.
fastened.
positioned as low as possible over the pelvis.
Have the seat belts checked regularly by a
The upper part must be positioned in the
PEUGEOT dealer or a qualified workshop,
Unfastened
hollow of the shoulder.
particularly if the straps show signs of
After the ignition is switched on, the warning
At the front, adjusting the position of the
damage.
lamp and the corresponding indicator lamps light
seat belt may require the seat height to be
Clean the seat belt straps with soapy water or
up if the driver and/or one or more passengers
adjusted.
a textile cleaning product, sold by PEUGEOT
unfasten their seat belts.
In order to be effective, a seat belt must:
dealers.
At a speed greater than 12 mph (20 km/h), these
- be tightened as close to the body as
warning lamps flash, accompanied by an audible
possible.
signal for approximately two minutes. After this
- be pulled in front of you with a smooth
Airbags
time, these warning lamps remain on as long as
movement, checking that it is not twisted.
the seatbelts are not refastened.
- only be used to secure one person.
General information
- not show signs of tearing or fraying.
Advice
This system is designed to improve the safety
- not be changed or modified, in order to
of the occupants of the front seats and the rear
The driver must ensure that passengers
avoid affecting its performance.
outer seats in the event of a violent collision. The
use the seat belts correctly and that they
airbags supplement the action of the seat belts
are all fastened before setting off.
Recommendations for children
equipped with a force limiting system.
Wherever seated in the vehicle, you must
Use a suitable child seat if the passenger
Electronic detectors record and analyse the
always fasten the seat belt, even for short
is less than 12 years old or shorter than 1.5
front and side impacts sustained in the impact
journeys.
metres.
detection zones:
Do not invert the seat belt buckles, as they
Never use the same seat belt to secure more
- In the event of violent impact, the airbags
will not fulfil their role properly.
than one child.
deploy instantly and help better protect the
To ensure the proper functioning of the belt
Never carry a child on your lap.
occupants of the vehicle; immediately after the
buckles, make sure that there are no foreign
For more information on Child seats, refer to
impact, the airbags deflate rapidly in order not
bodies present (e.g. a coin) before fastening.
the corresponding section.
to hinder the visibility or the possible exit of the
Before and after use, ensure that the seat belt
occupants.
is reeled in correctly.
Maintenance
- In the event of a slight impact, a rear impact
After folding or moving a seat or rear bench
In accordance with current safety
and under certain rollover conditions, the airbags
seat, ensure that the seat belt is positioned
regulations, for all work on your vehicle's
may not deploy; only the seat belt helps to
and reeled in correctly.
seat belts, contact a qualified workshop with
protect you in these situations.
75
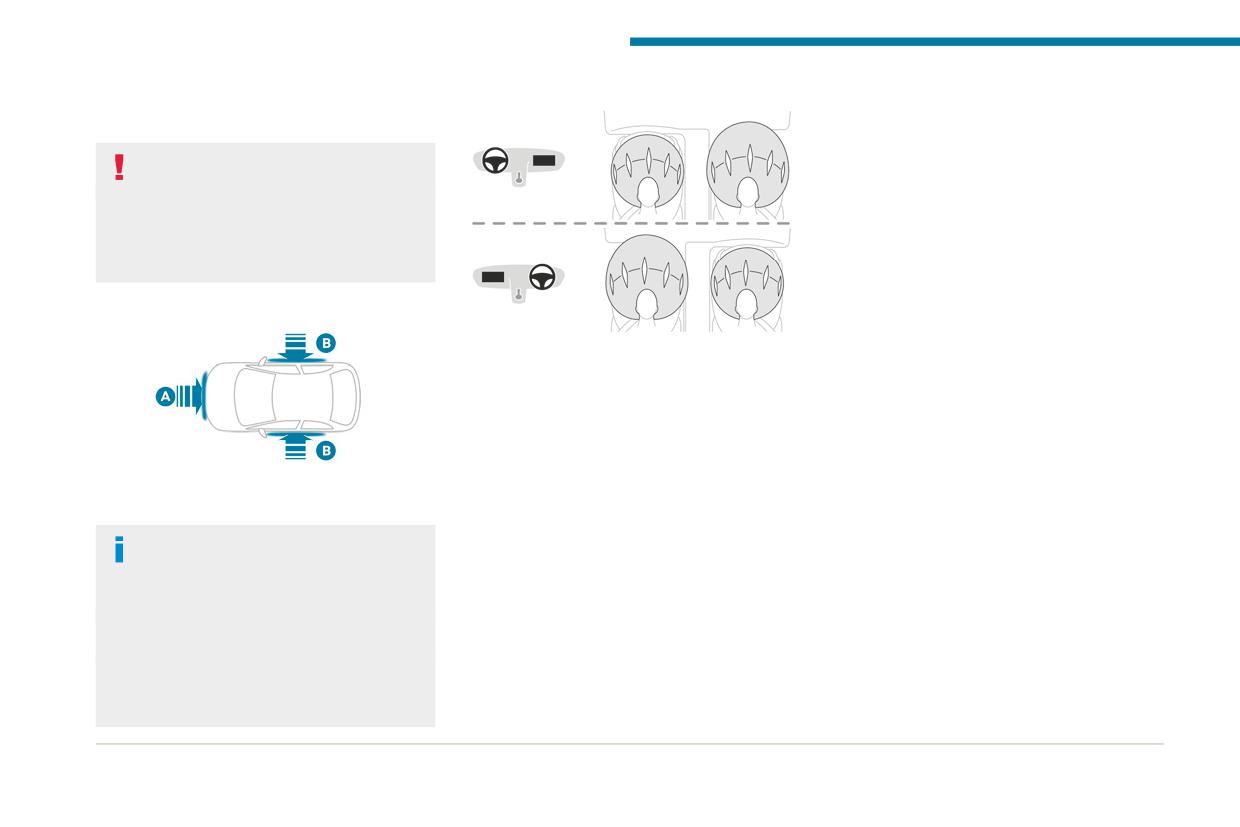
Safety
The seriousness of the impact depends on the
Front airbags
Lateral airbags
nature of the obstacle and the speed of the
This system protects the driver and front
vehicle at the moment of collision.
passenger in the event of a serious side impact,
The airbags do not operate when the
limiting the risk of injury to the chest, between
ignition is switched off.
the hip and the shoulder.
This equipment will only deploy once. If a
Each lateral airbag is fitted in the seat backrest
second impact occurs (during the same or a
frame, on the door side.
subsequent accident), the airbag will not be
Deployment
deployed again.
The lateral airbags are deployed on one side in
the event of a serious side impact applied to all
Impact detection zones
or part of the side impact zone B.
The lateral airbag inflates between the chest of
This system protects the driver and front
the vehicle's occupant and the corresponding
passenger in the event of a serious front impact,
door panel.
limiting the risk of head and chest injury.
The driver's airbag is fitted in the centre of the
Curtain airbags
steering wheel; the front passenger airbag is
This system helps provide greater protection for
fitted in the dashboard above the glove box.
the driver and passengers (with the exception
A. Front impact zone
Deployment
of the rear centre passenger) in the event of a
B. Side impact zone
serious side impact, in order to limit the risk of
They are deployed, except for the front
injury to the side of the head.
When one or more airbags are deployed,
passenger airbag if it is deactivated*, in the
Each curtain airbag is built into the pillars and
the detonation of the pyrotechnic charge
event of a violent front impact applied to all or
the upper passenger compartment area.
incorporated in the system makes a noise and
part of front impact zone A.
releases a small quantity of smoke.
The front airbag inflates between the chest and
Deployment
This smoke is not harmful, but sensitive
head of the front occupant of the vehicle and
It deploys simultaneously with the corresponding
individuals may experience irritation.
the steering wheel, on the driver's side, and the
lateral airbag in the event of a serious side
The detonation noise associated with the
dashboard, on the passenger's side, to cushion
impact applied to all or part of the side impact
deployment of one or more airbags may result
their forward movement.
zone B.
in a slight loss of hearing for a short time.
* For more information on Deactivating the front passenger airbag, refer to the corresponding section.
76
Safety
The curtain airbag inflates between the front
Even if all of the precautions mentioned are
covers suitable for your vehicle, contact a
5
and rear occupants of the vehicle and the
observed, a risk of injury or of minor burns to
PEUGEOT dealer.
corresponding windows.
the head, chest or arms cannot be ruled out
Do not fix or attach anything to the seat
when an airbag is deployed. The bag inflates
backrests (e.g. clothing) as this could cause
Malfunction
almost instantly (within a few milliseconds)
injuries to the chest or arm when the airbag is
In the event of a malfunction, this warning
then deflates within the same time,
deployed.
lamp lights up on the instrument panel.
discharging the hot gas via openings provided
Do not sit with the upper part of the body any
Contact a PEUGEOT dealer or a qualified
for this purpose.
nearer to the door than necessary.
workshop to have the system checked.
After an accident or if the vehicle has been
The vehicle's front door panels include side
The airbags may not be deployed in the event of
stolen, have the airbag systems checked.
impact sensors.
a serious impact.
All work must be carried out only by a
A damaged door or any unauthorised or
PEUGEOT dealer or a qualified workshop.
incorrectly executed work (modification or
In the event of a minor impact or bump at
repair) on the front doors or their interior trim
the side of the vehicle or if the vehicle
Front airbags
could compromise the operation of these
rolls over, the airbags may not be deployed.
Do not drive holding the steering wheel
sensors - risk of malfunction of the lateral
In the event of a rear or front collision, none of
by its spokes or resting your hands on the
airbags!
the lateral airbags are deployed.
centre part of the wheel.
All work must be carried out only by a
Passengers must not place their feet on the
PEUGEOT dealer or a qualified workshop.
Advice
dashboard.
Do not smoke as deployment of the airbags
Curtain airbags
For the airbags to be fully effective,
can cause burns or the risk of injury from a
Do not fix or attach anything to the roof,
observe the safety recommendations
cigarette or pipe.
as this could cause head injuries when the
below.
Never remove or pierce the steering wheel or
curtain airbag is deployed.
Adopt a normal and upright sitting position.
hit it violently.
Do not remove the grab handles installed on
Fasten your seat belt and position it correctly.
Do not fix or attach anything to the steering
the roof, as these help to secure the curtain
Do not place anything between the occupants
wheel or dashboard, as this could cause
airbags.
and the airbags (e.g. child, animal, object), do
injuries when the airbags are deployed.
not fix or attach anything near or in the path of
the airbags, as this could cause injuries when
Lateral airbags
Child seats
they are deployed.
Use only approved seat covers
Never modify the original definition of the
compatible with the deployment of these
The regulations on carrying children are
vehicle, particularly in the area directly around
airbags. For information on the range of seat
specific to each country. Refer to the
the airbags.
legislation in force in your country.
77
Safety
For maximum safety, please observe the
1.5 metres tall must travel in approved child
correctly on the child seat and that it secures
following recommendations:
seats suited to their size or weight, on seats
the child seat firmly on the vehicle seat. If
- In accordance with European regulations,
fitted with a seat belt or ISOFIX mountings.
the passenger seat is adjustable, move it
all children under the age of 12 or less than
- Statistically, the safest seats in your
forwards if necessary.
1,5 metres tall must travel in approved child
vehicle for carrying children are the rear
Remove the head restraint before
seats suited to their weight, on seats fitted with
seats.
installing a child seat with a backrest on a
a seat belt or ISOFIX mountings.
- Children ageing less than 15 months must
passenger seat.
- Statistically, the safest seats in your
travel in the "rearward facing" position,
Ensure that the head restraint is stored or
vehicle for carrying children are the rear
whether in the front or rear of the vehicle.
attached securely to prevent it from being
seats.
thrown around the vehicle in the event of
It is recommended that children travel
- Children weighing less than 9 kg must
sharp braking. Refit the head restraint once
on the rear seats of the vehicle:
travel in the "rearward facing" position,
the child seat has been removed.
- "rearward facing" up to the age of 3.
whether in the front or rear of the vehicle.
- "forward facing" over the age of 3.
Installing a booster seat
It is recommended that children travel
The chest part of the seat belt must be
on the rear seats of the vehicle:
Make sure that the seat belt is correctly
positioned on the child's shoulder without
- ‘rearward facing’ up to the age of 3,
positioned and tightened.
touching the neck.
- ‘forward facing’ over the age of 3.
For child seats with a support leg, ensure that
Ensure that the lap part of the seat belt
the support leg is in firm and steady contact
passes correctly over the child's thighs.
Make sure that the seat belt is correctly
with the floor.
Use a booster seat with a backrest, equipped
positioned and tightened.
with a belt guide at shoulder level.
For child seats with a support leg, ensure that
An incorrectly installed child seat in a
the support leg is in firm and steady contact
vehicle compromises the child's safety in
Additional protections
with the floor.
the event of an accident.
To prevent accidental opening of the
Ensure that there is no seat belt or seat belt
doors and rear windows, use the "Child lock".
The regulations on carrying children are
buckle under the child seat, as this could
Take care not to open the rear windows by
specific to each country. Refer to the
destabilise it.
more than one third.
legislation in force in your country.
Remember to fasten the seat belts or the
To protect young children from the sun's rays,
child seat harness keeping the slack relative
For maximum safety, please observe the
fit side blinds on the rear windows.
to the child's body to a minimum, even for
following recommendations:
As a safety measure, do not leave:
short journeys.
- In accordance with European regulations,
- A child alone and unsupervised inside a
When installing a child seat using the seat
all children under the age of 12 or less than
vehicle.
belt, ensure that the seat belt is tightened
78
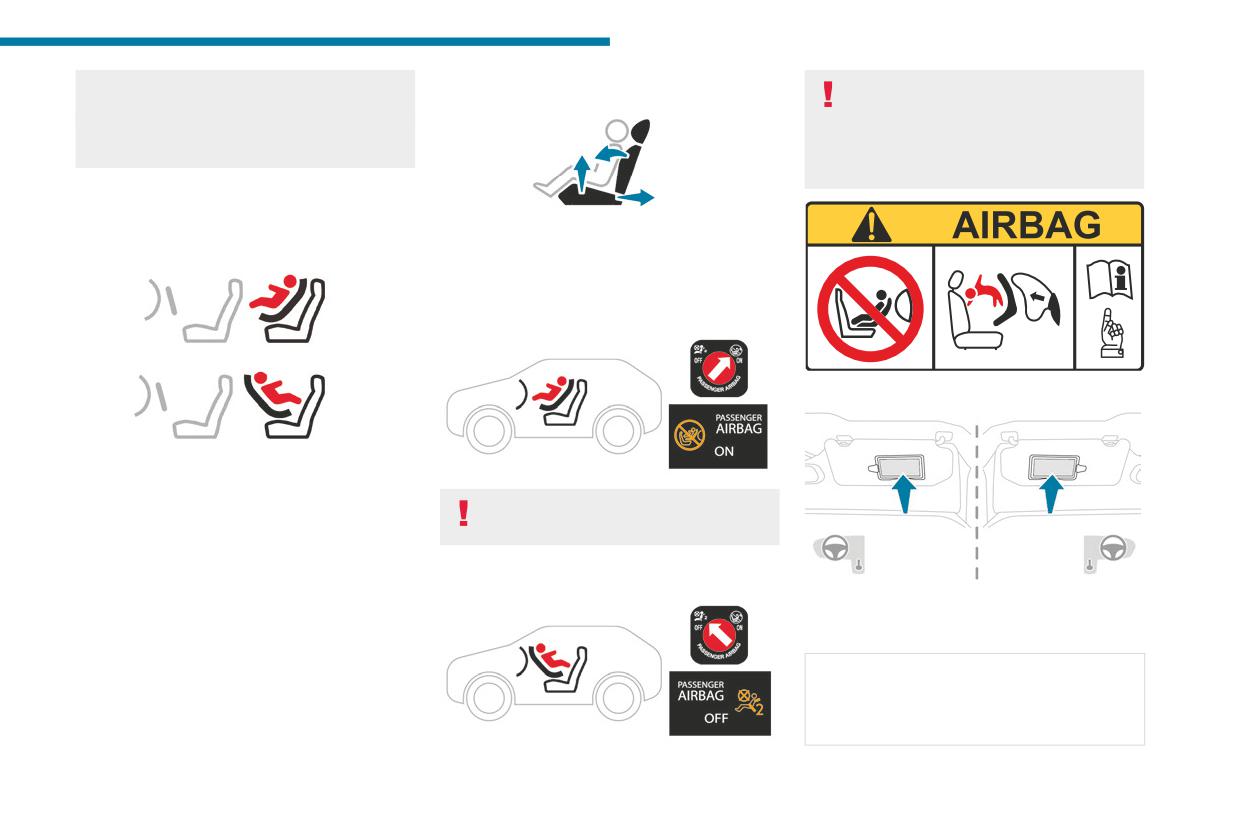
Safety
- A child or an animal in a vehicle which is
Child seat at the front
The front passenger airbag must be
5
exposed to the sun, with the windows closed.
deactivated before installing a rearward
- The keys within reach of children inside the
facing child seat. Otherwise, the child risks
vehicle.
being seriously injured or killed if the
airbag is deployed.
Child seat at the rear
► Adjust the front passenger seat to the
Forward-facing or rearward-facing
highest and fully back longitudinal position,
with the backrest straightened.
"Forward facing"
Warning label - Front passenger airbag
► Move the vehicle's front seat forward and
straighten the backrest so that the legs of the
child in the forward-facing or rearward-facing
You must leave the front passenger
child seat itself do not touch the vehicle's front
airbag active.
seat.
► Check that the backrest of the forward-facing
"Rearward facing"
child seat is as close as possible to the backrest
You must comply with the following instruction,
of the vehicle's rear seat, and ideally in contact
as reminded by the warning label on both sides
with it.
of the passenger sun visor:
Centre rear seat
NEVER use a rearward facing child restraint
A child seat with a support leg must never be
on a seat protected by an ACTIVE AIRBAG in
installed on the centre rear passenger seat.
front of it, DEATH or SERIOUS INJURY to the
CHILD can occur.
79
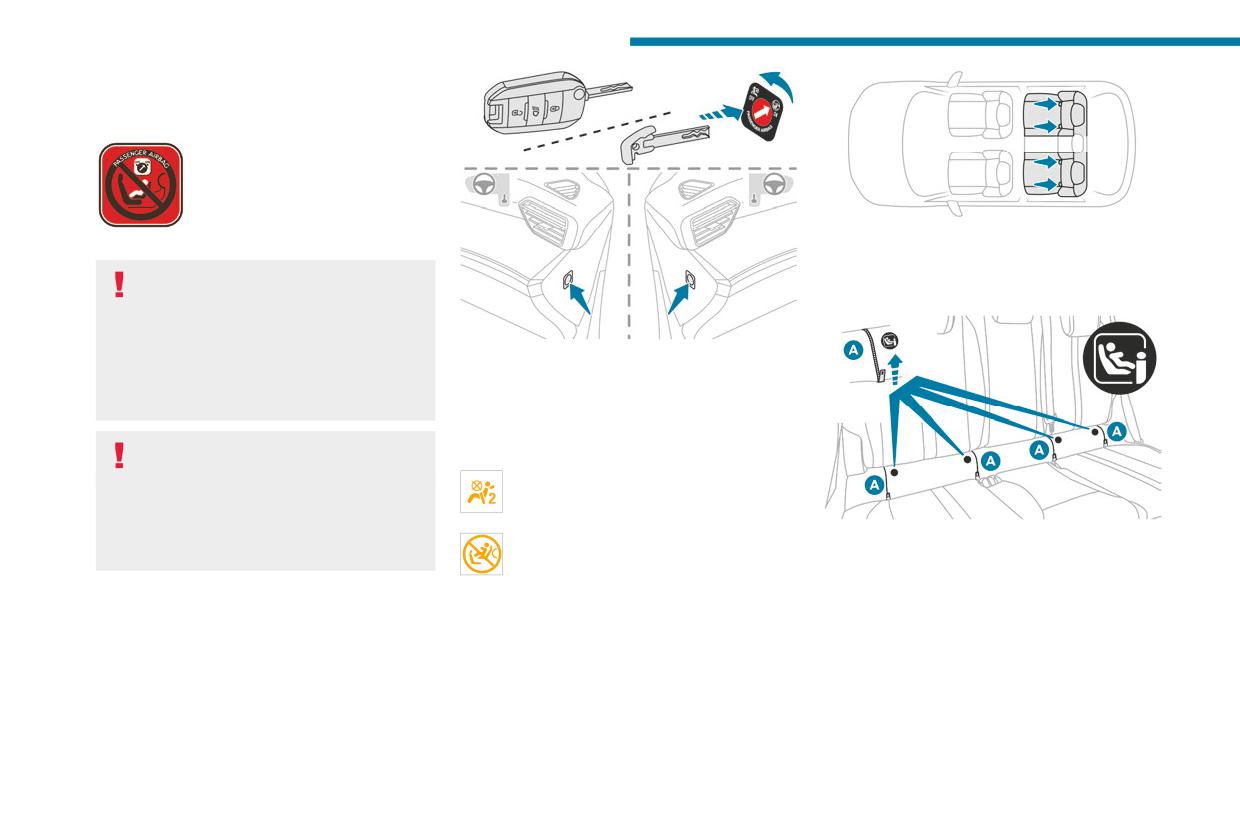
Safety
Deactivating the front
passenger airbag
The mountings comprise three rings for each
Passenger airbag OFF
seat, indicated by a marking:
To ensure the safety of the child, the front
- Two rings A, located between the vehicle seat
passenger airbag MUST be deactivated
backrest and cushion.
when a "rearward facing" child seat is
installed on the front passenger seat.
With the ignition off:
Otherwise, the child risks being seriously
► To deactivate the airbag, turn the key in the
injured or killed in the event of deployment of
switch to the "OFF" position.
the airbag.
► To reactivate it, turn the key to the "ON"
position.
Vehicles not equipped with a
When the ignition is switched on:
deactivation/reactivation control
This warning lamp comes on and remains
Installing a "rearward facing" child seat on
lit to signal deactivation.
the front passenger seat is strictly prohibited
Or
- risk of death or serious injury in the event of
The 2 latches on ISOFIX child seats are
This warning lamp comes on for about
airbag deployment!
secured to them.
1 minute to signal activation.
- One ring B, located behind the seat, called the
TOP TETHER, for attaching seats fitted with an
Deactivating/Reactivating the front
"ISOFIX" mountings
upper strap.
passenger airbag
The seats shown below are fitted with ISOFIX
For vehicles on which it is fitted, the switch is
compliant mountings:
located on the side of the dashboard.
80
//////////////////////////////////////////