Peugeot Traveller (2016 year). Instruction - part 18
271
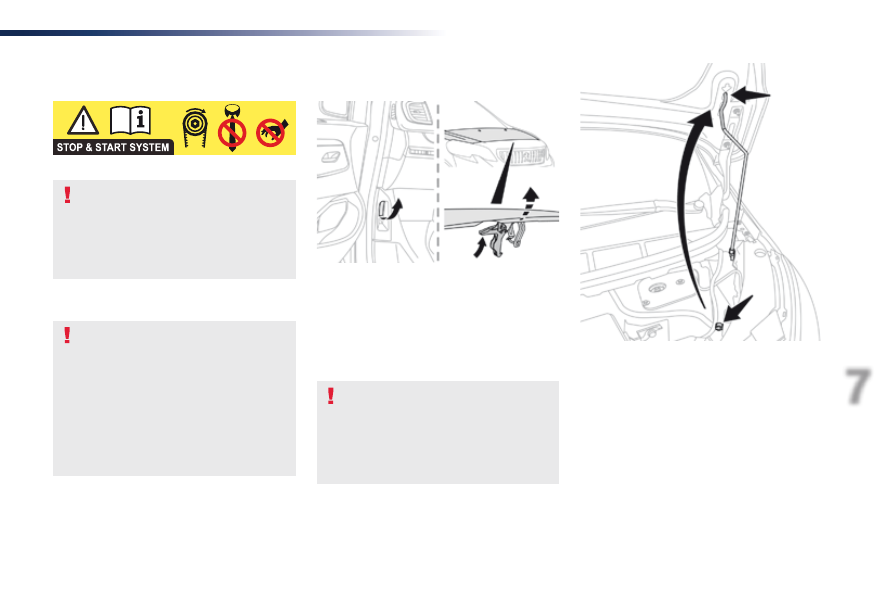
7
Practical information
Traveller-VP_en_Chap07_info-pratiques_ed01-2016
Bonnet
Opening
Closing
F Take the stay out of its support slot.
F Clip the stay back into its housing.
F Lower the bonnet and release it at the end
of its travel.
F Pull on the bonnet to check that it has
latched correctly.
F unclip the stay from its housing and place
it in the support slot to hold the bonnet
open.
Do not open the bonnet under very
windy conditions.
When the engine is hot, handle the
exterior safety catch and the stay with
care (risk of burns).
To avoid damaging electrical units,
it is strictly forbidden to use a high
pressure jet wash under the bonnet.
The cooling fan may start after
switching off the engine: take care
with articles and clothing that might
be caught by the fan blades.
F Lift the safety catch, then raise the bonnet.
F open the door.
F Pull the release lever, located at the bottom
of the door aperture, towards you.
Before doing anything under the
bonnet, deactivate the Stop & Start
system to avoid any risk of injury
resulting from an automatic change to
START mode.