Peugeot 508 Hybrid Dag (2012.5). Instruction - part 13
8
191
Practical information
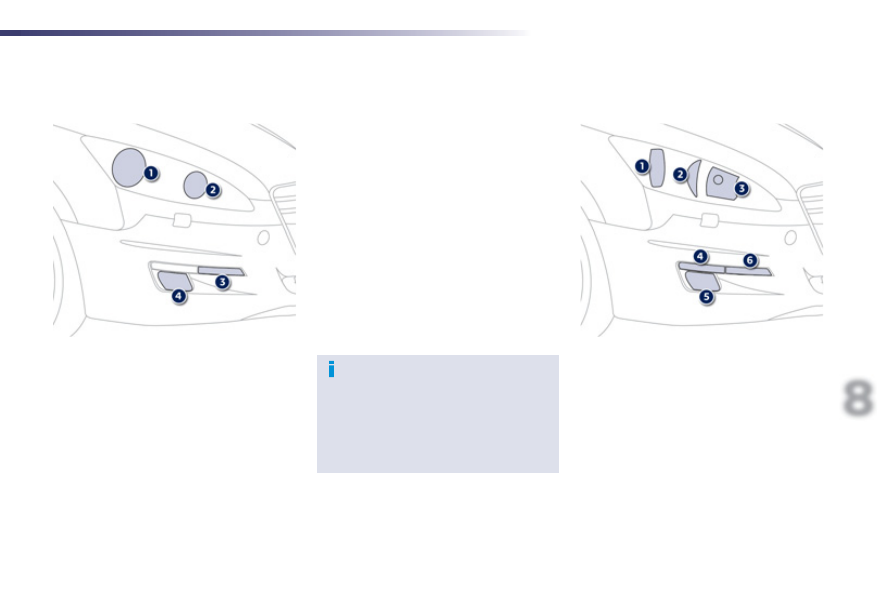
Changing a bulb
Front lamps
Model with xenon and directional
headlamps
1. Daytime running lamps / sidelamps
(light emitting diodes - LEDs).
2. Directional dipped / main beam
headlamps (D1S-35W).
3. Direction indicators (PY21-21W).
4. Foglamps (directional according to
version) (H8).
Model with halogen headlamps
1. Dipped and main beam headlamps
(H7-55W).
2. Sidelamps (W5-5W).
3. Main beam headlamps (H7-55W).
4. Daytime running lamps (SP13-13W).
5. Foglamps (directional according to
version) (H8).
6. Direction indicators (PY21-21W).
For H7 type bulbs with lugs... take care to
observe their correct installation so as to
ensure the best lighting performance.
In some weather conditions (e.g. low
temperature or humidity), the presence
of misting on the internal surface of the
glass of the headlamps and rear lamps
is normal; it disappears after the lamps
have been on for a few minutes.