Peugeot 407 C (2010.5). Instruction - part 9
10
10
115
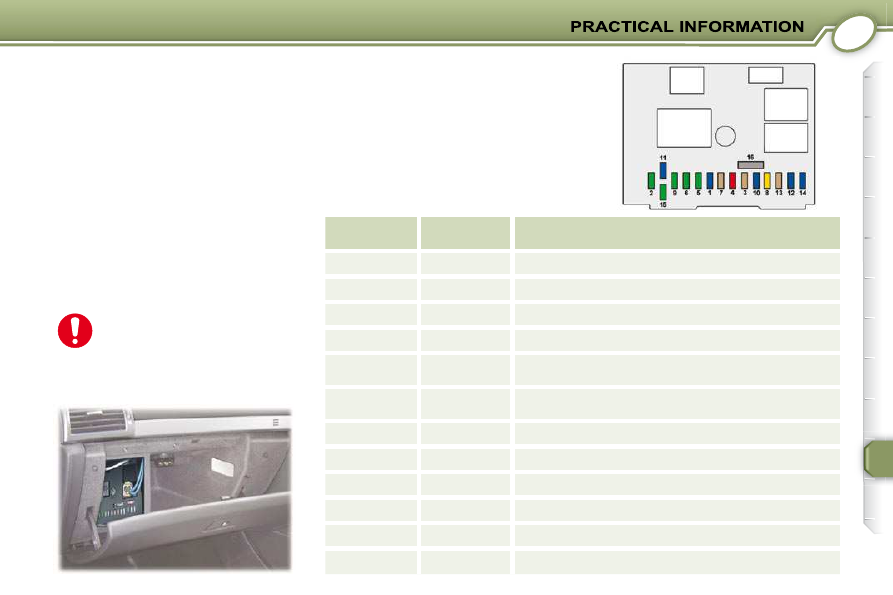
CHANGING A FUSE
The fuseboxes are placed in the glove
box (passenger side), in the engine
compartment (left-hand side) and in
the left boot trim.
Dashboard fuses
To access the fuses, open the glove
box and tilt the fusebox lid.
Replacing a fuse
Before replacing a fuse, the cause of
the fault must be found and rectifi ed.
The fuse numbers are indicated on the
fusebox.
Always replace a faulty fuse
with a fuse of the same rating
(same colour).
Use the special tweezer located on
the support next to the fusebox; this
support also contains the replacement
fuses.
Fuse N°
Rating
A
Functions
G29
-
Not used.
G30
5
Heated rear screen.
G31
5
Tyre under-infl ation detection.
G32
-
Not used.
G33
5
Power steering electropump unit,
dual-function brake switch.
G34
5
Dual-function brake switch,
automatic gearbox relay.
G35
5
Steering wheel angle sensor and ESP gyroscope sensor.
G36
25
Hi-Fi amplifi er.
G37
15
Automatic gearbox.
G38
20
Heated seats.
G39
30
Passenger seat memory unit.
G40
30
Driver’s seat memory unit.