Peugeot 407 C (2010.5). Instruction - part 3
2
34
Choice of language
German, Spanish, French, English,
Italian, Dutch, Turkish, Portuguese
and Brazilian Portuguese.
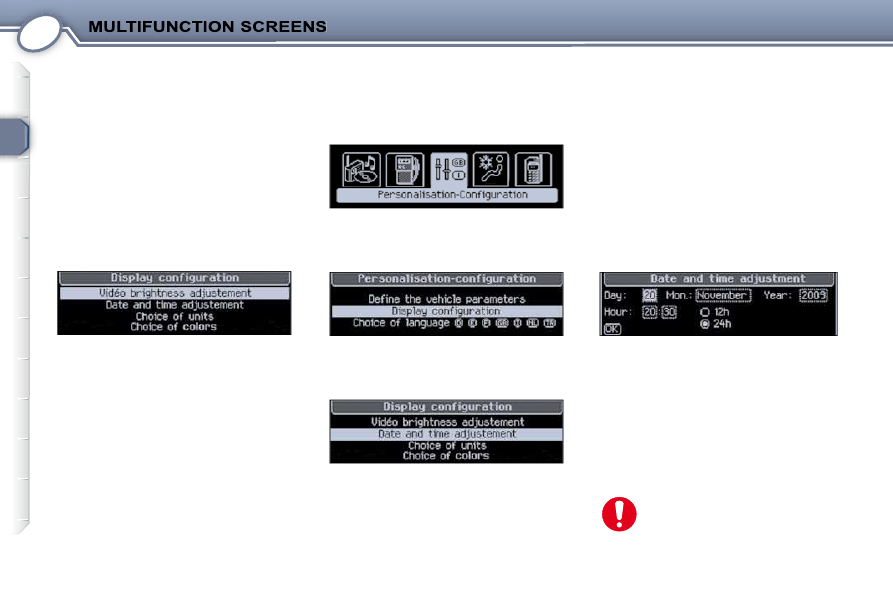
Display confi guration
- "Video brightness adjustment".
- "Date and time adjustment".
- "Choice of units".
- "Choice of colors".
Setting the date and time
From the main menu , select the
"Personalisation-Configuration"
icon using the navigator, then confi rm.
From the list displayed, select " Display
confi guration " , then confi rm.
From the list displayed, select " Date
and time and adjustment "
, then con-
fi rm.
Adjust the settings one by one:
- the zone selected is displayed on
the screen,
- use the navigator to move from
one zone to another,
- your new settings are confi rmed
one by one, by pressing the navi-
gator button,
- all of the changes are saved, if you
click on "OK"
on the screen, or
cancelled, if you press the "ESC"
button on the control panel.
For safety reasons, confi gu-
ration of the multifunction
screen by the driver must only
be done while stationary.