Peugeot 407 C Dag (2008 year). Instruction - part 6
4
73
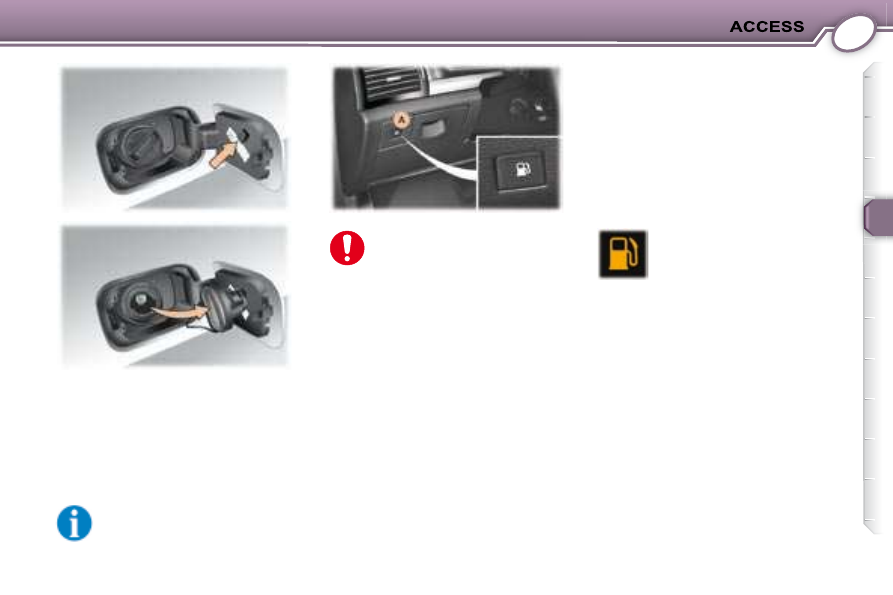
FILLING WITH FUEL
The fuel fi ller fl ap is electric, you can
only open it by pressing button A .
Button A is deactivated auto-
matically from 6 mph (10 km/h).
When fi lling with fuel, the
engine must be switched off
with the ignition off:
Operating fault
A fuel gauge fault is indicated by the
fuel level indicator needle returning to
zero.
Consult a PEUGEOT dealer.
Fuel warning
Turn the cap to the left.
Remove the cap and hang the end
on the hook located on the inside
of the fl ap.
A label affi xed to the inside of the fuel
fi ller fl ap indicates which type of fuel
to use.
When you fi ll your tank, do not con-
tinue after the third cut-off of the pump.
This could cause your vehicle to mal-
function.
The capacity of the tank is approxi-
mately 67 litres.
After fi lling the tank, screw on the
cap and close the fuel fi ller fl ap.
Ensure that the fuel fi ller fl ap is
closed correctly.
When
this
warning
light
comes on in certain driving
conditions and depending
on the engine, the distance
which can be travelled with
the fuel remaining may be
less than 30 miles (50 kilometres).
Note: should you run out of fuel, you
must add at least 6 litres.