Peugeot 406 Break Dag (2003 year). Instruction - part 3

133
YOUR 406 IN DETAIL
Seat belt not fastened
warning light
With the engine running, the
indicator light comes on
when the driver's seat belt is
not fastened.
Door open warning
light
Coolant temperature indicator
When the engine is running,
the warning light indicates
When the needle is in zone A, the
that a door has not been
temperature is correct.
closed properly or that the
When the needle is in zone B, the
boot is open.
temperature is too high. The central
(STOP) warning light flashes.
Electronic immobiliser
You must stop immediately.
warning light
Contact a PEUGEOT dealer.
This indicates a malfunction
of the electronic immobiliser.
Contact a PEUGEOT dealer.
Low fuel level
warning light
When this warning light
comes on, you have
enough fuel to drive at least 30 miles
(50 km). The tank capacity is approx-
imately 70 litres (15.4 gallons).
17-02-2003
167
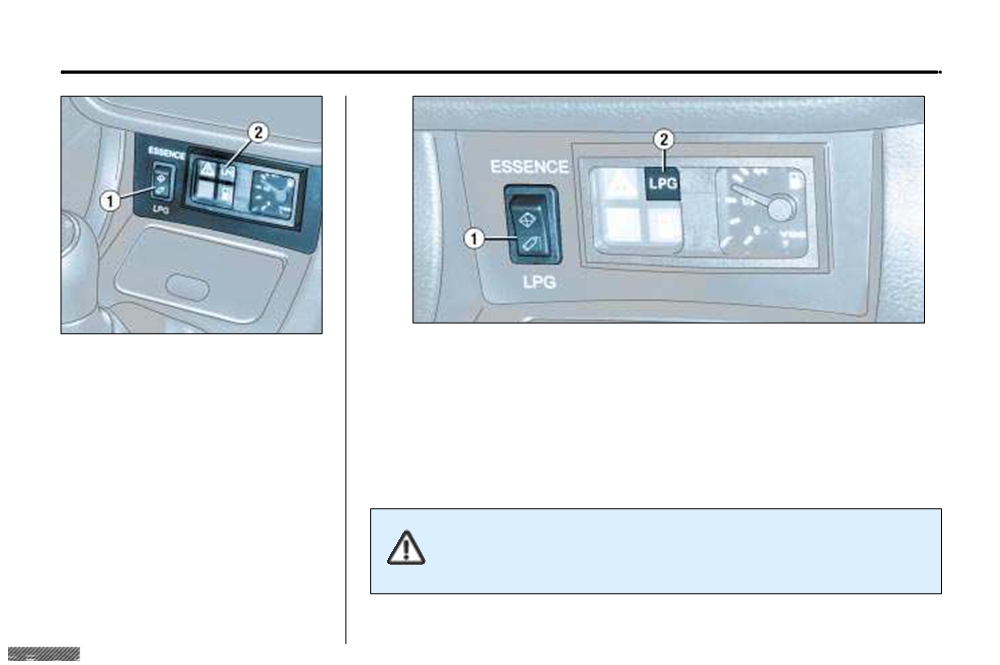
PETROL/LPG TWIN FUEL VERSION
Starting
Operation
Irrespective of the position of switch 1, the engine starts using petrol.
The twin fuel system allows petrol or
The switch to operation using LPG will take place if switch 1 is in the LPG
liquid petroleum gas
(LPG) to be
position. The LPG indicator light flashes until the engine reaches an adequate
used indifferently.
temperature.
Press switch 1 in the centre of the
The switch from one fuel to the other is displayed by the switching on/switching
centre console.
off of indicator light 2.
Different statuses of indicator light 2:
When the minimum LPG level is reached, while driving, this is indicated by flashing
- flashing; request for operation
of switch 2; the system then switches to operation using petrol automaitcally.
using LPG,
- fixed; operating using LPG,
- off; operating using petrol.
If switch 2 flashes rapidly, move switch 1 to the petrol position, then
return to LPG mode.
If switch 2 still flashes rapidly, consult a PEUGEOT dealer.
It is advisable to drive in petrol mode from time to time to keep the petrol
injection system in good condition.
17-02-2003

134
YOUR 406 IN DETAIL
Lighting
Instrument panel display
rheostat
After switching on the ignition, three functions are shown in succession:
- engine oil level indicator,
With the lights on, press the button to
- service indicator,
vary the intensity of the lighting of the
- total distance recorder.
instruments and controls. When the
lighting reaches the minimum
(or
maximum) setting, release the but-
ton then press it again to increase (or
reduce) the brightness.
Engine oil level
As soon as the lighting is of the
When the ignition is switched on, the engine oil level indicator is displayed
required brightness, release the
for approximately five seconds, then the service indicator is displayed for
button.
five seconds.
Maximum
Use the dipstick to confirm the level on the indicator; a surplus of
oil can cause damage to the engine.
Contact a PEUGEOT dealer as soon as possible.
Trip recorder
Minimum
zero reset
Check the level with the dipstick and top it up. The indication is
only correct if the vehicle has been on stable, level ground, with
the engine stopped, for 10 minutes.
With the ignition on, press the button.
No oil
It is essential to top up the oil to the correct level, otherwise there
is a risk engine will be damaged.
17-02-2003

137
YOUR 406 IN DETAIL
Display B
This enables the following information to be displayed:
- the time,
- the date,
- the outside temperature (the °C symbol flashes when there is a risk of ice),
- the radio displays,
- the status of the doors. The display shows you whether a door, the boot or the
bonnet is open and if the fuel filler cap is missing.
- the warning messages (e.g. ''battery low'') or information messages (e.g. "top
up fuel tank''), displayed temporarily, can be cleared by pressing button 1 or 2
- the trip computer.
Setting the parameters
Press button 1 for two seconds to access the settings. The information flashes to
show it is ready to be modified.
Then, individual presses on button 1 allow you to scroll through the various data
in the following sequence:
- language in which the information is displayed,
- unit of distance (kms or miles),
- unit of temperature (Celsius or Fahrenheit),
- time format (12 then 24 hour mode)
- hour,
- minutes,
- year,
- month,
- day.
Pressing button 2 allows you to change the information selected. Maintain the
pressure for rapid scrolling.
After ten seconds without action, the display returns to the main screen and the
modified data are recorded.
17-02-2003
138
YOUR 406 IN DETAIL
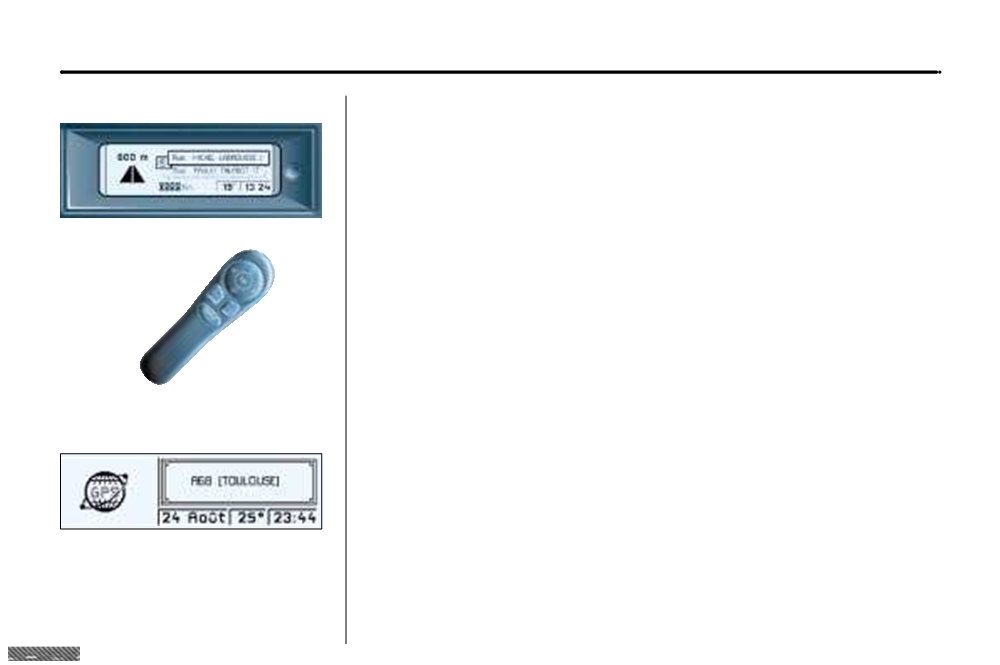
Display C
This enables the following information to be displayed:
- the time,
- the date,
- the outside temperature (the °C symbol flashes when there is a risk of ice),
- the radio displays,
- the status of the doors. The display shows you whether a door, the boot or the
bonnet is open,
- the warning messages are displayed temporarily (e.g. "top up fuel tank'') and
can be cleared using the remote control,
- the trip computer (see following page),
- the satellite navigation system (see corresponding section),
- the name of the road along which the vehicle is travelling (permanent locat-
ing).
Setting the parameters
The remote control allows you to access the settings. Accessing the different
menus is described in the section on the Satellite Navigation System.
Permanent locating
This function makes it possible to display the name of the road along which the
vehicle is travelling when guidance is not activated.
Press the "MODE" button on the remote control to display the name of the road
along which you are travelling.
To "ZOOM" in order to display the information more clearly, press the right arrow
on the remote control.
WARNING: the CD ROM containing the map data must be in the drive.
17-02-2003

60
YOUR 406 IN DETAIL
AUDIO RB2
Movement
Function
1 - Press (behind)
Increase volume
2 - Press (behind)
Decrease volume
1+2 - Simultaneous press
Cutting off the sound (mute); restoring the sound by pressing
any button
3 - Press
Automatic search of higher frequencies (radio)
Selection of next track (CD and cassette)
4 - Press
Automatic search of lower frequencies (radio)
Selection of previous track (CD and cassette)
5 - Press the end
Source selection
(radio, cassette, CD changer)
6 - Rotation
Selection of higher frequency station stored in memory (radio)
(clockwise)
Selection of next CD - Reversal of direction of play (cassette)
7 - Rotation
Selection of lower frequency station stored in memory (radio)
(anti-clockwise)
Selection of previous CD - Reversal of direction of play
(cassette)
17-02-2003

61
YOUR 406 IN DETAIL
Button
Function
A
ON VOL
Radio on/off. Adjustment of volume.
B
RDS
RDS function on/off
Press for more than 2 seconds: regional following mode on/off.
C
TA
Traffic information priority on/off.
D
Press fully: cassette rewind.
E
Press fully: cassette fast forward.
D + E
j
k
Press half-way: reversal of direction of play of the cassette.
jj
kk
Press fully: ejection of the cassette.
F
▲
Increasing the bass/treble setting.
G
▼
Decreasing the bass/treble setting.
H
AUDIO
Adjustment of bass, treble, loudness and sound distribution.
I
SRC
Source selection: radio, cassette or CD changer.
Press for more than 2 seconds: CD shuffle.
J
Automatic search of higher frequency.
k
Selection of next CD track.
K
Automatic search of lower frequency.
j
Selection of previous CD track.
L
MAN
Manual/automatic operation of buttons I and J in radio mode.
M
BND
Selection of FM1, FM2, FMast and AM wavebands.
AST
Press for more than 2 seconds: storing of a station in the memory (autostore).
1 à 6
12 34 56
Selection of station stored in the memory.
Press for more than 2 seconds: storing of a station in the memory.
Selection of a CD.
17-02-2003

62
YOUR 406 IN DETAIL
GENERAL FUNCTIONS
On/off
With the ignition key in the ACCESSORIES or IGNITION position, press button A to switch the set on or off.
The set can operate for 30 minutes without the vehicle ignition being switched on.
Anti-theft system
The set is coded in such a way that it can operate only on your vehicle. It would not function if fitted to another vehicle.
The anti-theft system is automatic and requires no action on your part.
VOLUME SETTING
Adjusting the volume
Turn button A to increase or reduce the volume.
AUDIO SETTINGS
Press the "AUDIO" button several times to access the bass (BASS), treble (TREB), loudness (LOUD), fader
(FAD) and balance (BAL) .
Exit from audio mode is automatic after a few seconds without pressing any button, or by pressing the
"AUDIO" button after adjusting the balance.
Note: bass and treble settings are specific to each source. It is possible to set them differently for radio,
cassette or CD changer.
17-02-2003

63
YOUR 406 IN DETAIL
Adjusting the bass
When "BASS" is displayed, press button F or G to vary the setting.
- "BASS -9" for a minimum bass setting,
- "BASS 0" for a normal setting,
- "BASS +9" for a maximum bass setting.
Adjusting the treble
When "TREB" is displayed, press button F or G to vary the setting.
- "TREB -9" for a minimum treble setting,
- "TREB 0" for a normal setting,
- "TREB +9" for a maximum treble setting.
Adjusting the loudness
This function automatically emphasises bass and treble tones when the volume is low.
Press button F or G to switch the function on or off.
Setting the front/rear sound distribution (Fader)
When "FAD" is displayed, press button F or G.
Button F increases the volume at the front.
Button G increases the volume at the rear.
Setting the right/left sound distribution (Balance)
When "BAL" is displayed, press button F or G.
Button F increases the volume on the right-hand side.
Button G increases the volume on the left-hand side.
17-02-2003

64
YOUR 406 IN DETAIL
RADIO
Notes on radio reception
Car radio receivers are subject to phenomena which do not affect domestic radio sets. Both MW/LW and FM reception are
subject to various forms of interference. This is no reflection on the quality of the equipment, but is due to the nature of the
signals and the way in which they are transmitted.
On MW/LW, interference may be noticed when passing under high voltage power lines or bridges, or in tunnels.
On FM, interference may be the result of increasing distance from the transmitter, deflection of the signals by obstacles
(mountains, hills, buildings etc), or of being in an area which is not covered by a transmitter.
Selecting radio mode
Press the "SRC" button until the radio is selected.
Selecting a waveband
Briefly press the "BAND/AST" button to select the FM1, FM2, FMast and AM wavebands.
Automatic station search
Briefly press button J or K to search for the station immediately above or below.
By continuing to press the button in the direction selected, you will obtain contin-
uous scrolling of the frequency.
The scrolling stops at the first station found as soon as the button is released.
If the TA traffic programme is selected, only stations broadcasting this type of programme are selected.
Searching for a station occurs first in "LO" sensitivity (selection of the most powerful transmitters) during scanning of the
waveband, then in "DX" sensitivity (selection of the weakest and most distant transmitters).
17-02-2003
65
YOUR 406 IN DETAIL
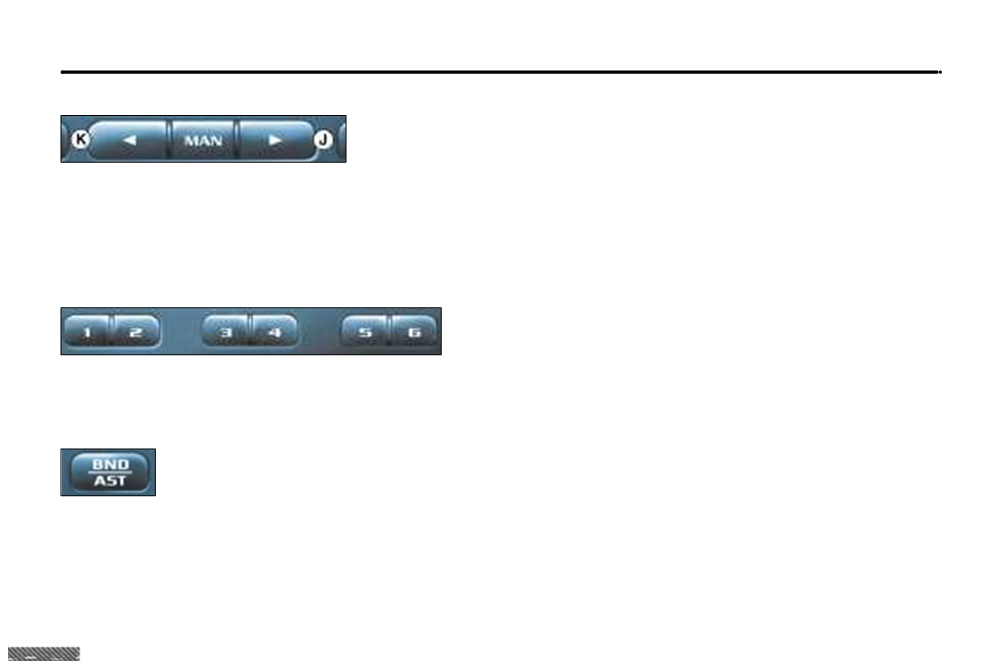
Manual station search
Press the "MAN" button.
Briefly press button J or K to increase or decrease the frequency displayed.
By continuing to press the button in the direction selected, you will obtain contin-
uous scrolling of the frequency.
The scrolling stops at the first station found as soon as the button is released.
Pressing the "MAN" button again returns you to automatic station search.
Manual storing of stations in the memory
Select the station required.
Press one of the buttons "1" to "6" for more than two seconds.
The sound stops then becomes audible again, confirming that the station has been stored in the memory.
Automatic storing of FM stations in the memory (autostore)
Press button "BND/AST" for more than two seconds, to automatically store the 6 stations with the strongest
signal in FM. These stations are stored in the FMast waveband.
- If it is not possible to find 6 stations, the remaining memories are empty.
Recalling stations stored in the memory
For each waveband, briefly press buttons "1" to "6" to recall the corresponding station.
17-02-2003

66
YOUR 406 IN DETAIL
RDS
Using the RDS (Radio Data System) function on FM
Radio Data System allows you to continue listening to the same station, whatever frequency it is using for the
region you are going through.
Briefly press the "RDS" button to switch the function on or off.
RDS station following
The display indicates the name of the station selected. The radio is continually searching for the station which has the best
reception and which is transmitting the same programme.
Traffic information programme
Press the "TA" button to switch the function on or off.
Any traffic information flash will be given priority, whatever source you are listening to (radio, cassette or CD
changer).
If you wish to interrupt a message, press the "TA" button; this switches the function off.
Note: the volume of traffic information announcements is independent of the volume of normal radio listening. You
can adjust it using the volume button. The setting will be stored and will be used when the next messages are broad-
cast.
Regional following mode
When they are part of a network, certain stations broadcast regional programmes in the various areas they serve. With
regional following mode, you can keep listening to the same programme.
Press the "RDS" button for more than two seconds to switch the function on or off.
17-02-2003

67
YOUR 406 IN DETAIL
CASSETTE
Selecting cassette mode
When a cassette is inserted, the cassette player will start automatically.
If a cassette is already inserted, press the "SRC" button until cassette mode is selected.
Ejecting the cassette
Fully press buttons D and E to eject the cassette from the player.
Direction of play
The player will play sides 1 and 2 of the cassette alternately, by automatically reversing the direction of play
at the end of a side.
To manually reverse the direction of play, press buttons D and E half-way.
Fast forward/rewind
Fully press button D or E to fast forward or rewind the cassette. At the end of the fast forward/rewind, the set plays the cur-
rent side.
Recommendations regarding the use of cassettes
- Use good quality cassettes.
- Do not use cassettes which play for more than 90 minutes.
- Never expose the cassettes to heat or direct sunlight.
- Re-tension the tape if necessary before inserting the cassette in the player.
- Regularly clean the playing heads with a humid type cleaning cassette.
17-02-2003

68
YOUR 406 IN DETAIL
CD CHANGER
Selecting CD changer mode
Press the "SRC" button until the CD changer is selected.
Selecting a disc
Press buttons "1" to "6" to select the corresponding disc.
Selecting a track
Press button J to select the next track.
Press button K to return to the start of the current track or to select the previous
track.
Accelerated play
Press the "MAN" button.
Press and hold button J or K for forwards or backwards accelerated play.
Accelerated play stops as soon as the button is released.
Buttons J and K resume the "track selection" function when the "MAN" button is pressed again.
Shuffle
When the CD changer is selected, keep the "SRC" button pressed for two seconds. The tracks will be played
in random sequence. Pressing the "SRC" button again for two seconds returns you to normal play.
17-02-2003

70
YOUR 406 IN DETAIL
AUDIO RM2
Stalk movement
Function
1 - Press (behind)
Increase volume.
2 - Press (behind)
Decrease volume.
1 + 2 - Simultaneous press
Cutting off of the sound (mute); restoring of the sound by
pressing any button.
3 - Press
Automatic search of upper frequencies (radio) -
Selection of the following track (CD).
4 - Press
Automatic search of lower frequencies (radio) -
Selection of the previous track (CD).
5 - Press the end
Change of source (radio/cassette/CD changer).
6 - Rotation
Selection of next memorised station (radio) -
(clockwise)
Selection of following CD.
7 - Rotation
Selection of previous memorised station (radio) -
(anti-clockwise)
Selection of previous CD.
17-02-2003

71
YOUR 406 IN DETAIL
Button
Function
A
ON/VOL
Radio On/Off. Volume adjustment.
B
Radio selection. Selection of FM1, FM2, FMast and AM wavebands.
Press for more than 2 seconds: automatic storing of stations in the memory (autostore).
C
Cassette selection. Reversal of the direction of play of the cassette.
Press for more than 2 seconds: noise reduction.
D
CD changer selection.
Press for more than 2 seconds: shuffle.
E
▲
Ejection of the cassette.
F
TA
Traffic information priority on/off.
Press for more than 2 seconds: PTY function on/off.
G
RDS
RDS function on/off.
Press for more than 2 seconds: regional following mode on/off.
H
▲
Increase bass/treble setting.
I
▼
Decrease bass/treble setting.
J
AUDIO
Adjustment of bass, treble, loudness, sound distribution and
automatic volume correction.
K
kk
Automatic search of higher frequency.
Selection of following track - cassette and CD.
L
MAN
Manual/automatic operation of buttons K and M in radio mode.
M
jj
Automatic search of lower frequency.
Selection of previous track - cassette and CD.
1 to 6
1 2 3 4 5 6
Selection of station stored in the memory.
Press for more than 2 seconds: storing of a station in the memory.
Selection of a disc in the CD changer.
17-02-2003

72
YOUR 406 IN DETAIL
GENERAL FUNCTIONS
On/off
With the ignition key in the ACCESSORIES or IGNITION position, press button A to switch the set on or off.
The set can operate for 30 minutes without the vehicle ignition being switched on.
Anti-theft system
The audio system is coded in such a way that it can operate only on your vehicle. It would not function if fitted to another
vehicle.
The anti-theft system is automatic and requires no action on your part.
ADJUSTING THE VOLUME
Turn button A to increase or decrease the volume.
AUDIO SETTINGS
Press the "AUDIO" button several times in succession to access the bass (BASS), treble (TREB), loudness
(LOUD), fader (FAD), balance (BAL) and the automatic volume correction.
Exit from audio mode is automatic after a few seconds without pressing any button, or by pressing the
"AUDIO" button after configuration of the automatic volume correction.
Note: bass and treble settings are specific to each source. It is possible to set them differently
for radio, cassette and CD changer.
17-02-2003