Peugeot 308 CC (2014 year). Instruction - part 11
10
159
PRACTICAL INFORMATION
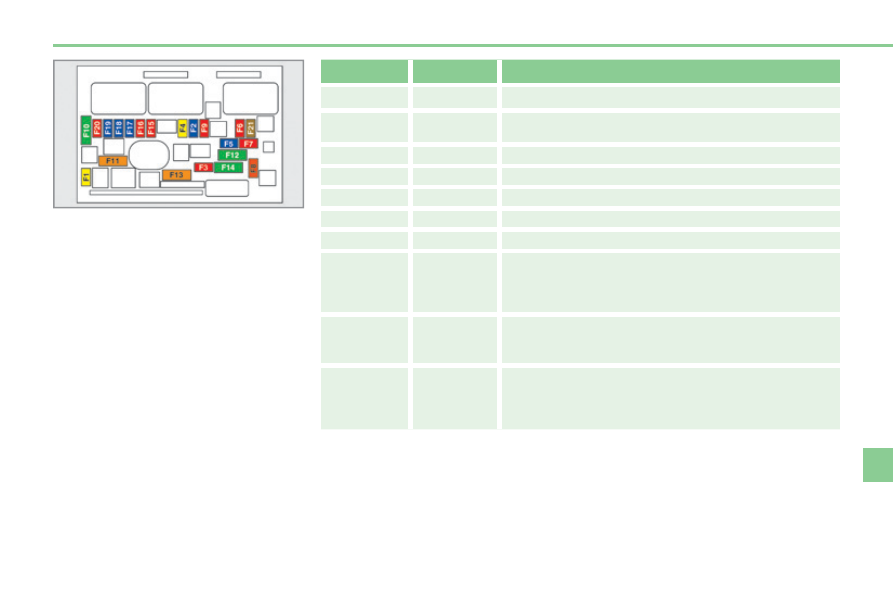
Fuse N°
Rating
Functions
F12
30 A
Windscreen wipers slow/fast speed.
F13
40 A
Built-in systems interface supply (ignition positive).
F14
-
Not used.
F15
10 A
Right-hand main beam headlamp.
F16
10 A
Left-hand main beam headlamp.
F17
15 A
Left-hand dipped headlamp.
F18
15 A
Right-hand dipped headlamp.
F19
15 A
Oil vapour heater (1.6 litre VTi), purge canister
electrovalve (1.6 litre VTi), oxygen sensors (petrol),
air cooling electrovalves (Diesel).
F20
10 A
Electronic thermostat, variable timing electrovalves,
Turbo pressure regulation electrovalve (Diesel),
engine coolant level detector (Diesel).
F21
5 A
Fan assembly relay supply, Valvetronic relay control
(1.6 litre VTi), Turbo cooling (1.6 litre THP), air fl ow
sensor (1.6 litre HDI).