Peugeot 307 CC Dag (2007.5). Instruction - part 1


  Index      Peugeot     Peugeot 307 CC Dag 2007.5 - instruction in english


Search                


Content   ..  1  2  3   ..


Peugeot 307 CC Dag (2007.5). Instruction - part 1


FAMILIARISATION

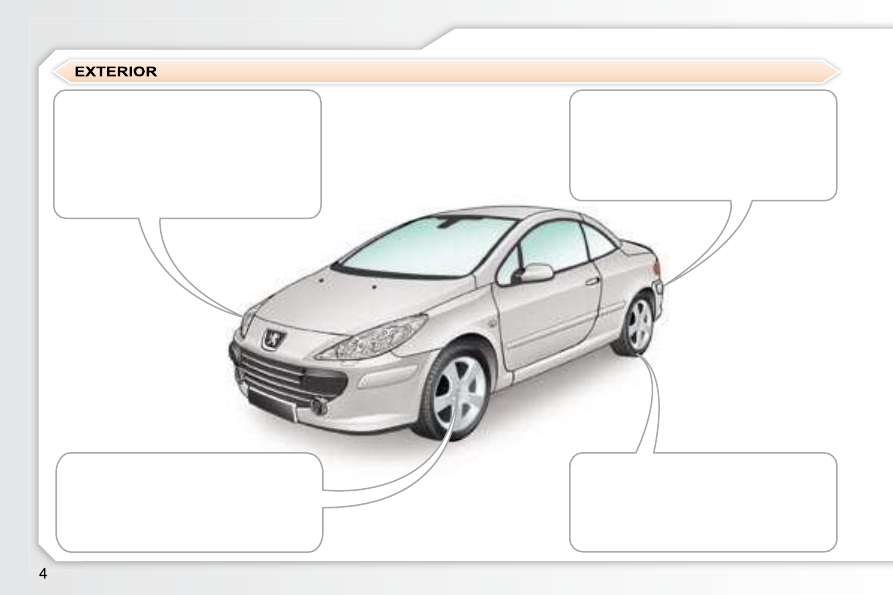
  Automatic switching on of the 
lights 

 This  equipment  switches  on  the  side 

lights  and  dipped  headlamps  auto-

matically  if  a  low  level  of  light  is  de-

tected  or  following  activation  of  the 

wipers. 

     62   

  ASR and ESP systems 

 This  equipment  is  linked  to  guarantee 

the  directional  stability  of  the  vehicle 

within the limits of the laws of physics. 

     73   

  Visual and audible rear parking 
assistance 

 When  reversing,  this  equipment  warns 

you  of  obstacles  detected  behind  the 
vehicle. 

     89   

  Tyre under-inflation detection 

 This equipment monitors the pressure in 

each tyre and warns you in the event of 

a puncture or under-inl ation. 

     71   

FAMILIARISATION

  Fuel tank 

  From the outside  
   1.   Unlocking of the doors and boot. 
  2.

   Opening of the tailgate.  

  Remote control key 

   A.   Unfolding/Folding of the key.  

  Boot 

   1.

   Opening of the fuel i ller l ap. 

  2.

   Opening and hooking of the fuel 

tank cap.  

 Capacity  of  the  fuel  tank:  approxi-

mately 60 litres. 

     60   

 Normal locking  
(a single press) (i xed lighting 

of the direction indicators). 

 or 

 Deadlocking of the vehicle  
(two consecutive presses) 

(i xed lighting of the 

direction indicators). 

 Unlocking of the vehicle  
(rapid l ashing of the 

direction indicators). 

     51   

  From the inside  
   1.  

Key  present  in  the  ignition  switch 

and permanent locking deactivated. 

  2.   Unlocking using the interior 

central control or the interior 

door opening control.  

     58   

 Partial opening of the boot. 

!

!

!

i

FAMILIARISATION

  Retractable roof 

  Preliminary conditions 
     

Turn the ignition key to position  M . 

  

   Be absolutely certain that:  

   -   the  vehicle  is  not  in  "energy 

economy mode" (refer to the cor-

responding section), 

  -   the  battery  voltage  is  sufi cient 

(lighting  of  the  indicator  light  on 
the roof control button), 

  -   the  roof  fuse  is  in  good  condition 

(refer to the corresponding section), 

  -   the electric windows are initialised 

(refer  to  the  corresponding  sec-

tion), 

  -   the exterior temperature is higher 

than -20 °C.  

 It is advisable to operate the roof 

with the engine running.  

The roof may be operated  at a 

speed below 6 mph (10 km/h). 

 After  washing  the  vehicle  or 

following rain, it is advisable to 

wait until the roof has dried be-

fore opening it. 

 When  operating  the  roof  with 

the  engine  off,  if  the  "energy 

economy  mode"  is  activated 

(message  on  the  display)  the 

movement  of  the  roof  stops. 

Start the engine to exit "energy 

economy mode" and complete 

the movement.  

 You  are  strongly  advised  not 

to  operate  the  roof  in  strong 

winds. 

 When washing your vehicle: 

   -   do  not  forget  to  lock  it  to 

avoid  any  risk  of  automatic 

partial  opening  of  the  win-

dows, 

  -   avoid spraying the upper part 

of the windows, 

  -   keep  the  end  of  the  high-

pressure nozzle at least 1 metre 

from  the  windows  and  door 

seals.   

 Operation of the roof is the sole 

responsibility of the driver. 

 When  opening  and  closing  the 

roof,  to  avoid  any  risk  of  injury, 

ensure that no one is in the vicin-

ity of the moving parts. 

  Precautions to be taken before 
operating the roof 
      Park the vehicle on level ground. 
  

   Check that no object could hin-

der the operation of the roof: 

   -   nothing  should  be  placed  on 

the moving rear shelf  1 , on the 
boot screen  2  or on or near the 
hinged covers  3 , 

  -   if luggage is transported in the 

boot,  this  must  not  raise  the 
boot screen, 

  -   any object, such as a jacket or 

umbrella,  placed  in  the  boot, 

must  be  retained  by  the  lug-

gage retaining net  4 . 

     Ensure that the boot screen  2  

is secured correctly. 

    Close the boot correctly.    

i

!

!

i

!

FAMILIARISATION

 To guarantee correct operation, 

do  not  release  the  roof  button 

when  the  roof  is  in  an  interme-

diate  position  (neither  com-

pletely  open  nor  completely 

closed). 
 However, if there is any danger, 

release  the  roof  button  and  the 

manoeuvre  will  stop  instantly. 

Once  the  danger  has  been  eli-

minated,  complete  the  required 

manoeuvre. 

  Maintenance  
 Carry out a complete roof opera-

ting cycle at least once a month 

to keep it in perfect working or-

der.   

 If  you  continue  to  pull  or  push 

this  button  after  the  end  of  the 

manoeuvre,  the  four  windows 

rise. 

  Change to "cabriolet" 

coni guration

 The  four  windows  lower,  the  boot 

opens, the hinged covers unfold, the 

roof  folds  into  the  boot,  the  moving 

rear shelf takes up its position, then 

the boot closes. 

Change to "coupé coni guration"

 The  four  windows  lower,  the  boot 

opens, the moving rear shelf and the 

roof unfold and take up their position, 

the hinged covers fold, then the boot 
closes. 

  Operating fault  
 If an electrical or hydraulic mal-

function  of  the  roof  occurs, 

switch off the ignition, restart the 

engine,  then  start  the  required 

manoeuvre again.  
If  the  problem  persists,  contact 

a PEUGEOT dealer. 

 The electric window controls are 

deactivated  during  operation  of 

the roof. 

  Opening the roof  

     

 Pull this button until the 

end of the roof opening 

manoeuvre.  

  Closing the roof  

     

 Push this button until the 
end of the roof closing 
manoeuvre.  

 Operating the retractable roof 

 This is coni rmed by an audible signal 

and  a  message  on  the  multifunction 

display. 

  OPEN 

 This is coni rmed by an audible signal 

and  a  message  on  the  multifunction 

display. 

FAMILIARISATION

  Dual-zone automatic air 
conditioning 

 This equipment permits the setting of a 

different comfort level for the driver and 

front passenger. It then controls this le-

vel automatically in relation to the exte-

rior climatic conditions. 

     38   

  Automatic gearbox 

 This  equipment  guarantees  perfect  dri-

ving  by  combining  a  fully  automatic 

mode, associated with two special pro-

grammes, and a manual mode. 

     80   

  Cruise control/speed limiter 

 These two functions allow you to control 

the speed of the vehicle in relation to the 

value that you have programmed. 

     83, 85   

  Audio and communication 
systems 

 This  equipment  benei ts  from  the  latest 

technology:  MP3  compatible  RD4  audio 

equipment, Bluetooth hands-free kit, RT4 

GPS audio/telephone, JBL audio system. 

  RT4        123  

  RD4        152   

FAMILIARISATION

   1.

   Cruise control/speed limiter 

switch. 

  2.

   Steering wheel adjustments 

control. 

  3.   Lights and direction indicators 

control. 

  4.

   Instrument panel. 

  5.   Driver's air bag.  
 

Horn. 

  6.   Gear lever. 
  7.   Handbrake. 
  8.   Electric mirror controls.  
 

Electric window controls.  


Rear electric windows 

deactivation control. 

  9.   Bonnet release. 
  10.  Fuse box. 
  11.

  Headlamp height adjustment. 

  12.

  Side adjustable and closing vent. 

  13.

  Door window de-icing vent. 

  14.

  Speaker (tweeter). 

  15.

  Windscreen de-icing vents.  

FAMILIARISATION

   1.   Steering lock and ignition. 
  2.

   Steering wheel audio equipment 

control. 

  3.

   Wipers/wash-wipe/trip computer 

control. 

  4.   Alarm button.  
 

Central locking button.  


Hazard warning lights button.  


Dynamic stability control
(ESP/ASR) button. 

  5.

   Multifunction display. 

  6.   Passenger air bag. 
  7.   Glove box/Audio/video sockets. 
  8.   Retractable roof control. 
  9.

   Control for the four windows. 

  10.  Heated seat controls. 
  11.  12 volt socket. 
  12.  Front ashtray. 
  13.  Heating/Automatic air 

conditioning controls. 

  14.  CD changer. 
  15.  Audio RD4 or RT4 GPS 

audio/telephone. 

  16.

  Central adjustable and closing 

vents.  

!

FAMILIARISATION

  5.   Head restraint height and angle 

adjustment. 

  6.   Heated seat control.  

 Never  drive  with  the  head  re-

straints removed. 

     43   

   

   When  stationary,  pull  the  control 

 A

  to unlock the steering wheel. 

  

   Adjust the height and depth of the 

steering wheel. 

  

   Lock  by  pushing  the  control   A  

fully.  

     42   

  Front seat adjustment 

   1.

   Forwards-backwards 

adjustment. 

  2.

   Driver or passenger seat 

height adjustment. 

  3.

   Seat back angle adjustment. 

  4.   Access to rear seats. 

  Steering wheel adjustment 

FAMILIARISATION

  Interior mirror 
adjustment 

  Front seat belts 

      Place the control  A  on the right or 

on  the  left  to  select  the  mirror  to 

be adjusted. 

     Move  the  control   B

  in all four di-

rections to adjust. 

     Return the control  A  to the central 

position.  

 When  parking,  the  mirrors  can  be 

folded electrically, by pulling the con-

trol  A

  rearwards, or automatically on 

locking the vehicle using the remote 
control or the key. 

     41   

   1.

   Selection of the "day" position of 

the mirror. 

  2.   Directing of the mirror.  

     42   

   A.   Fastening.  

     74   

  Electric mirror adjustment 

FAMILIARISATION

  Control A: windscreen wipers  
  2


Fast wipe. 

  1


Normal wipe. 


Intermittent wipe. 

  0  

Park. 

  AUTO

    Automatic wiping or single 

wipe. 

 Wash-wipe:  pull  the  control  towards 

you. 

  Ring A: front and rear lights  

 Lights off. 
 Automatic  switching  on  of 

the lights. 

 Side lights. 

 Front and rear fog lamps. 

 Dipped/main beam headlamps. 

  Ring B: fog lamps  

     61   

 The  position  is  displayed  on  the  in-

strument panel by the corresponding 

indicator light. 

  Wipers 

  Switching on "AUTO" mode  
 Push  the  control  down  and  release 

it. 
  Switching off "AUTO" mode  
 Push  the  control  up  and  return  it  to 

position  "0" . 
 If  the  ignition  has  been  off  for  more 

than  approximately  one  minute,  the 

automatic wiping must be reactivated. 

     64   

  Lights 

FAMILIARISATION

   A.   When the ignition is on, the 

needle should indicate the level 
of fuel remaining. 

  B.   When the engine is running, the 

associated low level warning 

light should switch off. 

  C.   When the ignition is on, the 

oil level indicator should 

display  "OIL OK"  for a few 

seconds.  

 If the levels are not correct, top up as 

necessary. 

     18   

   1.   When the ignition is on, the 

orange and red warning lights 

come on. 

  2.   When the engine is running, 

these warning lights should 

switch off.  

 If  warning  lights  remain  on,  refer  to 

the page concerned. 

     20   

 If an indicator light is on, this indicates the 

status of the corresponding function. 

   A.   Deactivation of the interior 

protection alarm.

     54   

  B.   Central locking.

     59   

  C.   Deactivation of the 

ESP/ASR system.

     73     

  Instrument panel 

  Warning lights 

  Controls bar 

FAMILIARISATION

   1.   Insertion of the key. 
  2.

   Selection of the position:  "OFF"  

(disarming), with "rear facing" 

child seat,  


 "ON" 

 (activation), with front 

passenger or "forward facing" 

child seat. 

  3.

   Removal of the key keeping the 

switch in this position.  

     77   

   A.  

When the ignition is on, the warning 

light  comes  on  if  the  driver  has  not 
fastened his seat belt. 

  B.  

When  the  engine  is  running  with 

the doors closed, the warning light 

switches  off  automatically  after 

30 seconds. 

  C.

   Below 12 mph (20 km/h), the war-

ning light comes on continuously 
if the seat belt is unfastened. 

  D.

   Above  12  mph  (20  km/h),  the 

warning light l ashes for 2 minutes 

accompanied  by  an  audible  si-

gnal of increasing volume.  

     74   

  Passenger's front air bag 

  Front seat belt not fastened/
unfastened 

   1.    Stop 

 position. 

  2.    Ignition 

 position. 

  3.    Starting 

 position.  

     52   

  Ignition switch 

FAMILIARISATION

 SPEED LIMITER "LIMIT" 

  Cruise control "CRUISE" 

  Display on the instrument panel 

   1.   Cruise control mode Selection/

Off. 

  2.

   Programming of a speed/

Decreasing of the programmed 

value. 

  3.

   Programming of a speed/

Increasing of the programmed 

value. 

  4.   Cruise control Off/Resume.  
 In order to be programmed or activat-

ed, the vehicle speed must be higher 

than 25 mph (40 km/h), with at least 

fourth  gear  engaged  on  the  manual 
gearbox  (second  for  the  automatic 
gearbox). 

     85, 87   

   1.  

Speed limiter mode Selection/Off. 

  2.

   Decreasing of the programmed 

value. 

  3.

   Increasing of the programmed 

value. 

  4.

   Speed limiter On/Off.  

 The values must be set with the en-

gine running. 

     83  

  Cruise control  

  Speed limiter   

 The  cruise  control  or  speed  limiter 

mode  appears  on  the  instrument 

panel when it is selected. 

FAMILIARISATION

   1.   Gear lever. 
  2.    "SPORT"  button. 
  3.    "SNOW"  button.  

  Position selection gate 
 Move  the  lever  in  the  gate  to  select 

a position. 

 Once  a  position  has  been  selected, 

the  corresponding  indicator  light  is 

displayed  on  the  instrument  panel 

screen.  

   A.

   Switching on. 

  B.   Detection. 
  C.   Activation/Deactivation.  
 

(via the multifunction display 

coni guration menu).  

      89   

  Display on the instrument panel 
  P:  Park. 
  R:  Reverse. 
  N:  Neutral. 
  D:  Drive. 
  M:  Manual mode. 
  S:

  Sport programme. 

    :

  Snow programme. 

  1 2 3 4:  gears engaged.  

  Moving off 
 With  the  handbrake  applied,  select 

position  P  or  N . 

 Switch on the ignition. 

 With  the  engine  running,  in  position 

 P  or  N ,  with your foot on the brake 
pedal, release the handbrake
.  
 Select position  R ,  D  or  M . 

 Gradually  release  the  brake  pedal; 

the vehicle moves off immediately.   

  Visual and audible rear 
parking assistance 

  "PORSCHE TIPTRONIC 
SYSTEM" automatic gearbox 

     80  

18

INSTRUMENTS and CONTROLS

   1.

   Engine oil temperature

indicator. 

  2.   Rev counter. 

  3.

   Coolant temperature

indicator. 

  4.

   Low fuel level

warning light. 

  5.   Fuel gauge. 

  6.

   Speedometer. 

  7.   Service indicator, oil level 

indicator, distance recorder and 
cruise control/speed limiter. 

  8.

   Trip recorder zero

reset button. 

  9.   Lighting rheostat button. 

  10.

  Left-hand direction

indicator. 

  11.

  Central STOP warning light. 

  12.

  Right-hand direction

indicator. 

  13.

  Service warning light. 

  14.

  Handbrake, brake l uid level and 

electronic brake force distribution 

warning light 

  15.

  Anti-lock braking system (ABS) 

warning light. 

  16.  Electronic stability control

(ESP/ASR) warning light. 

  17.  Driver's seat belt not fastened 

warning light 

  18.  Emission control system

warning light. 

  19.

  Air bags and rear, protective 

pop-up roll-over hoops warning 

light. 

  20.  Passenger air bag disarmed 

indicator light * . 

  21.

  Dipped beam headlamps 

indicator light. 

  22.

  Main beam headlamps

indicator light. 

  23.

  Front fog lamps indicator light. 

  24.

  Rear fog lamp indicator light. 

  25.

  Diesel engine pre-heat warning 

light. 

  26.

  Engine oil pressure warning 

light * . 

  27.

  Battery charge warning light * .   

  PETROL-DIESEL INSTRUMENT PANELS: MANUAL GEARBOX 

   *    According to country.   

19

INSTRUMENTS and CONTROLS

   1.

   Engine oil temperature

indicator. 

  2.

   Sport programme

indicator light. 

  3.

   Gear lever position indicator. 

  4.

   Snow programme

indicator light. 

  5.   Rev counter. 

  6.

   Coolant temperature

indicator. 

  7.

   Low fuel level warning light. 

  8.   Fuel gauge. 

  9.

   Speedometer. 

  10.  Service indicator, oil level 

indicator, distance recorder and 

cruise control/speed limiter. 

  11.

  Trip recorder zero

reset button. 

  12.  Lighting rheostat

button. 

  13.

  Left-hand direction

indicator. 

  14.  Central STOP

warning light. 

  15.

  Right-hand direction

indicator. 

  16.

  Service warning light. 

  17.

  Handbrake, brake l uid level and 

electronic brake force distribution 

warning light. 

  18.

  Anti-lock braking system (ABS) 

warning light. 

  19.  Electronic stability control

(ESP/ASR) warning light. 

  20.  Driver's seat belt not fastened 

warning light. 

  21.

  Emission control system warning 

light. 

  22.

  Air bags and rear, protective pop-

up roll-over hoops warning light. 

  23.  Passenger air bag disarmed 

indicator light * . 

  24.

  Dipped beam headlamps 

indicator light. 

  25.

  Main beam headlamps indicator 

light. 

  26.

  Front fog lamps indicator light. 

  27.

  Rear fog lamp indicator light. 

  28.

  Engine oil pressure warning light * . 

  29.

  Battery charge warning light * .  

 PETROL INSTRUMENT PANEL DIALS: AUTOMATIC GEARBOX 

  *    According to country.  


Content   ..  1  2  3   ..