Peugeot 206 SW Dag (2008 year). Instruction - part 5
ACCESS
62 -
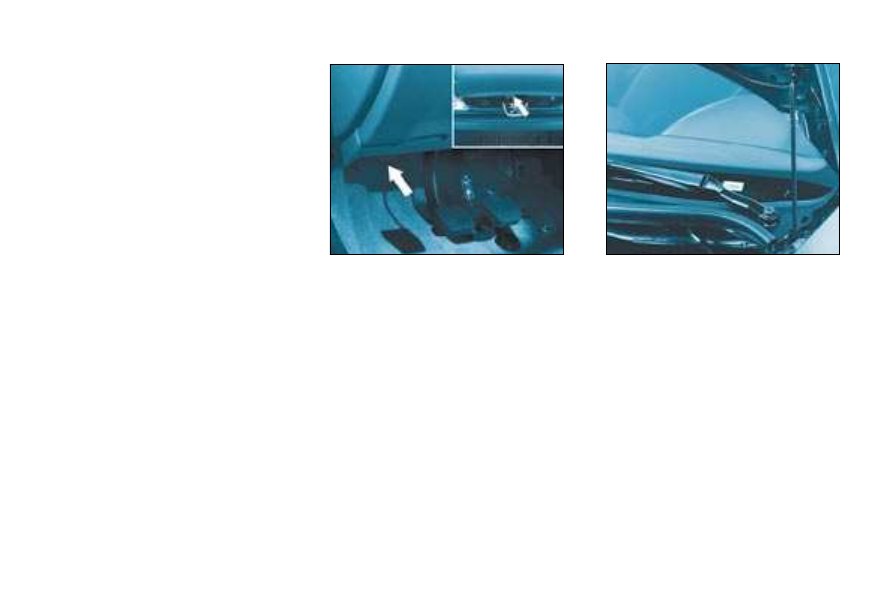
OPENING THE BONNET
Inside the vehicle: pull the handle on
the left-hand side, under the fascia.
Outside the vehicle: lift the catch
and raise the bonnet.
BONNET STRUT
Secure the strut to hold the bonnet
open.
Before closing the bonnet, replace
the strut in its housing.
FILLING THE FUEL
TANK
The tank must be illed with fuel with
the engine switched off.
Insert the key then turn it to the left.
Remove the cap.
A label indicates which type of fuel to
use.
If you ill your tank, do not continue
after the third cut-off of the pump
nozzle. This could result in vehicle
malfunctions.
The capacity of the tank is approx-
imately 50 litres.
To close
Lower the bonnet and release it at
the end of its travel.
Check that the bonnet is locked.