Opel Zafira (2017 year). Manual - part 5
70
Storage
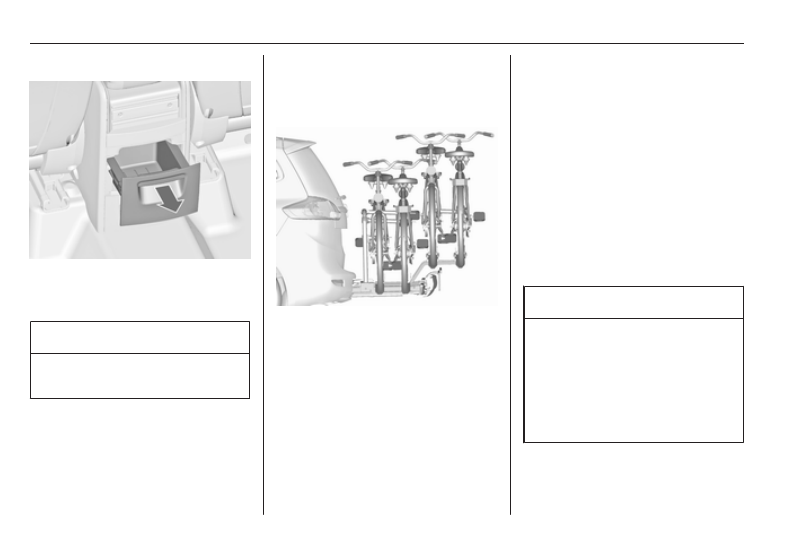
Rear console
At the rear side of the FlexConsole
there is a storage drawer. Pull out to
open.
Caution
Do not use for ashes or for other
glowing items.
Rear carrier system
Rear carrier system for four
bicycles
The rear carrier system (Flex-Fix
system) allows two bicycles to be
attached to an extendable carrier
integrated into the vehicle floor. It is
possible to attach two further bicycles
on an adapter. The transportation of
other objects is not permitted.
The maximum load of the rear carrier
system is 80 kg with attached adapter
and 60 kg without attached adapter.
The maximum load per bicycle on the
rear carrier system is 30 kg. This
allows the attachment of electrically-
powered bicycles to the rear carrier
system. The maximum load per
bicycle on the adapter is 20 kg.
The wheelbase of a bicycle must not
exceed 1.15 metres. Otherwise the
secure fastening of a bicycle is not
possible.
If not in use, the rear carrier system
must be slid back into the vehicle
floor.
There must not be any objects on the
bicycles that could become loose
during transportation.
Caution
If the rear carrier system is
extended and the vehicle is fully
loaded, the chassis clearance will
be reduced.
Drive carefully whenever the road
has a steep inclination or when
driving over a ramp, bump, etc.