Nissan Altima L32. Manual - part 628
EM-48
< ON-VEHICLE REPAIR >
[QR25DE]
CAMSHAFT
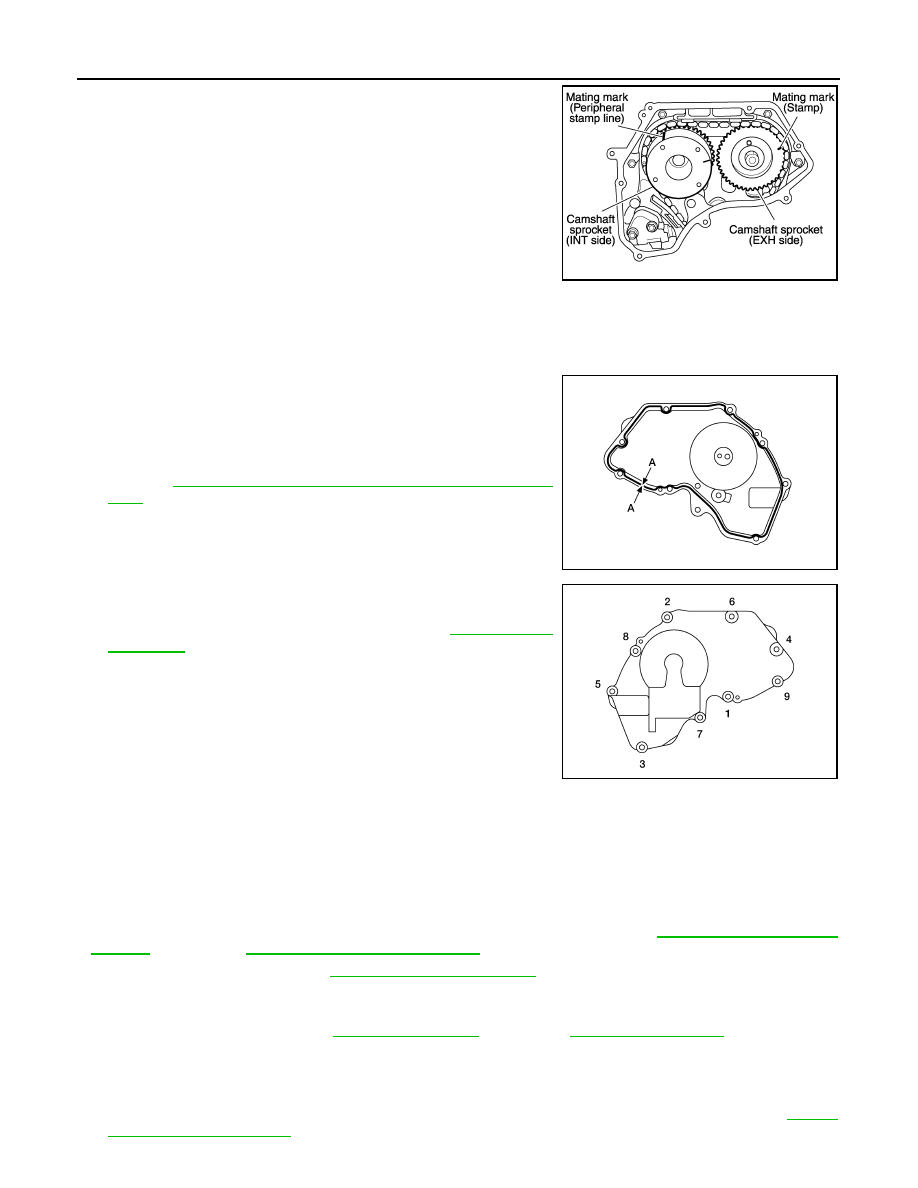
5. Install camshaft sprockets.
• Install them by lining up the mating marks on each camshaft
sprocket with the ones painted on the timing chain during
removal.
• Before installation of chain tensioner, it is possible to re-match
the marks on timing chain with the ones on each sprocket.
CAUTION:
• Aligned mating marks could slip. Therefore, after match-
ing them, hold the timing chain in place by hand.
• Before and after installing chain tensioner, check again to
make sure that mating marks have not slipped.
6. Install chain tensioner.
CAUTION:
• After installation, pull the stopper pin off completely, and make sure that the tensioner is fully
released.
7. Install chain guide.
8. Install IVT control cover with the following procedure.
a. Install IVT control solenoid valve to intake valve timing control
cover.
b. Install O-ring to front cover side.
c.
Apply Genuine Silicone RTV Sealant to the positions as shown.
Refer to
GI-15, "Recommended Chemical Products and Seal-
.
d. Install IVT control cover.
• Tighten the bolts in the numerical order as shown.
9. Check and adjust valve clearances. Refer to
.
10. Installation of the remaining components is in the reverse order
as shown.
Inspection After Installation
INFOID:0000000004202123
Inspection of Camshaft Sprocket (INT) Oil Groove
WARNING:
• Check when engine is cold so as to prevent burns from any splashing engine oil.
CAUTION:
• Perform this inspection only when DTC P0011 is detected in self-diagnostic results of CONSULT III
and it is directed according to inspection procedure of EC section. Refer to
(California),
1. Check engine oil level. Refer to
.
2. Perform the following procedure so as to prevent the engine from being unintentionally started while
checking.
a. Release fuel pressure. Refer to
(Except Califor-
nia).
b. Disconnect ignition coil and injector harness connectors if practical.
3. Support engine using a suitable hoist or jack.
4. Remove the RH engine mounting bracket, mounting insulator and support bracket. Refer to
Diameter (A)
: 3.0 - 4.0 mm (0.118 - 0.157 in)
KBIA0115E
ALBIA0193ZZ
ALBIA0192ZZ