Nissan Sentra. Manual - part 609
BODY SIDE TRIM
INT-25
< REMOVAL AND INSTALLATION >
C
D
E
F
G
H
I
K
L
M
A
B
INT
N
O
P
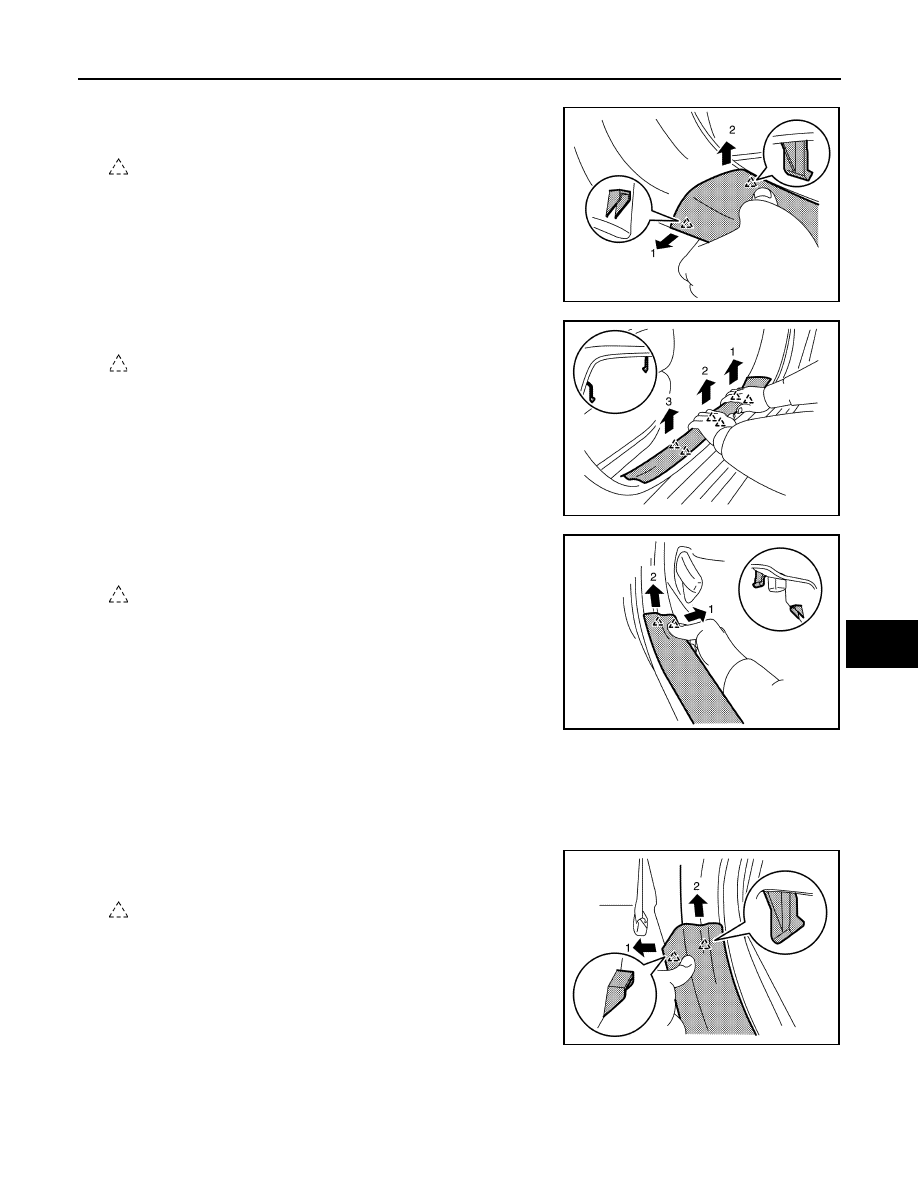
1. Move front seat to the full forward position.
2. Lift up front end lower of front kicking plate inner while pulling
toward inside of the vehicle and release front kicking plate inner
pawls as shown.
: Pawl
3. Begin at the front and release front kicking plate inner pawls as
shown.
: Pawl
4. Lift up rear end lower of front kicking plate inner while pulling
toward inside of the vehicle and release front kicking plate inner
pawls as shown, then remove front kicking plate inner.
: Pawl
Installation
Installation is in the reverse order of removal.
REAR
Removal
1. Lift up front end lower of rear kicking plate inner while pulling
toward inside of the vehicle and release rear kicking plate inner
pawls as shown.
: Pawl
JMJIA6486ZZ
JMJIA6487ZZ
JMJIA6488ZZ
JMJIA6489ZZ