Nissan Pathfinder (2008 year). Manual - part 82


  Index      Manuals     Nissan Pathfinder (2008 year) - Service and Repair Manual


Search            copyright infringement  


Content      ..     80      81      82      83     ..


Nissan Pathfinder (2008 year). Manual - part 82


PRECAUTIONS

BR-3

< PRECAUTION >

C

D

E

G

H

I

J

K

L

M

A

B

BR

N

O

P

PRECAUTION

PRECAUTIONS

Precaution for Supplemental Restraint System (SRS) "AIR BAG" and "SEAT BELT 
PRE-TENSIONER"

INFOID:0000000001297388

The Supplemental Restraint System such as “AIR BAG” and “SEAT BELT PRE-TENSIONER”, used along
with a front seat belt, helps to reduce the risk or severity of injury to the driver and front passenger for certain
types of collision. This system includes seat belt switch inputs and dual stage front air bag modules. The SRS
system uses the seat belt switches to determine the front air bag deployment, and may only deploy one front
air bag, depending on the severity of a collision and whether the front occupants are belted or unbelted.
Information necessary to service the system safely is included in the SR and SB section of this Service Man-
ual.

WARNING:

• To avoid rendering the SRS inoperative, which could increase the risk of personal injury or death in

the event of a collision which would result in air bag inflation, all maintenance must be performed by
an authorized NISSAN/INFINITI dealer.

• Improper maintenance, including incorrect removal and installation of the SRS, can lead to personal

injury caused by unintentional activation of the system. For removal of Spiral Cable and Air Bag
Module, see the SR section.

• Do not use electrical test equipment on any circuit related to the SRS unless instructed to in this

Service Manual. SRS wiring harnesses can be identified by yellow and/or orange harnesses or har-
ness connectors.

Precaution for Brake System

INFOID:0000000001297389

• Recommended fluid is Genuine NISSAN Super Heavy Duty Brake Fluid or equivalent. Refer to 

MA-10, "Flu-

ids and Lubricants"

.

• Do not reuse drained brake fluid.
• Be careful not to splash brake fluid on painted areas.
• To clean or wash all parts of master cylinder, disc brake caliper and wheel cylinder, use clean brake fluid.
• Do not use mineral oils such as gasoline or kerosene. They will ruin rubber parts of the hydraulic system.
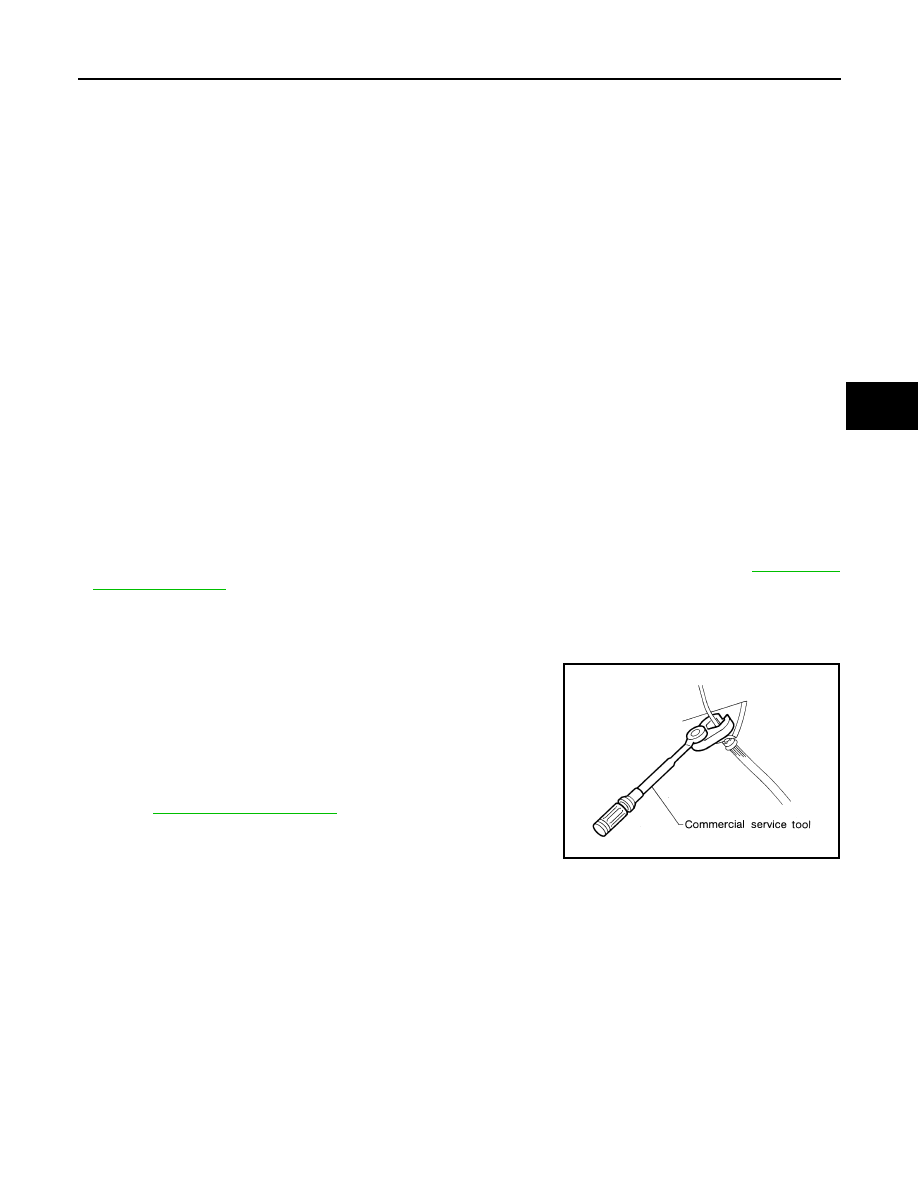
• Use flare nut wrench when removing and installing brake tube.
• Always check tightening torque when installing brake lines.
• Before working, turn ignition switch to OFF and disconnect con-

nectors for ABS actuator and electric unit (control unit) or battery
negative terminal.

• Burnish the brake contact surfaces after refinishing or replacing

drums or rotors, after replacing pads or linings, or if a soft pedal
occurs at very low mileage.
Refer to 

BR-27, "Brake Burnishing"

.

WARNING:

• Clean brake pads and shoes with a waste cloth, then wipe

with a dust collector.

SBR686C

BR-4

< PREPARATION >

PREPARATION

PREPARATION

PREPARATION

Special Service Tool

INFOID:0000000001297390

The actual shapes of Kent-Moore tools may differ from those of special service tools illustrated here.

Commercial Service Tool

INFOID:0000000001297391

Tool number
(Kent-Moore No.)
Tool name

Description

(J-46532)
Brake and clutch pedal height measure-
ment tool

Measuring brake pedal height

LFIA0227E

Tool name

Description

1. Flare nut crowfoot
2. Torque wrench

Removing and installing each brake pip-
ing
a: 10 mm (0.39 in) / 12 mm (0.47 in)

Power tool

Removing nuts, bolts and screws

S-NT360

PBIC0190E

PBIC0191E

NOISE, VIBRATION, AND HARSHNESS (NVH) TROUBLESHOOTING

BR-5

< FUNCTION DIAGNOSIS >

C

D

E

G

H

I

J

K

L

M

A

B

BR

N

O

P

FUNCTION DIAGNOSIS

NOISE, VIBRATION, AND HARSHNESS (NVH) TROUBLESHOOTING

NVH Troubleshooting Chart

INFOID:0000000001297392

Use the chart below to help you find the cause of the symptom. If necessary, repair or replace these parts.

×

: Applicable

Reference page

BR-7

BR-7

BR-10

BR-12

BR-33

BR-37

BR-33

BR-37

BR-33

BR-37

BR-33

BR-37

BR-33

BR-37

BR-27

BR-14

BR-33

BR-37


DLN-306, "

NVH T

rou

bl

es

ho

ot

in

g

 Cha

rt

"

 (2F

1

3

10),


DLN-314, "

NVH T

roub

le

sh

oo

tin

g

 Ch

art

"

 (2

S1

33

0),

DLN-323, "

NVH T

ro

ubl

es

ho

ot

ing

 Cha

rt

"

 (2S1

35

0)

DLN-336, "

NVH T

rou

bl

es

ho

ot

in

g

 Cha

rt

"

 (R18

0A),


DLN-370, "

NVH T

rou

bl

es

ho

ot

in

g

 Cha

rt

"

 (M

20

5)

DLN-402, "

NVH T

ro

u

b

les

ho

ot

in

g Ch

art

"

 (R20

0), 

DL

N-43

9, "

NVH T

ro

u

b

les

ho

ot

ing

 Ch

art

"

 (R

23

0)

F

AX-4, "

NVH T

rou

bl

es

ho

ot

in

g

 Cha

rt

"

 (F

AX

), 

RAX-4, "

NVH T

rou

ble

s

h

o

o

tin

g Chart

"

 (RAX)

FSU-4

, "

NVH T

rou

ble

s

h

o

o

tin

g Chart

"

 (FSU),


RSU-4, "

NVH T

ro

u

b

les

ho

ot

ing

 Ch

art

"

 (RSU)

WT

-33, "

NVH T

rou

bl

es

ho

ot

in

g

 Cha

rt

"

ST

-9, "

NVH T

ro

u

b

les

ho

ot

in

g

 Ch

art

"

Possible cause and
SUSPECTED PARTS

Pad

s

 - 

da

ma

ge

d

Pad

s

 - un

ev

en

 wea

r

Shi

m

s

 da

ma

ge

d

Roto

r im

ba

la

nc

e

Roto

r da

ma

ge

Rotor runout

Roto

r de

fo

rma

tio

n

Roto

r de

fle

c

tio

n

Rotor rust

Roto

r th

ic

kn

es

va

riat

ion

PROP

ELLER SHAFT

FRON

T FINA

L DRIVE

REAR FINA

L DRIVE

DR

IVESHAFT


SUSPENSION

TIRES 

AND ROA

D

 WHEEL

STEERING

Symptom

Noise

×

×

×

×

×

×

×

×

×

×

Shake

×

×

×

×

×

×

Shimmy, Shudder

×

×

×

×

×

×

×

×

×

×

×

BR-6

< FUNCTION DIAGNOSIS >

NOISE, VIBRATION, AND HARSHNESS (NVH) TROUBLESHOOTING

Hydraulic Circuit

INFOID:0000000001297393

CAUTION:

• All hoses and piping (tubes) must be free from excessive bending, twisting and pulling.
• Make sure there is no interference with other parts when turning steering both clockwise and coun-

terclockwise.

• The brake piping is an important safety part. If a brake fluid leak is detected, always disassemble the

parts. Replace applicable part with a new one, if necessary.

• Be careful not to splash brake fluid on painted areas; it way cause paint damage. If brake fluid is

splashed on painted areas, wash it away with water immediately.

• Do not bend or twist brake hose sharply, or strongly pull it.
• When removing components, cover connections so that no dirt, dust, or other foreign matter gets in.
• Refill with new brake fluid. Refer to 

MA-10, "Fluids and Lubricants"

.

• Do not reuse drained brake fluid.

1.

Actuator

2.

Master Cylinder

3.

Brake Booster

Flare nut

Union Bolt

AWFIA0068ZZ

INSPECTION AND ADJUSTMENT

BR-7

< BASIC INSPECTION >

C

D

E

G

H

I

J

K

L

M

A

B

BR

N

O

P

BASIC INSPECTION

INSPECTION AND ADJUSTMENT

Brake Fluid Level Inspection

INFOID:0000000001297394

LEVEL CHECK

• Check that the brake fluid level in the reservoir tank is within speci-

fication, between the MAX and MIN lines as shown.

• Visually check around reservoir tank for fluid leaks.
• If fluid level is excessively low, check brake system for leaks.
• If brake warning lamp remains illuminated after the parking brake

pedal is released, check the brake system for any brake fluid
leaks.

Brake Booster Inspection

INFOID:0000000001297422

VISUAL INSPECTION

Check for improper assembly, damage and deterioration.

CHECK VALVE INSPECTION

Airtightness Inspection

Use a suitable vacuum pump to check. Connect to brake booster
side of check valve.

Pad Wear Inspection

INFOID:0000000001297451

PAD WEAR INSPECTION

• Inspect the thickness of pad through cylinder body inspection hole.

Use a scale for inspection if necessary. Refer to 

BR-41, "Front Disc

Brake"

 (Front), 

BR-41, "Rear Disc Brake"

 (Rear).

Brake Pedal Inspection and Adjustment

INFOID:0000000001297429

INSPECTION

LFIA0234E

Check 
valve 
specifi-
cation

: Vacuum decrease should be within 1.3 kPa 
(10 mmHg, 0.39 inHg) for 15 seconds under 
a vacuum of – 66.7 kPa (– 500 mmHg, – 19.69 
inHg)

LFIA0217E

BRA0010D

BR-8

< BASIC INSPECTION >

INSPECTION AND ADJUSTMENT

1.

Inspect the brake pedal free height "H" from dash lower panel
using Tool. 

2.

Adjust the height referring to the following specifications.

CAUTION:

The adjustable pedal must be in the frontmost (closest to
the floor) position for pedal height measurement.

Unit: mm (in)

ADJUSTMENT

1.

Loosen the stop lamp switch and ASCD cancel switch by turning 45

°

 counterclockwise.

2.

Loosen lock nut on the input rod, then turn input rod to adjust the
pedal to specified height. When finished adjusting, tighten lock
nut.

CAUTION:

Make sure that the screw portion of the end of input rod is
located inside the clevis.

3.

With the pedal pulled up and held by hand, press the stop lamp
switch and the ASCD cancel switch in until threaded ends con-
tact pedal arm. 

4.

With the threaded ends of the stop lamp switch and ASCD cancel switch contacting the pedal arm, turn
the switches 45

°

 clockwise to lock in place.

CAUTION:

Make sure that the gap "C

1

 or C

2

" between the rubber stops and switch ends are within specifica-

tion.

5.

Check the pedal play.

CAUTION:

Make sure that the stop lamp goes off when the pedal is released.

6.

Start the engine and check the height of the brake pedal when depressing it.

Tool

:

(J-46532)

WFIA0160E

Free height "H"

: 182.1 - 192.1 (7.17 - 7.56)

Depressed pedal height ("D" [under a force of 490 N (50 kg, 110 
lb) with engine running]

: 105 - 115 (4.13 - 4.53)

Clearance between pedal stopper and threaded end of stop lamp 
switch and ASCD cancel switch "C

1

" or "C

2

"

: 0.74 - 1.96 (0.029 - 0.077)

Pedal play "A"

: 3 - 11 (0.12 - 0.43)

Lock nut

: 18.6 N·m (1.9 kg-m, 14 ft-lb)

SBR229E

BRAKE FLUID

BR-9

< ON-VEHICLE MAINTENANCE >

C

D

E

G

H

I

J

K

L

M

A

B

BR

N

O

P

ON-VEHICLE MAINTENANCE

BRAKE FLUID

Drain and Refill

INFOID:0000000001297460

CAUTION:

• Refill with new brake fluid. Refer to 

MA-10, "Fluids and Lubricants"

.

• Do not reuse drained brake fluid.
• Do not let brake fluid splash on the painted surfaces of the body. This might damage the paint, so

when splashing it, immediately wipe off the area and wash away with water.

• Before servicing, disconnect battery negative cable.
1.

Connect a vinyl tube to each bleed valve.

2.

Depress brake pedal, loosen each bleed valve, and gradually
remove brake fluid.

3.

Make sure there is no foreign material in reservoir tank, and refill
with new brake fluid.

4.

Rest foot on brake pedal. Loosen bleed valve. Slowly depress
pedal until it stops. Tighten bleed valve. Release brake pedal.
Repeat this process a few times, then pause to add new brake
fluid to master cylinder. Continue until new brake fluid flows out.
Bleed air from brake system. Refer to 

BR-9, "Bleeding Brake

System"

.

Bleeding Brake System

INFOID:0000000001297461

CAUTION:

While bleeding, monitor the master cylinder brake fluid level.
1.

Turn ignition switch OFF and disconnect battery negative cable.

2.

Connect a vinyl tube to the rear right bleed valve.

3.

Fully depress brake pedal 4 to 5 times.

4.

With brake pedal depressed, loosen bleed valve to let the air out, and then tighten it immediately.

5.

Repeat steps 3 and 4 until no more air comes out.

6.

Tighten bleed valve to the specified torque. Refer to 

BR-10, "Component"

 (front disc brake), 

BR-12,

"Component"

 (rear disc brake). 

7.

Perform steps 2 to 6 at each wheel, with master cylinder reservoir tank filled at least half way, bleed air
from the front left, rear left, and front right bleed valve, in that order.

SBR419C

SBR995

BR-10

< ON-VEHICLE MAINTENANCE >

FRONT DISC BRAKE

FRONT DISC BRAKE

Component

INFOID:0000000001297474

Front Disc Brake Caliper and Pads

WARNING:

Clean dust on caliper and brake pad with a vacuum dust collector to minimize the hazard of airborne
particles or other materials.

CAUTION:

AWFIA0077GB

1.

Sliding pin bolt

2.

Cylinder body

3.

Piston seal

4.

Piston

5.

Piston boot

6.

Sliding pin

7.

Sliding pin boot

8.

Torque member bolt

9.

Torque member

10.

Upper pad retainer

11.

Outer shim

12. Inner brake pad

13.

Outer brake pad

14. Lower pad retainer

15. Shim cover

16.

Bleed valve

17. Cap

18. Copper washers

19.

Union bolt

20. Brake hose

21. Pad return spring

B.

Brake fluid

R.

Rubber grease

: Front


Content      ..     80      81      82      83     ..