Nissan Pathfinder. Manual - part 292
RADIATOR
CO-15
< REMOVAL AND INSTALLATION >
[VQ35DE]
C
D
E
F
G
H
I
J
K
L
M
A
CO
N
P
O
REMOVAL AND INSTALLATION
RADIATOR
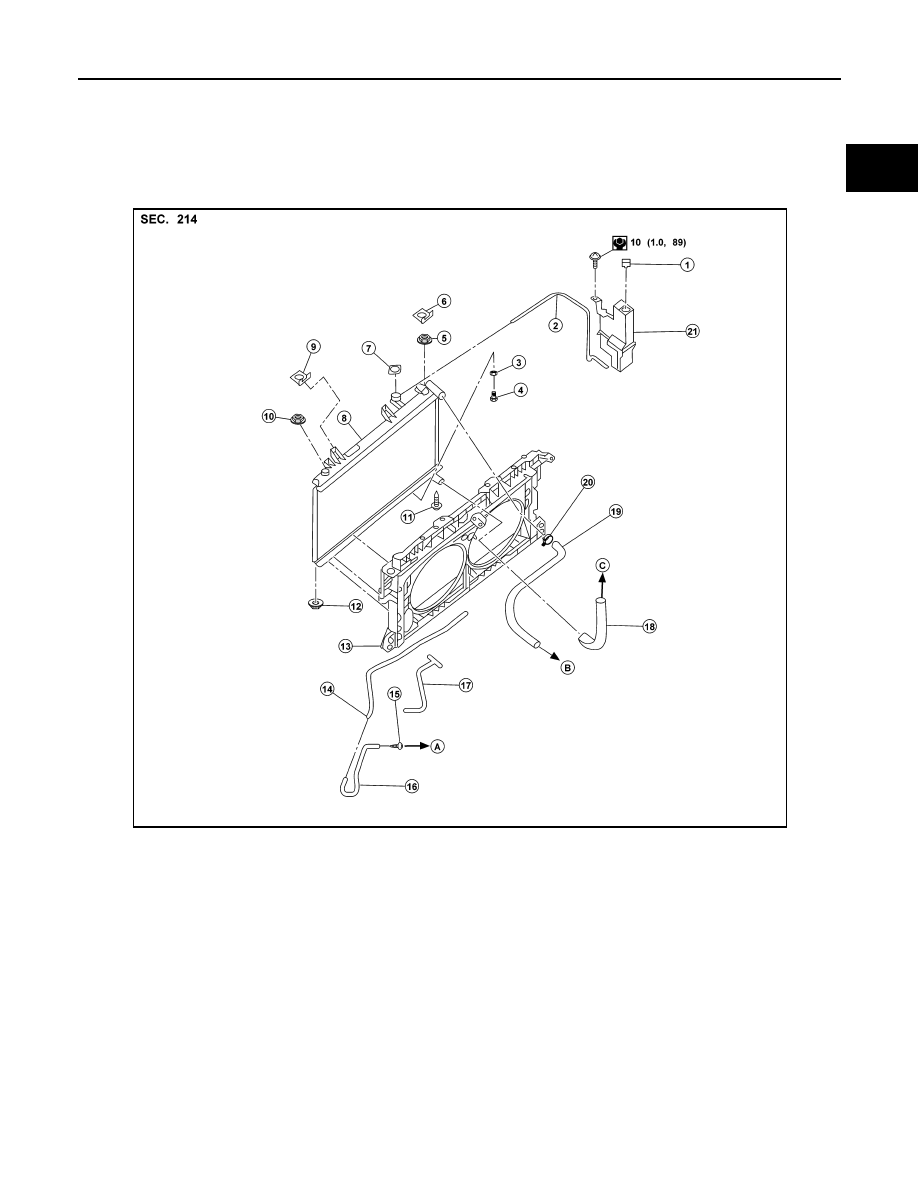
Exploded View
INFOID:0000000009177984
Removal and Installation
INFOID:0000000009177985
WARNING:
Do not remove the radiator cap when the engine is hot. Serious burns could occur from high pressure
engine coolant escaping from the radiator. Wrap a thick cloth around the cap. Slowly turn it a quarter
turn to allow built-up pressure to escape. Carefully remove the cap by turning it all the way.
NOTE:
1.
Reservoir tank cap
2.
Reservoir tank hose
3.
O-ring
4.
Drain plug
5.
Mounting rubber (upper) RH
6.
Radiator mount (upper) RH
7.
Radiator cap
8.
Radiator
9.
Radiator mount (upper) LH
10.
Mounting rubber (upper) LH
11.
Mounting rubber (lower) RH
12. Mounting rubber (lower) LH
13.
Radiator core support
14. CVT fluid cooler pipe
15. CVT oil cooler hose clamp
16.
CVT oil cooler hose
17. CVT oil cooler hose
18. Radiator hose (lower)
19.
Radiator hose (upper)
20. Radiator hose clamp
21. Reservoir tank
A.
To CVT
B.
To water inlet
C.
To water outlet
AWBIA1647ZZ