Mitsubishi Outlander. Body repair manual - part 18


  Index      Mitsubishi     Mitsubishi Outlander - body repair manual 2004-2006 year


Search            


Content   ..  16  17  18  19   ..


Mitsubishi Outlander. Body repair manual - part 18


FRONT PILLAR

WELDED PANEL REPLACEMENT

3-15

CAUTION

Weld and repair the front pillar support if it is 
damaged.

AB200372AB

Cover

7. To assemble Part B, weld the front pillar support 

then weld the cover of the front pillar 
reinforcement upper.

AB200373AD

Cover

100 mm

Side sill outer 
reinforcement 
centre

Side sill reinforcement 
support

 50 mm

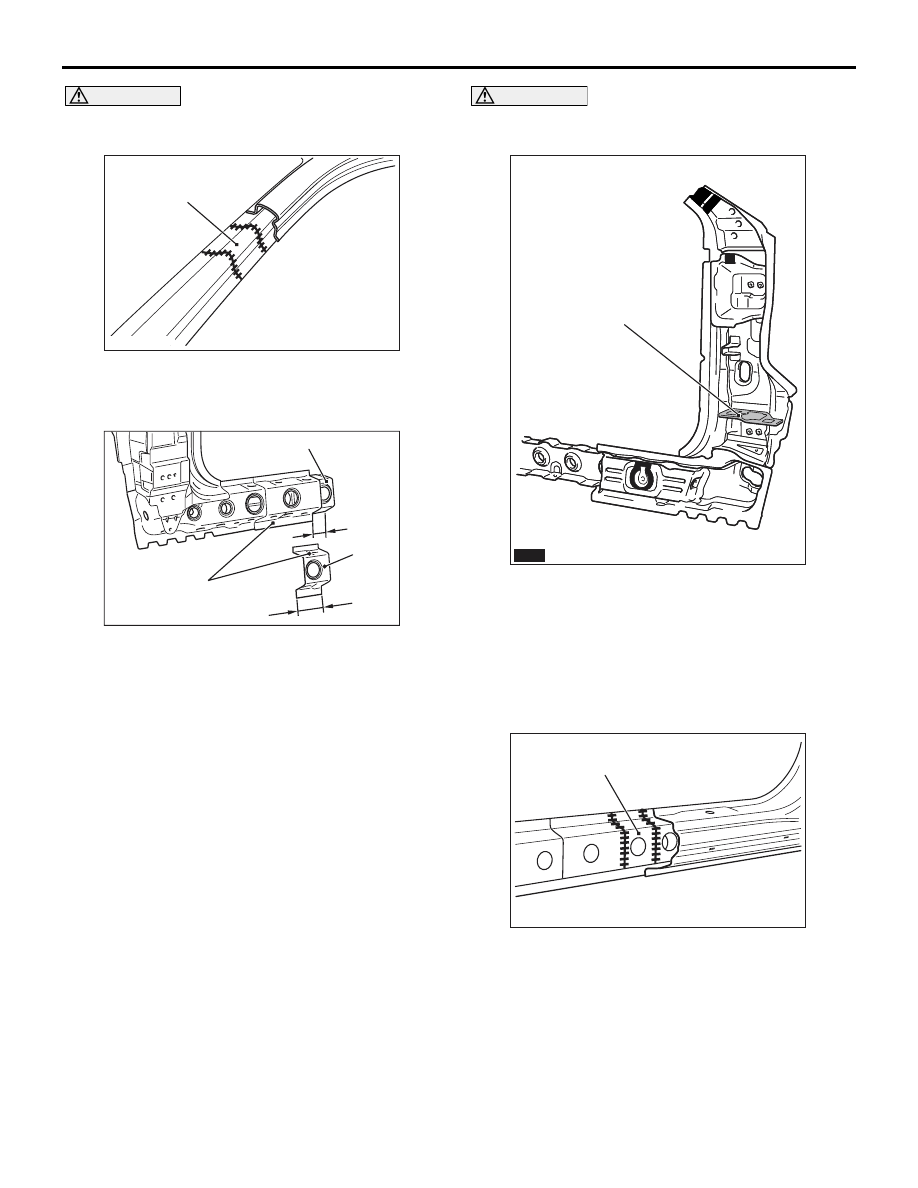
8. Remove the side outer panel from the new front 

pillar outer parts. Cut the front pillar outer by 
aligning it with the side sill outer reinforcement 
centre on the body-side. Next, cut only the side sill 
outer reinforcement centre 100 mm forward from 
the cut area to create a cover, then cut the side sill 
reinforcement support 50 mm behind the cut area 
of the side sill outer reinforcement centre.

CAUTION

Weld and repair if the side sill reinforcement sup-
port is damaged.

AB200375

AB200375AB

Front pillar 
silencer protector

: Adhesive

9. When assembling a new front pillar outer parts, 

apply a front pillar silencer protector in advance, 
bury the clearance with butyl tape then apply 
structural adhesives in the areas shown in the 
figure of the instructions.

Adhesive : Epoxyayresin adhesive
Brand : 3M ATD Part No.8115 or equivalent

AB200374AB

Cover

10.Weld the side sill reinforcement support then weld 

the cover of the side sill outer reinforcement 
centre.

AB200475AB

: Body sealant

FRONT PILLAR

WELDED PANEL REPLACEMENT

3-16

11.Apply in advance body sealant in the areas shown 

in the figure of the instructions when assembling 
the side outer panel.

AB100228 AC

12.Assemble the side outer panel, then bolt and tape 

the hole and flange with aluminium tape and fill 
the hole with foam materials as shown in the 
figure of the instructions.
FOAM: 3M ULTRAPRO Panel foam-Yellow

AB100787

13.Wait 2 hours after filling the foam materials to 

remove the bolt and aluminium tape, then melt the 
foam materials with a soldering gun so a clip, etc. 
can thoroughly be inserted in the hole filled with 
foam materials.

CENTRE PILLAR

WELDED PANEL REPLACEMENT

3-17

CENTRE PILLAR

M4030006000347

AB300048

Spot welding

MIG plug welding      : indicates two panels to be welded
                                  : indicates three panels to be welded

MIG spot welding

MIG arc welding (continuous)

Braze welding

Anti-corrosion agent application locations
(Use access holes to apply liberally to butt-welded joints.)

(                                                               )

Symbol

Operation description

AG

AB200568AC

A

B

B

D

A

D

C

C

E

E

REPAIR WELDS

150 ± 20 mm

160 ± 30 mm

335 ± 30 mm

Acoustic foam

CAUTION

When repairing the area using foam materials do not use firing tools since the foaming materials may 
burn.

CENTRE PILLAR

WELDED PANEL REPLACEMENT

3-18

NOTE ON REPAIR WORK
REMOVAL

AB300016AC

Side sill outer 
reinforcement centre

Centre pillar 
reinforcement

Adhesive point

Adhesive
point

1. Since the centre pillar reinforcement and side sill 

outer reinforcement centre of the side sill is 
adhered together, cut the side outer panel in a 
place where the reinforcement joint is visible, as 
shown in the figure of the instructions, to remove 
the centre pillar reinforcement.

AB300017AC

(a)

Side roof

rail inner

Centre pillar seat belt 
reinforcement

2. To detach the welding of the centre pillar seat belt 

reinforcement and centre pillar reinforcement, cut 
the lower part of the side roof rail inner as shown 
in the figure of the instructions.
NOTE: Hold the side roof rail inner (A) that was 
cut since it will be re-used.

INSTALLATION

AB300018AB

30mm

1. Remove the side outer panel and side sill outer 

reinforcement centre from the new parts.

2. To reinforce the strength of the centre pillar upper 

area that was cut, cut the side outer panel 30 mm 
above the cut area of the centre pillar top part.
Cut the new part in the same area.

AB300019AC

Centre pillar 
seat belt reinforcement

Centre pillar
reinforcement

3. Cut only the centre pillar reinforcement, aligned 

with the body-side, of the new centre pillar 
reinforcement parts so the centre pillar seat belt 
reinforcement is not damaged.

CAUTION

Weld and repair if the centre pillar seat belt rein-
forcement is damaged.

AB300021

: Adhesive

AB

4.  When assembling the centre pillar reinforcement, 

apply adhesives in the areas shown in the figure 
of the instructions.

Adhesive : Epoxyayresin adhesive
Brand : 3M ATD Part No.8115 or equivalent

AB300020AB

Urethane 
foam

5. When assembling the centre pillar inner, fill the 

centre pillar with urethane foam since it is no 
longer possible to fill the areas shown in the figure 
of the instructions with foam materials.


Content   ..  16  17  18  19   ..