Mitsubishi Montero (2004+). Manual - part 102
 

  Index      Mitsubishi     Mitsubishi Montero - service repair manual 2004 year


Search            


Content   ..  100  101  102  103   ..


Mitsubishi Montero (2004+). Manual - part 102


ON-VEHICLE SERVICE

TSB Revision

ENGINE MECHANICAL

11A-13

If the noise is reduced or disappears, clean the lash adjuster 
(Refer to GROUP 11B, Engine Overhaul 

− Rocker Arms and 

Camshaft 

− Inspection 

P.11B-25

). As it is suspected that the 

noise is due to seizure of the lash adjuster. If there is no 
change in the level of the abnormal noise, proceed to step 5.

5. Run the engine to bleed the lash adjuster system (Refer to 

P.11A-12

.).

6. If the abnormal noise does not disappear after air bleeding 

operation, clean the lash adjuster (Refer to GROUP 11B, 
Engine Overhaul 

− Rocker Arms and Camshaft − Inspection 

P.11B-25

).

.

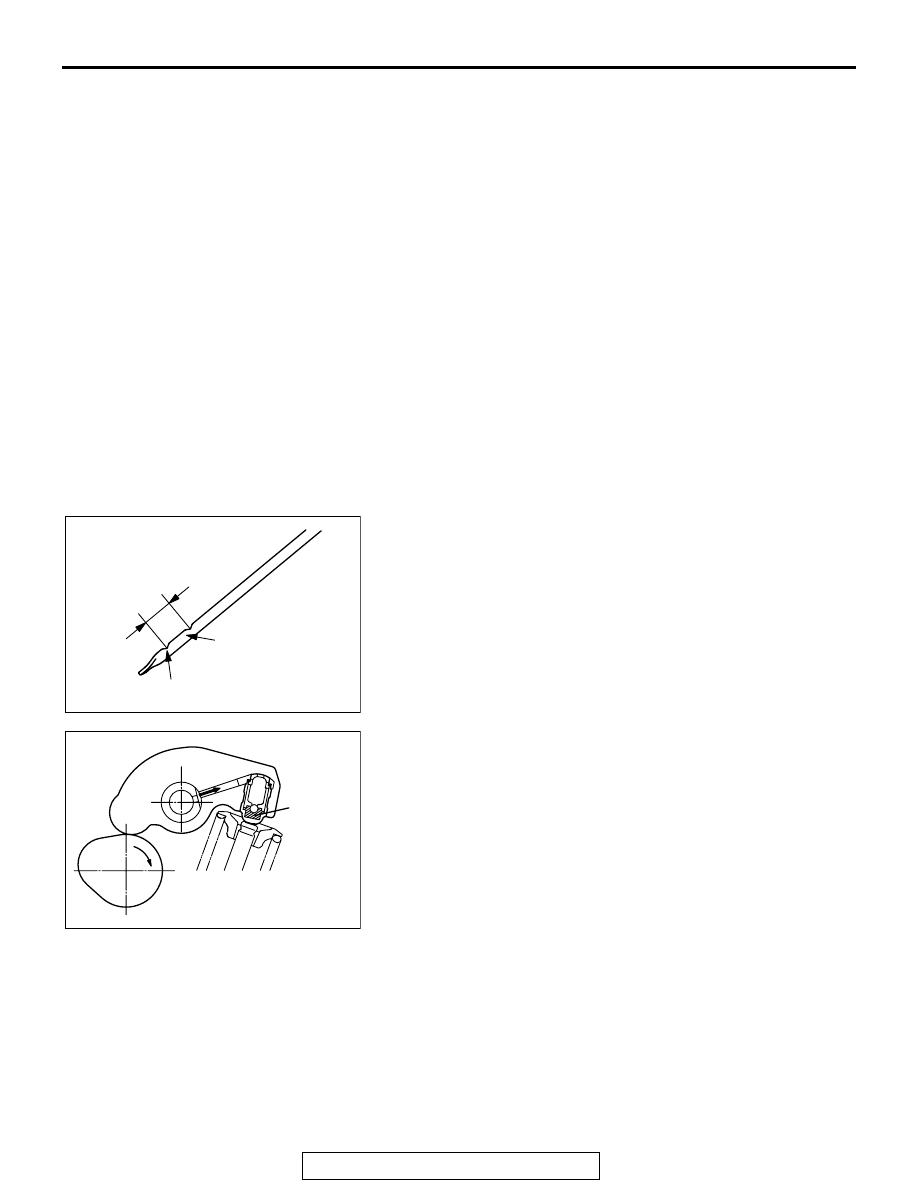
Bleeding lash adjuster system
NOTE: Parking the vehicle on a grade for a long time may 
decrease oil in the lash adjuster, causing air to enter the high 
pressure chamber when starting the engine.
NOTE: After parking for many hours, oil may run out from the 
oil passage and take time before oil is supplied to the lash 
adjuster, causing air to enter the high pressure chamber.
NOTE:  In the above cases, abnormal noise can be eliminated 
by bleeding the lash adjuster system.
1. Check engine oil and add or change oil if required.

NOTE: If the engine oil level is low, air is sucked from the oil 
screen, causing air to enter the oil passage.
NOTE: If the engine oil level is higher than specification, oil 
may be stirred by the crankshaft, causing oil to be mixed 
with a large quantity of air.
NOTE: If oil is deteriorated, air is not easily separated from 
oil, increasing the quantity of air contained in oil.

NOTE: If air mixed with oil enters the high pressure chamber 
inside the lash adjuster from the above causes, air in the 
high pressure chamber is compressed excessively while the 
valve is opened, resulting in an abnormal noise when the 
valve closes. This is the same phenomenon as that 
observed when the valve clearance has become excessive. 
The lash adjuster can resume normal function when air 
entered the lash adjuster is removed.

2. Idle the engine for one to three minutes to warm it up.

AKX00328

GOOD

MINIMUM

MAXIMUM

AB

AKX00329

HIGH-
PRESSURE
CHAMBER

AB

ON-VEHICLE SERVICE

TSB Revision

ENGINE MECHANICAL

11A-14

3. Repeat the operation pattern, shown in left figure, at no load 

to check for abnormal noise. (Usually the abnormal noise is 
eliminated after repetition of the operation 10 to 30 times. If, 
however, no change is observed in the level of abnormal 
noise after repeating the operation more than 30 times, 
suspect that the abnormal noise is due to some other 
factors.)

4. After elimination of abnormal noise, repeat the operation 

shown in left figure five more times.

5. Run the engine at idle for one to three minutes to make sure 

that the abnormal noise has been eliminated.

AKX00330

OPEN THROTTLE
VALVE GRADUALLY

CLOSE
THROTTLE VALVE

APPROXI-
MATELY
3,000 r/min

IDLING
OPERATION

ONCE

15 s

15 s

AIR BLEEDING OPERATION PATTERN

AB

ENGINE ASSEMBLY

TSB Revision

ENGINE MECHANICAL

11A-15

ENGINE ASSEMBLY

REMOVAL AND INSTALLATION

M1112001000968

CAUTION

*: Indicates parts which should be initially tightened, and then fully tightened after placing the vehicle 
horizontal and loading the full weight of the engine on the vehicle body.

Pre-removal Operation
• Skid Plate and Under Cover Removal

• Engine Oil Draining (Refer to GROUP 12, On-vehicle Ser-

vice 

− Engine Oil Replacemen

P.12-3

.)

• Engine Coolant Draining (Refer to GROUP 14, On-vehicle 

Service 

− Engine Coolant Replacement 

P.14-6

.)

• Fuel Line Pressure Reduction [Refer to GROUP 13A, 

On-vehicle Service 

− Fuel Pump Relay Disconnection 

(How to Reduce Pressurized Fuel Lines) 

P.13A-998

.]

• Hood Removal (Refer to GROUP 42, Hood 

P.42-5

.)

• Battery Removal

• Air Cleaner and Air Intake Hose Removal (Refer to 

GROUP 15, Air Cleaner 

P.15-6

.)

• Radiator Removal (Refer to GROUP 14, Radiator 

P.14-8

.)

• Cooling Fan and Clutch Assembly Removal (Refer to 

GROUP 14, Cooling Fan 

P.14-10

)

• Front Exhaust Pipe Removal (Refer to GROUP 15, 

Exhaust Pipe and Main Muffler 

P.15-13

.)

• Transmission Assembly Removal (Refer to GROUP 23A, 

Transmission and Transfer Assembly 

P.23A-563

.)

Post-installation Operation
• Transmission Assembly Installation (Refer to GROUP 

23A, Transmission and Transfer Assembly 

P.23A-563

.)

• Front Exhaust Pipe Installation (Refer to GROUP 15 

P.15-13

.)

• Radiator Installation (Refer to GROUP 14 

P.14-8

.)

• Cooling Fan and Clutch Assembly Installation (Refer to 

GROUP 14, Cooling Fan 

P.14-10

)

• Air Cleaner and Air Intake Hose Installation (Refer to 

GROUP 15 

P.15-6

.)

• Battery Installation

• Hood Installation (Refer to GROUP 42, Hood 

P.42-5

.)

• Engine Oil Refilling (Refer to GROUP 12, On-vehicle Ser-

vice 

− Engine Oil Replacement 

P.12-3

.)

• Engine Coolant Refilling (Refer to GROUP 14, On-vehicle 

Service 

− Engine Coolant Replacement 

P.14-6

.)

• Fuel Leak Check

• Skid Plate and Under Cover Installation

AC204398AB

1

2

3

4

5

6

7

8

9

11

12

13

14

15

16

18

19

10

17

9.0 ± 2.0 N·m
80 ± 17 in-lb

9.0 ± 2.0 N·m
80 ± 17 in-lb

REMOVAL STEPS

1.

THROTTLE POSITION SENSOR 
CONNECTOR

2.

EGR CONNECTOR

3.

RIGHT BANK HEATED OXYGEN 
SENSOR CONNECTOR

4.

MANIFOLD ABSOLUTE 
PRESSURE SENSOR 
CONNECTOR

5.

NOISE CONDENSER 
CONNECTOR

REMOVAL STEPS (Continued)

ENGINE ASSEMBLY

TSB Revision

ENGINE MECHANICAL

11A-16

6.

CONTROL WIRING HARNESS 
AND CAMSHAFT POSITION 
SENSOR WIRING HARNESS 
CONNECTOR

7.

KNOCK SENSOR CONNECTOR

8.

IGNITION COIL CONNECTOR

9.

LEFT BANK HEATED OXYGEN 
SENSOR CONNECTOR

10. CONTROL WIRING HARNESS 

AND INJECTION WIRING 
HARNESS COMBINATION 
CONNECTOR

11. POWER STEERING PUMP 

SWITCH CONNECTOR

12. A/C COMPRESSOR ASSEMBLY 

CONNECTOR

13. INTAKE MANIFOLD TUNING 

SOLENOID CONNECTOR

14. CRANKSHAFT POSITION 

SENSOR CONNECTOR

15. ENGINE COOLANT 

TEMPERATURE GAUGE UNIT 
CONNECTOR

16. ENGINE COOLANT 

TEMPERATURE GAUGE 
SENSOR CONNECTOR

17. GROUND CABLE
18. GROUND CABLE
19. GROUND CABLE

REMOVAL STEPS (Continued)


Content   ..  100  101  102  103   ..