Mitsubishi Lancer. Manual - part 237
AC304340
1
1
A
A
A
A
AB
B
B
C
C
C
C
B
B
N
N
N
2
N
2
4
3
N
3
N
4
N
6
9
7
N
6
N
N
7
N
N
9
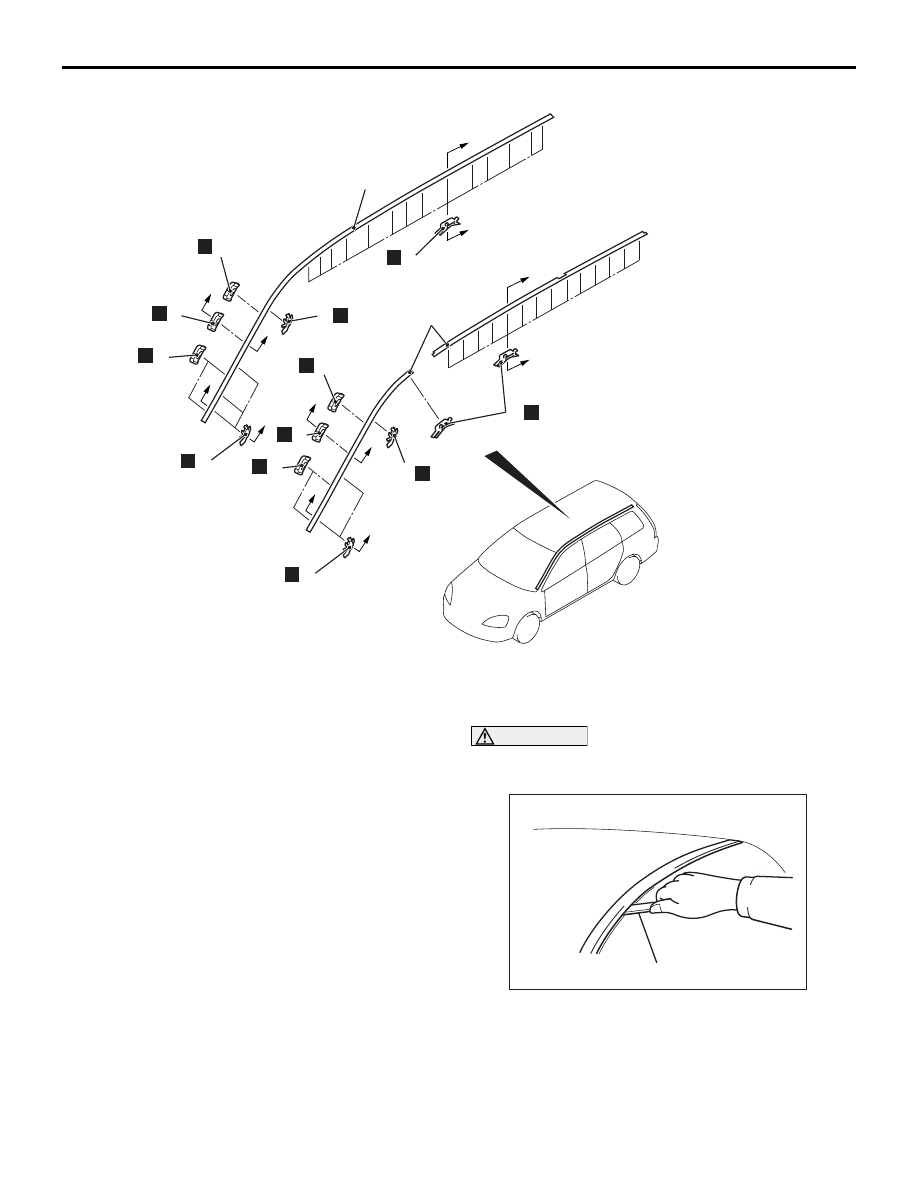
<Wagon>
<Vehicle with roof rail>
<Vehicle without roof rail>
Removal steps
<<
A
>> >>
C
<< 1. Roof drip moulding
>>
B
<< 2. Front drip moulding clip A
>>
B
<< 3. Front drip moulding clip B
>>
B
<< 4. Front drip moulding clip C
>>
B
<< 5. Rear drip moulding clip
>>
A
<< 6. Drip moulding clip A
>>
A
<< 7. Drip moulding clip B
>>
A
<< 8. Drip moulding clip C
9. Roof drip moulding clip
MOULDINGS
EXTERIOR
51-10
REMOVAL SERVICE POINT
<<A>> ROOF DRIP MOULDING REMOVAL
CAUTION
If the moulding has become warped, it should not
be reused.
AC304375
MB990449
AB
Use special tool window moulding remover
(MB990449) to lever out the moulding.