Mitsubishi Lancer. Manual - part 236
REAR BUMPER ASSEMBLY
EXTERIOR
51-6
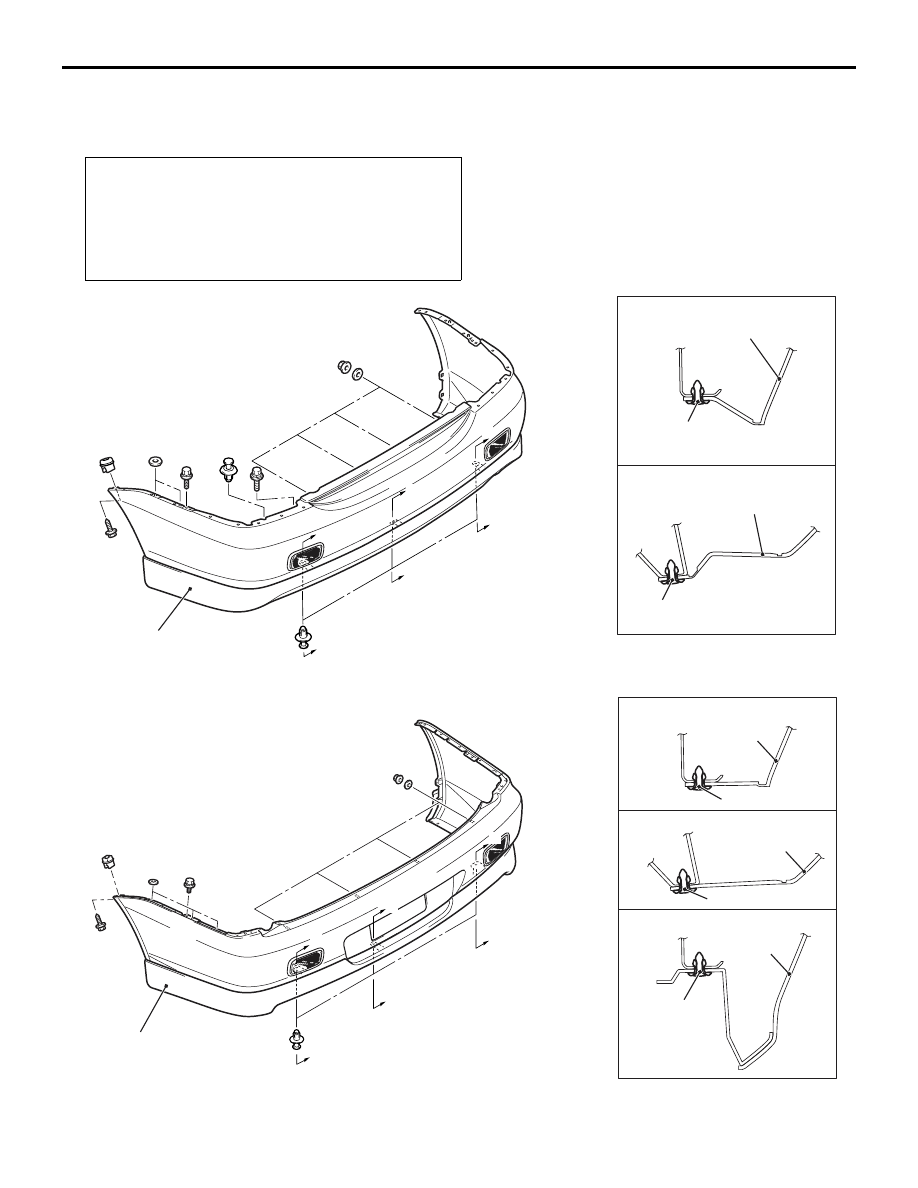
REAR BUMPER ASSEMBLY
REMOVAL AND INSTALLATION
M1511001901022
Pre-removal and Post-installation Operation
• Rear Combination Light Removal and Installation.
<Sedan> (Refer to GROUP 54A, Rear Combination Lamp
• Rear End Trim Removal and Installation. (Refer to
GROUP 52A, Trims
.)
• Rear Splash Shield Removal and Installation.
AC300411
AC300412
AC504608
Clip
Rear bumper assembly
Section A – A
Section B – B
Clip
Rear bumper assembly
Rear bumper assembly
AB
B
B
A
A
A
A
<Sedan>
AC504610
A
A
B
B
C
C
Clip
Clip
Rear bumper
assembly
Rear bumper
assembly
Rear bumper
assembly
Clip
Section A – A
Section B – B
Section C – C
Rear bumper assembly
<Wagon>
AB