LEXUS LX 570 (2019 year). Instruction - part 34
539
7-2. Steps to take in an emergency
7
When trouble
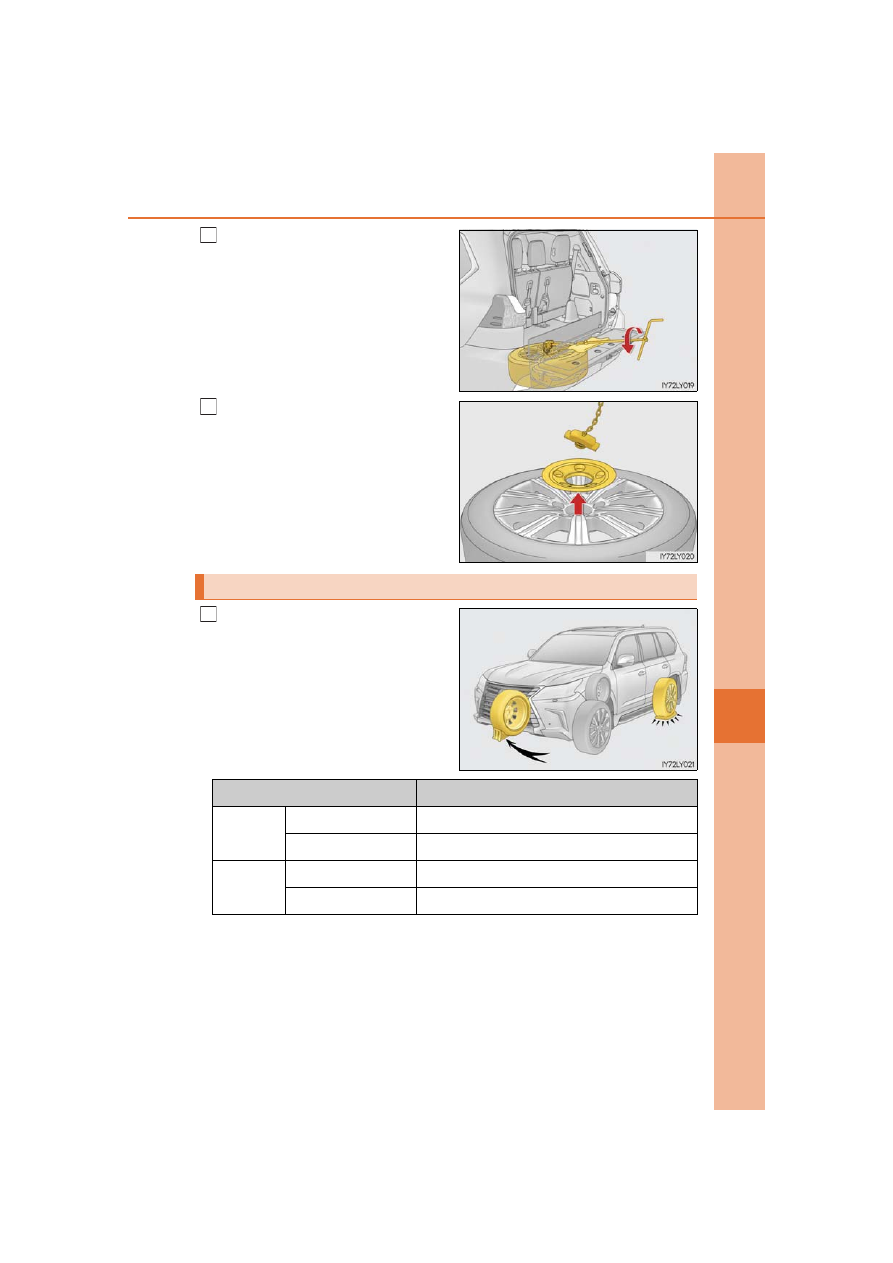
Lower the spare tire completely to
the ground.
Pull out the spare tire and remove
the holding bracket and spare wheel
cover.
Chock the tires.
4
5
Replacing a flat tire
1
Flat tire
Wheel chock positions
Front
Left-hand side
Behind the rear right-hand side tire
Right-hand side
Behind the rear left-hand side tire
Rear
Left-hand side
In front of the front right-hand side tire
Right-hand side
In front of the front left-hand side tire