LEXUS LS 500 (2019 year). Instruction - part 22
348
5-6. Using the other interior features
LS500_OM_(U)_1809
■
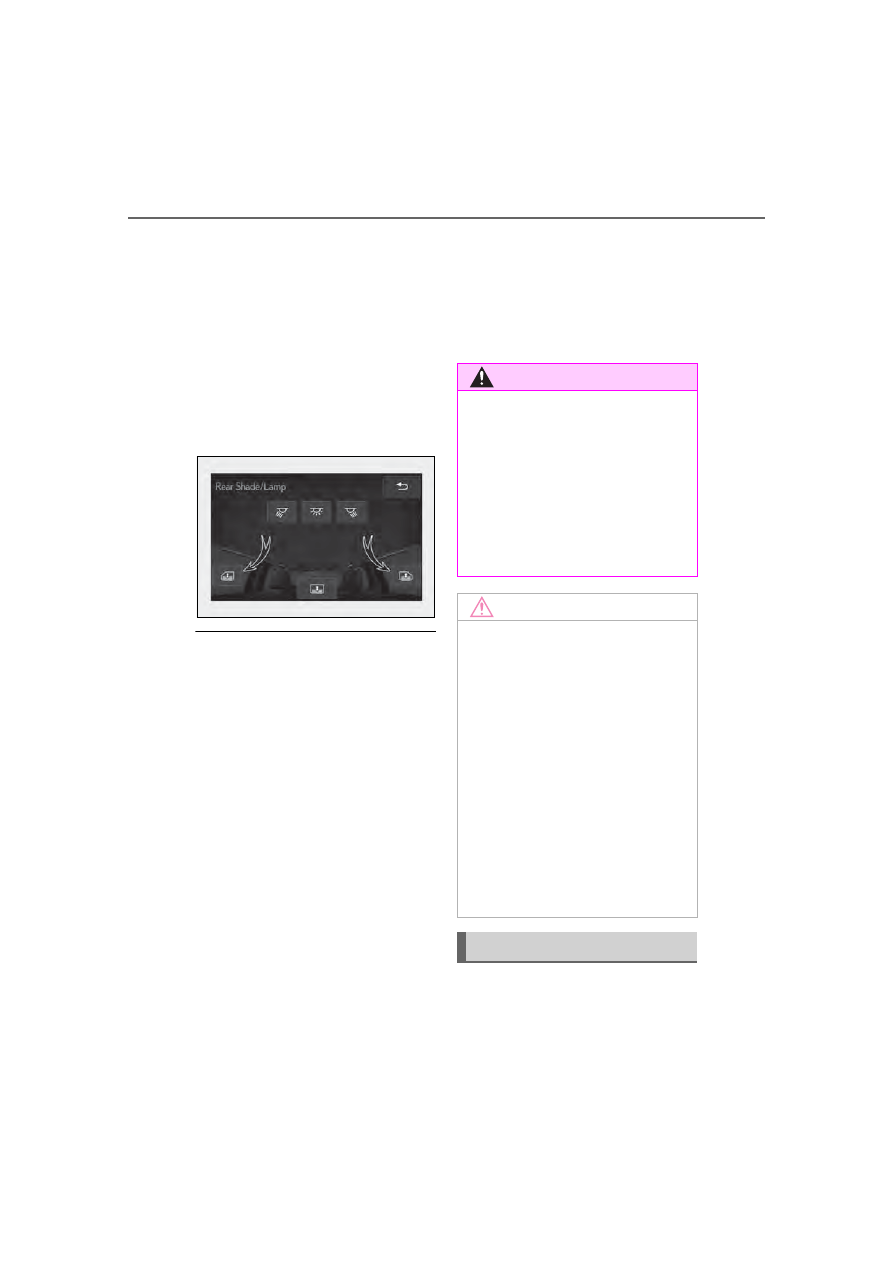
From rear seat
The rear seat power window switches
cannot be used to extend the rear door
sunshades/rear quarter sunshades.
1
Display the home screen and then
touch “Rear Shade/Lamp”.
(
P.308)
2
To fully extend/retract a rear
door/rear quarter sunshade, touch
the respective button.
■
Operating conditions
●
The engine switch is in IGNITION ON
mode.
●
The rear side windows are fully closed.
■
Operation of rear door sunshades/rear
quarter sunshades when extended
If a rear door power window switch is oper-
ated when the rear door sunshade/rear
quarter sunshade is extended, the rear door
sunshade/rear quarter sunshade will retract
while the rear window is opening.
■
Operating the rear door/rear quarter
sunshades after turning the engine
switch off
The rear door/rear quarter sunshades can
be operated for a while even after the
engine switch is turned to ACCESSORY
mode or off.
However, they cannot be operated using
the driver’s power window switch after
either front door is opened.
■
Jam protection function
If an object becomes caught between a rear
door sunshade and the window frame, the
rear door sunshade will stop and then
extend/retract slightly.
■
When reconnecting the battery
The rear door/rear quarter sunshades will
always be retracted the first time the button
is pressed.
The rear sunshade can be raised and
lowered by operating any of the
switches shown below.
WARNING
■
When the rear door/rear quarter sun-
shades are being extended or
retracted
Do not place fingers or other objects in
the shade mechanism or in the opening
as injury may result.
■
Jam protection function
Never use any part of your body to inten-
tionally activate the jam protection func-
tion.
NOTICE
■
To ensure normal operation of the
sunshades
Observe the following precautions:
●
Do not place excessive load on the
motor or other components.
●
Do not place objects where they may
hinder opening and closing opera-
tions.
●
Do not attach items to the rear
door/rear quarter sunshades.
●
Keep the opening clean and clear of
obstructions.
●
Do not operate the rear door/rear
quarter sunshades continuously for
long periods of time.
Rear sunshade (if equipped)