Land Rover V8 engine. Manual - part 6


  Index      Land Rover     Land Rover V8 engine (3.5, 3.9, 4.2 Litre) - service repair 1996 year


Search            


Content   ..  4  5  6  7   ..


Land Rover V8 engine. Manual - part 6


ENGINE

10

OVERHAUL

Sump - remove

1. Remove dipstick.
2. Remove screw securing dipstick tube to LH

rocker cover.

3. Remove 16 bolts securing sump to cylinder

block.

NOTE: Engine numbers with suffix B, 17
bolts are used to secure sump to cylinder
block.

4. Carefully release sump from cylinder block.

CAUTION: Take care not to damage
sealing faces of cylinder block and sump.

5. Remove sump.

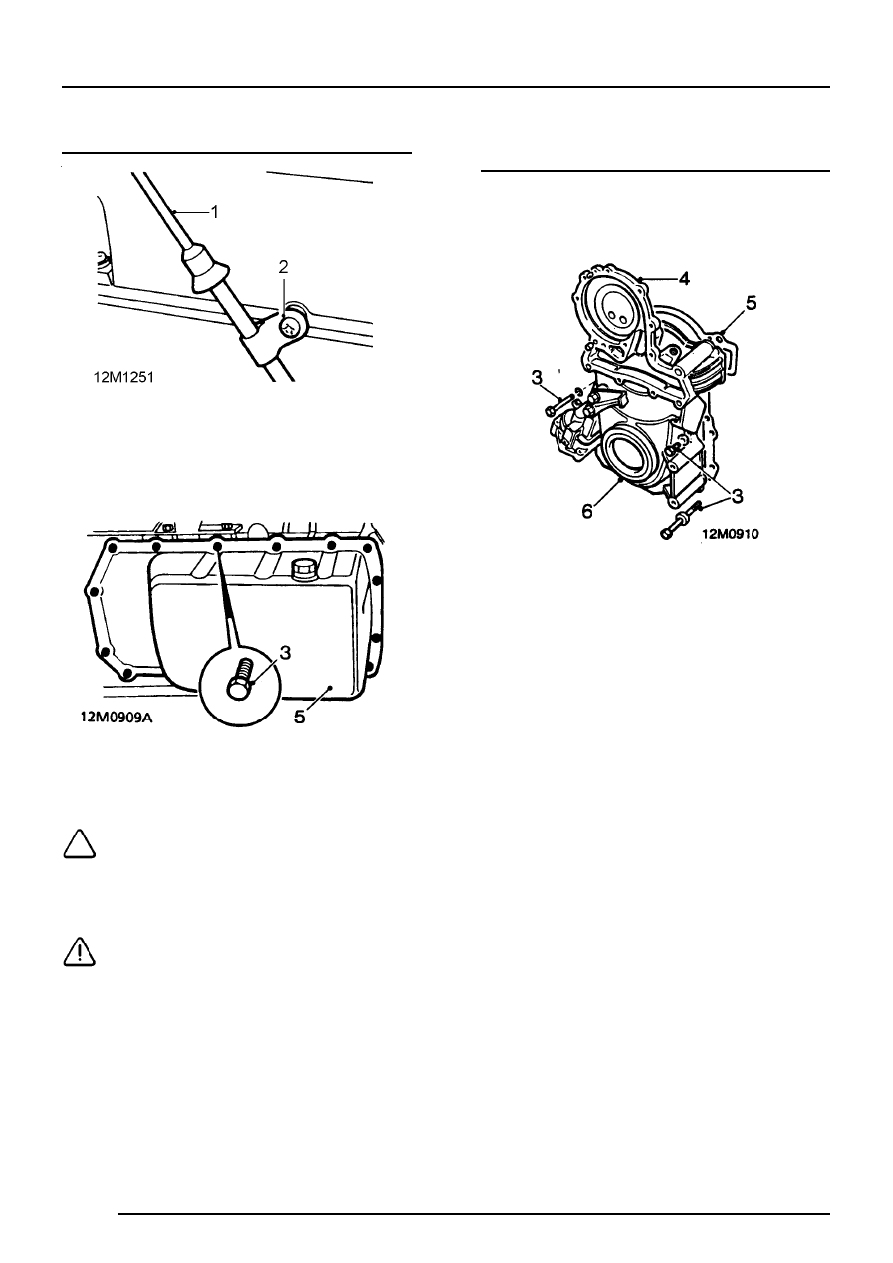
Timing cover - remove - Engine numbers without
suffix B

1. Remove crankshaft pulley bolt and collect

spacer washer.

2. Remove crankshaft pulley.

3. Remove bolts and nut securing timing cover to

cylinder block.

4. Release and remove timing cover.
5. Remove and discard gasket.
6. Remove and discard oil seal from timing cover.

ENGINE

OVERHAUL

11

Timing cover - remove - Engine numbers with
suffix B

NOTE: Timing cover, oil pump and oil
pressure relief valve are only supplied as
an assembly.

1. Using assistance, restrain flywheel and remove

crankshaft pulley bolt; collect spacer washer.

2. Remove crankshaft pulley.

3. Noting their fitted position, remove bolts

securing timing cover to cylinder block; remove
cover.

NOTE: Dowel located.

4. Remove oil pump drive gear.
5. Remove and discard gasket.
6. Remove and discard oil seal from timing cover.

Timing gears - remove

1. Restrain camshaft gear and remove bolt

securing gear, collect washer.

2. Remove distributor drive gear and spacer.

3. Remove timing chain and gears as an

assembly.

4. Collect Woodruff keys from camshaft and

crankshaft.

Timing gears - inspection

1. Thoroughly clean all components.
2. Inspect distributor drive gear for wear.
3. Inspect timing chain links and pins for wear.
4. Inspect timing chain sprockets for wear. Renew

parts as necessary.

ENGINE

12

OVERHAUL

Timing gears - refit

1. Clean gear locations on camshaft and

crankshaft, fit Woodruff keys.

2. Check camshaft Woodruff key is fully engaged

in keyway.

CAUTION: Space between Woodruff key
and keyway acts as an oil feed. It is
therefore most important that key is

properly seated and parallel to axis of camshaft.
Overall dimension ’A’ must not exceed 30.15
mm.

3. Temporarily fit crankshaft gear, and if

necessary turn crankshaft to bring timing mark
on gear to the twelve o’clock position, remove
gear.

4. Temporarily fit camshaft gear with marking ’F’

facing forwards.

5. Turn camshaft until mark on camshaft sprocket

is at the six o’clock position, remove gear
without moving camshaft.

6. Position timing gears on work surface with

timing marks upwards and aligned.

7. Fit timing chain around gears, keeping timing

marks aligned.

8. Fit gear and chain assembly.

NOTE: Timing marks and ’F’ mark on
camshaft gear must be facing forwards.

9. Fit spacer to camshaft with flange facing

forwards.

10. Fit distributor drive gear to camshaft with

grooved face towards camshaft gear.

11. Fit camshaft gear bolt and washer, restrain

camshaft gear and tighten bolt to correct
torque.

ENGINE

OVERHAUL

13

Timing cover - refit - Engine numbers without
suffix B

1. Clean sealant from threads of cover bolts.
2. Clean all traces of old gasket material from

timing cover and mating face of cylinder block.

CAUTION: Use a plastic scraper.

3. Use a lint free cloth and thoroughly clean oil

seal location in timing cover.

4. Lubricate new oil seal sealing surfaces with

engine oil.

5. Locate seal to timing cover and press seal in

squarely until flush with front face of timing
cover.

6. Position new gasket to cylinder block.
7. Coat threads of timing cover bolts with Loctite

242 sealant.

8. Fit timing cover, fit bolts and nut and tighten to

correct torque.

9. Fit crankshaft pulley.

10. Fit spacer washer to pulley bolt, fit bolt and

tighten to correct torque.

Timing cover - refit - Engine numbers with suffix
B

NOTE: Timing cover, oil pump and oil
pressure relief valve are only supplied as
an assembly.

1. Clean sealant from threads of timing cover

bolts.

2. Clean all traces of gasket material from mating

faces of timing cover and cylinder block.

CAUTION: Use a plastic scraper.

3. Clean oil seal location in timing cover.
4. Lubricate oil pump gears and oil seal recesss

in timing cover with engine oil.

5. Apply Hylosil jointing compound to new timing

cover gasket, position gasket to cylinder block.

6. Position oil pump drive gear in timing cover

with groove towards front of timing cover.

7. Locate tool LRT-12-090 on timing cover and oil

pump drive gear.

8. Position timing cover to cylinder block and at

the same time, rotate tool LRT-12-090 until
drive gear keyway is aligned with Woodruff
key.

9. Fit timing cover to cylinder block.

10. Smear threads of timing cover bolts with

Loctite 242 sealant, fit bolts and tighten
progressively to the correct torque.

NOTE: Do not fit coolant pump bolts at
this stage.

11. Remove tool LRT-12-090.


Content   ..  4  5  6  7   ..