Range Rover Classic. Manual - part 119
68
AIR SUSPENSION
4
REPAIR
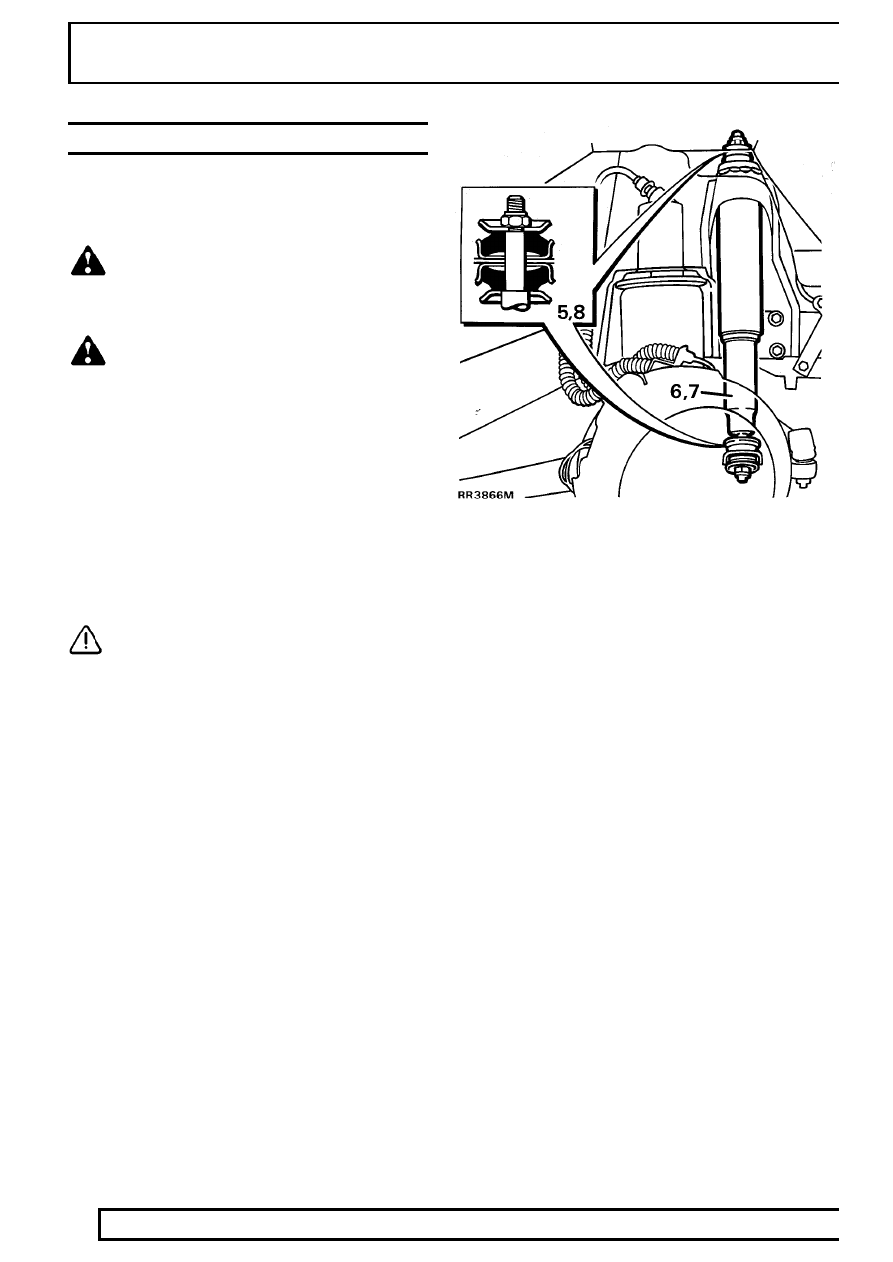
FRONT DAMPER
Service repair no - 60.30.02
Remove
WARNING: Air suspension is pressurised
up to 10 bar. Dirt or grease must not enter
the system. Wear hand, ear and eye safety
standard protection when servicing system.
WARNING: Unrestricted movement of a
pressurised air spring will result in failure
of assembly, causing component damage
and possible personal injury. It is possible to
remove damper assembly without depressurising
air springs, providing distance between axle and
chassis is held as if damper assembly were still
fitted. This is achieved by supporting vehicle on
stands with a jack under the axle.
1. Disconnect battery negative lead.
2. Remove wheel.
See WHEELS AND TYRES,
Repair, Wheels
3. Support chassis on axle stands.
4. Support front axle with jack.
CAUTION: Do not lower axle when damper
is removed, this may result in damage to
air springs.
5. Remove top and bottom damper fixings.
6. Remove damper.
Refit
7. Fit damper.
8. Fit top and bottom fixings, ensuring mounting
rubbers are fitted as shown.
9. Tighten fixings to
38Nm.
10. Reverse removal procedure. 1 to 4.