Range Rover Classic. Manual - part 65


  Index      Land Rover     Range Rover Classic - service manual 1995 year


Search            


Content   ..  63  64  65  66   ..


Range Rover Classic. Manual - part 65


BORG WARNER

3

REPAIR

Remove transmission assembly

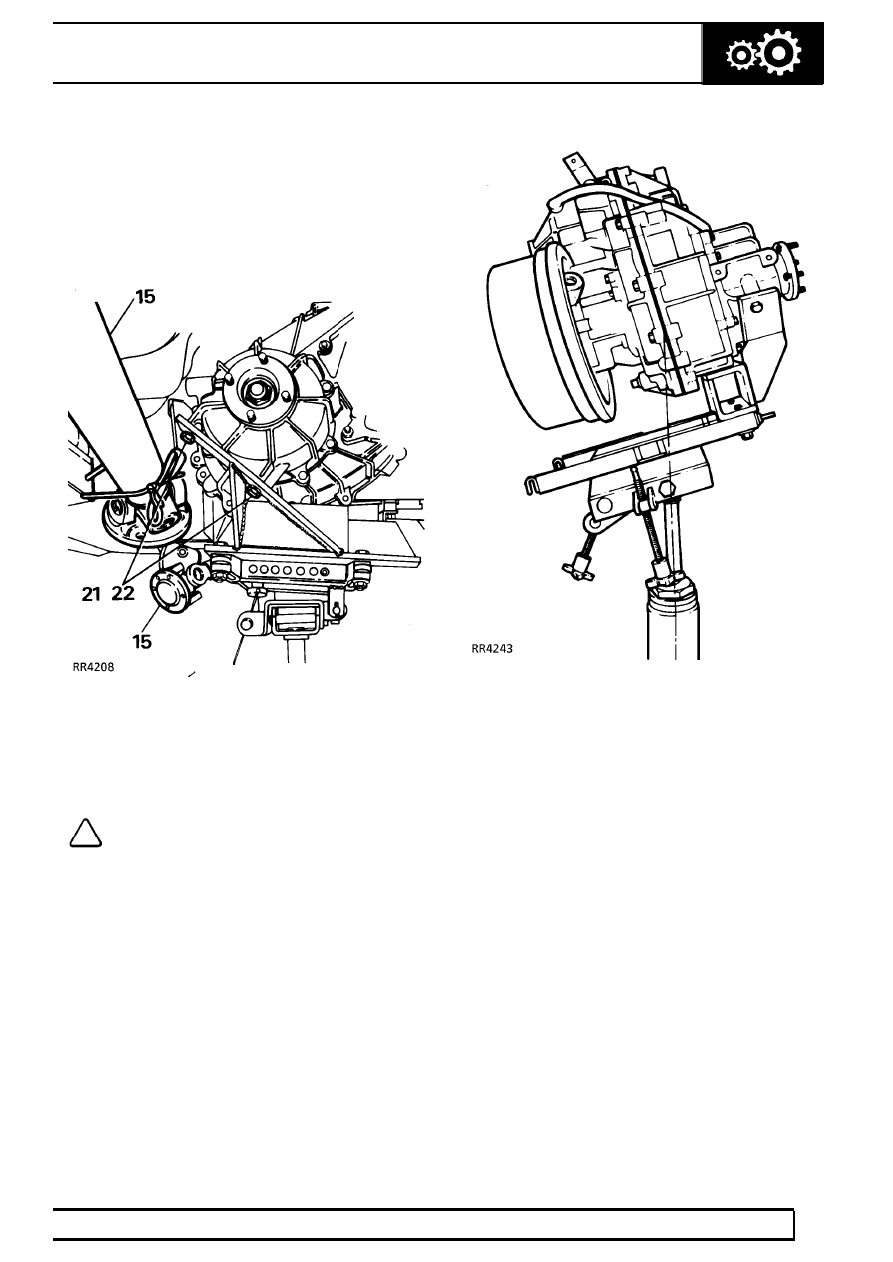
19. Position a suitable transmission hoist on rear

output housing to support weight of assembly.

20. Remove fixings and withdraw transfer gearbox

mountings.

21. Fit adaptor plate to transmission hoist. Raise

hoist and position under transfer box.

See

Service tools, Adapter Plate Transfer Box

NOTE: Centralise adaptor plate on hoist
platform so split line of gearbox is aligned
with centre of ram.

22. Secure fixture to transfer box mounting points.
23. Remove hoist from rear of transfer box.
24. Remove chassis cross member. (Tdi only)
25. Remove front exhaust section. (Tdi only)
26. Lower transmission until top of transfer gearbox

clears rear floor.

27. Remove breather pipe from top of gearbox.

41

TRANSFER GEARBOX

4

REPAIR

28. Remove high/low rod from gearbox selector

lever.

29. Support main gearbox with hoist and detach

transfer gearbox.

30. Remove upper and lower bolts and two nuts

securing transfer box to main gearbox.

31. Move transfer gearbox rearwards to detach it.

Refit Transfer Gearbox

1. Clean joint faces of transfer gearbox and main

gearbox.

2. Lubricate oil seal in joint face of transfer

gearbox.

3. Fit gearbox to adaptor plate on hoist. Raise hoist

until input shaft enters transfer gearbox.

CAUTION: Ensure input shaft splines do
not damage oil seal in transfer gearbox.

4. Fit transfer gearbox to main gearbox with nuts

onto two studs. Fit remaining bolts.

Transfer gearbox high/low link adjustment

5. Select neutral gear position.
6. Set transfer gearbox lever in a vertical position.

Rotate clevis on end of rod until hole aligns with
hole in selector lever.

7. Fit clevis pin and retaining clip. Select high and

low transfer to prove operation.

8. Reverse removal instructions, noting following

points.

9. Fit mounting bracket to gearbox. Tighten to

102

Nm

10. Fit three fixings which secure right hand

mounting bracket to chassis. Tighten to

45 Nm

11. Fit propeller shafts. Tighten to

46Nm

12. Refill transfer gearbox with oil. See maintenance

schedule - check / top up transfer gearbox oil.
See LUBRICANTS, FLUIDS AND
CAPACITIES, Information, Recommended
Lubricants and Fluids

13. Check operation of parkbrake and adjust if

necessary.

See SECTION 10, Maintenance,

Vehicle Interior

BORG WARNER

1

OVERHAUL

BORG WARNER GEARBOX ILLUSTRATED
ASSEMBLIES

Service repair no - 41.20.28

1. Front output housing assembly
2. Viscous unit

41

TRANSFER GEARBOX

2

OVERHAUL

1. Rear output housing and output shaft assembly
2. Transmission brake drum assembly
3. Speedometer drive pinion assembly


Content   ..  63  64  65  66   ..