Range Rover. Manual - part 297
 

  Index      Land Rover     Range Rover P38 - service manual 1995 year


Search            


Content   ..  295  296  297  298   ..


Range Rover. Manual - part 297


AIR CONDITIONING

9

REPAIR

NOTE:
Do not carry out further dismantling if
component is removed for access only.

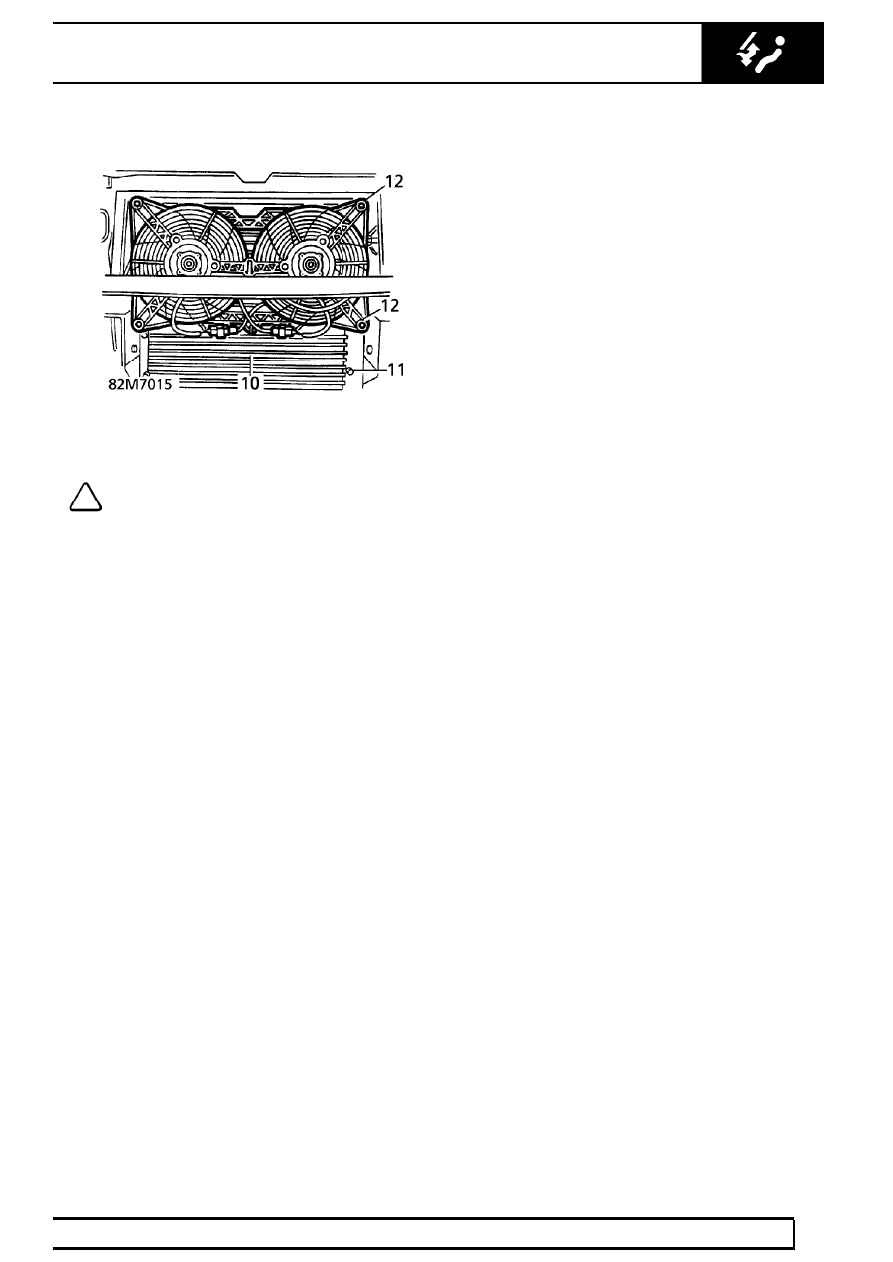
11. Remove condenser securing bolts from

locations.

12. Remove 4 bolts securing fans to condenser.

Remove fans.

Refit

13. Position fans on condenser. Secure with bolts.
14. If removed, position condenser securing bolts in

condenser.

15. Position condenser assembly.
16. Connect multiplugs to fans.
17. Remove plugs from condenser and pipes.
18. Ensure mating faces are clean.
19. Lubricate new ’O’ rings with compressor oil. Fit

to pipes.

20. Connect pipes to condenser.
21. Align pipe clips to condenser fan studs. Secure

with nuts.

22. Secure condenser to radiator bracket with bolts.
23. Position deflector panel. Secure with studs.
24. Fit intercooler.

See FUEL SYSTEM, Repair.

25. Evacuate and recharge air conditioning system.

See Adjustment.

26. Reconnect battery negative lead.

82

AIR CONDITIONING

NEW RANGE ROVER

10

REPAIR

COMPRESSOR - V8 - UP TO 99MY

Service repair no - 82.10.20

Remove

1. Disconnect battery negative lead.
2. Discharge air conditioning system.

See

Adjustment.

3. Remove drive belt tension. Release belt from

compressor.

See ELECTRICAL, Repair.

4. Disconnect compressor multiplug.
5. Remove 2 bolts securing pipes to compressor.
6. Release pipes from compressor. Discard ’O’

rings. Plug pipes and connections.

7. Remove 3 bolts securing compressor to

mounting bracket. Remove compressor.

Refit

8. Position compressor on mounting bracket.

Secure with bolts.

9. Remove plugs from pipes and connections.

10. Lubricate new ’O’ rings with compressor oil. Fit

to connections.

11. Align pipes to compressor. Tighten bolts to

23 Nm (17 lbf.ft).

12. Connect compressor multiplug.
13. Engage drive belt over compressor pulley.
14. Evacuate and recharge air conditioning system.

See Adjustment.

15. Reconnect battery negative lead.

AIR CONDITIONING

11

REPAIR

COMPRESSOR - V8 - FROM 99MY

Service repair no - 82.10.20

Remove

1. Depressurise A/C system.

See Adjustment.

2. Remove auxiliary drive belt.

See ELECTRICAL,

Repair.

3. Disconnect multiplug from compressor.
4. Remove 2 bolts securing A/C pipes to

compressor and discard ’O’ rings.

CAUTION: Immediately cap all air
conditioning pipes to prevent ingress of
dirt and moisture into the system.

5. Remove 4 bolts securing compressor to

mounting bracket and remove compressor.

Refit

6. Clean compressor dowels and dowel holes.
7. Position compressor to mounting bracket and

tighten bolts to

25 Nm (16 lbf.ft).

8. Remove caps from compressor and pipe

connections.

9. Clean compressor and pipe connections.

10. Lubricate new ’O’ rings with refrigerant oil and fit

to compressor.

11. Position A/C pipes to compressor and tighten

bolts to

9 Nm (7 lbf.ft).

12. Connect multiplug to compressor.
13. Fit auxiliary drive belt.

See ELECTRICAL,

Repair.

14. Recharge A/C system.

See Adjustment.

82

AIR CONDITIONING

NEW RANGE ROVER

12

REPAIR

COMPRESSOR - DIESEL

Service repair no - 82.10.20

Remove

1. Raise vehicle on four post lift.
2. Disconnect battery negative lead.
3. Raise lift.
4. Discharge air conditioning system.

See

Adjustment.

5. Remove drive belt.

See this section.

6. Disconnect compressor multiplug.
7. Remove 2 bolts securing high and low pressure

pipes.

8. Release pipes from compressor. Discard ’O’

rings. Plug pipes and connections

9. Remove 4 bolts securing compressor to

mounting bracket. Remove compressor.

NOTE: On RHD vehicles, bolts cannot be
removed completely.

Refit

10. Position compressor on bracket ring dowels.

Secure with bolts.

11. Remove plugs from pipes and compressor.
12. Lubricate new ’O’ rings with compressor oil. Fit

to connections.

13. Connect pipes to compressor. Secure with bolts.

Tighten to

23 Nm. (17 lbf.ft)

14. Connect compressor multiplug.
15. Fit drive belt.

See this section.

16. Evacuate and recharge air conditioning system.

See Adjustment.

17. Lower lift.
18. Reconnect battery negative lead.

EVAPORATOR

Service repair no - 82.25.20

Remove

1. Remove heater.

See HEATING AND

VENTILATION, Repair.

2. Remove screw inside centre vent duct.

3. Remove 2 bolts securing evaporator to heater

unit.

4. Remove evaporator from heater unit.

Refit

5. Reverse removal procedure.


Content   ..  295  296  297  298   ..