Range Rover. Manual - part 248
CHASSIS AND BODY
87
REPAIR
BACKLIGHT GLASS
Service repair no - 76.81.10
NOTE: The following equipment is
required:
masking tape.
Sharp knife.
Cutting wire and handles, or a reciprocating
blade, powered cutting knife*.
Suction lifters.
Windscreen repair kit.
Sealer applicator gun.
*A reciprocating blade cutting tool, such as ’FEIN
Special Cutter’ is recommended for this operation. A
flat blade, with an effective length of at least 25mm
and a ’U’ shaped blade of at least 30mm are required.
WARNING: Wear protective gloves when
handling glass, solvents and primers.
Remove
1. Remove interior trim from tailgate,
See this
section.
2. Release backlight lower finisher from 7 clips.
3. Remove backlight lower finisher.
4. Remove backlight side finishers.
NOTE: Side finishers are secured to
backlight with P.U. sealer. New backlight
glasses are supplied with side finishers
fitted. Side finishers are available separately if
original glass is to be refitted.
5. Remove rubber finisher from upper edge of
backlight glass.
6. Protect tailgate panel with masking tape.
7. Disconnect two Lucar terminals from screen
heater element.
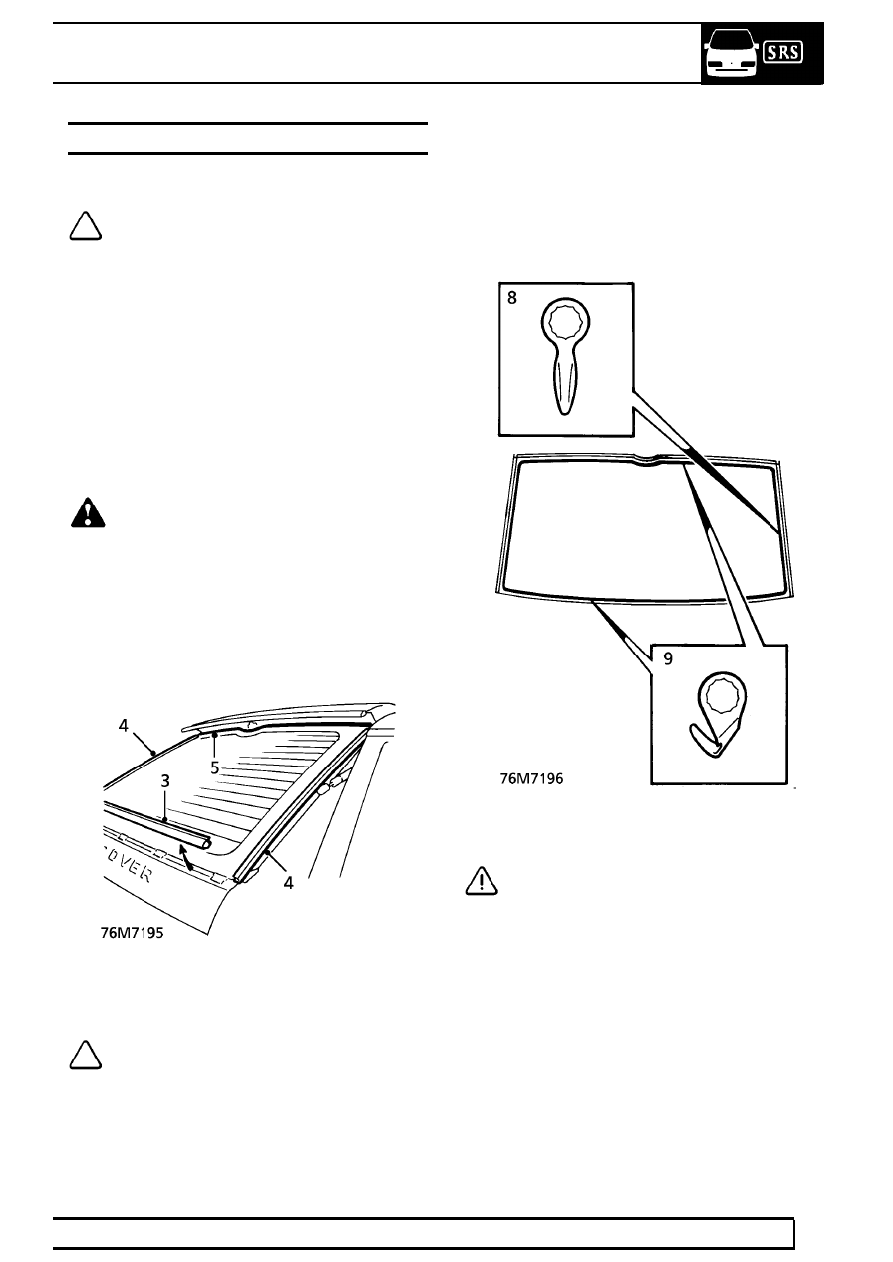
Removal Using Reciprocating Blade Tool
8. Cut through P.U. adhesive along sides of screen
using flat blade.
9. Using a ’U’ shaped blade, cut through adhesive
bead along upper and lower edges of glass.
CAUTION: Access around lower clips is
restricted. Manoeuvre blade to cut through
as much adhesive as possible.
10. Attach suction lifters to glass. With assistance,
cut through remaining sealant around lower
clips.
11. With assistance, remove backlight glass.