Range Rover. Manual - part 244


  Index      Land Rover     Range Rover P38 - service manual 1995 year


Search            


Content   ..  242  243  244  245   ..


Range Rover. Manual - part 244


CHASSIS AND BODY

71

REPAIR

SUNROOF - SUNSHADE

Service repair no - 76.82.03

Remove

1. Remove sunroof panel.

See this section.

2. Remove wind deflector.

See this section.

3. Remove front map/courtesy lamp.

See

ELECTRICAL, Repair.

4. Wind mechanism (manually) in a clockwise

direction to open position using sunroof key.

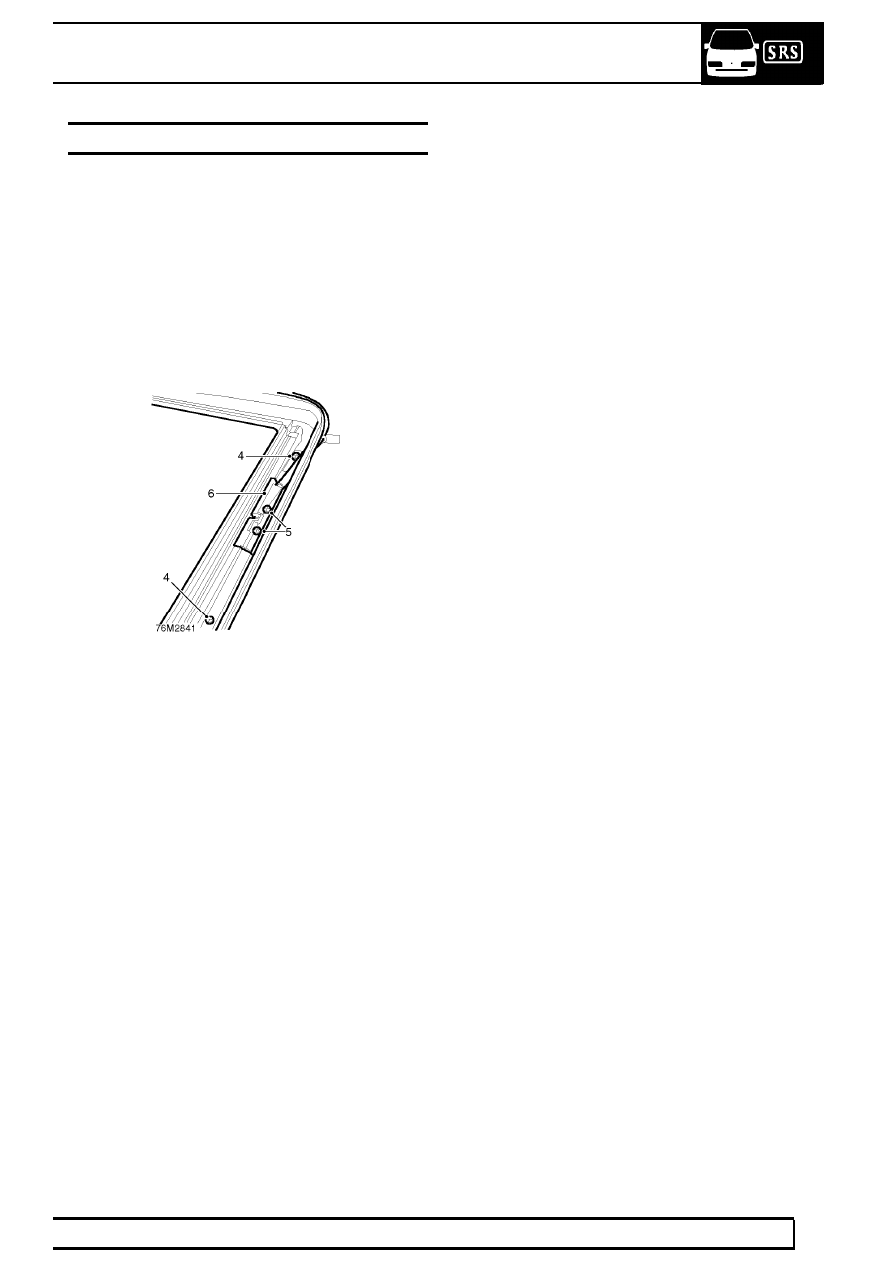
5. Remove 2 screws securing RH guide assembly.
6. Remove 2 screws securing RH drive cable

locator.

7. Remove the drive cable locator.
8. Move LH guide assembly aside.
9. Remove sunshade.

10. Collect 4 slide clips.

Refit

11. Position sunshade to LH guide assembly and

insert clips.

12. Position RH guide assembly to sunshade and

insert clips.

13. Secure RH guide assembly with screws and

torque tighten front screws to

3 Nm (2.2 lbf.ft)

and rear screws to

1.5 Nm (1.1 lbf.ft).

14. Position drive cable locator and secure with

screws and torque tighten screws to

3 Nm (2.2

lbf.ft).

15. Fit wind deflector.

See this section.

16. Wind mechanism in an anti-clockwise direction

to closed position using sunroof key.

17. Fit front map/courtesy lamp.

See ELECTRICAL,

Repair.

18. Fit sunroof panel.

See this section.

76

CHASSIS AND BODY

NEW RANGE ROVER

72

REPAIR

SUNROOF - MOTOR

Service repair no - 76.82.53

Remove

1. Close sunroof panel.
2. Remove front map/courtesy lamp.

See

ELECTRICAL, Repair.

3. Remove 3 screws securing sunroof motor to

mounting bracket.

4. Remove motor and collect spacers.
5. Remove sunroof motor multiplug from mounting

clip and disconnect multiplug.

Refit

6. If position of sunroof motor is not known,

synchronise motor to closed position before
fitment as follows:
Connect motor to motor multiplug. With ignition
in position I or II, operate sunroof switch to open
position. Press and hold sunroof switch to closed
position until motor stops.

7. Connect motor multiplug and secure to mounting

clip.

8. Fit spacers to motor.
9. Position motor to mounting bracket and secure

with screws. Torque tighten screws to

2 Nm (1.5

lbf.ft).

10. Fit front map/courtesy lamp.

See ELECTRICAL,

Repair.

SUNROOF - CABLE

Service repair no - 76.82.14

Remove

1. Remove sunroof panel.

See this section.

2. Remove sunroof motor.

See this section.

3. Remove 2 screws securing the cable locator.
4. Remove cable locator.
5. Remove cable from slide.
6. Withdraw cable from tube.

Refit

7. Grease cable.
8. Feed cable into tube and locate into slide.
9. Position locator and secure with screws. Torque

tighten screws to

3 Nm (2.2 lbf.ft).

10. Fit the sunroof motor.

See this section.

11. Fit the sunroof panel.

See this section.

CHASSIS AND BODY

73

REPAIR

SUN VISOR

Service repair no - 76.10.47

Remove

1. Release visor from clip.
2. Remove 3 visor retaining screws.

3. Disconnect visor lamp multiplug.
4. Remove visor.
5. Remove clip if required. Carefully lever plastic

tag down.

6. Remove screw, remove clip.

Refit

7. Reverse removal procedure.

SILL FINISHER

Service repair no - 76.43.84

Remove

1. Remove 3 screws securing front tread plate.
2. Remove 2 screws securing rear tread plate.
3. Remove trim stud securing rear of sill finisher.
4. Release 8 clips securing finisher to sill.
5. Remove sill finisher.

Refit

6. Renew clips as necessary.
7. Reverse removal procedure.

76

CHASSIS AND BODY

NEW RANGE ROVER

74

REPAIR

TAILGATE - UPPER

Service repair no - 76.28.29

Remove

1. Remove both ’E’ post finishers.
2. Remove 2 trim fixing studs. Release headlining

from ’E’ posts.

3. Release 4 turn buckles securing access panel to

LH side load space trim. Remove panel.

4. Locate rear screen washer non-return valve.

Disconnect tailgate feed tube from valve.

5. Attach draw string to tube to aid re-assembly.
6. Release tailgate harness protective sleeve from

roof panel.

7. Disconnect 3 tailgate harness multiplugs from

body harness. Pull plugs out through hole in roof
panel.

8. Pull screen washer tube out through hole in roof

panel. Disconnect draw string.

9. Mark outline of hinge on tailgate to aid

re-assembly.

10. Apply protective tape to roof panel before

releasing tailgate.

11. With assistance, disconnect gas struts from

tailgate.

12. With assistance, remove 4 bolts securing hinges

to tailgate. Remove tailgate.


Content   ..  242  243  244  245   ..