Frelander 2. Manual - part 595


  Index      Land Rover     Land Rover Frelander 2 - service repair manual 2006-2010 year


Search            


Content   ..  593  594  595  596   ..


Frelander 2. Manual - part 595


1

1

1

2

3

4

1

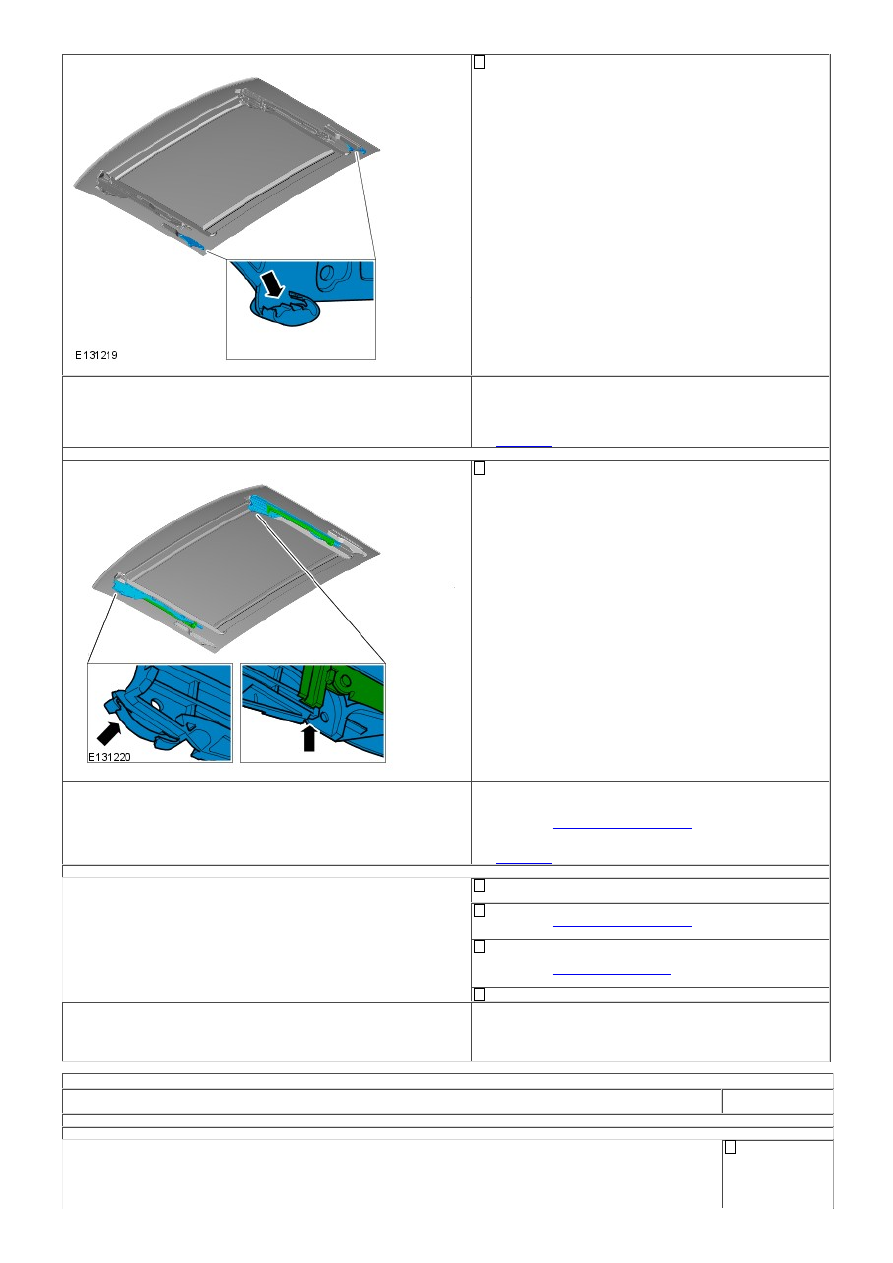
Carry out visual and manual inspection of the rear sliders and
the connecting bar for damage (pieces broken) and correct
location.

Are the rear sliders or connecting bar damaged / jammed?
Yes

Replace the damaged rear slider(s) or connecting bar as
required.

No

GO to C17

.

C17: GLASS MOUNTED GUIDE BRACKETS

Visually inspect the glass mounted guide brackets on the
glass panels for damage.

Are the glass mounted guide brackets damaged?
Yes

Install a new opening panel glass.
REFER to: 

Roof Opening Panel Glass

 (501-17 Roof Opening

Panel, Removal and Installation).

No

GO to C18

.

C18: GLASS PANEL - REASSEMBLY

Install the rails using the 20 machine screws that secure the
glass panel guide(s) if previously removed.
Re-assemble the glass panel onto the roof opening panel.
REFER to: 

Roof Opening Panel Glass

 (501-17 Roof Opening

Panel, Removal and Installation).
Perform the manual roof opening panel initialization
procedure.
REFER to: 

Motor Synchronization

 (501-17 Roof Opening

Panel, General Procedures).
Check for correct roof opening panel operation.

Does the roof opening panel operate correctly?
Yes

No further action required.

No

Contact dealer technical support.

PINPOINT TEST D : ROOF OPENING PANEL - BOUNCE BACK

TEST CONDITIONS

DETAILS/RESULTS

/ACTIONS

D1: INITIALIZATION

• NOTE: These tests are to be carried out to determine the cause of the unnecessary roof opening panel bounce back.

Perform the
manual roof
opening panel
initialization
procedure.

2

3

1

2

3

REFER to:

Motor
Synchronization

(501-17 Roof
Opening Panel,
General
Procedures).
Operate the
roof opening
panel through
all possible
positions (slide
open / slide
close / tilt open
/ tilt close)
using the roof
mounted
switch.
Operate the
roof opening
panel one
touch function
five times in
succession
using the roof
mounted
switch.

Does the roof
opening panel
operate correctly
five times in
succession?
Yes

No further
action required.

No

GO to D2

.

D2: INCORRECT SEAL LOCATION CAUSING BOUNCE-BACK

Visually inspect
the location of
the roof
opening panel
seals.
Drip Lip

Front Acoustic
Seal

Vehicles
built up to
VIN 154971.
Vehicles
built from
VIN 154972.

4

5

Side Acoustic
Seal

Aperture Seal

Are any of the seals
causing the bounce
back?
Yes

GO to D3

.

No

GO to D8

.

D3: SIDE ACOUSTIC SEAL - LOCATION

1

1

Visually inspect
the roof
opening panel
side acoustic
seals.

Is the bounce back
caused by either of
the roof opening
panel side acoustic
seals?
Yes

Replace the
side acoustic
seals. Clean all
relevant
surfaces then
correctly
position and
bond the new
side acoustic
seals to the
roof opening
panel. 

GO to

D4

.

No

GO to D4

.

D4: FRONT ACOUSTIC SEAL - LOCATION

Visually inspect
the roof
opening panel
front acoustic
seal.

Vehicles
built up to
VIN 154971.
Vehicles
built from
VIN 154972.

Is the bounce back
caused by the roof
opening panel front
acoustic seal?
Yes

Replace the
front acoustic
seal. Clean all
relevant
surfaces then
correctly
position and
bond the front
acoustic seal to
the roof
opening panel.


Content   ..  593  594  595  596   ..