Frelander 2. Manual - part 445

Instrument Cluster - Instrument Cluster
Diagnosis and Testing
Principles of Operation
For a detailed description of the Instrument Cluster, refer to the relevant Description and Operation section in the
workshop manual.
REFER to:
Instrument Cluster
(413-01 Instrument Cluster, Description and Operation).
Inspection and Verification
CAUTION: Diagnosis by substitution from a donor vehicle is NOT acceptable. Substitution of control modules does
not guarantee confirmation of a fault, and may also cause additional faults in the vehicle being tested and/or the donor
vehicle.
1. Verify the customer concern.
1.
2. Visually inspect for obvious signs of mechanical or electrical damage and system integrity.
2.
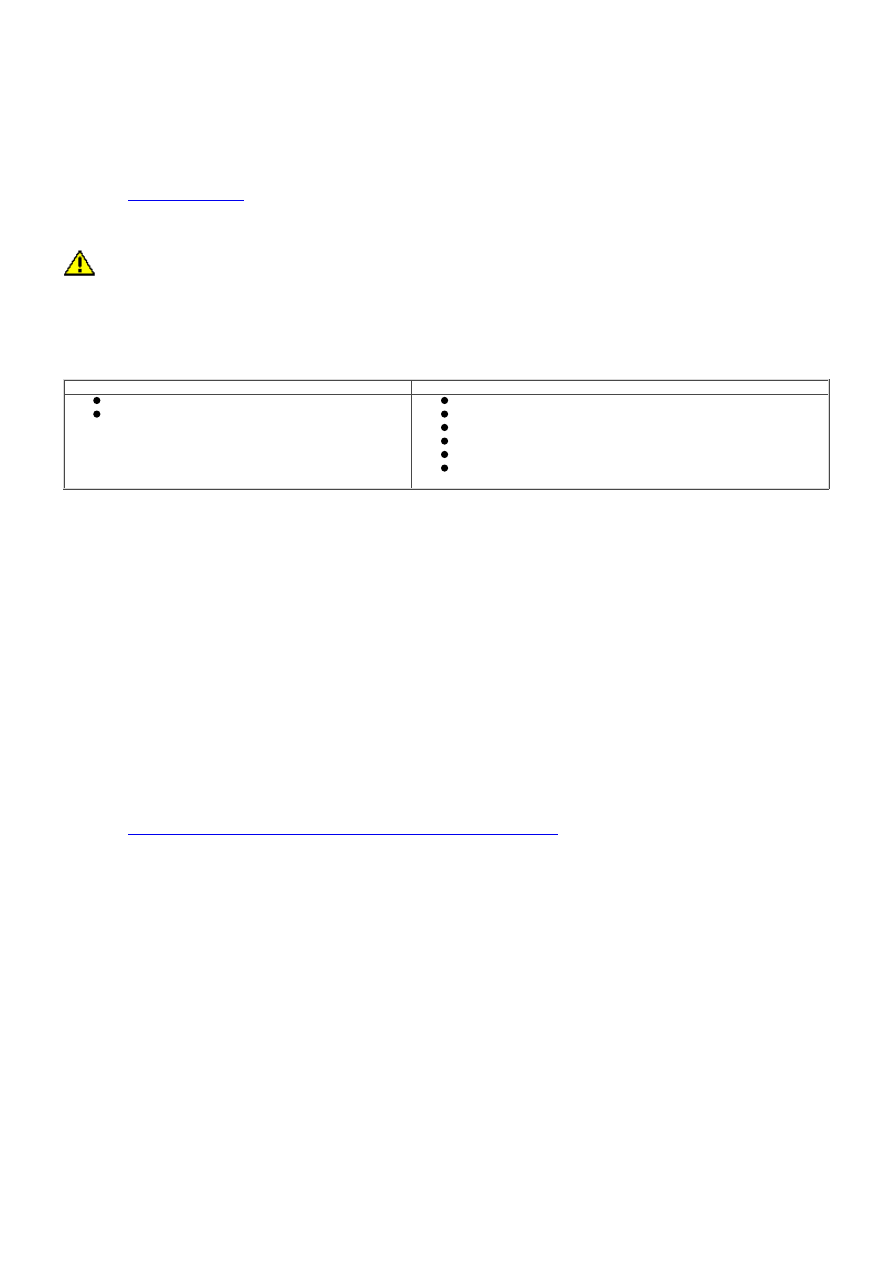
Visual Inspection
Mechanical
Electrical
Fluid levels
Accessory installations
Fuse
W iring harness
Electrical connectors
Instrument cluster
Central Junction Box (CJB)
Engine Control Module (ECM)
3. If an obvious cause for an observed or reported concern is found, correct the cause (if possible) before
proceeding to the next step
3.
4. If the cause is not visually evident, check for Diagnostic Trouble Codes (DTCs) and refer to the DTC Index.
4.
DTC Index
• NOTE: If the control module or a component is suspect and the vehicle remains under manufacturer warranty, refer to the
Warranty Policy and Procedures manual (section B1.2), or determine if any prior approval programme is in operation, prior
to the installation of a new module/component.
• NOTE: Generic scan tools may not read the codes listed, or may read only five digit codes. Match the five digits from the
scan tool to the first five digits of the seven digit code listed to identify the fault (the last two digits give extra
information read by the manufacturer-approved diagnostic system).
• NOTE: When performing voltage or resistance tests, always use a digital multimeter (DMM) accurate to three decimal
places and with a current calibration certificate. W hen testing resistance, always take the resistance of the DMM leads into
account.
• NOTE: Check and rectify basic faults before beginning diagnostic routines involving pinpoint tests.
• NOTE: If DTCs are recorded and, after performing the pinpoint tests, a fault is not present, an intermittent concern may
be the cause. Always check for loose connections and corroded terminals.
REFER to:
Diagnostic Trouble Code (DTC) Index - DTC: Instrument Cluster (IPC)
(100-00 General Information, Description
and Operation).