Frelander 2. Manual - part 416


  Index      Land Rover     Land Rover Frelander 2 - service repair manual 2006-2010 year


Search            


Content   ..  414  415  416  417   ..


Frelander 2. Manual - part 416


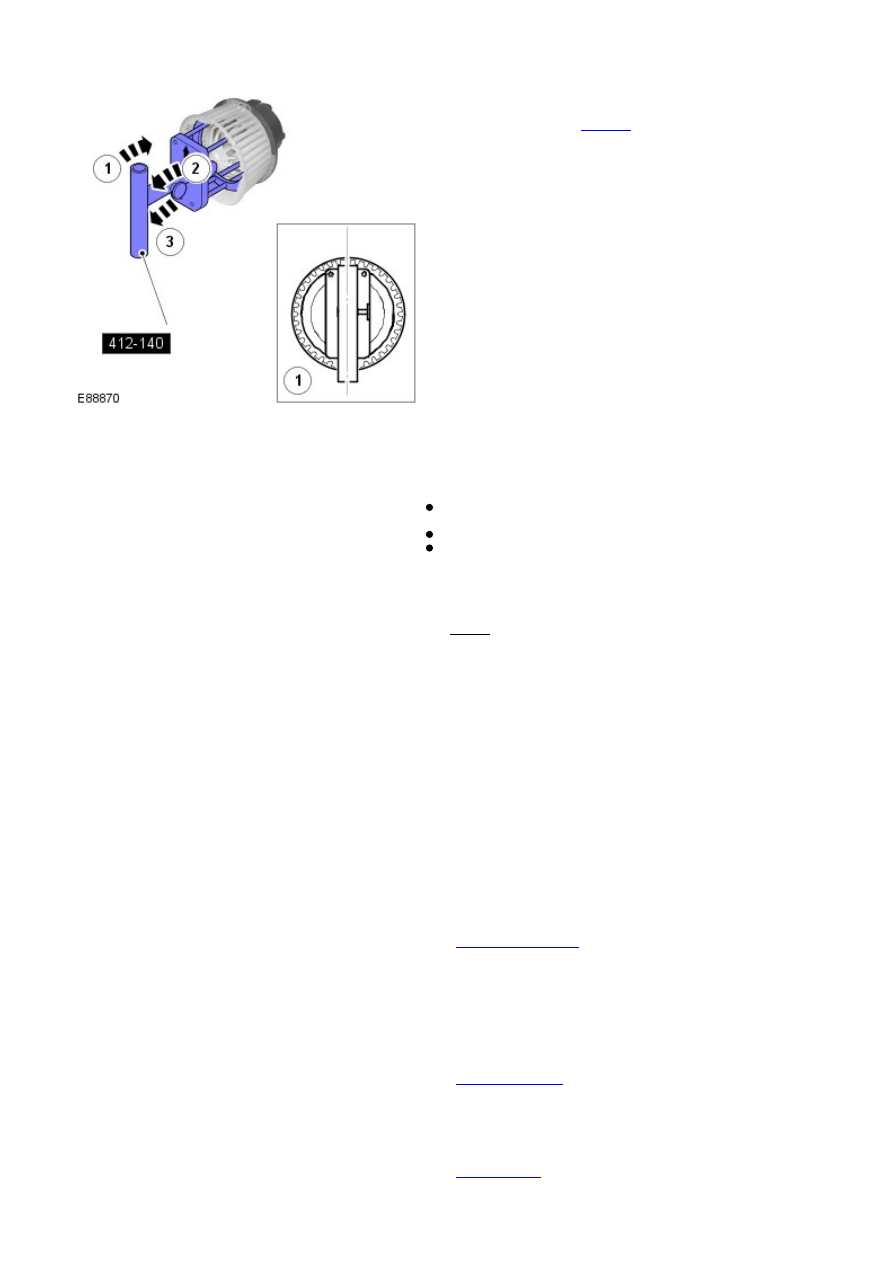
Rotate the special tool clockwise to secure the blower
motor assembly.

Special Tool(s): 

412-140

2.

Install the recirculation blend door housing assembly.

3.


Connect the recirculation blend door actuator electrical
connector.
Connect the air quality sensor electrical connector.
Secure the wiring harness.

4.

Install the CJB bracket.

Torque: 10 Nm

5.

Secure the wiring harnesses to the CJB bracket.

6.

Install the CJB.

7.

Connect the 5 electrical connectors to the CJB and secure the front
carpet.

8.

Install the CJB lower access cover.

9.

Install the passenger side footwell duct.

10.

Install the glove compartment.

Refer to: 

Glove Compartment

 (501-12 Instrument Panel and

Console, Removal and Installation).

11.

Connect the blower motor electrical connector.

12.

Install the accelerator pedal assembly.

Refer to: 

Accelerator Pedal

 (310-02 Acceleration Control, Removal

and Installation).

13.

Connect the battery ground cable.

Refer to: 

Specifications

 (414-00 Battery and Charging System -

General Information, Specifications).

14.

Climate Control - Blower MotorRHD AWD

Removal and Installation

Special Tool(s)

412-140
Remover/Installer, Blower Motor

Removal

All vehicles

1. NOTE: The recirculation blend door must be closed in order for the
removal of the recirculation blend door housing.

Activate recirculation.

1.

Disconnect the battery ground cable.

Refer to: 

Specifications

 (414-00 Battery and Charging System -

General Information, Specifications).

2.

Vehicles with manual transmission

Remove the clutch pedal assembly.

Refer to: 

Clutch Pedal - RHD AW D

 (308-02 Clutch Controls, Removal

and Installation).

3.

All vehicles

4.

Remove the glove compartment.

Refer to: 

Glove Compartment

 (501-12 Instrument Panel and

Console, Removal and Installation).

5.

6.

7.

8.

9.

10.


Content   ..  414  415  416  417   ..