Freelander Body Repair Manual - part 66


  Index      Land Rover     Freelander Body Repair Manual 1998 year


Search            


Content   ..  64  65  66  67   ..


Freelander Body Repair Manual - part 66


PANEL REPAIRS

PROCEDURES

7

3. Use a resistance spot welder where access

permits. Try to ensure weld quality by using a
welding monitor where possible.

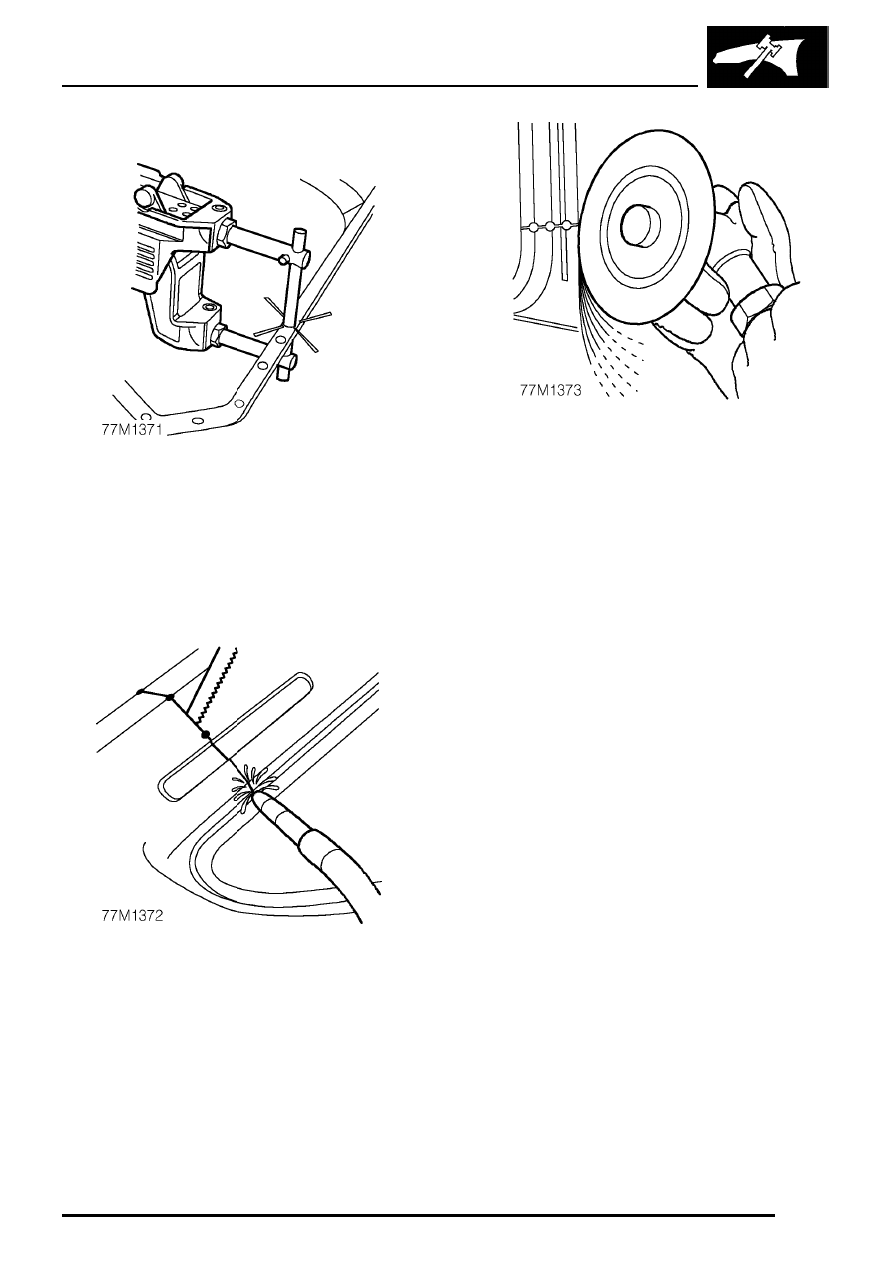
4. MIG tack weld butt joints and re-check

alignment and panel contours where
necessary. Ensure that a gap is maintained to
minimise welding distortion, by inserting a
hacksaw blade as an approximate guide.

5. Dress MIG tack welds using a sander with 36

grit disc, or a belt-type sander where access is
limited.

PANEL REPAIRS

8

PROCEDURES

6. MIG seam weld butt joints.

7. Always use MIG plug welds where excessive

metal thickness or limited access make
resistance spot welding impractical. Make plug
welds either by using holes left by the spot
weld cutter, or through holes punched and
drilled for the purpose.

8. Dress all welds using either a sander with 36

grit disc, or a belt-type sander and/or
impregnated wire brush.

NOTE: Brazing operations, if required,
must be carried out at this point.

PANEL REPAIRS

REPAIRS

1

BODY REPAIR

The following panel repair operations itemize
components which must be removed for access
during repair of a base model vehicle.

Because of the unpredictable nature of accident
damage, the items listed make no allowance for any
difficulties which may be found in removal and only
apply to an undamaged vehicle. All damaged
components should be renewed following panel
repairs.

FRONT BULKHEAD ASSEMBLY

NOTE: In this procedure, the
crossmember to sidemember gusset
plates are replaced in conjunction with the

front bulkhead assembly.

Remove

1. Disconnect battery earth lead.
2. Disconnect alternator.

See ELECTRICAL,

Repairs.

3. Disconnect all ECUs.
4. Remove front bumper valance.

See BODY,

Exterior fittings.

5. Remove front bumper armature.
6. Remove radiator.

See COOLING SYSTEM,

Repairs.

7. Remove PAS fluid cooler.

See STEERING,

Repairs.

8. Remove LH and RH headlamps.

See

ELECTRICAL, Repairs.

9. Release wiring to headlamps and position

aside.

10. Remove LH and RH engine bay shields.
11. Remove bumper valance LH and RH

attachment brackets.

12. Remove battery.

See ELECTRICAL, Repairs.

13. Remove air intake hose.
14. Remove horn.

See ELECTRICAL, Repairs.

15. Remove windscreen washer reservoir.

See

WIPERS & WASHERS, Repairs.

16. Remove bonnet lock.
17. Support bonnet in open position.
18. Remove bonnet stay.

Repair

1. Remove existing panel(s), prepare panel joint

faces and install new panel(s) in accordance
with Panel Replacement Procedure. Punch or
drill holes in new panel for plug welding as
shown.

PANEL REPAIRS

2

REPAIRS

Refit

1. Fit bonnet stay.
2. Fit bonnet lock.
3. Fit windscreen washer reservoir.

See WIPERS

& WASHERS, Repairs.

4. Fit horn.

See ELECTRICAL, Repairs.

5. Fit air intake hose.
6. Fit battery. Do not connect earth lead.

See

ELECTRICAL, Repairs.

7. Fit bumper valance LH and RH attachment

brackets.

8. Fit LH and RH engine bay shields.
9. Fit LH and RH headlamps.

See

ELECTRICAL, Repairs. Secure headlamps
wiring.

10. Fit PAS fluid cooler.

See STEERING,

Repairs.

11. Fit radiator.

See COOLING SYSTEM,

Repairs.

12. Fit front bumper armature.
13. Fit front bumper valance.

See BODY, Exterior

fittings.

14. Connect all ECUs.
15. Connect alternator.

See ELECTRICAL,

Repairs.

16. Connect battery earth lead.


Content   ..  64  65  66  67   ..