Freelander 1. Manual - part 284


  Index      Land Rover     Freelander 1 - service manual 2002 year


Search            


Content   ..  282  283  284  285   ..


Freelander 1. Manual - part 284


IN CAR ENTERTAINMENT

REPAIRS

86-6-5

Coaxial lead - front aerial - 5 door

$% 86.50.24

Remove

1. Remove aerial.


 + 

 IN CAR ENTERTAINMENT, 

REPAIRS, Aerial - manual - 5 door.

2. Remove 'A' post upper trim finisher.


 + 

 INTERIOR TRIM COMPONENTS, 

REPAIRS, Trim finisher - 'A' post - upper - 
renew.

3. Remove sun visor.


 + 

 INTERIOR TRIM COMPONENTS, 

REPAIRS, Sun visor.

NOTE: Original coaxial lead cannot be 
removed as it is part of the body harness.

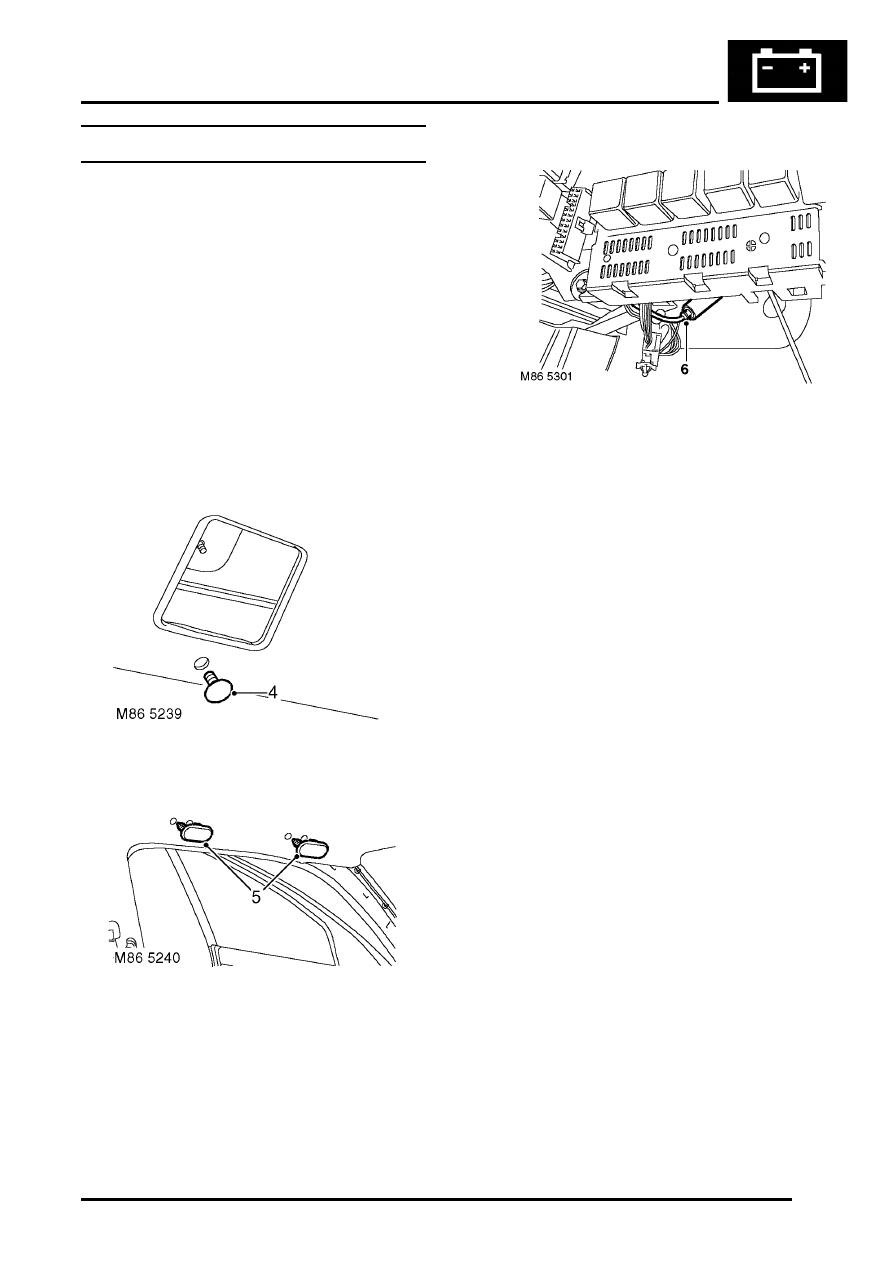
4. Remove stud securing front edge of headlining.

5. Remove grab handle blanking plugs.

6. Disconnect coaxial lead from link lead behind 

fuse box.

Refit

1. Position new coaxial lead to roof panel.
2. Align coaxial lead behind fascia and connect to 

link lead.

3. Secure coaxial lead to harness with cable ties.
4. Fit stud and grab handle blanking plugs to 

headlining.

5. Fit 'A' post upper trim finisher.


 + 

 INTERIOR TRIM COMPONENTS, 

REPAIRS, Trim finisher - 'A' post - upper - 
renew.

6. Fit sun visor.


 + 

 INTERIOR TRIM COMPONENTS, 

REPAIRS, Sun visor.

7. Fit aerial.


 + 

 IN CAR ENTERTAINMENT, 

REPAIRS, Aerial - manual - 5 door.

IN CAR ENTERTAINMENT

86-6-6

REPAIRS

Speaker - tweeter - front

$% 86.50.34

Remove

1. Release cheater panel from front door.
2. Disconnect Lucars from tweeter speaker.
3. Remove cheater panel.

4. Remove tweeter.

Refit

1. Fit tweeter to cheater panel.
2. Position cheater panel and connect Lucars.
3. Fit cheater panel to door.

Coaxial lead - extension

$% 86.50.65

Remove

1. Remove radio.


 + 

 IN CAR ENTERTAINMENT, 

REPAIRS, Radio.

2. Disconnect coaxial link lead from aerial lead.
3. Release coaxial link lead from harness.
4. Remove coaxial link lead.

Refit

1. Fit coaxial link lead and secure to harness.

WARNING: Ensure link lead does not foul 
control pedals or steering column.

2. Connect link lead to aerial lead.
3. Fit radio.


 + 

 IN CAR ENTERTAINMENT, 

REPAIRS, Radio.

HARNESSES

REPAIRS

86-7-1

HARNESSES

REPAIRS

Fuse box - passenger compartment

$% 86.70.01

Remove

1. Disconnect battery earth lead.
2. Open glove box.
3. Remove hinge pins and lid.
4. Remove fuse box cover.

5. Remove relays from fuse box mounting plate.
6. Remove bolt securing fuse box mounting plate 

to steering column bracket.

7. Remove 2 bolts securing mounting plate to 

body.

8. Remove 2 bolts securing fuse box to mounting 

plate.

9. Disconnect 3 multiplugs from CCU in rear of 

fuse box.

10. Release fusebox and disconnect 8  multiplugs.
11. Remove fusebox.
12. Remove fuses and relays from fuse box.

Refit

1. Identify and fit fuses.
2. Fit relays.
3. Fit fuse box.
4. Connect multiplugs to fusebox.
5. Connect multiplugs to CCU.
6. Fit bolts fuse box to mounting plate and tighten 

to 8 Nm (6 lbf.ft).

7. Fit bolts securing fuse box mounting plate to 

body and tighten to 8 Nm (6 lbf.ft).

8. Fit relays to mounting plate.
9. Fit fuse box cover.

10. Fit glove box lid and hinge pins.
11. Close lid.
12. Connect battery earth lead.

HARNESSES

86-7-2

REPAIRS

Harness - main

$% 86.70.07

Remove

1. Make the SRS system safe. 


 + 

 GENERAL INFORMATION, 

Supplementary restraint system 
precautions.

2. Remove carpet.
3. Remove engine acoustic cover.


 + 

 ENGINE - Td4, REPAIRS, Cover - 

engine acoustic.

4. Remove windscreen washer reservoir.


 + 

 WIPERS AND WASHERS, REPAIRS, 

Reservoir - washer.

5. Pull reservoir harness and washer tubes into 

engine bay.

6. Remove nut and release earth header from RH 

inner wing.

7. Disconnect multiplug from ABS modulator.
8. Disconnect multiplug from RH ABS speed 

sensor and release harness from clips.

9. Disconnect 2 multiplugs from RH headlamp 

and headlamp levelling motor.

10. Disconnect multiplugs from horn, refrigerant 

pressure sensor and compressor.

11. Remove jack from holder in engine bay.

12. Disconnect multiplug from brake fluid low level 

indicator switch.

13. Disconnect multiplug from bonnet switch.
14. Remove bolt and 2 nuts securing PAS and 

coolant reservoir support bracket and position 
aside.

15. Release 5 harness retaining clips.
16. Release front screen wash tube from harness 

and position aside.

17. Remove nut securing earth header to bulk head 

and remove earth header.


Content   ..  282  283  284  285   ..