Freelander 1. Manual - part 209
EXTERIOR FITTINGS
REPAIRS
76-2-1
EXTERIOR FITTINGS
REPAIRS
Wing - front
$% 76.10.24
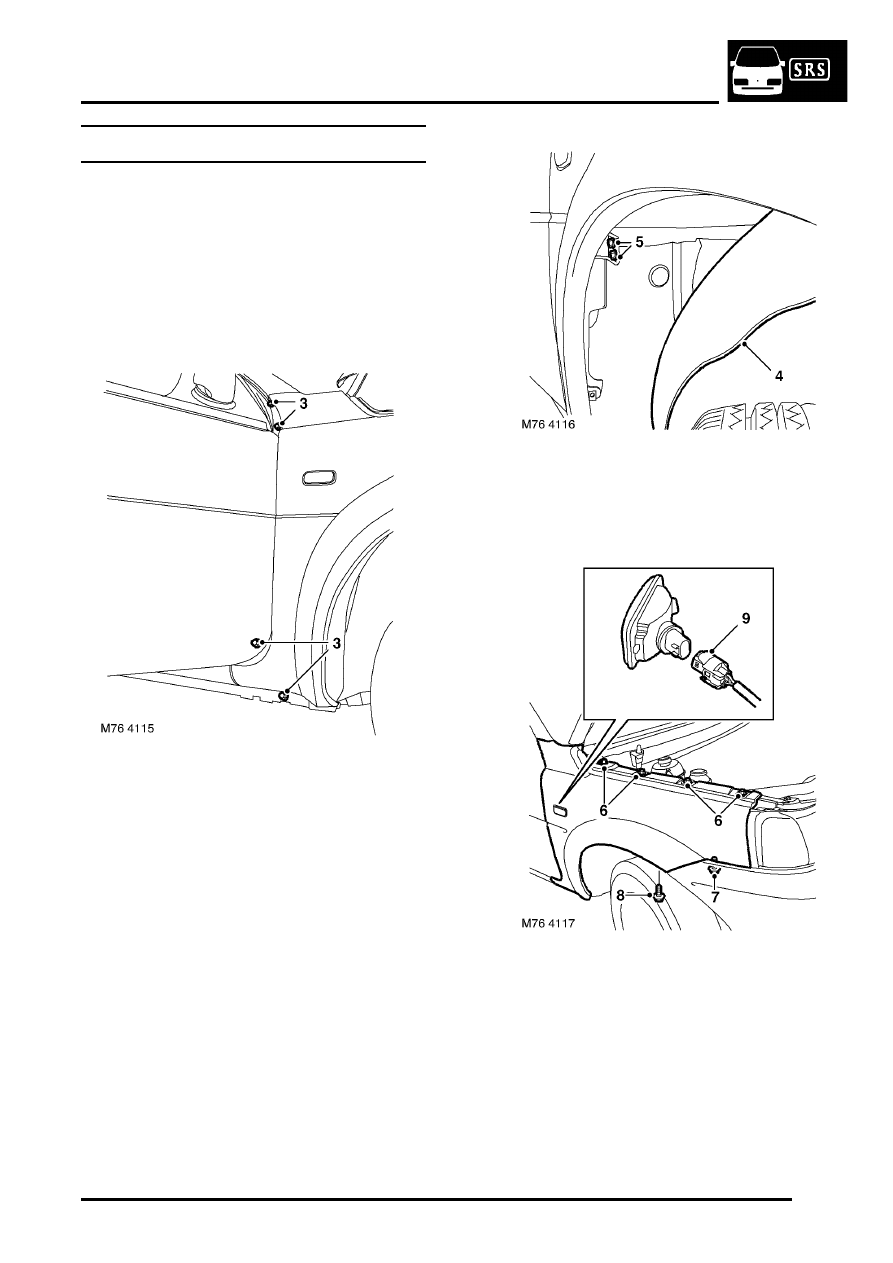
Remove
1. Remove front mud flap.
2. Remove lower sill finisher.
3. Remove 4 bolts securing rear of front wing.
4. Release wheel arch liner from rear of front
wing.
5. Remove 2 bolts securing wing bracket to 'A'
post.
6. Remove 4 bolts securing top of wing.
7. Remove bolt securing front of wing to bracket
on body.
8. Remove screw securing wheelarch liner to
under side of wing.
9. Release wing from body and disconnect
multiplug from repeater lamp.
10. Remove front wing from body.
11. Remove side repeater lamp from front wing.